If you’re looking for an inexpensive way to “frame” a poster, art, or large photograph, I have the solution for you! This DIY Plywood Picture Frame is not only the easiest thing to make, but it’s super inexpensive, too! 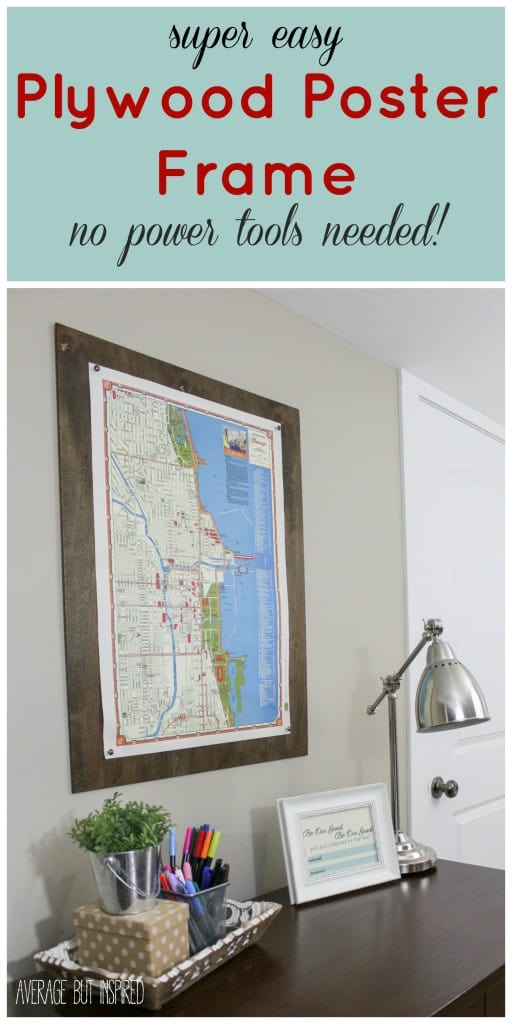
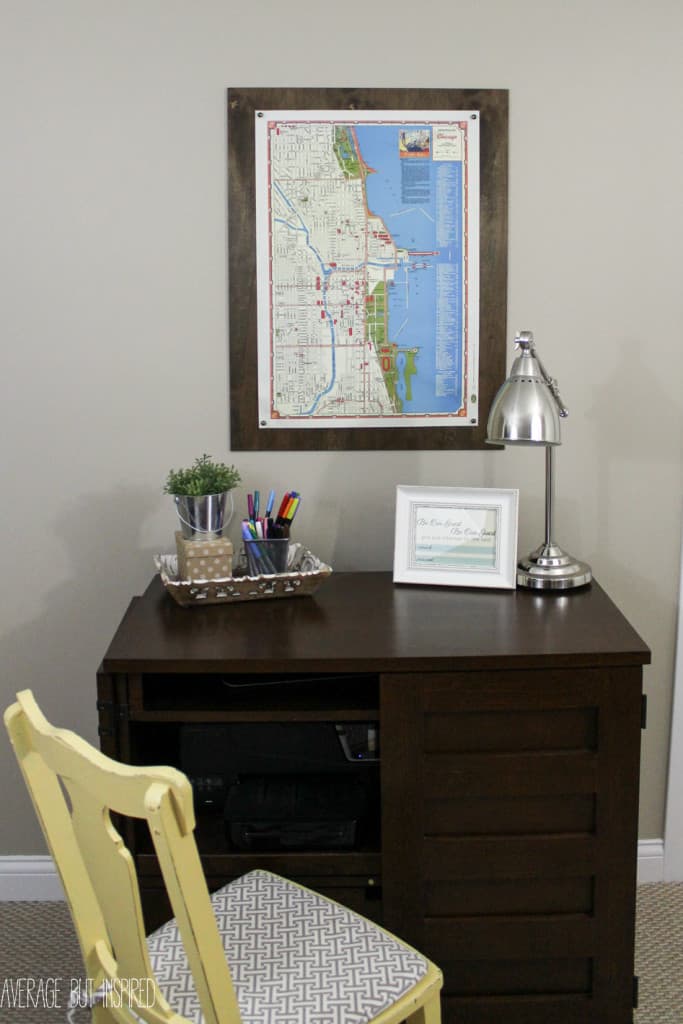
I made this plywood picture frame so that I could hang an awesome vintage wrapping paper map of Chicago in my basement. It prettied up a wall down there as part of my Basement Makeover that I just finished! I thought that guests who are staying down there might enjoy checking out the lay of the land!
Also, it was totally inexpensive and a very simple project – just how I like it.

Supplies Needed for a Plywood Picture Frame
Some of these links are affiliate links. To read my full disclosure policy, please click here.
- 1/4″ birch plywood, cut to desired size (approximately 3-4″ wider and taller than the poster to be framed)
- Wood stain (I used Minwax Dark Walnut – my fave), or paint
- Spray adhesive
- Decorative furniture tacks
- 3M Command Large Picture Hanging Strips
How to Make a DIY Plywood Picture Frame
Now, guys, I have to apologize here for a MAJOR BLOGGER FAIL. I recently started a new photo organization system and somehow I am completely DISorganized as a result. I have searched everywhere and I cannot find my tutorial photos for this project! I think I may have accidentally deleted them; they are nowhere to be found. So I’m really sorry, but I don’t have step-by-step photos. I think it’s OK though because it is seriously SO simple!
Step One: Cut the Plywood to Size
First, go to Home Depot’s precut wood aisle (sometimes called “project panels”), and find the 1/4″ thick birch plywood. This wood is thin, but sturdier than other types of plywood. Then have one of their employees cut it to the desired size for you. Alternatively, cut if yourself if you are skilled with the saw!
Step Two: Sand and Stain the Plywood
Sand down the rough edges and stain it or paint it.
Step Three: Apply Spray Adhesive
Once it’s fully dry, apply spray adhesive to the back of the picture or poster you want to display. Also carefully apply a thin layer of spray adhesive to the plywood, but be careful not to spray it on the edges of the plywood that will not be covered with the poster. Press the poster into place, making sure to gently smooth out any wrinkles.
Step Four: Add Pushpins or Tacks
For a decorative touch, add furniture tacks or push pins to the corners of the poster. I used furniture tacks, which were longer than the depth of the plywood. Because of that, I let them stick out so that they wouldn’t push through the back of the wood.
Step Five: Hang the Plywood Picture Frame
Finally, I hung the plywood poster frame with Command Large Picture Hanging Strips. They work perfectly for this type of project! Since the wood is so thin, it would have been difficult to hang the frame with regular picture hangers.
That’s it! So easy, right? Almost as easy as popping a picture into a real frame, but a little more unique!
Amanda @ Dwelling in Happiness says
Cute idea, Bre!! I love the tacks on the corners. the map totally pops against the dark wood, too! Looks fab in your basement! 🙂
Bre says
Thank you, Amanda! If you have some blank walls in your new house (once you move), you should try this for an inexpensive art idea! 🙂 Thanks for your sweet note.
Erin says
Ha! This is GENIUS! So simple and a fabulous impact! 🙂
Bre says
LOL – thanks lady!
Rose says
Oh my gosh I love this!!!
Bre says
Thanks, Rose!! 🙂
Katie @ Little House of Four says
Great idea and so perfect for those without power tools! Don’t you just love the precut wood section? 🙂 I’ll definitely be keeping this project in mind for our basement.
Bre says
Perfect basement project! And yes, I am a weirdo and actually love to wander the precut wood areas. And the decorative wood areas. People (aka the men) are always looking at me strangely. 🙂
Sarah @ Little Red Brick House says
So cute, Bre! I love how it is framing it without really framing it. Easy projects with great results are my favorite!
Bre says
Thank you, Sarah! Yeah I mean really, it does not get easier than this!! But I think it looks better than a regular poster frame. So that’s cool. 😉
Christina @ Operation Home says
I love this! The stained plywood adds such sophistication! I’m totally gonna do this one day. 🙂
Bre says
Well, I am a sophisticated lady. What can I say? 😉 LOL. Thanks, Christina!
Kristi says
This is such a great idea! I might just have to try something similar in my own room! Thanks for the inspiration!
Bre says
Thanks, Kristi! It sounds like you’ve got enough DIY on your plate right now with the ORC!! Don’t add another thing to your list. 🙂
Seana Turner says
That IS easy. Not everyone is comfortable with power tools, so this is a perfect option. When you step back and see the photo, that color stain looks soooo good!
Breanna says
I love the dark stain, it really makes the artwork pop!
Amy | Canary Street Crafts says
I’m all about easy and inexpensive wall art lately and this is such a great idea! Love the little furniture tacks on the corners too.
Bre says
Well thank you, Amy! Your wall art is totally AWESOME! I love those arrows. You should make some of them for your booth!
Rebekah || Charming Imperfections says
What a splendid idea! It looks so pretty and so easy to do! Your great, Bre!
Bre says
Aw, thanks, Rebekah! I know that whatever you would do would blow this out of the water – you are so talented with all those crazy power tools! 🙂