Average But Inspired

Inspiring creativity with crafts, DIY, and home decor projects.

  • About Bre
  • Contact Me
  • Disclosures
  • Policies
  • Home
  • Shop
  • DIY
  • Crafts
    • Dollar Store Crafts
  • Seasonal
    • Patriotic & Summer
    • Valentine’s Day
    • Easter & Spring
    • Fall & Halloween
    • Christmas & Winter
  • Home Decor
  • Furniture
  • Organization

Search Results for: entryway

February 26, 2020 by Bre

DIY Accent Wall: How to Paint a Grid Accent Wall

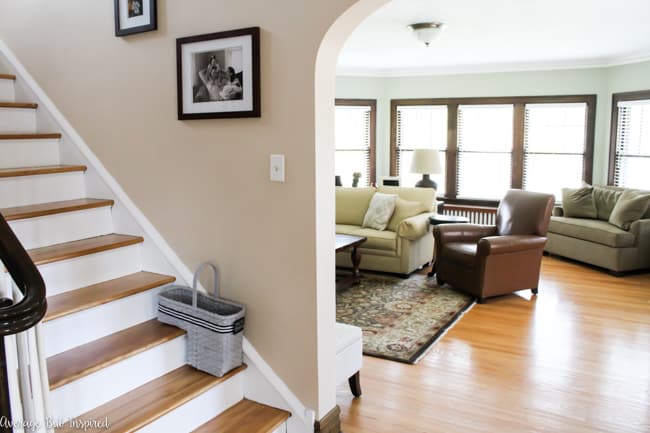
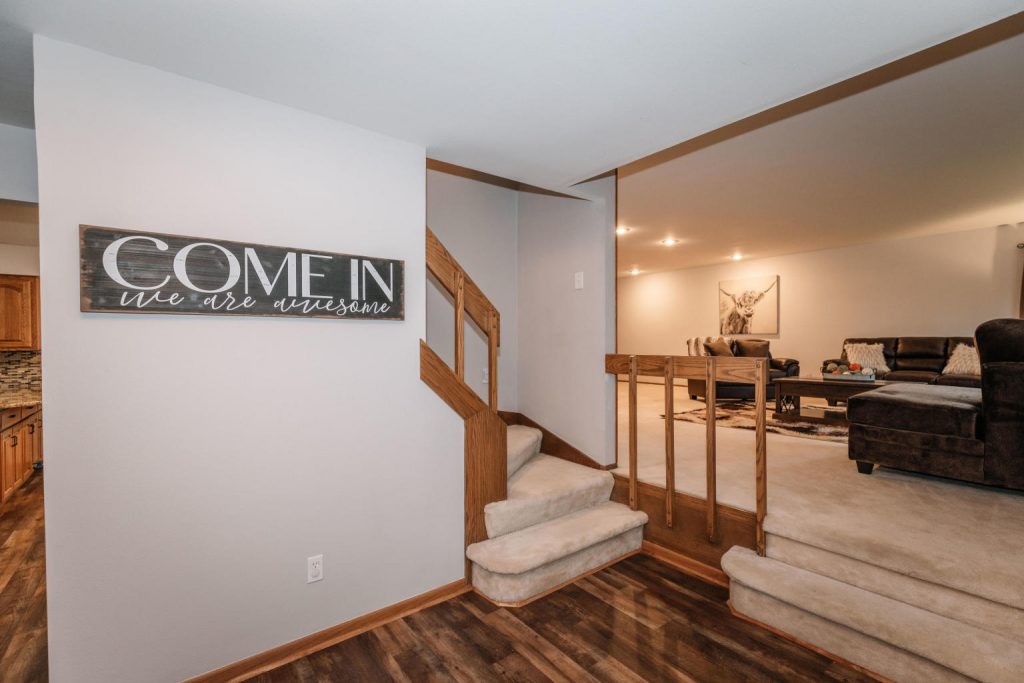
In my old house, you saw a beautiful staircase and arched doorways when you walked in the front door.  In my new house, you see a large wall and a 1970’s-style funky staircase with ugly carpeting.  Not exactly the best first impression.  (This is the photo from the real estate listing.  Yes, multiple people asked if we’d be negotiating for the stager’s “come in we are awesome” sign. :-))

This is the BEFORE photo of the DIY accent wall.

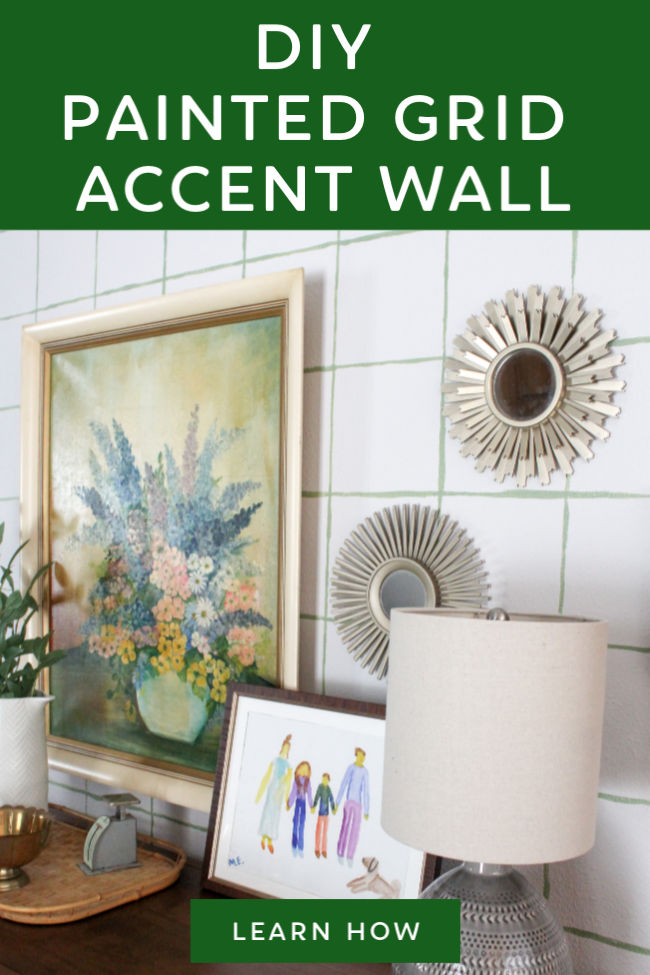
Because of that, I needed to make the foyer feel more like “us” – not too serious but still put-together (most of the time).  On a whim I decided to paint a DIY accent wall to greet visitors to my home, and I think it turned out adorable!  I used trash (yes trash) and craft paint to paint this fun grid accent wall, and I can’t wait to show you how easy it was to add some style to my foyer!

This DIY accent wall is so fresh and fun! It's easy to paint a grid accent wall and this project took under 1 hour to complete.

So first off, let me remind you that I’m no stranger to the DIY accent wall.  A couple of years ago I added an adorable-but-subtle accent wall to my old home by putting up vinyl decals in a pattern to look like wallpaper.  I loved the burst of personality this added to a large blank wall, so I figured I would like something similar here.

What Supplies Do You Need to Paint an Accent Wall?

This post contains affiliate links.  To read my full disclosure policy, please click here.   

To paint this grid accent wall in my new home, I only needed a few supplies:

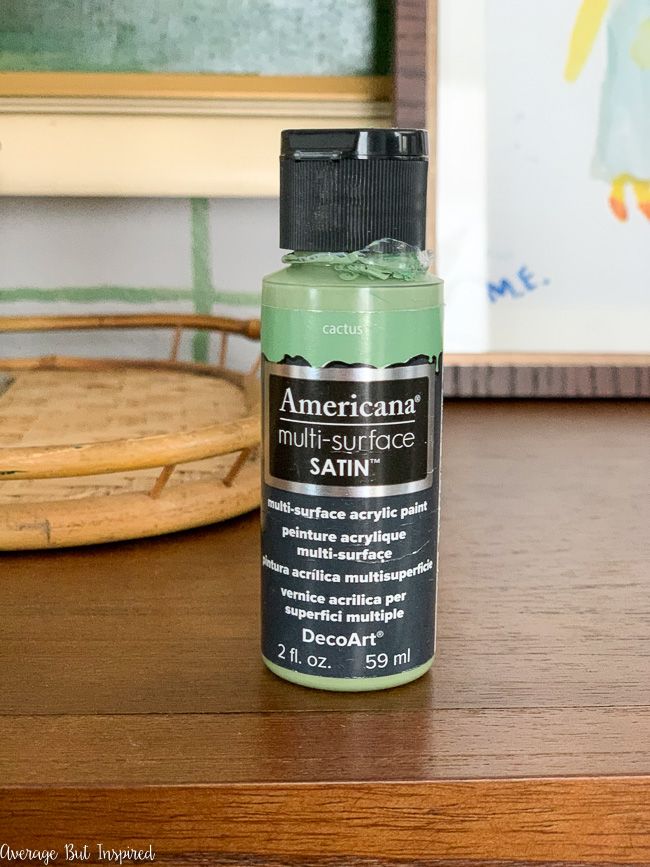
  • Craft paint (I used DecoArt Multi-Surface paint in Cactus)
  • Artist’s brush
  • Bowl of water
  • Pencil
  • Laser level (note: you could use a regular level if you don’t have a laser level)
  • Junk cardboard, foam, cardstock, poster board – anything with a little heft will do!

How Do You Paint a Grid Wall?

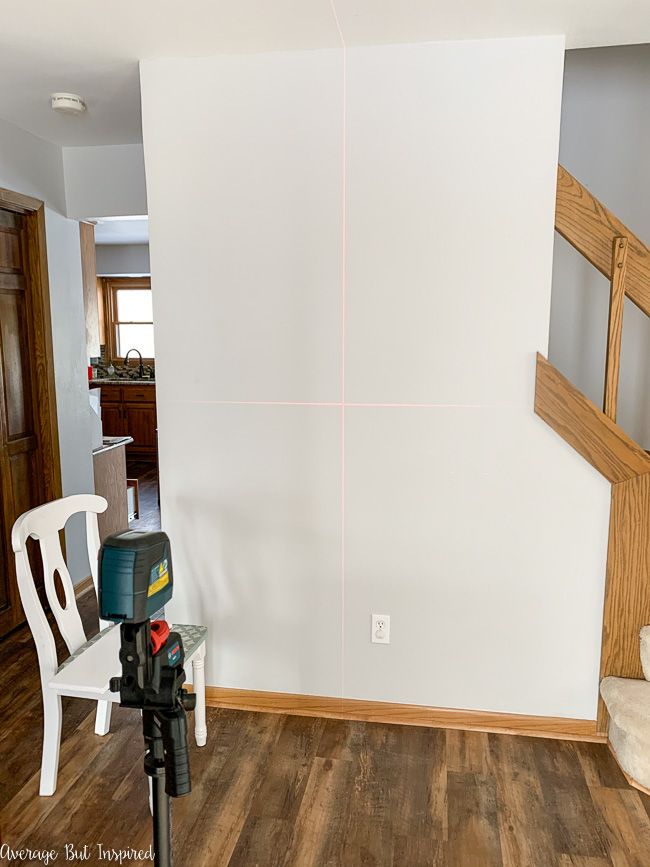
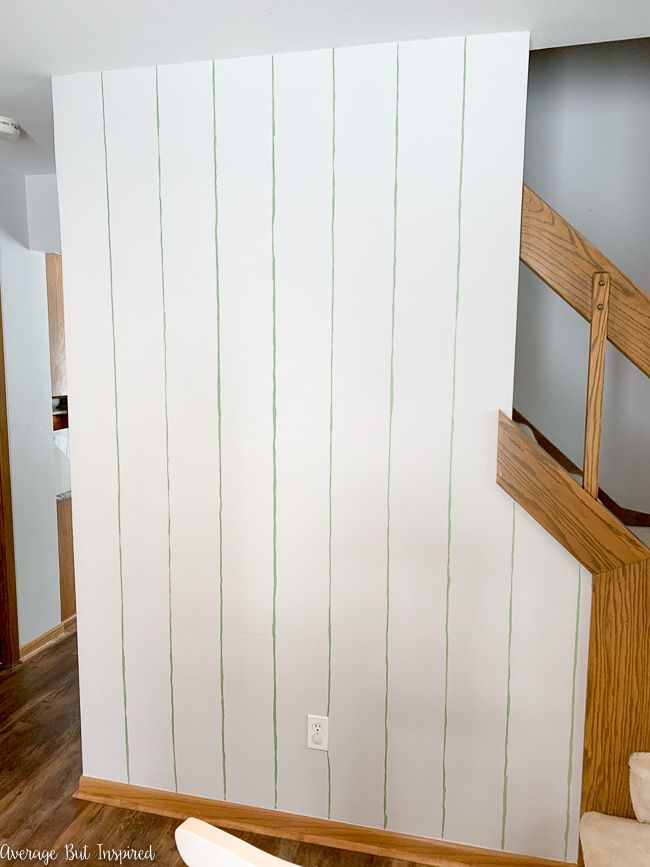
To begin, I fired up my laser level (which also came in handy for my vinyl decal accent wall!), and centered the red line cross on the wall I was going to paint.  When I had the red laser lines positioned where I wanted, I traced them onto the wall with a pencil.

Learn how to paint a grid accent wall in this post. The laser level is very helpful when painting a DIY accent wall.

Next, I grabbed a rectangular piece of foam padding that was in the box for my beautiful new rattan media console, and I held it parallel to the first vertical line that I’d drawn.  I traced along the edge of it, and brought it all the way down from ceiling to floor.  

Using a piece of trash foam, Bre creates a DIY accent wall with a grid pattern in her foyer.

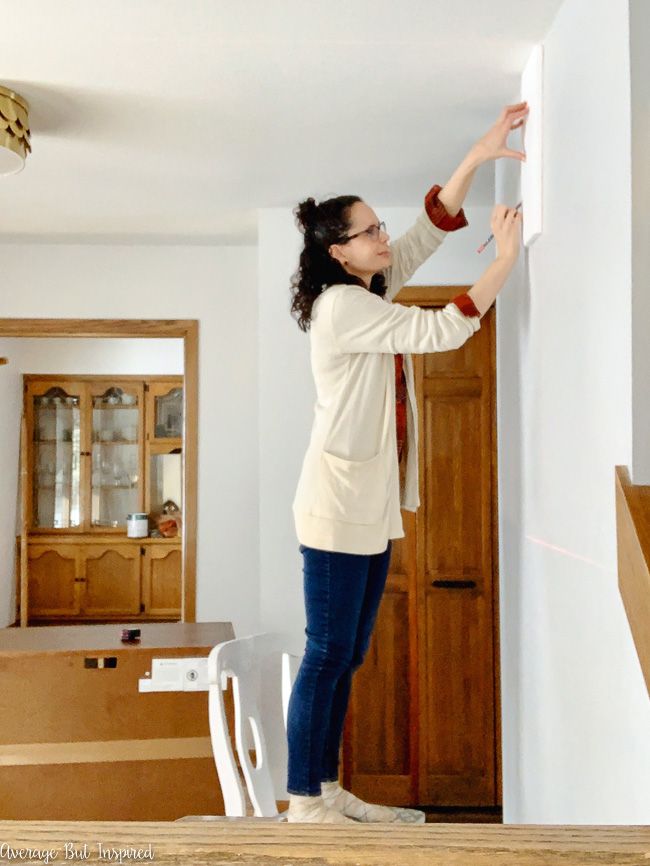
I repeated this “hold the foam, trace the line” process until the entire wall was covered in perfectly-spaced vertical lines.  If you try this, you could use ANY rectangular piece of cardboard/foam/paper that has some heft to it, which will allow you to trace along the edge.  You’re not limited to trash foam from my media console – ha!

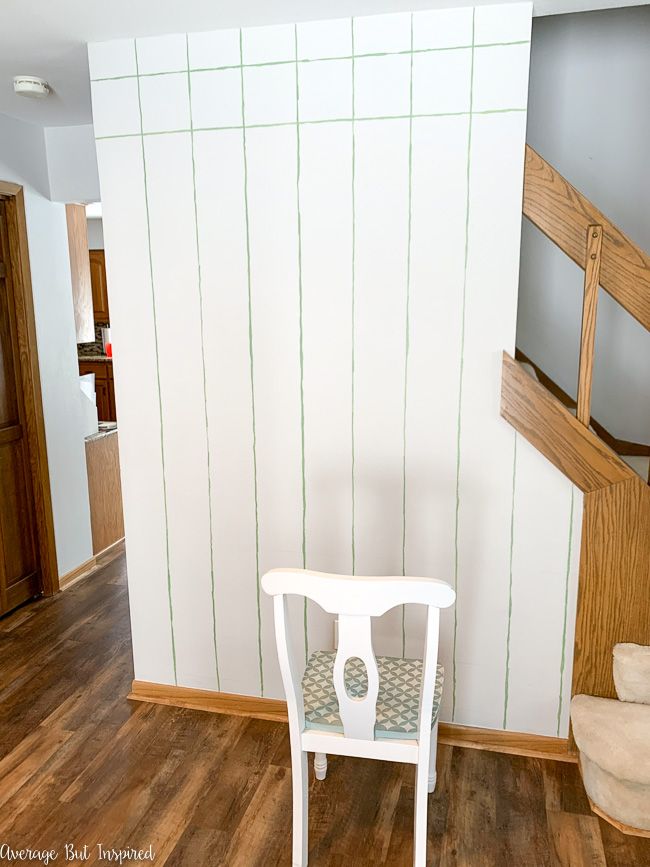
Then I did the same thing with the horizontal lines: I placed the foam parallel with the first horizontal line and traced along the edge; moving the foam from one side of the wall to the other.  

Draw the grid accent wall in pencil first.

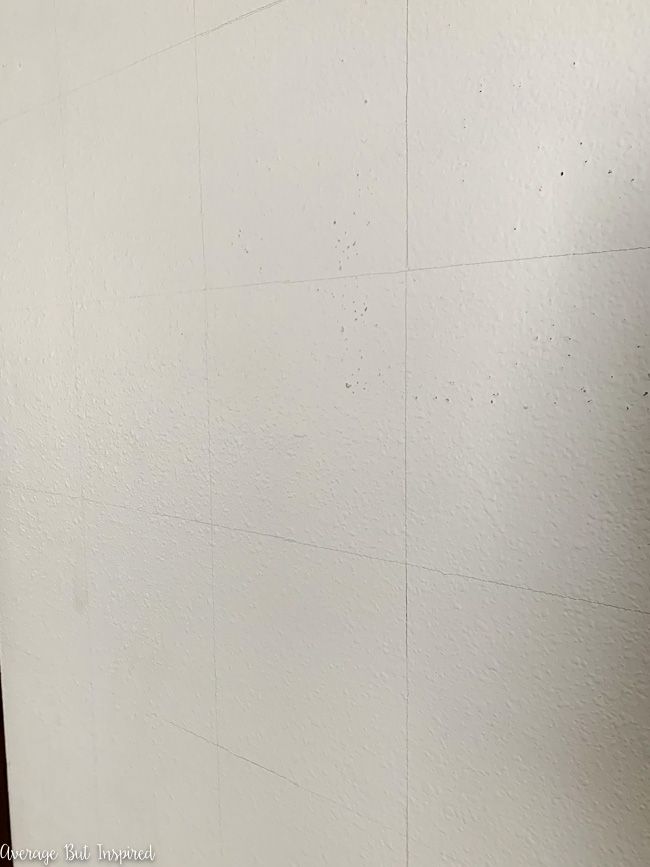
When this was finished, I had a pencil grid on the entire wall.  This part of the process took about 20 minutes tops.  So fast!

Next, I got out my craft paint stash and found this lovely shade of green craft paint. I used craft paint because I had it already and I didn’t want to go to the store.  🙂  Regular latex paint would also work perfectly!

Bre used DecoArt Americana Multi-Surface Satin paint in Cactus to paint her DIY accent wall. 

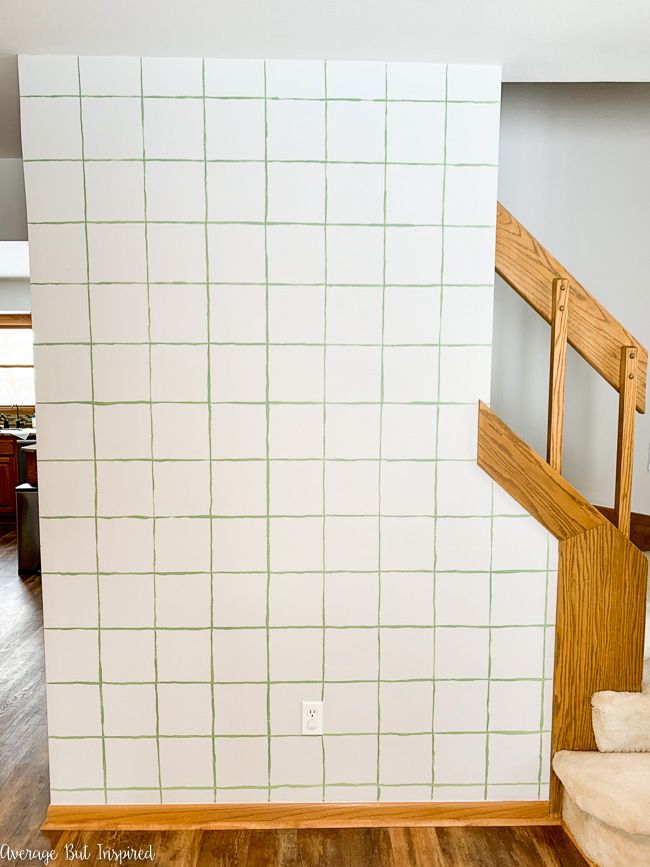
I started by painting over the vertical pencil lines, making sure to vary the thickness of each stroke.  I intentionally wanted this DIY accent wall to be imperfect – no precise lines here!  

To paint a grid accent wall, go over the vertical lines with craft paint first.

And then . . . you guessed it . . . I painted over the horizontal pencil lines . . . starting at the top and working my way down.  

To paint a DIY accent wall with a grid pattern, paint over the horizontal lines with craft paint.

This entire painting process took around 40 minutes.

This hand-painted grid accent wall took under an hour to paint.

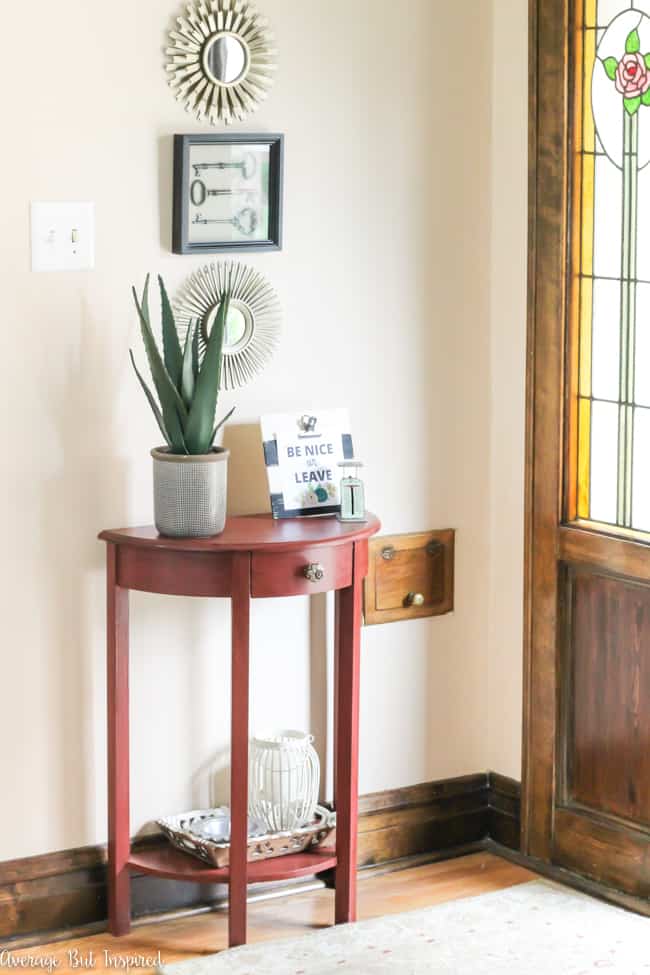
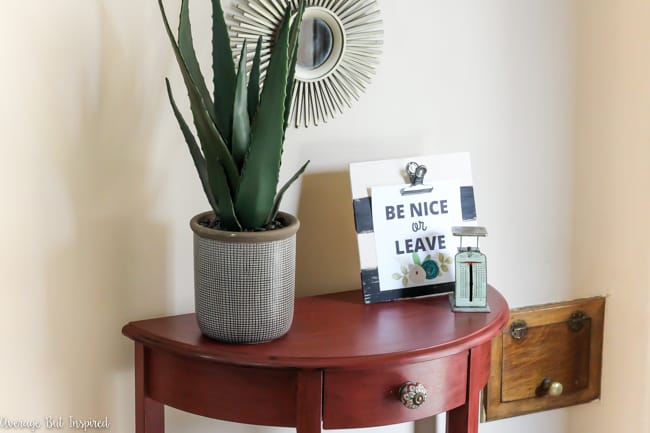
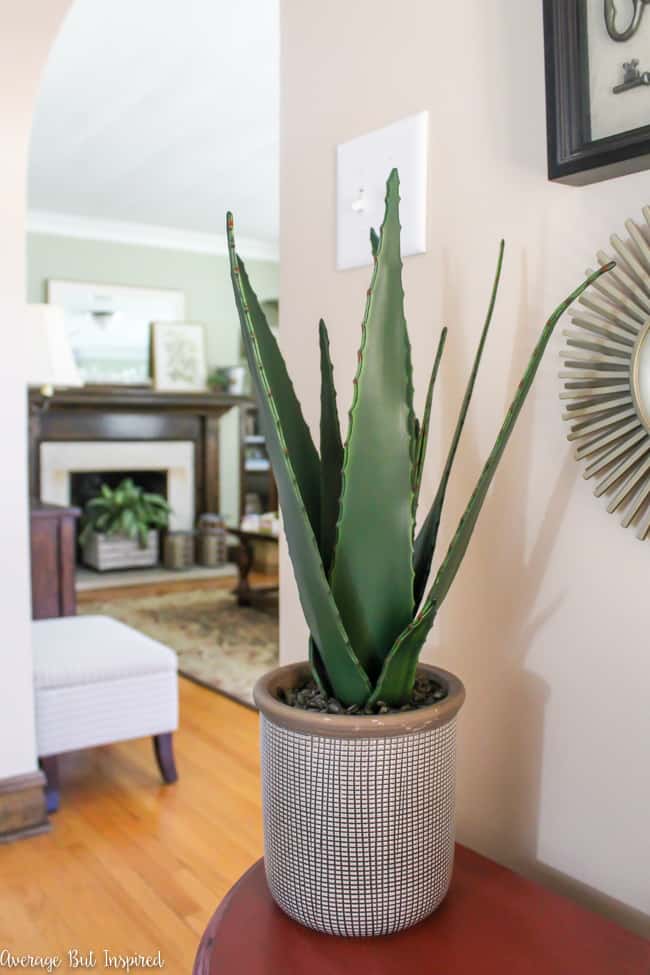
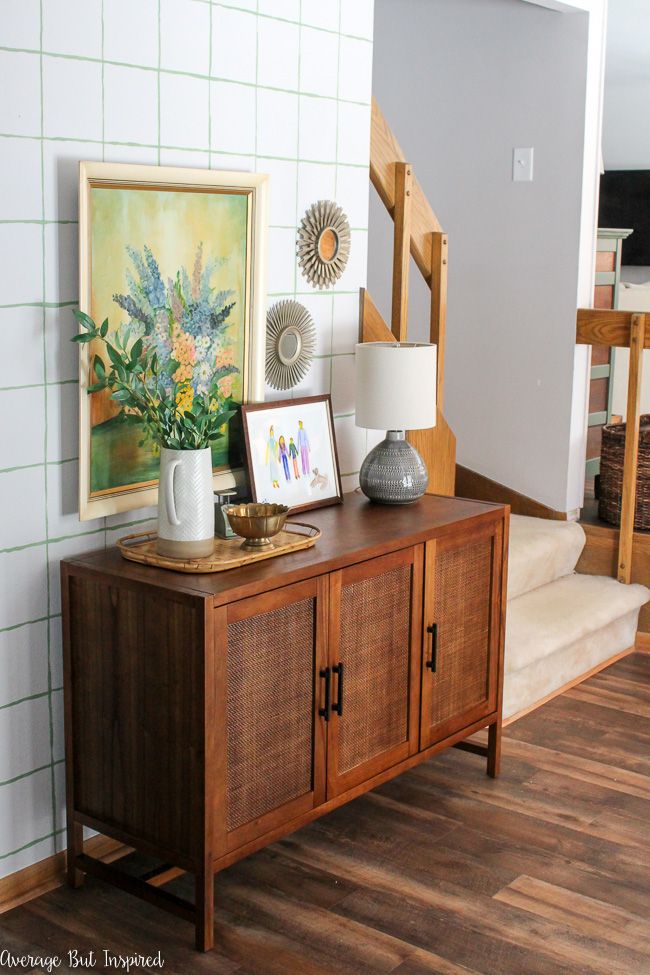
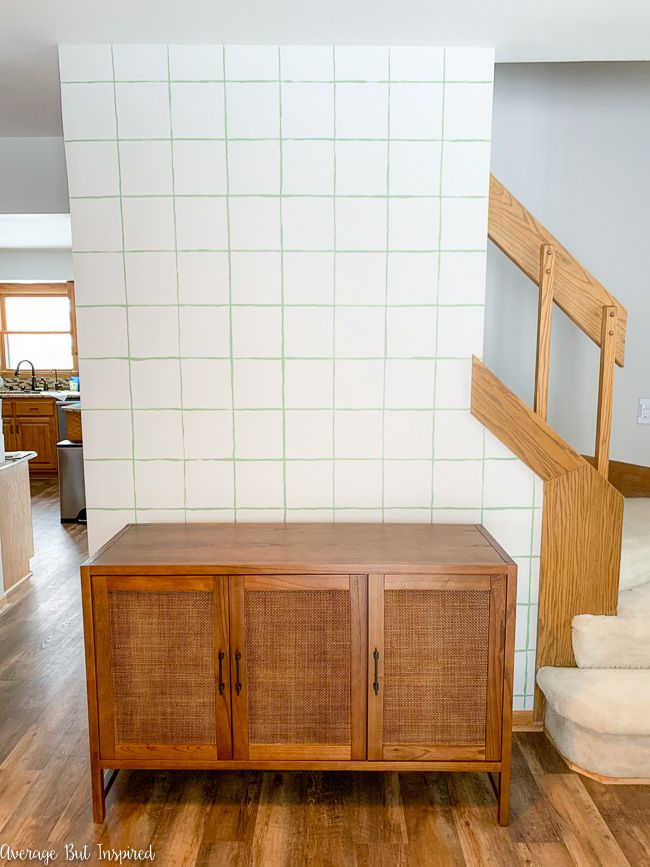
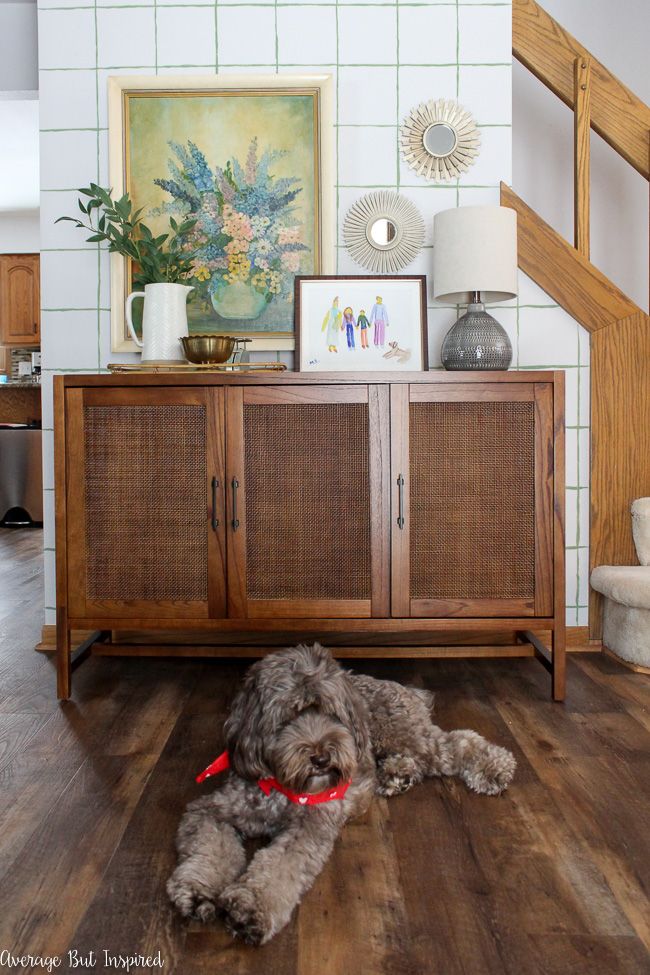
With my DIY grid accent wall complete, I moved my new console table into place.  

The Warwick 3-door cabinet from Target is a beautiful console table when paired with this hand-painted DIY accent wall.

And then I got to work on my favorite part: accessorizing!

Learn to paint a DIY accent wall in your home! This hand-painted grid accent wall cost nothing to paint and took under an hour to finish!

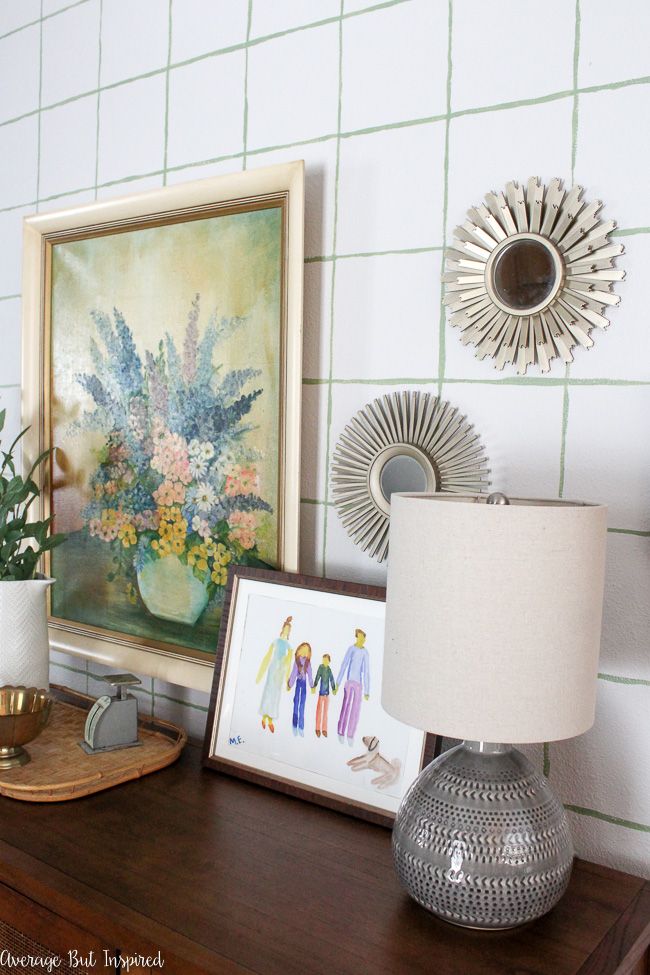
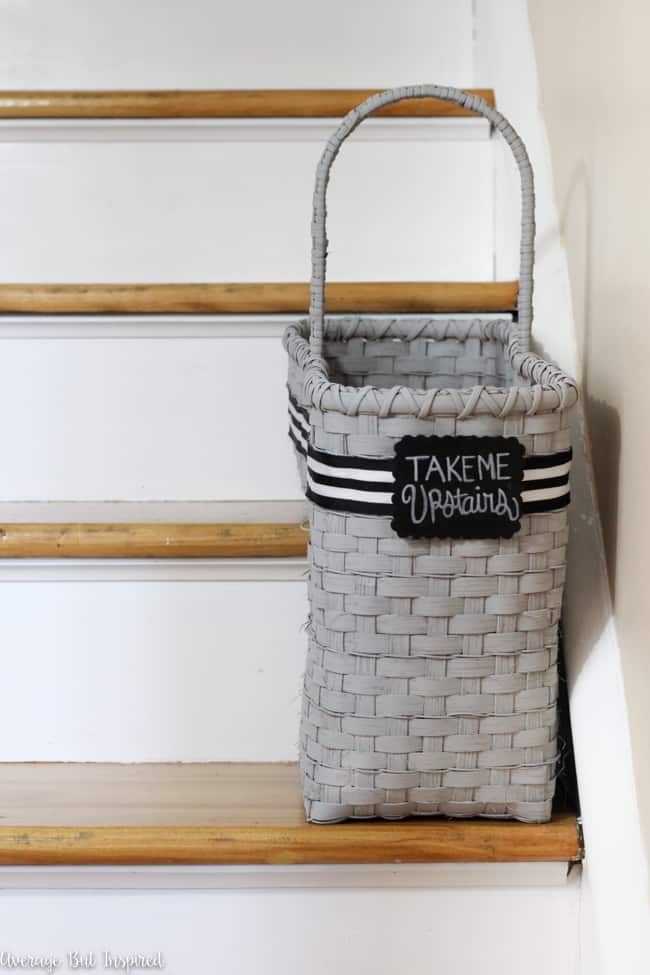
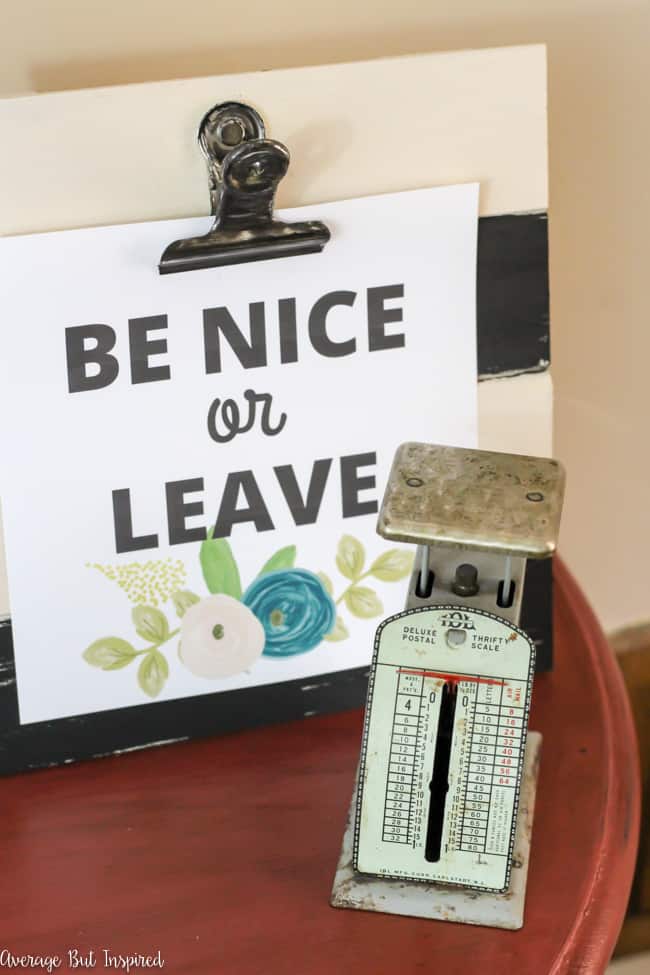
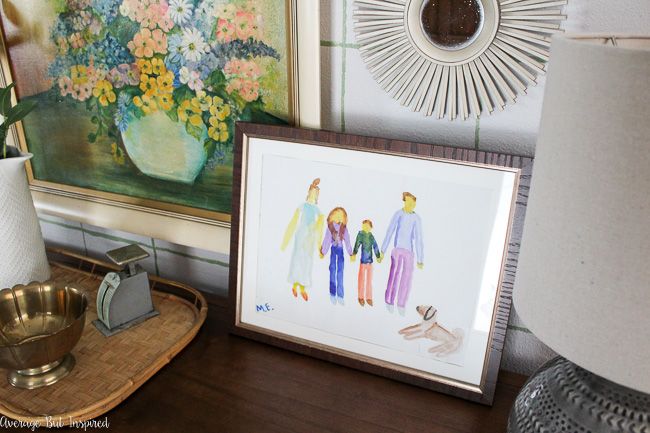
I rounded up a vintage painting I scored for $15, some other vintage finds (including the wicker tray, brass bowl, and postal scale), some big box store scores from years past (including the sunburst mirrors, pitcher and lamp), and my FAVORITE item: a watercolor family portrait painted by my nine-year-old daughter!

Hand-painted accent wall paired with vintage and meaningful decor makes for a beautiful entryway.

How CUTE is this little spot (and the doggie)???

This DIY accent wall with a hand-painted grid pattern and the cane console or rattan console make for a beautiful statement when entering this home.

Let’s do a quick recap: for $0 and an hour of time, I painted the cutest DIY accent wall in a fresh grid pattern.  Not bad, right?

If grids aren’t your thing, maybe you could try something different.  Perhaps a brushstroke accent wall, imperfect polka dot accent wall, crosses – whatever!  The point is that with no skill and no money (or very little money), you can add personality to your home.  So be encouraged and go get it done!  🙂

Painting your own accent wall is such a great way to add personality to your home! It's easy to paint a DIY accent wall and it doesn't cost much money at all. This painted grid accent wall is quirky and cute.

-Bre

September 30, 2019 by Bre

Halloween Skull Decoration: Make a Mini Halloween Cloche!

The spookiest time of year is almost here again!  Get ready to pull out those Halloween decorations and deck the halls for trick-or-treaters.  And of course, don’t forget to make time for some Halloween crafting!  This year, Halloween skull decorations are all the rage, and I’m going to show you how to make a mini Halloween cloche with Dollar Tree plastic skulls.  It’s a piece of Halloween decor that’s cute and creepy all at the same time!

Skull decorations are so hot for Halloween! Use Dollar Tree mini skulls to make these cute and creepy Halloween cloches!  

This Halloween skull decoration is pint sized, which makes it totally perfect for any little spot in your home or office that needs a tiny dash of Halloween.  Think shelves, entryway tables, window sills, and more!

I need small and discreet Halloween decorations this year so I can easily stash them away for house showings.  (We’re moving!  Read up on our unexpected life change here.)  This is just right!

Also, because this Halloween cloche is miniature (well, mini as compared to a regular-sized cloche, but not fairy garden mini!), you can make the whole thing in about 20 minutes.  Not bad!  Use Dollar Tree mini skulls to make adorable Halloween cloches for Halloween this year!

Supplies Needed to Make a Mini Skull Halloween Cloche

This post contains affiliate links.  To read my full disclosure policy, please click here.

  • Unfinished wood candle holder
  • Empty baby food jar or 4 oz. small mason jar
  • Acrylic craft paint in black and silver
  • Paint brush
  • Spanish moss (from Dollar Tree)
  • Mini skulls (from Dollar Tree)
  • High-temperature hot glue gun OR E6000 glue
  • Optional: small unfinished wood furniture buttons

How to Make a Mini Skull Cloche For Halloween Decor

Begin by getting your paints and paint brush ready!  Paint the unfinished wood candle holder, the mason jar rim (or baby food jar lid), and the unfinished wood furniture button with the black acrylic paint.  

Learn how to make a skull decoration with cheap craft supplies.

Chances are that the black paint won’t cover the rim of the mason jar very well (even with multiple coats), but that is OK!  Let some of that silver color underneath show through – it adds to the look!

Once the black paint dries on all of those pieces, lightly dab some silver metallic craft paint or acrylic paint onto the wooden pieces.  You can also add some silver paint to the mason jar lid if it needs it.  Mine did not.

Paint a wooden candle holder.

Let the silver paint dry and then use hot glue (only with a high temperature hot glue gun) or use a glue made for plastic and wood (like E6000), to attach the mason jar lid to the wood candle holder.  

Turn a candle holder and mason jar into a cute Halloween cloche with skulls!

Place a little Spanish moss inside the lid, and be careful not to put too much in.  You can hot glue the moss to the lid if you like, or leave it loose.  (You might like to see how I used this same Spanish moss to make my fake fiddle leaf fig tree look real!)  

Spanish moss adds a spooky touch to a Halloween cloche craft project.

Then pop a miniature skull on top of the moss.  You can also hot glue the skull onto the moss if you want a more stable skull.  🙂  (That sounds so funny.) 

Use Dollar Tree mini skulls to make adorable Halloween cloches for your decor this Halloween.

Now, screw the mason jar onto the lid and trim off any Spanish moss that sticks out the sides.  If you choose to add the little wooden button to the top, go ahead and glue that on now.  

So adorable! Use mini skulls to make tiny Halloween cloche decorations.

Once that glue is hardened or set, your adorable mini Halloween cloche is complete!  

Make a Halloween cloche with skulls to add some creepy and cute to your Halloween decor this year.

This is one Halloween skull decoration that you definitely want to add to your haunted house this year!  

This Halloween skull decoration is creepy and cute at the same time! Make a Halloween cloche with miniature skulls in under 20 minutes!

-Bre

August 29, 2019 by Bre

Make a Dollar Store Toolbox Planter

The kids are back in school and the temps are cooling off: my mind is definitely shifting gears toward fall!  Because of that, last week I shared a cute DIY Dollar Tree Pumpkin Sign project that will cozy up your home decor, and this week I’m sharing another fun fall project!  This dollar store toolbox planter is perfect for your your porch or an entryway table!  So cute!! Transform a Dollar Tree toolbox into a pretty planter filled with flowers for fall! Learn how to replicate this look for any season - it's so easy!

Isn’t it pretty?!?  And friends, it is SO darn cheap to put together.  EVERYTHING except the spray paint is from Dollar Tree!

Okay well enough oooooh’ing and aaaaah’ing over this dollar store fall decor – let’s get down to business!

Supplies Needed to Make a Dollar Tree Toolbox Planter

Like I said, pretty much everything for this project is from Dollar Tree!  If it’s not from the D.T., I will let you know next to the supply name.  Also, some of the links may be affiliate links.  You can read my full disclosure policy here.

  • Toolbox
  • Floral foam brick
  • Faux flowers of your choice (I used a bunch of sunflowers leftover from my Dollar Tree Sunflower Wreath, mums, and a beige flower of some sort)
  • Faux pumpkin clips (they come in a three pack)
  • Plaid wired ribbon
  • Harvest metal word (they come in a three pack of Harvest, Thankful, and Welcome)
  • Spray paint (I used this brand and color of spray paint) (not Dollar Tree)
  • Black acrylic paint to add some faux age to the toolbox (not Dollar Tree)
  • Gold acrylic paint for the metal word (not Dollar Tree)
  • E6000 glue (not Dollar Tree)

How to Make a Dollar Tree Toolbox Planter

Start by spray painting the toolbox in whatever color you like.  I really liked this matte burgundy/purple color because it was bold and moody – perfect for fall!  Spray paint a Dollar Tree toolbox a fun color and use it as a planter!

Once the spray paint dried, I lightly added a bit of black paint all over the toolbox to make it look older and less “flat” – if that makes any sense. 

Next, I popped a block of floral foam inside the toolbox.  The rectangular floral foam from Dollar Tree is the perfect fit for the toolbox.  Dollar Tree floral form is the perfect base for this toolbox planter.

Next, I got to work cutting faux florals and placing them into the floral foam.  

Fall faux flowers will be beautiful in the toolbox planter.

I had a stem of faux leaves set aside to use, but decided that the colors didn’t look right with the flowers I was using, so I ultimately ditched them.  Press faux flowers into floral foam.

Once I had the flowers in place, I worked in some of the Dollar Tree wired ribbon, and then added several of the faux pumpkin clips.  Those clips are great because they just attached right to the flowers, exactly where I wanted them!  Faux flowers and pumpkins from Dollar Tree make a beautiful fall arrangement.

Finally, and not pictured here because I forgot to photograph this step, I dabbed a little gold acrylic paint on the metal word “Harvest” and let it dry.  Then I glued it to the inside of the toolbox for a little extra flair.

It all came together super cute and much prettier than the toolbox in its original form.  🙂  This is so pretty! Learn how to upcycle a toolbox into a planter! This fall arrangement is gorgeous and made entirely with Dollar Tree florals.

I can’t stop making Dollar Tree crafts – I hope you’re not sick of them!  Love this pretty fall flower arrangement! See how she transformed a Dollar Tree toolbox and made it a beautiful fall planter!

This entire toolbox planter cost $7 in Dollar Tree Supplies and $4 in paint.  I had the rest of the supplies already, so there was no cost there.  That is not bad at all!  Faux pumpkins, plaid ribbon, and faux florals make a beautiful fall floral arrangement.

So what do you think – will you be transforming a toolbox into a pretty planter for your home?  Let me know!

-Bre


March 1, 2018 by Bre

How to Make Faux French Enamel Number Tags (That Look Like the Real Thing!)

I know I’ve said it a million times on here before, but I’m gonna say it again – I LOVE making simple updates to my decor with inexpensive items and supplies.  A few years ago I made a set of chalkboard wall hooks for my front entryway (you can see that post with its embarrassing photography here – wait until you see how much my skills have improved!).  I got tired of the chalkboard look, however, and needed to give it a new look.  I wanted to add French enamel house numbers, but at over $20 a piece, that was too pricey.  So I got to work and made my own Faux French Enamel Number Tags that look pretty close to the real thing!  It's so easy to make faux French enamel number tags with inexpensive craft supplies like paint! Learn how to make these French enamel number tags for your home decor and organization projects.

Supplies Needed for Faux French Enamel Number Tags

This post contains affiliate links.  To read my full disclosure policy, please click here.

  • Oval wood cutouts
  • Acrylic paint (white, black, brown, orange)
  • Vinyl number stickers OR number stencils and black paint
  • Mod Podge (glossy finish)
  • Dark brown wax
  • Paintbrushes
  • Stencil brush
  • Drill
  • Material to hang or affix your French enamel number tags (I used decorative furniture nails to fasten mine to the wall hooks)

How to Make Faux French Enamel Number Tags

Start by painting the oval wood cutouts white.  Regular acrylic paint does the trick for this step.It's so easy to make faux French enamel number tags with inexpensive craft supplies like paint! Learn how to make these French enamel number tags for your home decor and organization projects.

Once dry, place your number stickers onto the ovals or stencil your numbers onto them.  I cut out numbers with my Silhouette Portrait but you absolutely do not need a vinyl cutting machine for this project!  Regular black number stickers or stencils and paint will work perfectly!  It's so easy to make faux French enamel number tags with inexpensive craft supplies like paint! Learn how to make these French enamel number tags for your home decor and organization projects.

Once all of the numbers are in place and/or dry, cover everything with a coat of Mod Podge in glossy finish.  This is meant to give the ovals a glossy look like enamel.  You don’t want them to be dull or they will look less realistic.  It's so easy to make faux French enamel number tags with inexpensive craft supplies like paint! Learn how to make these French enamel number tags for your home decor and organization projects.

After they’ve dried, apply brown wax in strategic areas (like around the outside edges of the ovals), to help give the faux enamel number tags an aged look (you can see it on No. 47 in the below photo).  I used this type of brown wax, which is what I use on furniture projects and had available. If you don’t use brown wax regularly, buy a less expensive brand of wax like this!  It's so easy to make faux French enamel number tags with inexpensive craft supplies like paint! Learn how to make these French enamel number tags for your home decor and organization projects.

The brown wax will dry quickly, and then you can add some faux rust to the enamel tags with paint!  I got a little carried away with my “rust” and wish I wouldn’t have put so much on.  I’d recommend applying the paint very sparingly and in small areas to see how you like the look.  You can always add more, but you can’t always take it away!  All you do is dab a thick coat of black paint with a stencil brush, then a thick coat of brown paint over that, and then a little (but thick) dab of orange paint to create a bumpy rust look!  It's so easy to make faux French enamel number tags with inexpensive craft supplies like paint! Learn how to make these French enamel number tags for your home decor and organization projects.

After all of that, you’re ready to drill holes in the Faux French Enamel Number Tags and use them!  It's so easy to make faux French enamel number tags with inexpensive craft supplies like paint! Learn how to make these French enamel number tags for your home decor and organization projects.

You can fasten them to wood like I did, tie them to baskets with twine, use them as house numbers – whatever!  It's so easy to make faux French enamel number tags with inexpensive craft supplies like paint! Learn how to make these French enamel number tags for your home decor and organization projects.

It's so easy to make faux French enamel number tags with inexpensive craft supplies like paint! Learn how to make these French enamel number tags for your home decor and organization projects.

There are so many uses for them, but I do love them on my entryway hooks!  And I love that they cost hardly anything to make.  It's so easy to make faux French enamel number tags with inexpensive craft supplies like paint! Learn how to make these French enamel number tags for your home decor and organization projects.

How would you use Faux French Enamel Number Tags in your decor?

-Bre

November 29, 2017 by Bre

Colorful Christmas Kids Bedroom

The Most Wonderful Time of the Year is here, and I couldn’t be more excited to deck the halls and make my home festive!  Over the years I’ve shown you some of my Christmas decor, but it’s always been focused on the communal areas of the home.  Today I am switching things up a bit for the Come Home for Christmas Blog Hop, hosted by my friends Vicki & Jenn at 2 Bees in a Pod, and I’m sharing my daughter’s Colorful Christmas Kids Bedroom.  It’s a departure from my typically traditional holiday home decorating style, but it makes me so happy because it’s filled with sparkles, glitter, metallics and more!  

This post contains affiliate links. To read my full disclosure policy, please click here.

Before I jump into sharing my daughter’s colorful Christmas bedroom, I wanted to let you know that you’ll find links to 32 different Christmas room tours at the bottom of this post!  Every day focuses on a different space in the home.  I hope you’ll visit my friends’ posts and see how they are decorating different areas of their homes for the holidays!

Now, come on in and visit a Christmas bedroom that is truly merry & bright!  Deck the halls with these fun Colorful Christmas Kids Bedroom decor ideas!

I have to be honest, my seven-year-old’s room is usually a mess.  She’s somewhat of a packrat (just like her mama!), so we did a lot of cleaning and purging to get this space up to snuff for the holidays.  Seeing my daughter’s reaction when she saw all of this colorful Christmas decor was priceless.  The magic of the season means so much to children, so it’s extra fun to give them some of the seasonal sparkle in their bedrooms!Deck the halls with these fun Colorful Christmas Kids Bedroom decor ideas!

This little tree sitting on top of the Painted Butterfly Bench is something I’ve had for years and almost donated last year.  I’m glad I didn’t because it’s perfect for this young child’s Christmas bedroom.  (See, being a packrat can pay off!)  Its greens and pinks got me started on the color scheme that winds itself through the room.  Deck the halls with these fun Colorful Christmas Kids Bedroom decor ideas! Furry throws and pillows and bright colors make the room special for the holiday season!

We gave my daughter’s room a festive look for Christmas that feels young at heart by switching out the bedding for a plain white duvet, accented with an incredibly soft pink throw with metallic pink polka dots (link to similar throw).  Let me tell you that I am obsessed with this throw and might steal it from her.

Adding to the coziness factor is the faux fur pillows.  These are also incredibly soft, and were such a bargain!  Pillow covers are my new favorite way to instantly change your decor’s look (wrapping paper previously held this coveted spot.).  Deck the halls with these fun Colorful Christmas Kids Bedroom decor ideas! Furry throws and pillows and bright colors make the room special for the holiday season!

And for my sequin-obsessed daughter, I had to get this flippy sequin Christmas tree pillow.  The tree can be gold or white, depending on which way you flip the sequins.  So much fun built right into a pillow, friends!  Deck the halls with these fun Colorful Christmas Kids Bedroom decor ideas! Furry throws and pillows and bright colors make the room special for the holiday season!

Deck the halls with these fun Colorful Christmas Kids Bedroom decor ideas! Furry throws and pillows and bright colors make the room special for the holiday season!

The Merry & Bright prints over the bed are covering the regular artwork, and similar versions are available HERE as FREE PRINTABLES (2 color combos and in a single 8×10)!  And, the 3D Glitter Snowflake removable decals that Paper Riot Co. gave me are a perfect accent above those!  (P.S. you can enter to win a set right now on my Instagram feed!  Click here to find the entry.)  Deck the halls with these fun Colorful Christmas Kids Bedroom decor ideas! Furry throws and pillows and bright colors make the room special for the holiday season!

The festive new look has us all wanting to spend more time in my daughter’s room.  We even let Jasper the dog get in on the action (he’s not usually allowed on the furniture).  He gives that cozy throw blanket his stamp of approval.  Deck the halls with these fun Colorful Christmas Kids Bedroom decor ideas! Furry throws and pillows and bright colors make the room special for the holiday season!

Now, if I can figure out a way to get my daughter to keep her room this clean going forward, I will have received the best Christmas present ever!  (But wait – please don’t tell my husband this.  I would still like a real present under the tree.  :-))  Deck the halls with these fun Colorful Christmas Kids Bedroom decor ideas! Furry throws and pillows and bright colors make the room special for the holiday season!

Now that you’ve seen how I decked out my daughter’s bedroom for Christmas, please visit my friends to see each of their spaces!  Remember – the Thursday and Friday posts won’t be live until later this week, so make sure to check back!

MONDAY (11/27) – Entryway / Foyer

My Creative Days

Lydi Out Loud

Our Home Made Easy

Craving Some Creativity

Lehman Lane

Slightly Coastal

The Crowned Goat

TUESDAY (11/28) – Living Room

Green With Decor

Little Red Brick House

Catherina’s Creative Corner

Houseful of Handmade

1915 House

All Things Big and Small

WEDNESDAY (11/29) – Bedroom

2 Bees in a Pod – Vicki

Average But Inspired

Bliss Ranch

Keys to Inspiration

Country Design Style

Making it in the Mountains

THURSDAY (11/30) – Dining Room

Little Bits of Home

Two Purple Couches

Worthing Court

The Inspired Hive

DIY Beautify

Refresh Restyle

FRIDAY (12/1) – Kitchen

2 Bees in a Pod – Jenn

Robb Restyle

The Honeycomb Home

Chatfield Court

Home with Cupcakes and Crinoline

Thanks for visiting and happy holidays!

-Bre

  • 1
  • 2
  • Next Page »

Let’s Connect!

  • Facebook
  • Instagram
  • Pinterest
  • Twitter
  • YouTube

Hi, I'm Bre! I believe in working with what you've got to create a home you love. I hope to inspire you to do the same!

Love DIY & Decor? Join the Fun!

    How Can I Help You?

    How to Organize Digital Photos Using Amazon Photos

    How to Build a Backyard Fire Pit

    10 Dollar Tree Craft Supplies You Need

    How to Create a Faux Antique Brass Finish with Paint

    Looking for Something?

    Modernizing a Mirrored Wall: Tape to the Rescue!

    One of the biggest challenges in my Office and Guest Room Combo Makeover was modernizing a mirrored wall that screamed “hello, it’s 1980.”  OK, obviously it didn’t really scream that, but it might as well have! Of course I thought about removing the mirrored wall altogether.  But when I researched how to do that, I […]

    DIY Dollar Tree Easter Carrot Decor

    I’ve made a lot of Easter crafts over the years, and they’ve all tended to focus on bunnies and eggs.  Now I’m in an Easter carrot decor phase.  (It’s a real thing.)  Last year’s Easter craft post was this Carrot Door Hanger, and this year it’s all about the carrots, too. You’d think that I […]

    Refinished and Reupholstered Leather Seat Chair

    It’s the second Wednesday of the month, so you know what that means – it’s time for another edition of The Monthly DIY Challenge!  Every month some of my best blogger buddies and I team up to create projects based on a common item or theme.  In the past we’ve all used things like stencils […]

    Office and Guest Room Combo: How to Create a Double-Duty Space

    Our ‘new’ home has one more bedroom than at our last house, and because of that, we had no furniture for it.  It’s pretty tiny, but with some creative planning I turned it into an office and guest room combo space that easily pulls double-duty, making it a totally functional WIN for my family!   With […]

    Copyright © 2013-2021, Bre Eggert (Average But Inspired). All rights reserved.

    Pretty Chic Theme By: Pretty Darn Cute Design