Need some mouse ears for a Halloween costume or a trip to Disney? Learn how to make no-sew DIY Mickey Mouse ears in this tutorial!
I cannot believe this, but my daughter does not want to be Elsa from Frozen for Halloween. I am quite certain she’s the exception to the rule for the 4 year old girl demographic. Instead, she decided to be Minnie Mouse after her little brother decided he wanted to be Mickey Mouse.
I am one happy mama. A cute, coordinated costume for the two of them, and I didn’t even have to beg or bribe? It’s a miracle!
Anyway, I went to buy their costumes at my favorite big box store that shall remain nameless, and found that the costumes were: (1) expensive; and (2) junky. Like full of holes junky.
So, I decided that with hardly any effort at all, I could make them decent Mickey and Minnie costumes. (Luckily they’re young and won’t really know if their costumes are the laughingstock of the neighborhood.)

In case I fail miserably, I decided to start this costume-making process early. But I’m happy to say that I’ve gotten the ears down, and can show you how to make your own DIY Mickey Mouse ears and DIY Minne Mouse ears in 10 minutes or less!
Supplies Needed to Make DIY Mickey Mouse Ears or DIY Minnie Mouse Ears
This post contains affiliate links. Please read my disclosure policy for more information.
You hardly need any supplies to make these DIY mouse ears, which is a total bonus.
- Black Headband
- Stiffened Felt (in black) (I got this at Michaels in the same aisle as craft felt. It is about $2.00 per sheet, but it’s thicker and sturdier.)
- Hot Glue Gun
- Soup Can
- Scrap Paper
- Polka Dotted Ribbon (if you’re making Minnie Mouse ears)
- Silver or White Sharpie
- Fabric Scissors
How To Make DIY Mickey Mouse Ears or DIY Minnie Mouse Ears
Now that you have your supplies, let’s make the cutest DIY mouse ears around!
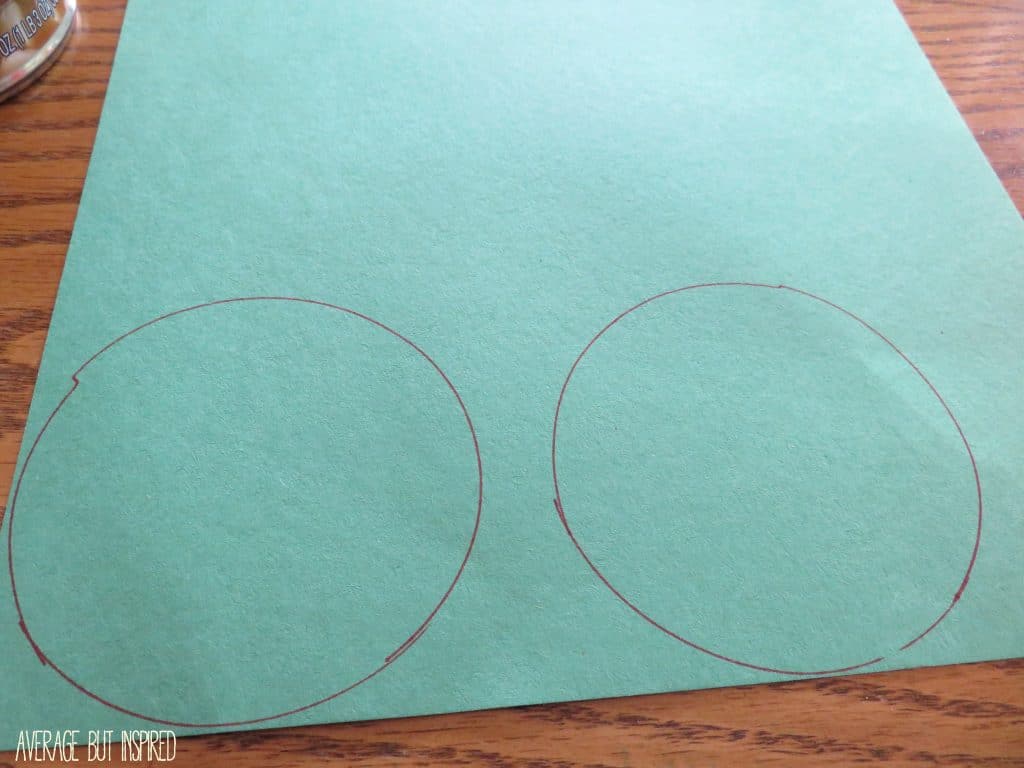
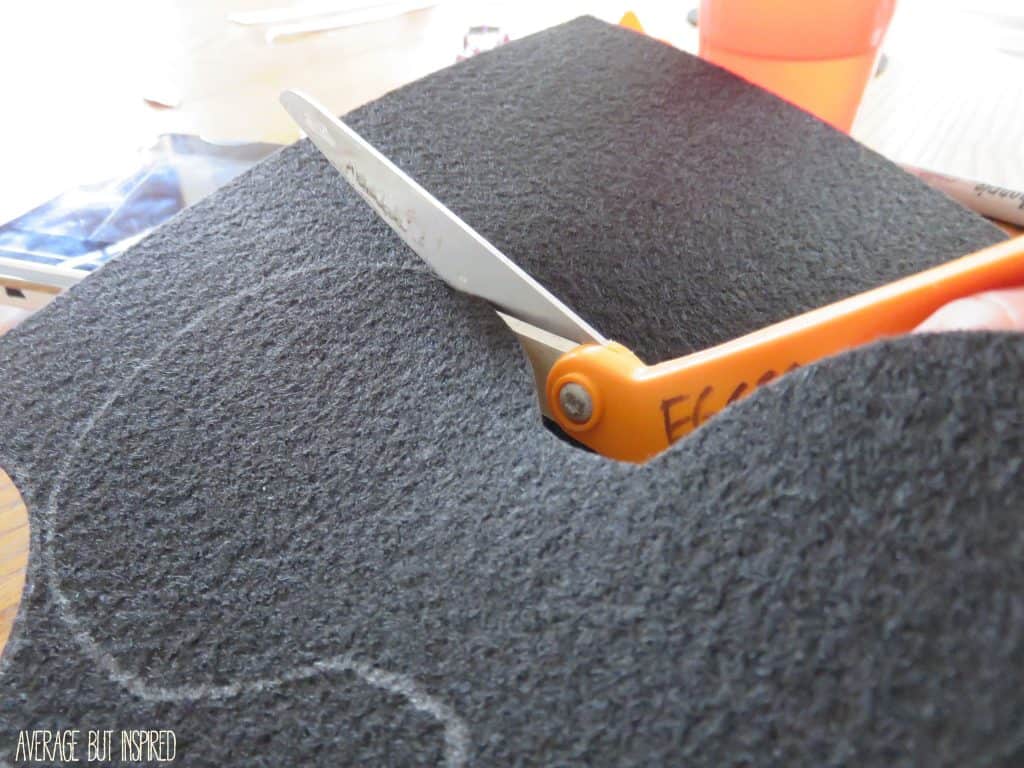
First, get a soup can and trace two circles about 1/4″ apart from one another on a sheet of construction paper.
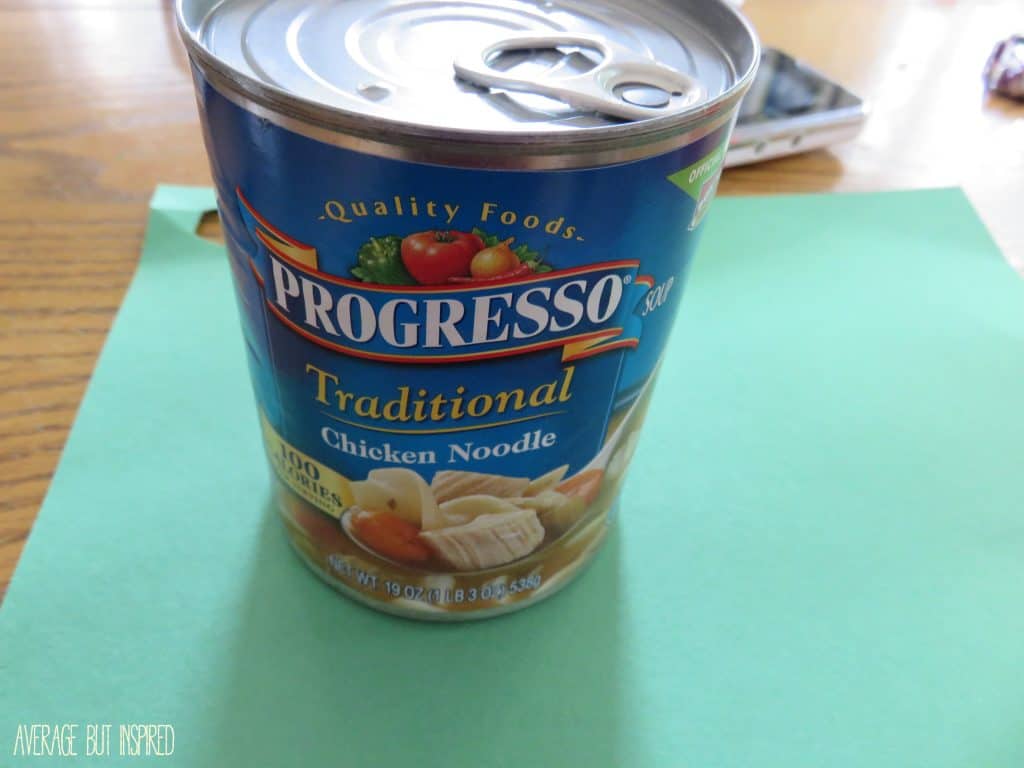
Chicken soup, tomato soup, Italian wedding soup . . . pick your favorite flavor! 🙂
Next, connect the two circles with two concave lines.
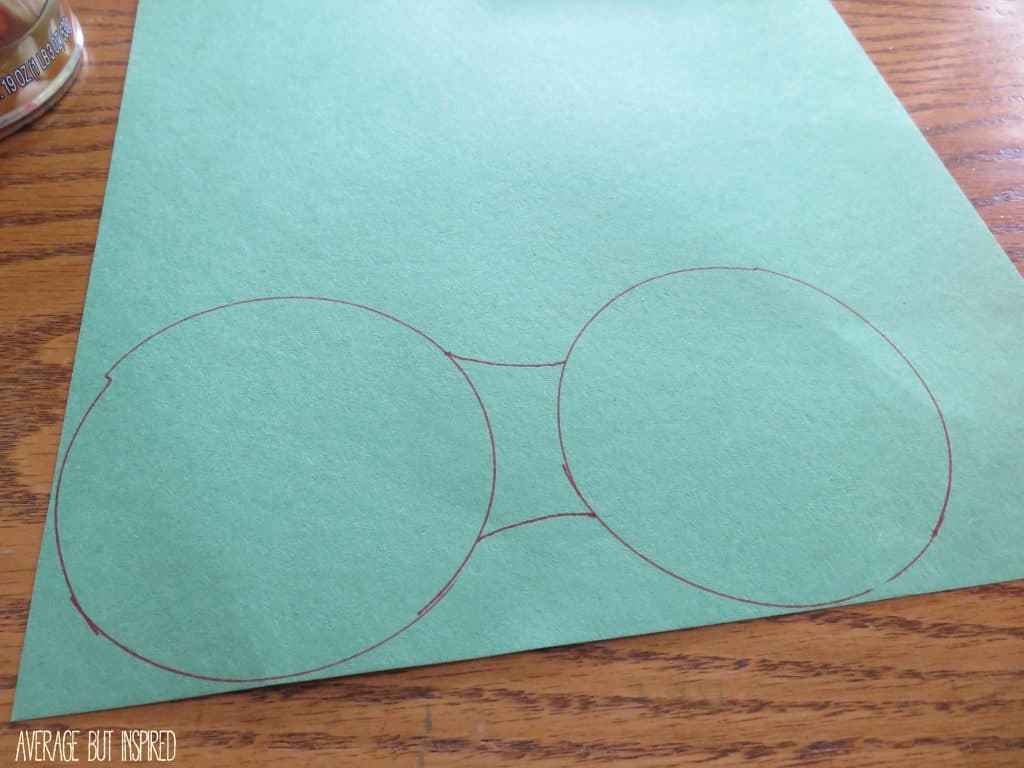
Then cut out your template.
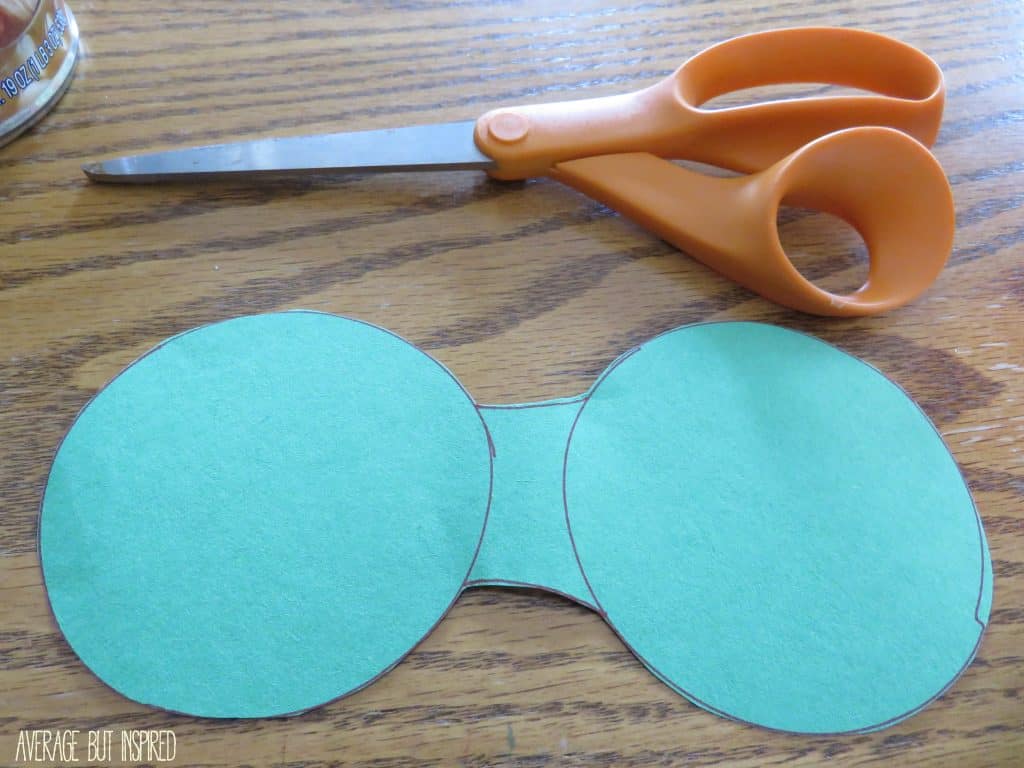
After that, trace the template onto stiffened felt using a metallic Sharpie. You’ll need to use a metallic or white Sharpie so that you can actually see the mouse ears outline.
Repeat the tracing process, and then cut out both sets of ears.
With your headband nearby, place hot glue in the middle portion of the ears.
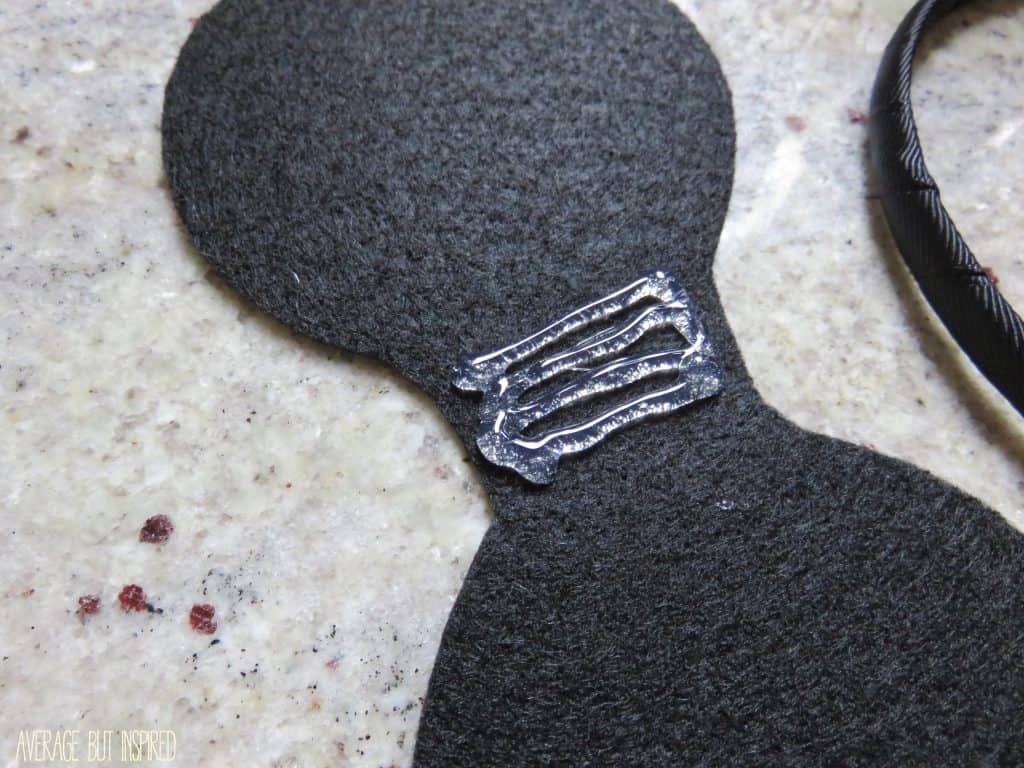
Then, press that hot glued part of the felt onto the underside of the headband, and fold the circles upwards toward each other.
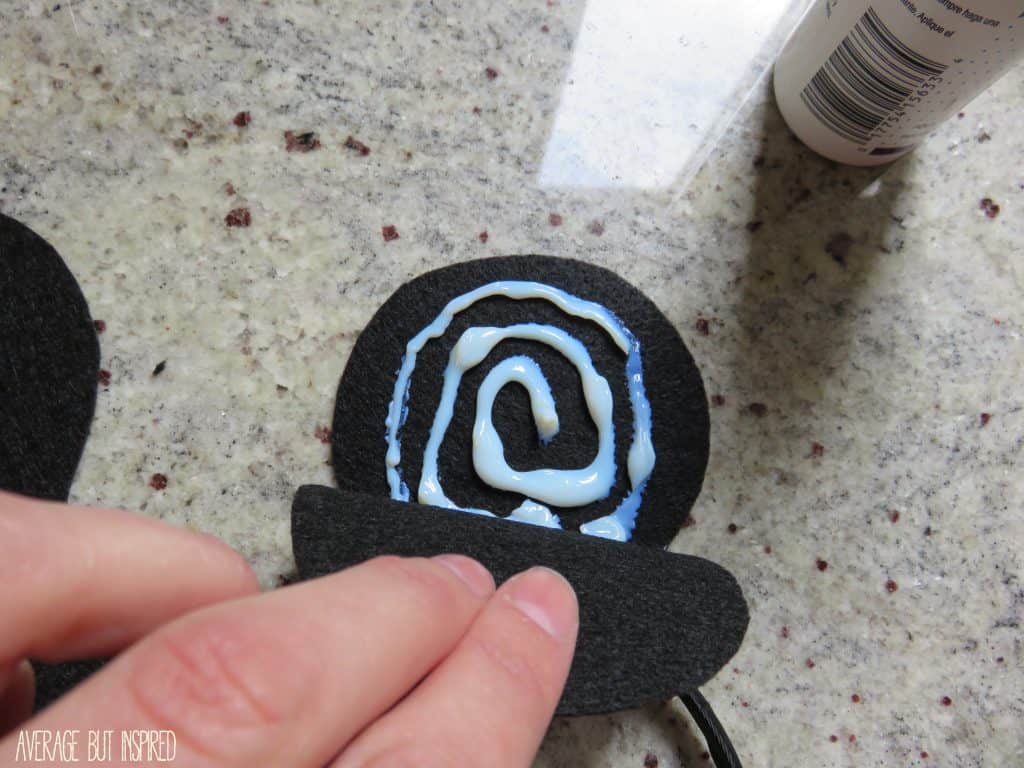
Put glue all over the inside of the circles and press them together to close them up.
Note that while I used fabric glue to do this, hot glue will work just fine!
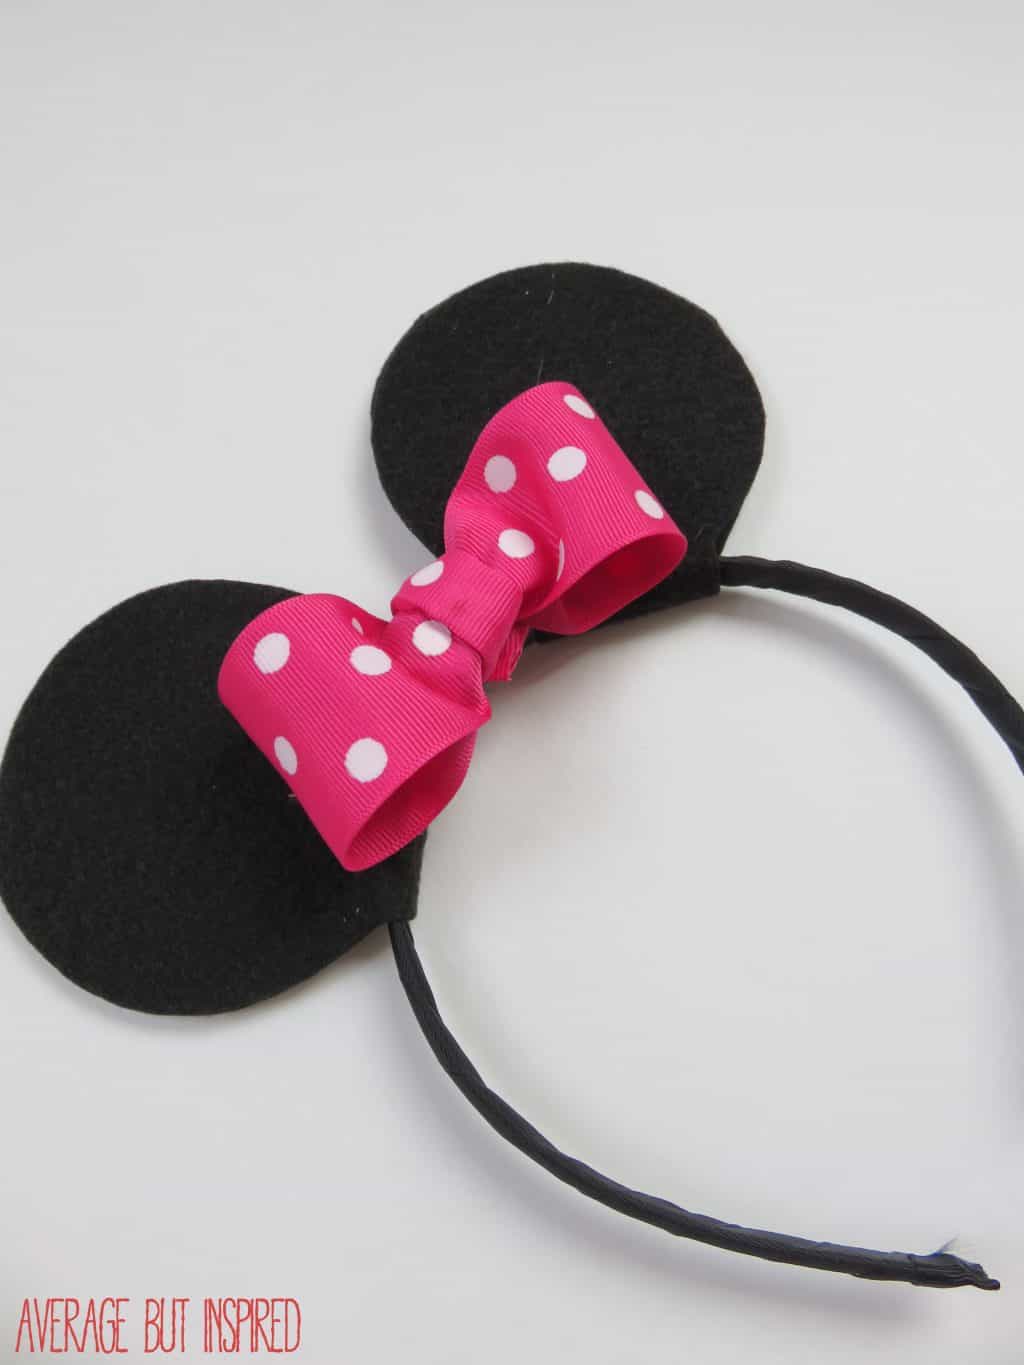
Now you’re finished if you want DIY Mickey Mouse ears!
If you want Minnie Mouse ears, make a bow out of polka dotted ribbon and glue that to the middle of the headband.
SUPER easy! And fast! And inexpensive! And . . . your kids will love them just like mine love theirs!
I am pretty proud of myself for figuring this out and for deciding to DIY their costumes this year. I just hope it doesn’t backfire . . . I guess we’ll see come October 31!

Make your own DIY Mickey Mouse ears or Minnie Mouse ears! Perfect for Halloween or child dress up.
How to Make Mickey Mouse or Minnie Mouse Ears
Materials
Instructions
Have you ever DIY’d a Halloween costume? How did it turn out for you?
Jill M DeCosmo says
It was amazing I was able to make enough pairs of ears for everyone. Pictures came out super cute. Thank you
Jill M DeCosmo says
Doing these at last minute fun birthday favors for my grandsons first birthday. Thank you definitely saved the day.
Bre says
AWESOME!!! I hope the party was so fun! 🙂
Tricia says
Our Make-a-Wish trip was sprung on us super early and I have no time to order ears. Thanks to your tutorial, I don’t have to. Thank you for sharing and saving me time and money!
Bre says
This makes me SO happy! First of all that you have a Make-a-Wish trip (which, by the way, I hope the loved one you’re traveling with is OK and going to continue to be OK), and second that you will be set with ears for the trip. Enjoy and have a wonderful time! 🙂
Maria @ Pastels & Macarons says
These are great. My 2 year old son is obsessed with Mickey Mouse right now, he would love these! x
Bre says
Thank you, Maria! If you make them, I hope he enjoys them! 🙂
Abigail says
Hi! How much fabric did you use for each ear? Making these for summer camp so i need to make sure i order enough fabric! Thanks!
Bre says
Hi, Abigail – I am SO sorry it took me so long to respond. I was offline for a while due to a death in the family. Anyway, I believe I used about 1 regular size sheet of stiffened felt per set of ears (a regular size sheet is around 8.5 x 11″). It will depend on the size of soup cans you use for the ears, however. Hope this helps!
Rachel says
Disney day at my daughters school . This is a perfect and easy for the finishing touch! Thanks!
Bre says
Hi, Rachel – that is SO fun!! I want to go to Disney day! 🙂 Glad this was helpful to you. 🙂
Dee says
Where did you find black headbands?
Bre says
Hi, Dee! I got mine at Michaels because I only needed two. In the “supplies” section of the post there is a link to black headbands on Amazon.com, which you can purchase in packs of 12 (I believe), if you need more of them!
Kristen says
Hello, you did such a great job on these ears, want to make them for my daughters 1st birthday. Where did you get the head bands?
Bre says
Hi, Kristen! Thank you! I bought the headbands at Michaels. I think they came in packs of two. They were near the ribbon and I recall they have a small section of hair accessory items where I found these. Thanks again for stopping by and happy 1st birthday to your daughter!! 🙂
Angie says
I love, love, love this idea! I looked for this exact headband online at Etsy. The prices online were a little more than what I wanted to pay for one. I’m going to make this for daughter. we’re going on our first Disney Cruise and to Disney World this summer and I’m so excited that I can make this and save money!
Bre says
Hi, Angie! YAY! Your trip sounds like SO much fun!! I’m happy this tutorial will be helpful to you. Have the BEST time! 🙂
Simply Chic Momma says
Love this! Will attempt these for my daughters birthday party! Will link back to this post when I blog about it!
Bre says
Hello! SO fun! That will be perfect for a birthday party! And I’m not kidding you – you will whip these out like nobody’s business! Awesome. 🙂
Simply Chic Momma says
I finally did them and I linked back to your post! I wasnt able to find the headbands at michaels so I bought satin headbands in packs of 12 from amazon 🙂
http://babyfromabove.blogspot.com/2015/04/diy-projects-minnie-mouse-birthday-party.html
Bre says
YAY!! Thank you!! I am looking forward to checking out your post. I hope the party was fun!
Ginger says
Darling! My 3 year old is obsessed with Minnie Mouse. I’ll have to make some for her too. Thanks for linking up to Show Me Saturday! Hope to see you there again this week.
Bre says
Hi, Ginger! For sure I will be back! You ladies are so sweet and throw a wonderful link party. If you make these ears, I bet your daughter will love them. My kids totally do and they can’t wait to wear them! Hooray!
Ashley ~ 3 Little Greenwoods says
Oh I’m so pinning and making these! We are going to Disney World in January and Tootsie will need a pair of ears to wear.
~ Ashley
Bre says
Hi, Ashley! SO FUN!!! My daughter is begging us to take her to “Disney Junior” as she calls it. If you make the ears that will be great; more money for souvenirs at Disney then! Have a wonderful trip. 🙂
Gail says
My my two were 2 & 4, my son {4} wanted to be batman, so we were batman and batgirl. All DIY except for mask.
Bre says
Aw, that is such a cute costume idea!!! I don’t know what it is, but I love coordinated costumes for little ones! Thanks for your note – I hope you have a great day!
Mrs. Mashed Up says
That is awesome!! My family loves Disney– should make myself a pair! Thank you for sharing your post with Pin Worthy Wednesday this week. I’m posting this to out group board on Pinterest.
Bre says
Hello!! Thank you SO much for your comment and for pinning my post! I really appreciate it! 🙂
Amy | Canary Street Crafts says
So cute, Bre! I’m all about the DIY costumes! This year my 4 year old wants to be a policeman (like his papaw), and we’re dressing my 2 year old up like a burglar 🙂
Bre says
OMG, Amy, I LOVE that costume idea! Your kids will have the most creative costumes! BTW, I didn’t know our kids are the same age – so fun!!!
Marie says
Love these! So cute. I may have to remember these for a future birthday party. Thanks for sharing! 🙂
Bre says
Hi, Marie! Thanks so much for your note! I do hope this post comes in handy for you in the future! Have a great weekend. 🙂
Erin says
These are absolutely adorable and so easy to make! I’m sure your kids will be the cutest Mickey and Minnie in the neighborhood!
Bre says
Ha, thanks Erin! We shall see . . . at least they’ll have cute ears. I’m not as confident about the rest of the costumes. Maybe I’ll bundle them up in coats so nobody can see anything other than the ears. 🙂 Thanks so much for stopping by and for leaving such a nice comment!
Sarah @ Little Red Brick House says
So cute, Bre! High five for coordinating costumes!
Bre says
Ha, thanks! Yes, total high five. I feel like I got so lucky on this one. They coordinated last year, too, but that was because she was Snow White and she demanded that he be her dwarf. He didn’t even get an identity; he just was “a dwarf.” 🙂
Amanda @ Dwelling in Happiness says
So cute, Bre! I STILL haven’t decided what my little one is going to be, if anything. She’s not quite a year old and can’t walk yet, so we’re debating even taking her out for trick or treating this year! BUT, I’m keeping this handy tip pinned away for future reference! 🙂
Bre says
Hi, Amanda! OK you have to dress her up. Babies in costumes are the CUTEST, even if they don’t go trick or treating! Plus you only have a few years where you get complete control over their costumes! 🙂 Thanks for your note!
Leia says
These are SO cute!! Fun for Halloween and a lot cheaper if I ever plan on taking my kiddos to Disney Land! 🙂
Bre says
Hi, friend! Thank you! And you’re right, SO inexpensive – I bet those ear hats are like $30 at Disney. Uh, no thanks! 🙂