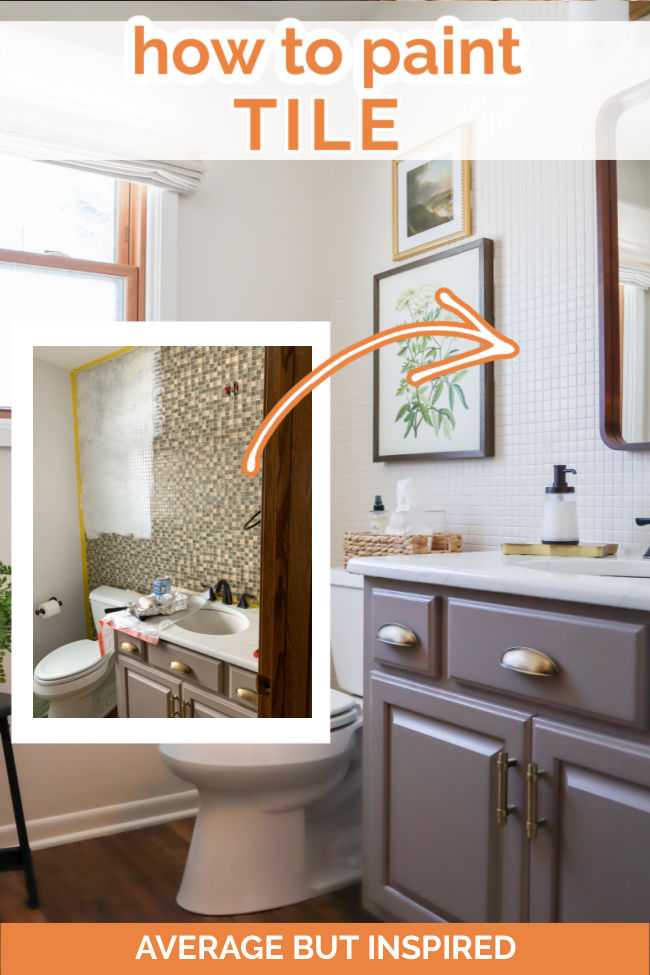
I’m no stranger to painting surfaces that you don’t typically think of painting – including tile. A couple years ago I painted my kitchen tile backsplash, and I just used a similar process to paint over tile in my powder room. This tile painting project freshened up the room immediately!
If you have tile you don’t love, you don’t have to live with it! Let me show you how to paint over tile and refresh your space.
In this tutorial, I’m showing you how to paint over tile that does not get direct exposure to water on a regular basis. But, if you want to paint tile that does get wet, like in a shower or around a bathtub, read my post on how to paint a tub. The products I used in that post are what you’ll need for painting tile in wet areas.
If you want to paint floor tile, read my post on how I painted my tile fireplace hearth. The materials I used in that project are better suited for painting floor tile.
Supplies Needed to Paint Over Tile
With that out of the way, here’s what I used to paint the mosaic tile wall in my bathroom. Some of these links are affiliate links, and you can read my disclosure policy for more information.
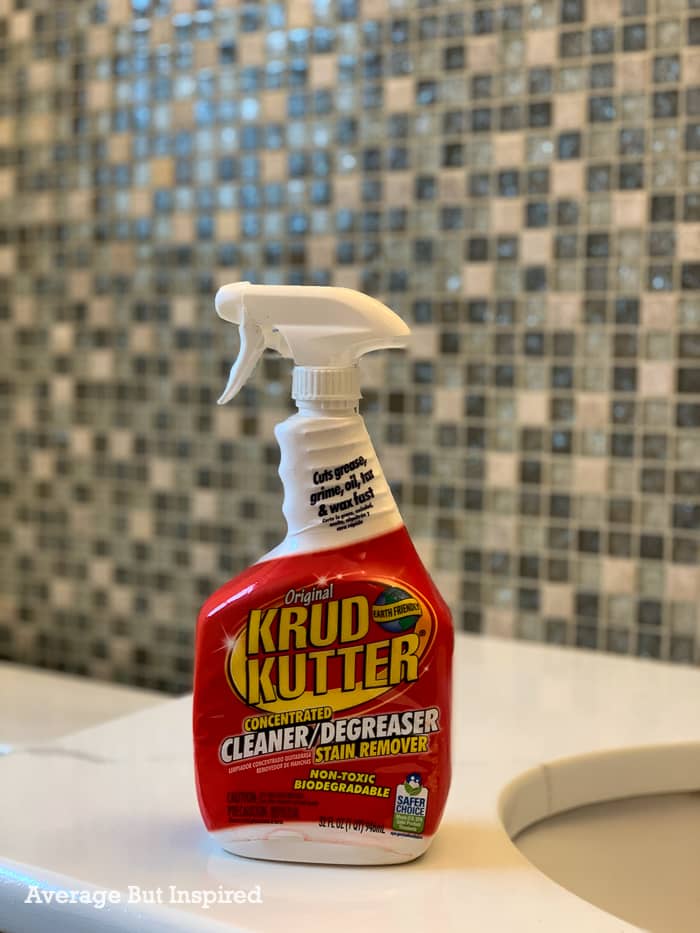
- Krud Kutter or TSP
- Palm sander
- Sandpaper (100 – 200 grit)
- STIX primer
- Behr Semi-Gloss Cabinet and Trim Enamel
- 1.5″ – 2″ angled paint brush
- Roller for rough surfaces
- Silicone caulk
- Dropcloth
- Paint tray
- Paper towels
- Painters tape
How to Paint Over Tile
Again, this method for painting over tile is best for tile that won’t be walked on or constantly subjected to water getting on it. It will work great for a tile wall like mine that needs to be covered or a backsplash, for example.
Prep the Tile to be Painted
Start by cleaning the tiles to be painted. I used Krud Kutter, which is the non-toxic cleaner I use before just about every painting project. TSP is another option that will work great for cleaning tile before paint.
Next, sand the tiles to scuff them up. This is really important because most tiles are glossy. Sanding them will help the primer and paint stick better. I used 100 grit sandpaper on my little hand sander, and it did a good job of roughing them up just enough.
After sanding, clean the tile again with another round of Krud Kutter or TSP.
Prime the Tile with Adhesion Primer
Using a great adhesion primer is so important when painting tile! If you don’t use the right primer, your paint will peel off in no time.
For this tile painting project I used Stix primer because it is the adhesion primer that professional painters recommend. I used it as the primer for painting my kitchen cabinets, and that paint job has held up amazing, so I decided to use it here, too. Plus, it shows tile on the label. 🙂

With some trial and error, I found the best method of applying the primer to the tile to be this: (1) roll the primer over a section of tile; (2) use a brush to get paint into the grout lines; (3) go back over the area with the roller to smooth everything out.
In the top left of this wall, I hadn’t yet figured out that technique, and you can see that the coverage is thinner than the other parts I primed.
Paint the Tile
Stix primer dries pretty quickly, so you’re able to get to the good stuff within a couple of hours of priming.
As with the painted kitchen tile backsplash, I used Behr Cabinet & Trim Enamel as the topcoat paint for this painted tile wall. I chose a semi-gloss finish to paint the tile so that it would still have the glossy look of tile.
I used the same technique for applying the paint as I did the primer (roll, brush, roll) – working in small sections – and the first coat looked good but not great. Up close there was a lot of primed grout line still visible once the first coat was finished.
With a second coat the next day, however, the busy mosaic tile looked calm and brand new! Once the paint dried, I caulked around the tile and countertop with silicone caulk to make sure that area was protected.
The Bathroom Makeover with Painted Tile
Once the tile was painted, I decided to make a few other changes, like painting the adjacent walls the same color as the painted tile (Behr Cotton Knit, but in an eggshell finish), painting the window frame (Benjamin Moore White Dove), swapping the light fixture and mirror, and adding some new accessories.
Now the powder room looks like this!
Here is the full progression of this powder room makeover from the time we moved in, to when I painted the vanity and painted countertop, to now. Can you believe that most of the changes in here have just been paint? Amazing!
JC says
This looks great! How did you paint behind the toilet? How did you adhere your pictures to the tile wall?
Ace says
OK. I like it. But really…
was there issues that were not mentioned?
Obviously you are a handyman of some type, so how much talent is needed for these results?
Bre says
Hi! No, I swear! It is SO EASY! I promise. No hiccups to mention at all. The only thing to really be cognizant of is whether the tile you’re painting will get wet regularly. If it will (like it’s around a shower), you’ll need to use an epoxy tile paint like I used on my bath tub (that post is linked). Otherwise, you’ve got this. Seriously!
Catherine Piaskowski says
Where is your roman shade from?
Bre says
Hi! It’s from SelectBlinds.com. 🙂
Britt says
What’s the name of the color you used for your vanity? Love it!
Bre says
Thank you! It’s called Grey Taupe and it’s by Americana Decor Satin Enamels. I bought it at Michaels craft store!!!
Angel says
Amazing, come do mine, lol
Bre says
Hahahaha!!! I would! It’s fun! 🙂
Jan says
Looks so good – I’ll be keeping this is mind!
Bre says
Hi Jan – thank you!! Yeah this is a really affordable way to freshen up some tile you’re not loving anymore. Thanks for leaving a note. Have a great day!