My house has many enormous, old radiators. Slowly but surely I’ve been painting them to fix years of neglect (think chipping paint and/or rust spots), or poor paint color choices from previous owners (think mustard yellow).
I can honestly say that, until recently, radiator painting was my LEAST FAVORITE JOB IN THE HISTORY OF THE WORLD.
But now I’ve finally figured out how to paint a radiator the easy way, and I am happy to pass along my tips to you!
Before I figured out how to paint radiators with the method I’m going to tell you about, I painted them by hand. Each of the medium-sized radiators I brush painted took about a week of half-day painting sessions to complete.
A week of stinky oil-based paint smell in my house, blocked off areas so that paint would not get smudged, and the mess that accompanies any painting job.
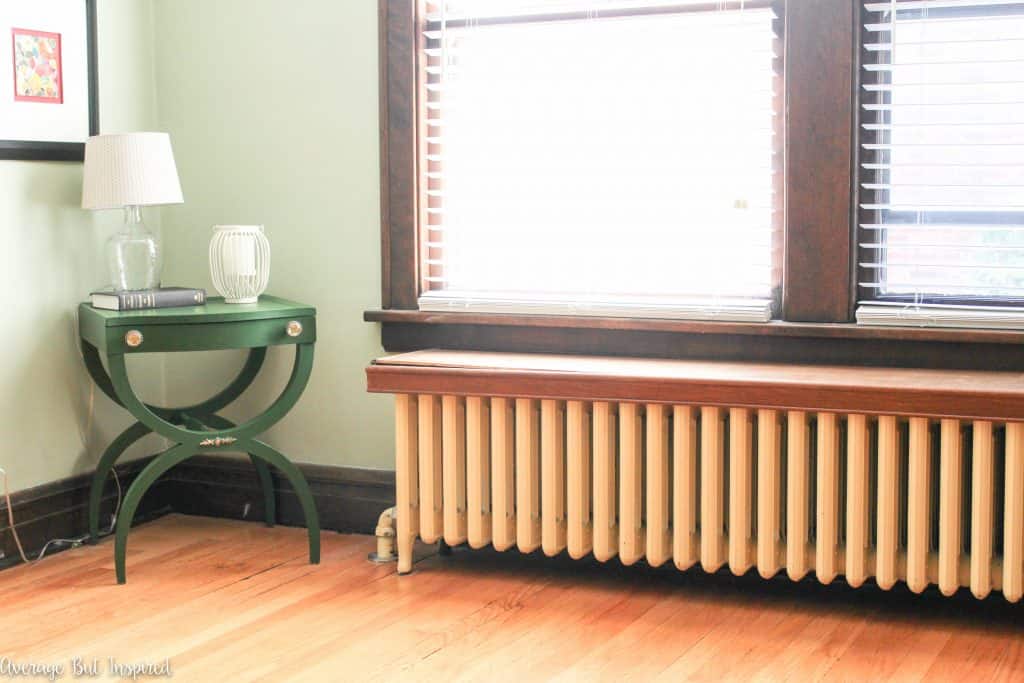
Needless to say, I was really dreading painting the radiators in my living room, which were gigantic yellow monstrosities. Here’s one . . .
And here’s the other. . .

I figured that each of these yellow beasts would take me about two weeks to refinish. And that’s why painting these radiators kept getting pushed to the bottom of the to-do list.
But now I know the SECRET of how to paint a radiator the easy way, and I am so glad to tell you that this method is life changing. Seriously!
Supplies Needed to Paint a Radiator the Easy Way
Thank you to HomeRight for providing product used in this post. The project and opinions are all my own. Also, this post contains affiliate links. To read my full disclosure policy, please click here.
- The KEY to painting a radiator is a spray painter. I am telling you that it makes all the difference in the world (and is MUCH cheaper than hiring a painter to tackle your radiators). I used the HomeRight Finish Max Sprayer for the first radiator I refinished in this room, and the HomeRight Super Finish Max Sprayer for the second radiator I refinished in this room. Both sprayers worked great for refinishing radiators, but you can read about why I liked the Finish Max Extra Fine Finish Sprayer more in the updated portion of this post near the end!
- 3M Advanced Masking Film
- Scotch Blue Painter’s Tape
- Spray Painting Mask (I wore a head sock like this; no joke. I didn’t post a photo of myself in it because I looked a little bit like a murderer or a terrorist.)
- Rustoleum Metal Primer
- Rustoleum Protective Enamel (I used a Satin finish)
- Acetone (for thinning the oil-based paint to use in the sprayer) (NOTE: if you use the HomeRight Finish Max Sprayer I talk about in the updated section of this post below, you will not need Acetone.)
- Mineral spirits (for cleaning up the sprayer once you’re finished)
- Wire brush
- TSP pre-paint cleaner
- Vacuum with hose extension or long feather dusters
- Recommended: lead paint testing kit
Instructions for How to Paint a Radiator
Before you do anything, make sure the radiator is turned off! Painting radiators is a job best done in the spring or summer, when you’re not using them.
Step One: Remove Loose Paint
Begin by scraping any loose paint areas from the radiator by using the metal brush.
VERY IMPORTANT: YOUR RADIATOR COULD HAVE LEAD PAINT ON IT. MAKE SURE TO USE ALL PROPER PRECAUTIONS BEFORE SCRAPING PAINT, AS INHALATION OF LEAD PAINT CAN HAVE SERIOUS HEALTH CONSEQUENCES. TO LEARN MORE, PLEASE VISIT THIS LINK.

Step Two: Clean the Radiator
Next, clean the radiator like the Queen of England is coming to visit, and her butler will be giving the place a white glove inspection.
Begin by vacuuming as much dust off of it as you can, and then washing it down with TSP. Once it’s dry, dust it again. I promise you, it will still be dirty.
Step Three: Protect Surrounding Surfaces
After you’ve cleaned the radiator, protect the entire area around the radiator with the masking film. Tape it everywhere. The last thing you want is oil-based paint all over your walls or floors.
The masking film is actually really easy to hang and goes up pretty quickly. I told my kids it was our new curtains; they were not impressed.
Step Four: Prime the Radiator
Once you have the entire area protected, set up your sprayer and thin the primer according to the manufacturer’s directions. (NOTE: if you use the HomeRight Super Finish Max Sprayer I talk about in the updated section of this post below, you will not need to thin the primer.)
Then spray the entire radiator with primer. It will already look a million times better!
(TIP: If you’ve never before used the sprayer you’ll be using for this job, you should test it out on a piece of cardboard first.)
(TIP: Oil-based paint smells REALLY really bad. Make sure you have the windows open and a fan going when you do this.)
Step Five: Paint the Radiator
Let the primer dry according to the manufacturer’s directions, and then spray the protective enamel on as the topcoat. Smile at your spouse or significant other because you’re so happy with the way this project is going! Seriously – you will not believe how much time you’re saving because of using the paint sprayer.
Once the entire radiator is sufficiently covered, clean the paint sprayer like the Queen’s butler will also be giving it the white glove inspection. Prepare yourself that it will be a pain, simply because you’ve used oil-based paint for your radiator painting project, and oil-based paint is chronically frustrating and time consuming to clean up.
Still, even though the clean up process is a bit involved, the entire project can be completed in less than a day, which is SO MUCH FASTER than hand brushing a radiator.
The finish is SO smooth (unlike the finish on the radiators that I hand brushed), and I am thrilled with the result! I vow to NEVER paint a radiator by hand again. Never.
Thank goodness the mustard yellow radiator paint is gone!
I still have one of the radiators in my living room left to paint, but I’ll get that done in the next month or so. I wanted to make sure this method actually worked before I tackled both of the yellow beasts at once!
Update: Radiator Painting with HomeRight Super Finish Max Sprayer
Although I planned to spray paint that second radiator last fall, I didn’t get around to it before we turned the heat back on. It all worked out in the end, however, because HomeRight came out with a new version of the Finish Max Sprayer, the HomeRight Super Finish Max Sprayer, which has a few more features that made radiator painting even easier than when I originally wrote this post!
The feature I liked best about this new version of the sprayer is that I didn’t have to thin the primer, and I only thinned the radiator paint a tiny bit (and just as a precaution).
I don’t even think thinning the paint was necessary; I only thinned it a little because I still had acetone left from the radiator I spray painted last year. Not having to thin the paint and do straining tests to see if it will work in the sprayer was a huge timesaver!
I also really liked that this new version of the sprayer has a flow control dial built right in, so I could easily adjust the amount of paint coming out of the sprayer depending on which part of the radiator I was working on.
The Super Finish Max Sprayer also comes with different nozzles and air caps so it can be used on a wide array of projects like cabinets, furniture, fences, decks, and more. (I most recently used it to paint my oak kitchen cabinets!)
I took my yellow radiator from this . . .
to this . . .
even faster than I did the first time around.
I cannot emphasize how much easier the the HomeRight Finish Max Sprayer and the HomeRight Super Finish Sprayer made this job. Anyone who knows me heard me complain about hand painting my radiators in the past. I promise that all anyone’s heard about this project is how wonderfully easy it was!
If you have any radiators to paint in your home, I absolutely recommend that you use this approach to paint them – do not hand paint them. You will want to pull your hair out!
Chantal Collins says
Hi there. This is the most helpful radiator painting description I have come across! I am wondering if you did it again would you prime a bunch of them first to avoid having to clean the sprayer multiple times? (I have 6 radiators that need help desperately)
Thank you!!
Bre says
Hi, Chantal- thank you so much! I am really happy this post was helpful to you and I appreciate you taking the time to let me know. It means a lot! Now – as for your question, absolutely yes!! You should for sure clean them all at the same time, then prime all at the same time, then paint all at the same time. It will save you SO MUCH TIME in the long run without having to clean out that sprayer all the time. 🙂 I know you do not have a fun project ahead of you, but I know you will be so happy to have freshened up radiators! 🙂
Sarah says
Did you make the wood topper radiator covers? I love those! I would love to have something equally simple that doesn’t add depth to my radiators the way that a box cover would. Any advice on the radiator covers?
Bre says
Hi! I did not make those – they were already in the house when we moved in! But, I think they would be fairly easy to build. You could show the photo to a carpenter and I’m sure he or she could replicate it for you! 🙂
Anne says
I just came across your blog and your website . Will show this to my husband as he is in charge of painting the radiators in our house. I’m wondering did someone make those radiator covers for you or they original to the house? I have been looking for similar items to use in my home but cannot find them.
Bre says
Hi, Anne! Smart to pass off that job. :-). OK as for the covers, unfortunately they came with the house. I am sure someone made them – I also didn’t find them when I was looking for more. My husband built one for a different room and it was a pretty simple build, so I am sure you could find a carpenter to do it!
Jeff says
I would love to know how you made the radiator top. Do you have plans for that? Or was it just a random DIY?
Bre says
Hi, Jeff! I’m so sorry but those actually came with the house so I don’t have plans!
Gamby Gambioli says
Fun read about painting radiators but 2 points, I hope you wore a mask while spraying and cleaning the sprayer.
I hope you sold a ton of these sprayers for Home Right
Bre says
Thanks for your concern about my health and wearing a mask! As I noted in the supply list, I wore a spray paint head sock and mask.
jimmy says
Hi,did the radiators smell at all when the heat went on?
Bre says
Hi, Jimmy – no they did not. There was a significant amount of time between drying and when I turned them on, so there was no odor.
Jennifer says
Thanks for this post. Really appreciate the information you have here. I know it’s an older post but I hope you don’t mind if I ask a question. Why did you use oil-based paint? I’d much prefer to use water-based if possible. I live in an apartment with four of these beasts and cleaning up an oil-based project will be really difficult. Thanks again.
Bre says
Hi, Jennifer! I used oil-based paint because typically it is better for metal applications. You definitely can use latex paint on radiators, but they’re more prone to chipping and the finish probably won’t last as long. That’s what I read when doing my research at least! I hate painting radiators so much that I wanted to have the paint last as long as possible, so I took the annoying and stinky way of doing things! Thank you!
Peg says
Thank you so much for this post. I am inspired to paint my radiators this way. My husband did one years ago but took it off and painted it outside. I don’t think that’s for me.
Bre says
Oh goodness no! Those radiators are SO heavy!! We did that once with the radiator in our kitchen . . . never again! The spray paint method is way better. Good luck, Peg – you’ve got this!!!
Loida says
Hello this is great how did you make the table top on the top of the radiator?
Bre says
Hi, Loida! I actually did not make that cover; it was on the radiator when we bought the house! I’m sorry I can’t help you with that part of the process. 🙂
Victoria says
What did you put on top of the radiator? Is that wood?
Bre says
Yes! We have wood toppers over the radiators so that you can sit on them (like benches) or set stuff on them.
Mary Magoonaugh says
Did you make the wood top’s? If so can you give some direction on this?
Bre says
Hi, Mary – I’m sorry I did not make those! They were in the house when we purchased it.
Emma says
Just wanted to see if you are still liking the radiators? I noticed that you didn’t use a high-heat paint or special radiator paint. Have you had any chipping or bubbling?
Bre says
Hi, Emma – they are still GREAT!! I used the same type of paint on every radiator in my house throughout the years, and they’re all working wonderfully and I’ve had zero problems with bubbling. One of them has a small chip where the cleaning lady bashed the vacuum into it, but that isn’t the paint’s fault. I think the thorough cleaning and priming before paint makes a difference. Also, I did research before painting them and found that high-heat paint is not necessary for radiators. High-heat paint is for devices/items that get much hotter than radiators do, so it’s unnecessary for this job. Good luck if you tackle this job!
Ceili says
Hi! Which enamel did you use-gloss, satin or flat? And for that size radiator, how much primer/paint? I have several to do, so want to plan accordingly. Thanks for the post!
Bre says
Hi, Ceili! I just double checked and I used the satin enamel. I really like the finish it gives! I used about half a can for the large radiator. Good luck with your project; I hope it goes well!!
Tanya says
We started today!!! We ran out of primer (our fault), but everything else went exactly as you described!!!! Thank you for this blog – it gave us confidence and all 5 radiators are coming out great!!! The masks were hilarious and the project easy and affordable!!!
Thank you again!!
Tanya
Bre says
Oh my gosh! Tanya, thank you for the update! You have no idea how happy I am to hear this. I am SO glad this post was helpful to you and that the project is going well! THANK YOU!! 🙂
Tanya says
Very silly question – how did you get to the back of the radiator or by spraying, did it simply cover up anywhere where there was visible yellow?
Also, how did you clean the sprayer? Soapy water?
We will be embarking on this project this week and I am curious and needing all the help I can get.
Thank you!
Bre says
Hi, Tanya! OK, so I did not paint the back of the radiator because you can’t see it at all. I don’t think there is a way to brush paint the back either . . . unless yours is somehow not up against a wall! I just covered everything that was visible.
As for cleaning the sprayer, since this required oil based paint, I used mineral spirits to clean it all up. The cleaning part was the worst of the entire job. Latex paint is super easy to clean in the sprayer, but the oil based paint is trickier for sure.
That being said, it was still SO MUCH EASIER and faster than hand-painting those radiator beasts! If you have ever hand-painted one then you know what I’m talking about! Good luck with your project and let me know how it goes!!
Katie @ Little House of Four says
Wow, the space looks so much cleaner (not that it was dirty before, haha) and brighter! I can not even imagine having to paint each radiator with a paint brush, how tedious. Thank goodness for the sprayer!
Bre says
Katie it has made SUCH a difference in the living room! I still have to paint the other one in the front of the room, but that is happening so soon. I am not exaggerating – it was life changing using the sprayer vs. brushing the paint on. I am so grateful for my sprayer!
Kristi says
It turned out perfectly!
Bre says
Thank you, Kristi! I could not be happier with it! 🙂
Stacey Cartwright says
Looks so much better Bre! Side note I LOVE that green table in the corner.
Bre says
Thank you, Stacey!! Oh that little table – it was my grandma’s! I’ve given it a few makeovers now, but I love having it because it reminds me of her. 🙂 Have a great weekend!
Angie @ ambient wares says
It looks amazing! I’m happy it went so much quicker than the radiators before. Paint sprayers seem to knock off years on some projects! Once I got mine, life got a little better 😉
Bre says
Thank you, Angie! And ha!!! It’s so true – I feel like my life has drastically improved with the addition of a sprayer into my arsenal. 😉 Hope you have a great weekend!
Seana Turner says
Wow! It looks really good. That is one job I’m glad I don’t need to do. Had those in my old house and what a pain. This sounds MUCH easier, even with all the prep and cleaning the sprayer. It really looks beautiful now:)
Bre says
Thank you, Seana! Oh my GOSH, seriously, count your lucky stars. Before I had this spray painter, I really contemplated leaving those beasts yellow forever. Hand painting a radiator is the worst! 🙂 Hope you have a great weekend!