Plain and simple: motorized skylight shades are the best things we’ve ever put in our home.
We loved the natural light from our skylights in our bedroom… until nighttime when the moon would shine in our eyes, or the morning when the sun would wake us up too early, or on summer days when the room would become unbearably hot in the afternoons.
OK, so yeah, there wasn’t too much time that we did love them.
Why we decided to install blackout motorized skylight shades
My husband rigged up temporary skylight shades with tension rods and blackout roller shades, but they were really ill-fitting, ugly, and could not be moved at all.
The shade on my side of the bed didn’t even cover the whole skylight. Talk about junky.
With the moon interrupting my sleep on an increasingly regular basis, I couldn’t take it anymore, and we started looking for a more permanent solution.
The motorized skylight shades we chose
Thank you to SmartWings for providing the skylight shades featured in this post. The opinions expressed herein are all my own. Also, this post contains affiliate links. Please read my disclosure policy for more information.
I came across SmartWings’ skylight shades, and the reviews were very positive, so we decided to give them a try.
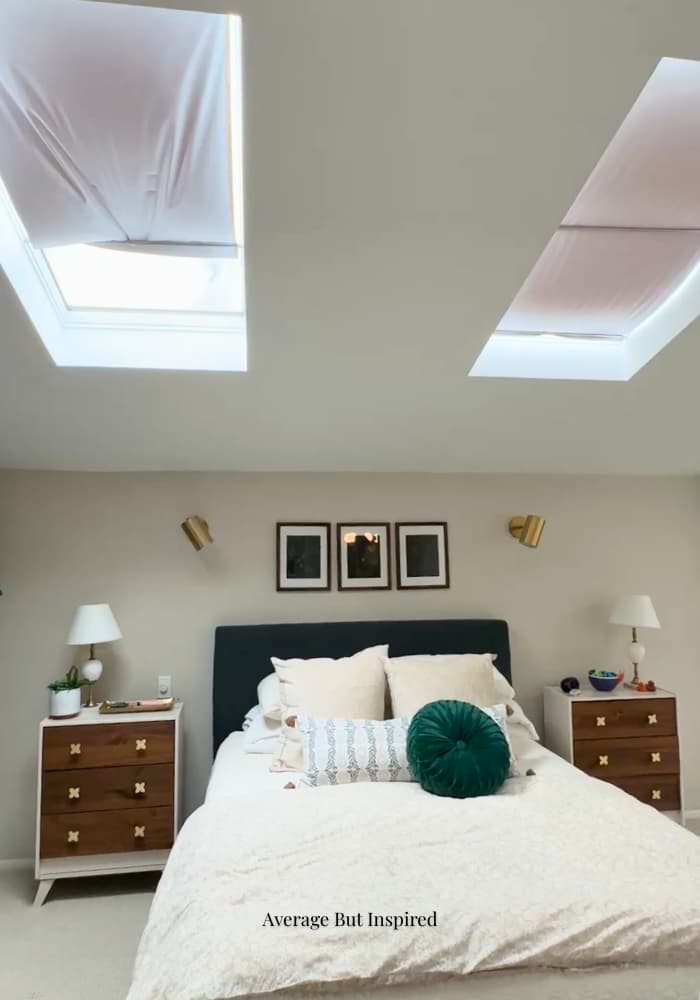
We selected the SmartWings Motorized Premium Skylight Cellular Shades in white with blackout fabric (remember that moon I was telling you about?). The fact that each shade was made to fit each skylight with custom measurements was great because each of our skylight openings was slightly different in size.
And, we chose the remote control shade functionality (though there is a model that can be controlled via smartphone), and the solar panel charging feature so that we wouldn’t have to plug the shades in to recharge them in the future. If you get these shades, I definitely recommend the solar charging panel.

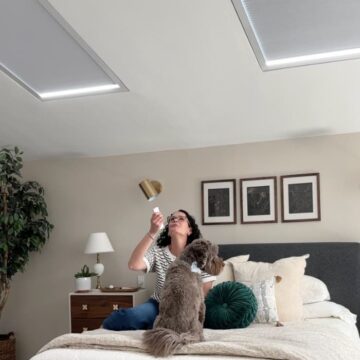
The skylight shades installation process
Apparently, people are surprised that you can install skylight shades on pre-existing skylights. That didn’t surprise me, but what DID surprise me was how easy the installation of our shades was.
The SmartWings skylight shades arrived almost completely assembled, so that was really nice. It only took a few minutes to put a couple of pieces in place, but it is important to know that there were some sharp or rough metal edges to the pieces that did need to be snapped into place.
From there, it was just a matter of hanging the shades in the skylight box. Because our skylights were framed out at the base, we didn’t even need to use anchors (which were included). We just screwed the shade frame right into the skylight frame.
Two sets of hands were definitely necessary (there is no way one person could hang these on their own), but they weren’t heavy, and hanging them went really quickly. My husband and I were both surprised by how fast we got them up. Hanging three shades probably took us an hour, and all we needed was a drill and two sets of hands.
Troubleshooting small gaps
As I mentioned earlier, the SmartWings skylight shades are custom-made to fit each skylight opening.
When measuring, you submit three sets of measurements for the width of the opening, and on one of my skylights, there was a significant difference between the top measurement and the bottom measurement.
The shades are made with the smallest measurement (otherwise they wouldn’t fit into the opening and the motor wouldn’t work), so when we hung that one shade, there were decent gaps in between the skylight frame and the frame of the shade.
These gaps allowed light to come through, so we pressed inexpensive foam backer rod into the gaps, and the light was eliminated. The backer rod isn’t visible in the gaps, so it really was a perfect solution.
To be clear, this is not a manufacturing defect; it’s just the nature of how the skylight shades have to be made. Thankfully, there’s a simple solution.
Did the motorized skylight shades make a difference?
I mean, if I could scream this I would: I wish we would have installed motorized skylight shades sooner!
The difference is insane. These are my favorite things we’ve ever put in our home.
First of all, that moon is not bothering me at night anymore. Thank goodness. The bedroom is so much darker and better for sleeping both at night and in the morning. (But let’s be real: with kids, I’m not sleeping too late anyway.)
Next, the ability to block the afternoon sun is incredible. And, we don’t have to close the shades all the way if we don’t want to. Even having them partially closed has drastically helped with that heat. I just know this is going to help with our air conditioning bills this summer.
The difference in my quality of life as it relates to my sleep and enjoyment of my bedroom is significant. (I can’t believe I’m saying that because of window treatments.)
At the end of the day, you don’t want your skylights to be a nuisance. They’re supposed to be a nice feature of your home. So if you’re dealing with glare, heat, or early-morning light, I genuinely think motorized blackout skylight shades are worth the investment.
Please ask me any questions in the comments below and I’ll do my best to answer them.