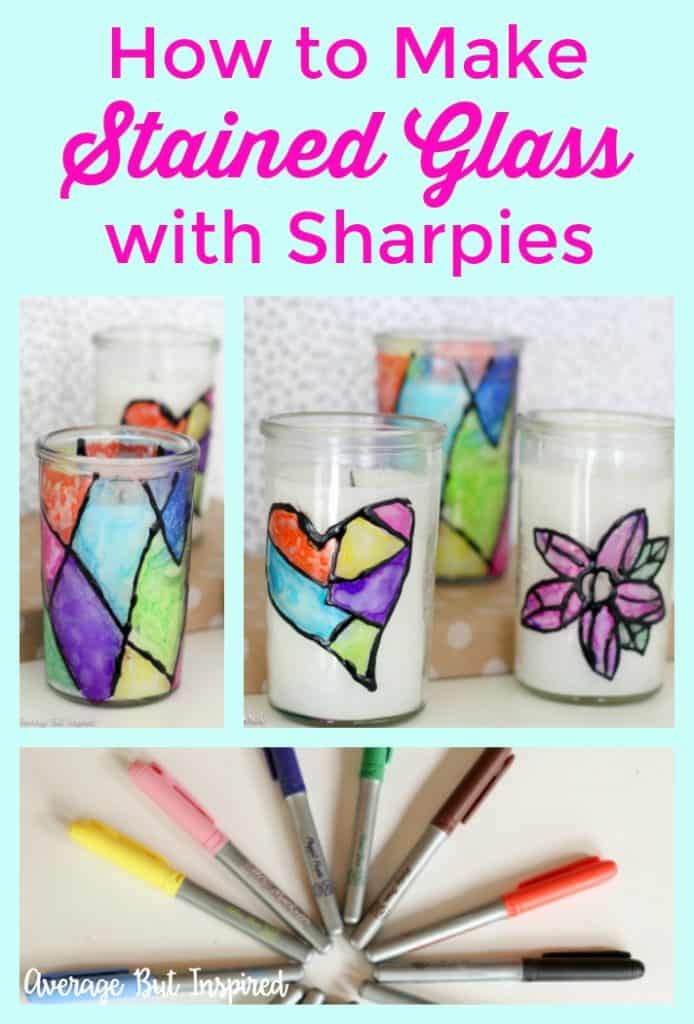
Sharpies – they’re one of the best craft supplies around! I used them on everything, and I am excited to show you how to make stained glass with Sharpies markers!
Supplies for Making Sharpies Stained Glass
This post contains affiliate links, which means I earn a small commission at no added cost to you, should you purchase through them. To read my full disclosure policy, please click here.
- Glass object (I used pre-filled glass candleholders)
- Sharpie Permanent Markers variety pack or other permanent marker brand markers
- Rubbing alcohol
- Cotton swabs and cotton balls
- Dimensional black paint
How to Make Stained Glass with Sharpies
Super easy project alert. These stained glass candles were the easiest things to make!
Step One: Clean the Glass
First, wipe down your glass surface with rubbing alcohol. This will remove any residue that could prevent your marker ink from adhering properly.
Step Two: Draw a Design
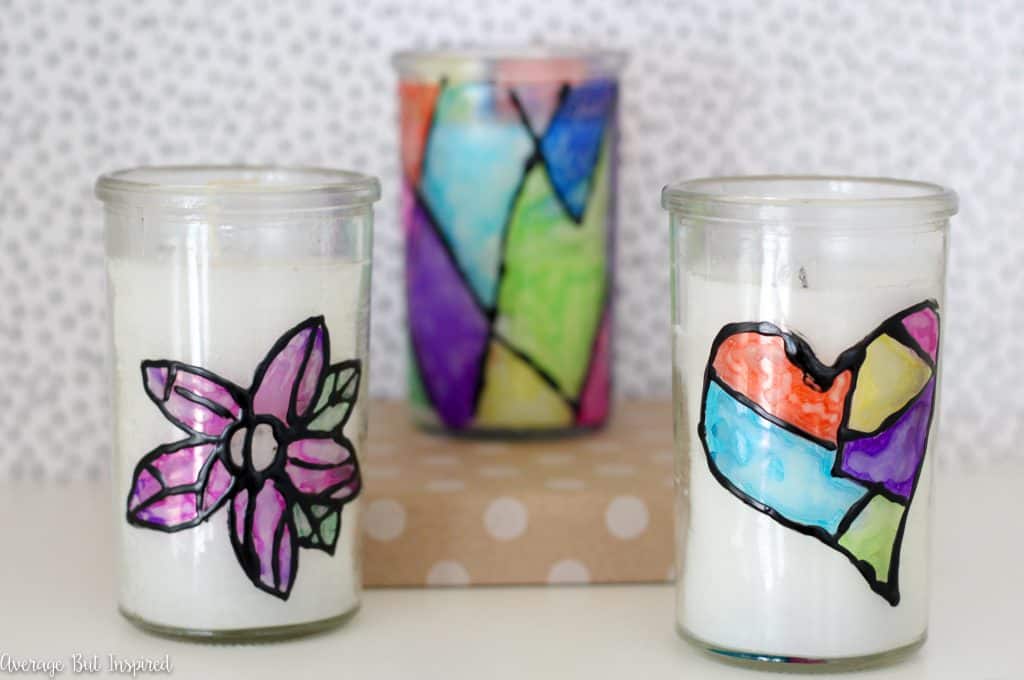
Once you’ve done that and the surface has dried, draw a design on the glass with the black marker. (Yes, you can write on glass and mason jars with a Sharpie marker!)

Step Three: Color in the Design with Sharpies
Then color in the design however you like with other color Sharpies.
Step Four: Dab Rubbing Alcohol on the Ink
Next, dip a cotton swab into the rubbing alcohol and gently dab it onto the colored designs. This will blend the marker a bit to give it a more authentic look. TIP: have a cotton ball on hand to dab any excess alcohol and prevent smearing.
Step Five: Add Dimensional Paint
Once the surface has totally dried, use the dimensional paint around the black edges to give it an authentic stained glass look!
Let it dry and enjoy your work!
Now guys, I actually made a video on how to make stained glass with Sharpies! It’s my first time putting a video on YouTube, so I’d love for you to watch it and let me know what you think. And if you’re a big YouTube user, please subscribe to my channel and stay tuned for more videos from me in the future. Hopefully they will improve with time.
This project could be modified in so many ways, and it would even be a fun thing to make with kids!
Well, I hope you enjoyed my DIY method for making your own stained glass! I’ve never made real stained glass, but I have a feeling this is a lot easier! That’s my favorite way of doing things.
Erica says
This is such a great idea! The kids I babysit will love this craft. Thank you for sharing!
Bre says
You sound like the BEST babysitter! 🙂
Orlaith says
Does it smudge once “dried”??
Bre says
Nope! No smudging!
Kendra @ www.joyinourhome.com says
So pretty, Bre! And led your video too! Have a great weekend!
Kendra @ www.joyinourhome.com says
* love your video!
Bre says
Thanks, Kendra! You’re a sweetie.
Erica @ Dwell Beautiful says
Oh wow, what a fun technique! I had no idea you could get the stained glass look from a Sharpie. These are just too cute!
Bre says
Thanks, Erica! Yeah, the rubbing alcohol lends such an interesting look to the glass! Thanks for your note! xo
Nicole B. says
What a cool idea!! You are so creative!
Bre says
Thanks lady! 🙂 xo
Breanna Bertolini says
So cool! It’s amazing what a little rubbing alcohol can do to a sharpie! 😉
Bre says
Thanks, Bre! YES! I know you know all about the rubbing alcohol + Sharpie effect! 🙂