• Skip to primary navigation
  • Skip to main content
  • Skip to primary sidebar
Average But Inspired logo - DIY and craft

Average But Inspired

Craft a home you love. DIY and craft tutorials.

  • About
    • Contact Me
    • Disclosures
    • Privacy Policy and Copyright Policy
  • DIY
    • Furniture
  • Crafts
    • Dollar Store Crafts
    • Seasonal
      • Patriotic & Summer
      • Valentine’s Day
      • Easter & Spring
      • Fall & Halloween
      • Christmas & Winter
  • Home Decor
    • Organization
  • Shop
    • DIY Swag
    • DIY Guides
  • Home

FAT Paint Antique Wedgewood Blue Console Cabinet Makeover

June 14, 2017 by Bre 16 Comments

Every time I make over a piece of furniture, I am reminded of how much I LOVE refinishing furniture!  There is something so exciting about taking a piece that was no longer wanted, or no longer desirable, and making it shine once again.  Because of that, I was ecstatic to try a paint brand that’s new to me, FAT Paint.

Thank you to The FAT Paint Co. for sponsoring this post.  The project and all opinions are my own!

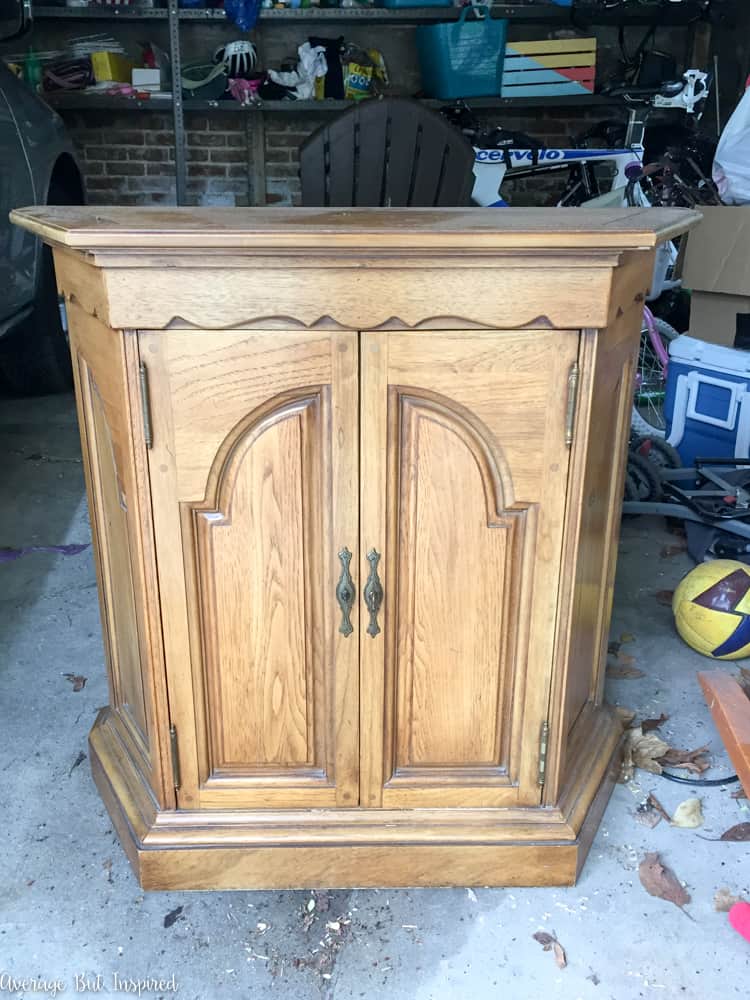
To test out this paint, I decided to give this $25 console cabinet a beautiful new look.  I chose this piece because I liked its scalloped details and the fact that it has lots of storage inside.  I knew this piece could be a knockout with some color!

This dated console cabinet was given a stunning makeover with FAT Paint chalky style paint in Antique Wedgewood and white wax. Click through to see the before and after photos!

As you probably know by now, I’m a little obsessed with chalk-style paint.  I love the instant results and durable finish it provides, so I was pumped to try a brand I hadn’t yet used – FAT Paint chalk-style paint.  The FAT Paint Co. is run by a brother and sister duo in Canada, and they have some of the most gorgeous chalk-style paint colors around, not to mention fantastic paint products that have virtually no smell and that are practically foolproof to use!

I chose to work with Antique Wedgewood (a smoky blue), Parchment (a creamy off-white), and to seal everything up, Natural FAT Wax.  Before I started painting, I gave the console cabinet a really light sanding and sprayed the top of it with Zinsser Shellac to prevent the water rings that were on there from bleeding through the paint.  Then I got to work!  This dated console cabinet was given a stunning makeover with FAT Paint chalky style paint in Antique Wedgewood and white wax. Click through to see the before and after photos!

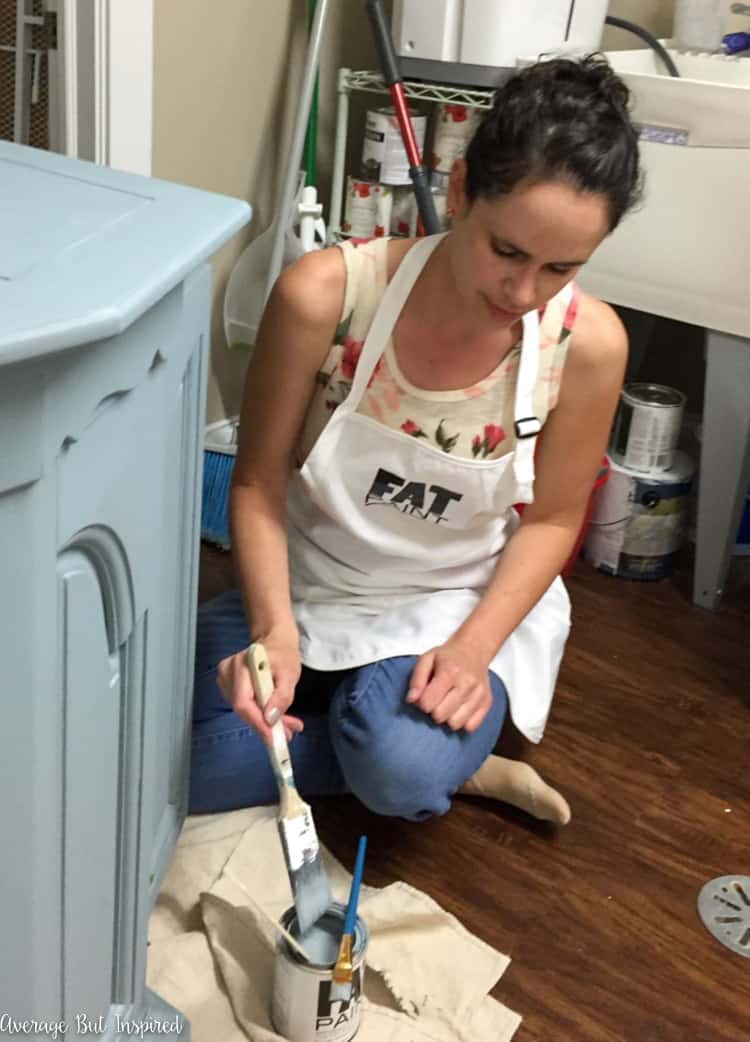
The first coat of Antique Wedgewood covered really well and I was loving where this project was heading!  This dated console cabinet was given a stunning makeover with FAT Paint chalky style paint in Antique Wedgewood and white wax. Click through to see the before and after photos!

Once the paint dried, I gave the cabinet a light sanding (FAT Paint recommends doing this for the most beautiful finish possible), and then put on another coat of Antique Wedgewood.  This dated console cabinet was given a stunning makeover with FAT Paint chalky style paint in Antique Wedgewood and white wax. Click through to see the before and after photos!

After that dried, I did another allover light sanding, and sanded some highlight areas to distress, and then applied the Natural FAT Wax to seal the entire cabinet.  I used my friend Amy from Canary Street Crafts‘ trick of putting the wax into a bowl instead of working from the canister – this way I don’t contaminate any of the wax in the canister!This dated console cabinet was given a stunning makeover with FAT Paint chalky style paint in Antique Wedgewood and white wax. Click through to see the before and after photos!

After the topcoat of wax dried and I buffed it to a shine, I put more wax in a bowl and mixed in some of the Parchment FAT Paint.  I mixed it all up to form a white wax, which I then wiped on with a cloth in strategic places to make the details really pop!  This dated console cabinet was given a stunning makeover with FAT Paint chalky style paint in Antique Wedgewood and white wax. Click through to see the before and after photos!

You can see where the white wax was applied in this photo.  The panel on the left has white wax, the panel on the right does not and is a solid color.

This dated console cabinet was given a stunning makeover with FAT Paint chalky style paint in Antique Wedgewood and white wax. Click through to see the before and after photos!

Once that dried, I drilled holes for new hardware, and of course messed that up.  Thankfully that was nothing a little wood filler and more paint couldn’t fix!  This dated console cabinet was given a stunning makeover with FAT Paint chalky style paint in Antique Wedgewood and white wax. Click through to see the before and after photos!

Finally, I decoupaged some gorgeous paper to the inside arches of the cabinet for a fun pop of color when you open the doors.  If you’re curious about how to add paper or fabric to your furniture, check out my post on how to do it!  This dated console cabinet was given a stunning makeover with FAT Paint chalky style paint in Antique Wedgewood and white wax. Click through to see the before and after photos!

Once the paper inside the cabinet dried, this makeover was finished!

This dated console cabinet was given a stunning makeover with FAT Paint chalky style paint in Antique Wedgewood and white wax. Click through to see the before and after photos!

And I am obsessed.  This dated console cabinet was given a stunning makeover with FAT Paint chalky style paint in Antique Wedgewood and white wax. Click through to see the before and after photos!

I am actually considering re-doing my entire foyer to accommodate this console cabinet.  This dated console cabinet was given a stunning makeover with FAT Paint chalky style paint in Antique Wedgewood and white wax. Click through to see the before and after photos!

This dated console cabinet was given a stunning makeover with FAT Paint chalky style paint in Antique Wedgewood and white wax. Click through to see the before and after photos!

This dated console cabinet was given a stunning makeover with FAT Paint chalky style paint in Antique Wedgewood and white wax. Click through to see the before and after photos!

I just can’t imagine giving this piece away!  I love everything about it – the colors, the paper, the hardware, the shape and details . . . I think we have an emotional connection, the two of us.  This dated console cabinet was given a stunning makeover with FAT Paint chalky style paint in Antique Wedgewood and white wax. Click through to see the before and after photos!

This dated console cabinet was given a stunning makeover with FAT Paint chalky style paint in Antique Wedgewood and white wax. Click through to see the before and after photos!

Anyway, while I consider whether or not I can bear to part with this Antique Wedgewood beauty, let me encourage you to start your own FAT Paint project.  Seriously, you will love this paint.  Find a retailer near you by checking their website.

Filed Under: Furniture

Reader Interactions

Comments

  1. Angie ~ ambient wares says

    June 28, 2017 at 3:18 pm

    This turned out beautiful, Bre! That paper is really something πŸ™‚ Great job!

    Reply
    • Bre says

      July 11, 2017 at 8:39 am

      Thank you so much, Angie!

  2. Amanda Fettig says

    June 14, 2017 at 5:00 pm

    Ahhh girl, this is amazing!!! I can’t get over the transformation! I love the color, and love love the floral inside! And you look adorable in your apron! πŸ˜‰

    Reply
    • Bre says

      June 20, 2017 at 2:09 pm

      Hahaha thanks, Amanda! I love that apron! πŸ™‚

  3. Leigh Anne says

    June 14, 2017 at 4:25 pm

    Perfect color choice!! such a fun transformation.

    Reply
    • Bre says

      June 20, 2017 at 2:10 pm

      Thank you, Leigh Anne!

  4. Katherine Alberter says

    June 14, 2017 at 4:01 pm

    Such a gorgeous and fun piece! The color is so pretty and I love how you mixed the parchment into the wax. The paper you chose is stunning and adds a nice surprise. Great job, Bre!

    Reply
    • Bre says

      June 20, 2017 at 2:10 pm

      Thanks, Katie! I am really happy with how this one turned out. πŸ™‚

  5. Erin says

    June 14, 2017 at 3:59 pm

    This piece is a great makeover!! The paper inside is too cute… and the colour you chose is perfect πŸ™‚ Well done!

    Reply
    • Bre says

      June 20, 2017 at 2:11 pm

      Thank you, Erin!

  6. Amy | Canary Street Crafts says

    June 14, 2017 at 2:42 pm

    This is gorgeous, Bre! The paper and hardware really compliment the pretty paint color. Thanks for the mention too!! xo

    Reply
    • Bre says

      June 20, 2017 at 2:11 pm

      Thanks, Amy! And thanks for that great tip on the wax!! πŸ™‚

  7. Erica @ Dwell Beautiful says

    June 14, 2017 at 2:01 pm

    Love the idea of tinting the wax with the paint for a cool finish! And oh my goodness that paper is to die for. Such a gorgeous transformation!

    Reply
    • Bre says

      June 20, 2017 at 2:11 pm

      Thanks, Erica! I really appreciate it!

  8. Kristi Mercer says

    June 14, 2017 at 8:48 am

    Oh my gosh! What a fun piece Bre! LOVE that gorgeous blue and what a great idea to mix a bit of white paint in with the wax to make those details pop that much more! LOVE it!

    Reply
    • Bre says

      June 20, 2017 at 2:11 pm

      Thank you, Kristi!

Leave a Reply Cancel reply

Your email address will not be published. Required fields are marked *


Primary Sidebar

Let’s Connect!

Hi, I’m Bre! Thanks for visiting Average But Inspired, where I show you how to work with what you’ve got to create a home you love.

Bre of Average But Inspired - a DIY and craft blog

Love DIY? Subscribe to Get Posts E-mailed!

How Can I Help You?

blank

How to Paint a Countertop to Look Like Marble!

blank

How to Paint a Door to Look Like Wood (It’s Easier Than You Think!)

blank

How to Create a Faux Antique Brass Finish with Paint

blank

7 Tips for Hosting a Party on a Budget

Looking for Something?

Copyright Β© 2013-2022, Bre Eggert (Average But Inspired). All rights reserved.
  • Home
  • DIY
  • Crafts
  • Home Decor
  • Privacy Policy and Copyright Policy
  • Disclosures
  • Contact Me