When I spotted this chair at my local Habitat ReStore, I knew it had good bones. But the fabric? Let’s just say it was giving the Golden Girls‘ living room. Bold floral upholstery that was not exactly my style.
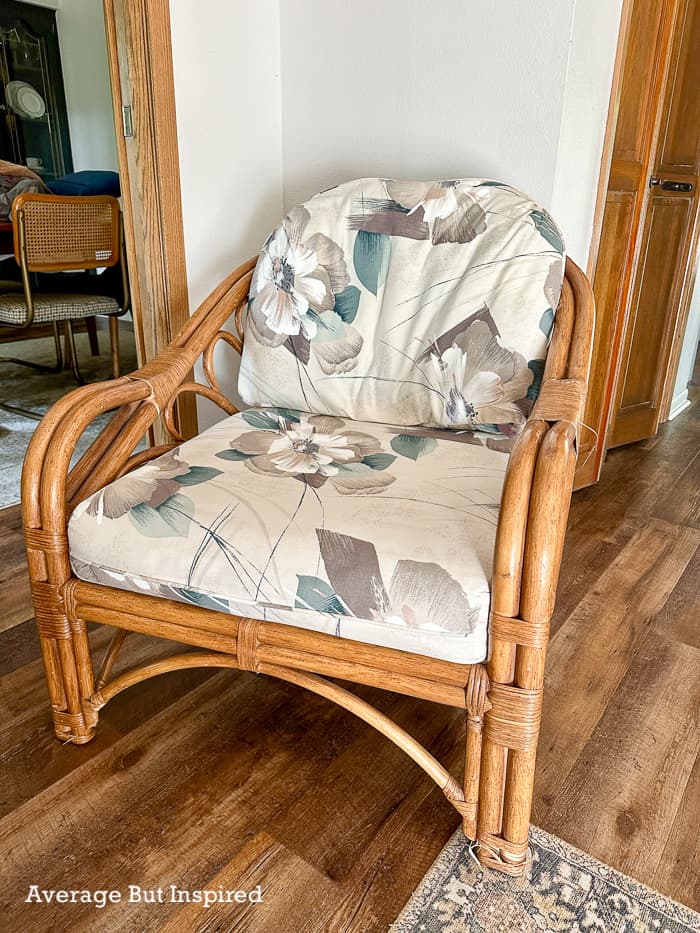
The typical solution would be to reupholster the cushions, but that’s time-consuming, can get expensive, and honestly, I wasn’t sure it was worth it for a thrift store find. So I decided to try something I’d been curious about: painting the fabric directly.
Two years later, I’m so glad I did.
Upholstery Painting Supplies
This post contains affiliate links. Please read my disclosure policy for more information.
- Chalk paint (in your color of choice)
- Fabric paint medium
- Chalk paint brush
- Extra fine grade sandpaper
- Spray bottle with water
- Iron or heat press
- Mixing cup and stir stick
How to Paint Seat Cushions
Painting fabric upholstery like this is actually pretty easy. I will walk you through each step so you can try it if you like.
Wash the cushion covers
If you can get them off, wash the cushion covers in the washing machine. If they’re not able to be removed, spot clean and vacuum them.
Mix your paint
Combine your chalk paint (any brand works!) with the fabric medium, according to the medium’s instructions.
The fabric medium is the key to this entire project. It keeps the dried paint flexible so it won’t crack or feel stiff when you sit on it.

Apply your first coat
Spritz the fabric with a light coat of water, and then paint your first coat of paint onto the cushion fabric. Work the paint into the fibers as you go, and don’t worry if it looks a little rough at this stage. That’s normal. Let it dry completely.
Sand lightly
Once the first coat is fully dry, take your extra fine grade sandpaper and lightly sand the surface. This knocks down any stiff or raised fibers, and gives you a much smoother finish on the second coat. Wipe away any dust before moving on.
Repeat the painting, drying, and sanding process
Yep, do it all again (and maybe even again) until you get the paint coverage you want.
I stopped at two coats. I liked that some of the large, white flowers peeked through instead of a totally solid color.
Heat-set with an iron
Once everything is dry, heat-set the paint using an iron (or a Cricut heat press like I used). This step helps lock in the paint and makes it much more durable over time.
Use a pressing cloth if needed to protect the surface, and follow the guidance on your fabric medium for temperature settings.
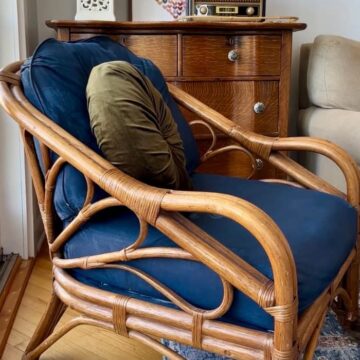
That’s it! The whole process is surprisingly simple, and the results are genuinely impressive. My chair cushions have held up beautifully for two years now with no cracking, no peeling, and they’re still comfortable to sit on.
If you’ve got a piece of furniture you love the shape of but can’t stand the fabric, this method is absolutely worth trying before you commit to a full reupholster.
Have you ever painted fabric furniture? I’d love to hear how it turned out in the comments!