Learn how to make the cutest wall shelf with hooks! This DIY scalloped shelf with hooks is functional and adorable.
When it comes to home decor, nothing is as sweet as scallops! While I, personally, love scalloped detailing on any piece, I have to use it sparingly. My husband is less of a fan – lol!
That didn’t stop me from making this totally adorable scalloped shelf with hooks for our lake cottage, however.

I knew that this was going to add a much-needed place to hang bags, hats, etc., and it would look perfect in our bedroom.
So I got to work making this piece from scrap wood, and I’m happy to fill you in on how to do it, too!
DIY Scalloped Shelf Supplies
This post contains affiliate links. Please read my disclosure policy for more information.
- 1×8 pine board
- 1×4 pine board
- circular object (I used a 6″ round wood cutout)
- jigsaw
- circular saw
- large clamps
- brad nailer
- 1″ brad nails
- drill
- electric sander
- 80-grit sandpaper
- wood glue
- wall hooks & screws (these gold flower wall hooks are the ones shown in this post)
- wood stain in color of your choice
- tape measure
- pencil
- Optional: hanging hardware like d-ring hangers
How to Make a DIY Scalloped Shelf with Hooks
You can put together this scalloped wall shelf with hooks in an afternoon! It’s a quick project that goes together easily.
Cut Boards to Size
I wanted this shelf to be 30″ long, so I cut a 1×8 pine board to size with my circular saw.
This board was left over from the DIY floating shelves I hung over the basement dry bar I built earlier this year! I stained it at that time with water-based walnut stain.
Then, I cut down the 1×4 pine board to the same length with the circular saw.
Create the Scallop Edge Detail
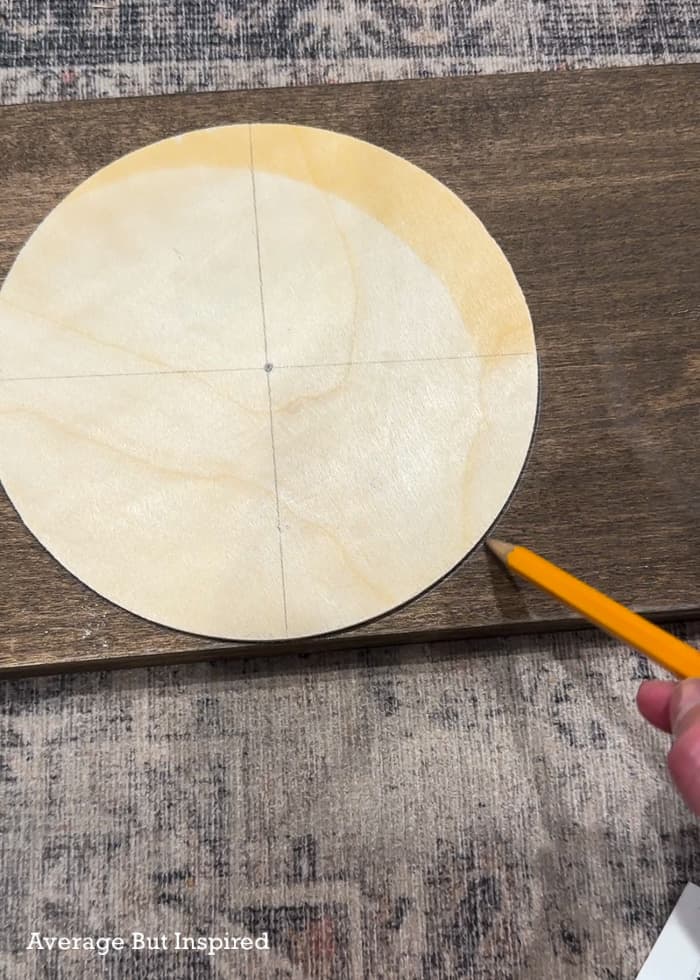
On the 1×8 pine board, I used a 6″ round wood cutout to trace semi-circles at the bottom of the board.
I found the center of the board (in this case, 15″) and aligned the left edge of the circle at that 15″ mark. Doing this meant that the center of the board had the upper edge of a scallop.
I then traced to the right of that semi-circle. That gave me another full scallop. And then one more time, which gave me a partial scallop at the end of the board.
I repeated this to the left of center, too.
Once I had the scallops drawn on the board, I set the jigsaw to the maximum depth and cut along that edge to create the scallops on the shelf board.

This looked totally awesome (go me!), but to smooth out the scallops a bit, I used my small electric sander with 80-grit sandpaper to make them even more rounded.
Attach Hanging Hardware (if Using)
I decided to attach d-ring hangers to the back of the wall hook board so that I could hang this on the wall without removing any of the wall hooks (more on that below).
BUT . . . I feel like the d-ring hangers aren’t the ideal method of hanging. When hanging objects on the hooks, the backer board moves around more on the wall than I’d like it to. And since I display things on the top shelf, that’s not ideal.
So, I’m going to re-hang this by removing two hooks, putting wall anchors into the wall where two of the hooks go, and attaching the hooks through the wood backer board into the wall.
If that sounds like too much work, then you could use picture hanging hardware like I did.
Attach the Shelf to the Wall Hooks Board
Next up, attaching the shelf to that hook backer board was easy!
I ran a line of wood glue along the top edge of the hook backer board and I put the 1×4 onto that.
I clamped the pieces together to get that glue to bond well, and then I put about six 1″ brad nails in for extra hold.
Put the Hooks Onto the Backer Board
Finally, I measured where I wanted each of the hooks and drilled pilot holes into the wood.
The adorable gold flower coat hooks I used did not come with mounting hardware, so I found screws that fit their openings and screwed those into the pilot holes.
Then I attached the hooks (kind of like how you attach curtain rod hardware to the wall) and finished this project!
The Finished Scalloped Wall Hooks Shelf
I hung up this shelf in one of the cottage bedrooms and I am in love!
The shelf is the perfect spot to display some decor, and the hooks are a wonderful extra bit of storage for this small room!
Even though it has a lot of femininity to it, I think the stained wood finish helps give it a tiny bit of masculinity, too. (Maybe. Maybe not.)
Leave me a comment below and let me know what you think of it! And, don’t hesitate to ask any questions, too!
Hoodsly says
Love this cute and functional scalloped shelf DIY!
Amelia Grace says
The scalloped shelf is both adorable and functional!
Bre says
Thank you!