Last weekend I got to go shopping by myself.
As a mother of small children, do you know how precious that time was?
I was actually able to browse around and go into stores with breakable merchandise. It was so liberating and SO INSPIRING!!!
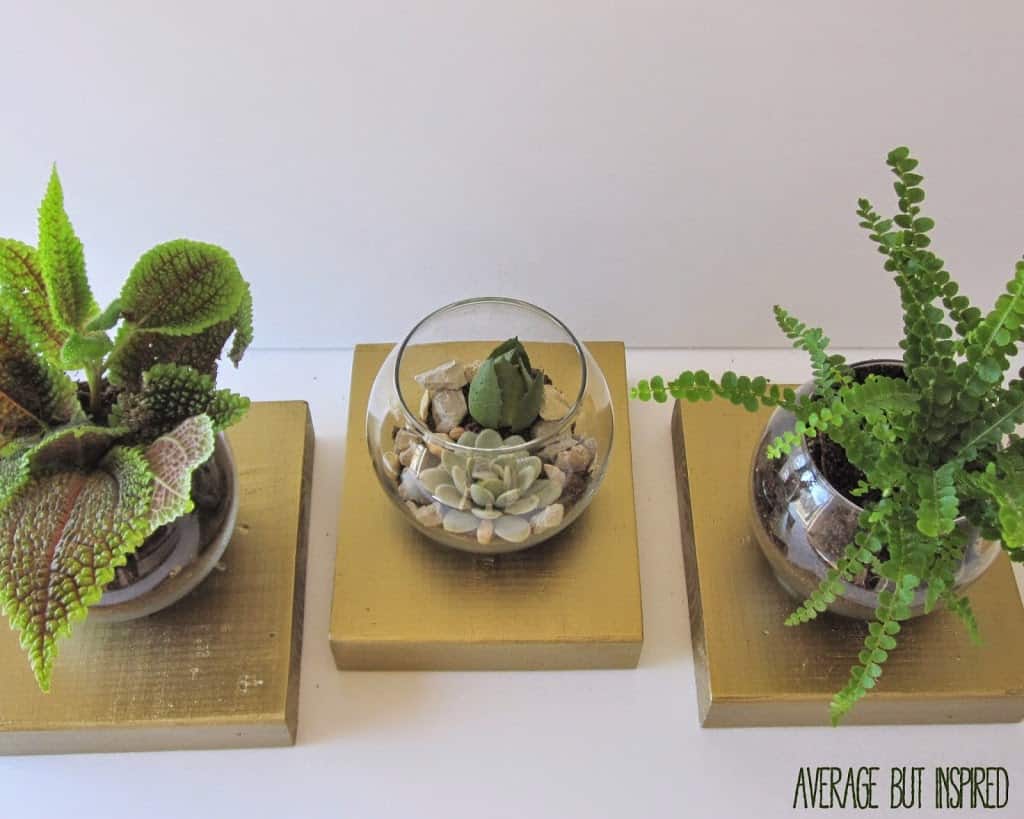
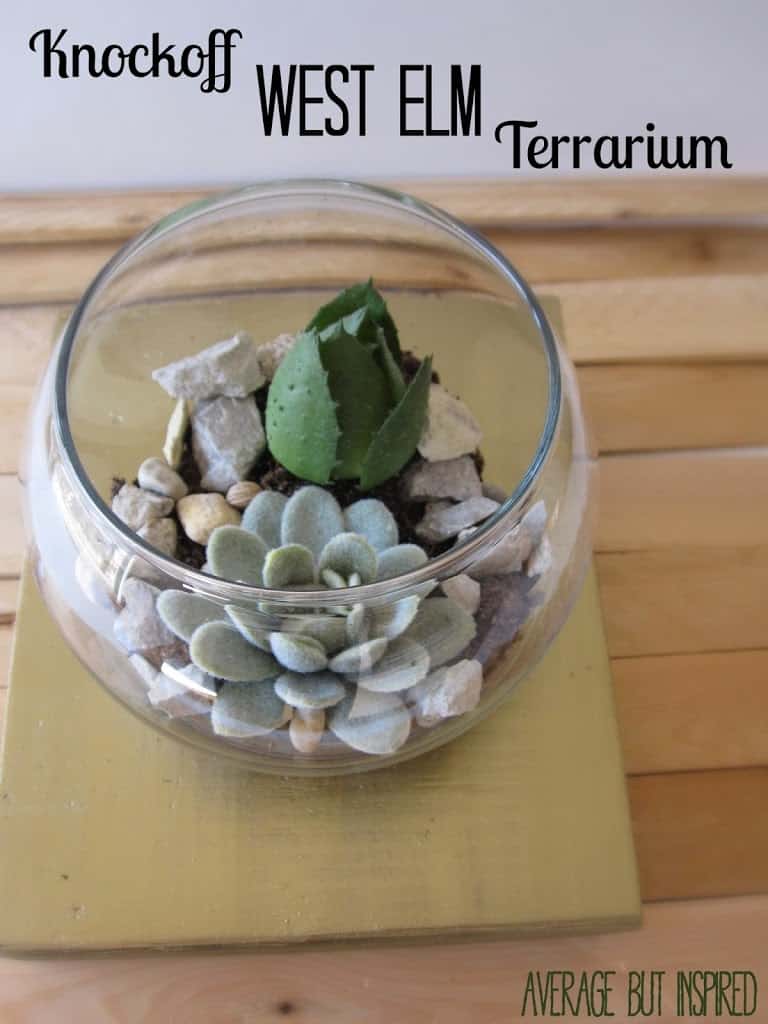
A direct result of that shopping trip was this project . . . my knockoff West Elm Brass Base Terrarium.
West Elm’s Brass Base Terrariums are beautiful. They come in two sizes – small and large – and are priced at $29.50 (small) and $59 (large). The interesting thing about the West Elm terrarium is that it looks like the bowl is almost tipped on its side, as opposed to being straight up (like mine). West Elm also sells the succulents to go inside of the terrarium at $12.50 a pop.
I love the low-maintenance nature of succulents and I wanted one of these terrariums. But I wasn’t about to lug one around the mall with me, nor was I about to pay $42 for a terrarium and one succulent. So yeah, I decided to try making one myself.
West Elm’s terrarium definitely looks nicer. But I think mine is okay, too. And for just $7 all in (like, with the plants), I’ll take it. And since my glass bowls aren’t tipped on their side, these can be used for taller plants as well. Bonus!
Faux Brass Base Terrarium Supplies
This post contains affiliate links. To read my full disclosure policy, please click here.
Here are the materials I used to make these faux brass base terrariums:
- Small glass bowl vase
- 4×6 piece of wood, cut to size
- Sandpaper
- American Accents spray paint in Aged Bronze (you can find this cheaper in a store!)
- Acrylic paint in bronze
- Elmer’s ProBond Advanced glue
How to Make a DIY Brass Base Terrarium
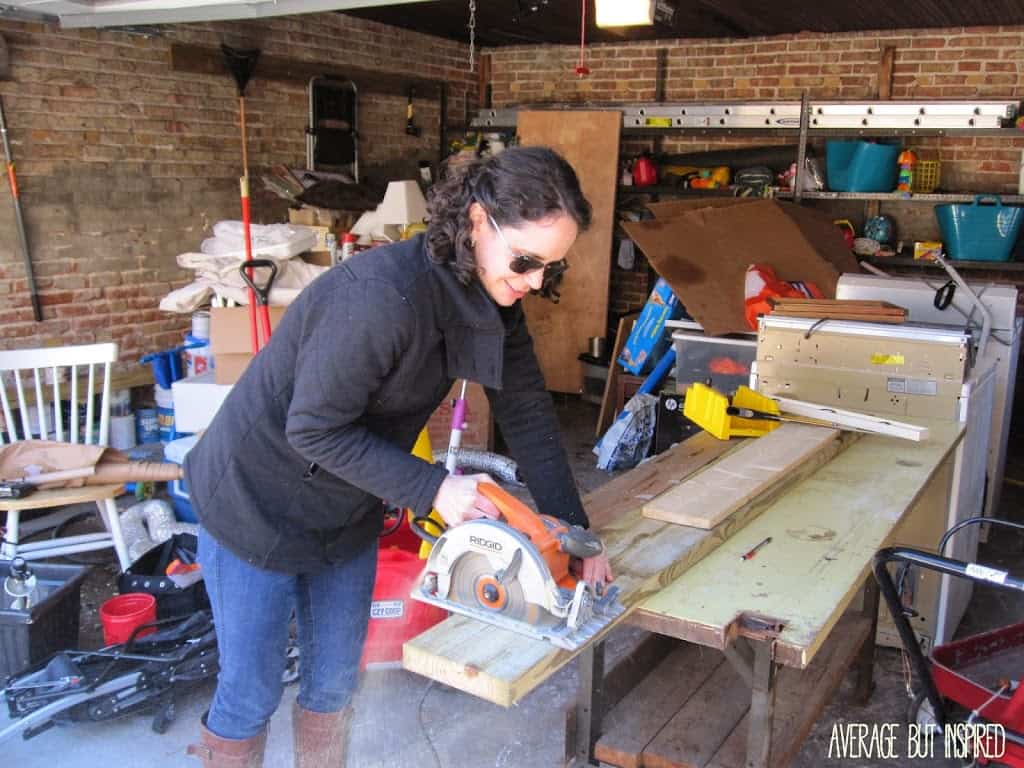
STEP ONE
Determine the desired size of your wood base by placing your glass bowl on top and deciding how large you want the bottom square to be. Measure and cut. (Ignore all the junk in my garage. We just finished a renovation and had to store a bunch of stuff in there. It’s normally not this messy!)
STEP TWO

STEP THREE
STEP FOUR
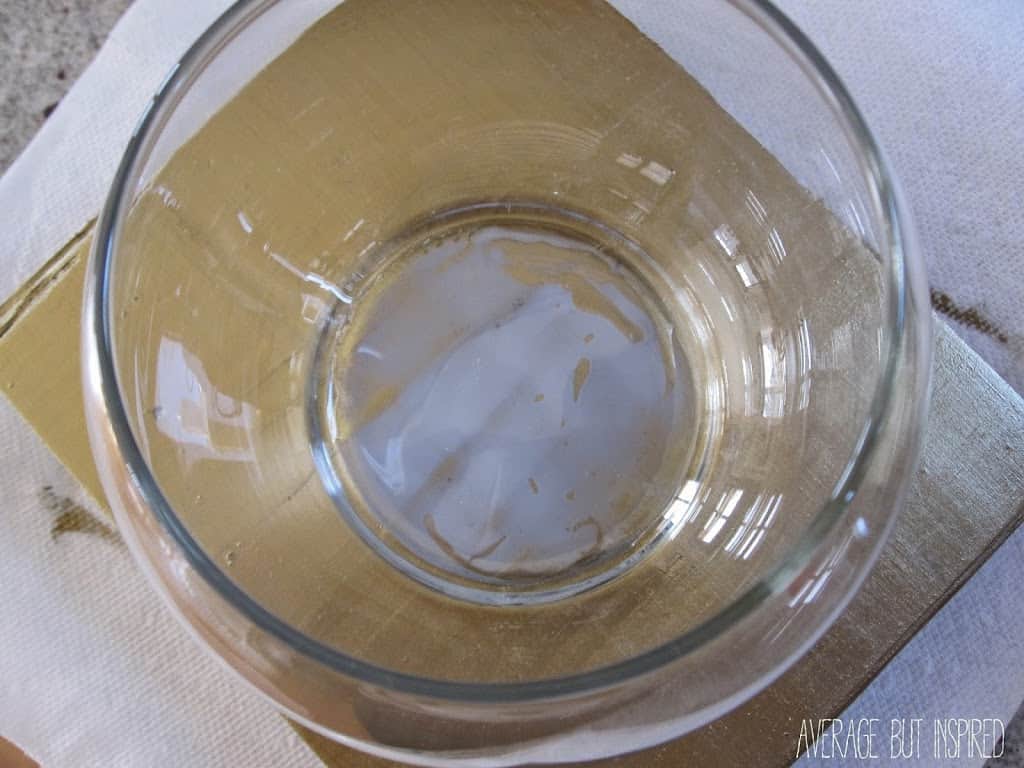
Once the paint has dried, apply the glue to the bottom of your glass bowl. Affix to the wood and follow the package’s instructions for proper adhesion. (NOTE: the glue does not dry clear so be sure not to apply too much or it will squeeze out the bottom of the bowl and leave a visible glue ring around your bowl and base.)
STEP FIVE
Once the glue is dry, add your plants and enjoy!
Deonna Wade says
Hey Girl! It’s Deonna from the Child at Heart blog. I was just stopping by to say hello! I just went to a wedding this weekend that had something similar on the tables and it was SO pretty. I like how you get out there and do the cutting yourself 🙂 I am doing a great spring necklace giveaway and would love for you to come by and enter to win 🙂 Have a joyful week!
http://www.thechildatheartblog.com/2014/04/spring-statement-necklaces-from.html
Kayla @ Home Coming says
Just wanted you to know that I loved this so much, it’s being featured on The DIY’ers today! http://homecomingmn.blogspot.com/2014/04/the-diyers-57.html
Bre Eggert says
Hi, Kayla! OMG I’m so flattered! You have the most amazing style, so for you to like these makes my day! Thanks so much. 🙂
Emily says
Your terrarium is beautiful! Love it!
Thanks for sharing with us at Your Designs This Time!
Emily @ elizabethjoandesigns.com
Bre Eggert says
Hi, Emily. Thank you very much!
Andrea @ This Pug Life says
Really lovely! I am totally loving the modern succulent displays people are putting together nowadays. Which is funny, because my grandma always had a huge bed of them growing up and I always thought they were so blah!
Bre Eggert says
Hi! I know! But then again, everything old is new again, right? The best thing about succulents is that they’re practically no-kill. That’s why I love them! 🙂 Have a good day!
RaChil Luke says
Wow! Yours is a practical steal! 12.99 for a succulent is six times the amount I want to pay for something I’m inevitably going to kill. These turned out gorgeous 🙂 I am off to explore the rest of your blog!
Bre Eggert says
Hahahaha, I know! I seriously couldn’t believe they were selling them for that much. So ridiculous! Thanks for stopping by and for your nice comment. 🙂
For My Love Of says
Im glad to see this knocked-off! Its obvious it could be done for somuch cheaper than they charge. Your version looks fantastic!
Bre Eggert says
Hi and thank you! Yes, I know – it’s almost insulting what they charge, right?! Especially for the succulents themselves. COME ON! 🙂
Angela @ Life in Velvet says
I LOVE this! What a fabulous knock off! Thank you so much for linking up at Thursday STYLE!
Bre Eggert says
Hi Angela. Thank you! 🙂
Meg Sluyter says
Hi Bre! Stopping by from Show Stopper Saturday. I love your terrariums, they look great! I am so in love with metallic spray paint (copper, bronze, gold, silver, chrome, they are all so fun) right now and any project I can do that uses it makes me super happy, especially one that looks so easy and beautiful. Thanks for sharing! 🙂
Bre Eggert says
Hi Meg! You are the sweetest! Thanks so much. Yes, metallic spray paint is the best!!! Thanks so much for commenting. 🙂
Suzan Sweatman says
Your terrariums are gorgeous – LOVE them !!!
I wouldn’t touch a power tool with a 10 foot ( power ) saw LMHO – when the compressor machine goes off I almost have a heart attack !
Happy weekend
Visiting from the Shabby Nest
Hugs,
Suzan
Bre Eggert says
Hi Suzan! Thank you so much! And what can I say, I’m a total bada**. HAHAHA yeah right! I hate it that my husband won’t cut this stuff for me. I cringed the entire time I was cutting these. 🙂 I’m really glad my fingers are still in tact. Have a great weekend!
Wangu says
Bre your terrariums turned out great! I love them.
I love that feeling when you do something yourself and save a bunch of coins any you´re standing there so happy feeling like a ninja. It´s great
Bre Eggert says
Hi! OMG you crack me up. Yes, I LOVE feeling like a ninja. 🙂 Thanks for your sweet note!
Ronda Waters says
Love the look of this! And impressive electric saw skills! (Is that even what it’s called?!?) 🙂
Bre Eggert says
Hi Ronda! HAHAHAHA, I’m glad you find that impressive. I definitely am impressed that I haven’t cut off my hand yet. My husband refuses to do anymore of my little projects, so he’s making me learn how to do all that stuff myself. And then I make him take my picture for proof. Ha! Thanks for your sweet comment!
brepurposed.com says
Just stopping over from Live Laugh Rowe’s link party! Great knock-off! P.S. You’ve got a great name too 😉
-fellow bre blogger
Bre Eggert says
Hi Bre! Thank you so much! I am in love with your blog – you have such wonderful ideas. Thanks for your sweet note!