Average But Inspired

Inspiring creativity with crafts, DIY, and home decor projects.

  • About Bre
  • Contact Me
  • Disclosures
  • Policies
  • Home
  • Shop
  • DIY
  • Crafts
    • Dollar Store Crafts
  • Seasonal
    • Patriotic & Summer
    • Valentine’s Day
    • Easter & Spring
    • Fall & Halloween
    • Christmas & Winter
  • Home Decor
  • Furniture
  • Organization

April 21, 2015 by Bre

Paint Splattered Pouches {An Easy Dollar Bin Upgrade}

Every time I step into Target, my cart takes on a mind of its own and directs me to aisles and places in the store that I never intended to visit.  The Dollar Spot is one of those places.  Do I ever really need a cute new notebook for my daughter with the latest, popular Disney character emblazoned on the front?  Or yet another rubber stamp with the letter “B” on it (but this one has a quatrefoil background print, Bre!)?  No.  The answer is always NO.  But I go there anyway – all.the.time.

On one of those recent visits to the Dollar Spot, I found some cute fully-lined, linen pouches for $3 a piece.  They were the perfect size for inside my purse and I liked the metallic thread that was woven throughout.  Upgrade some plain pouches with a little paint!  This 15 minute project makes a perfect gift or project for kids!
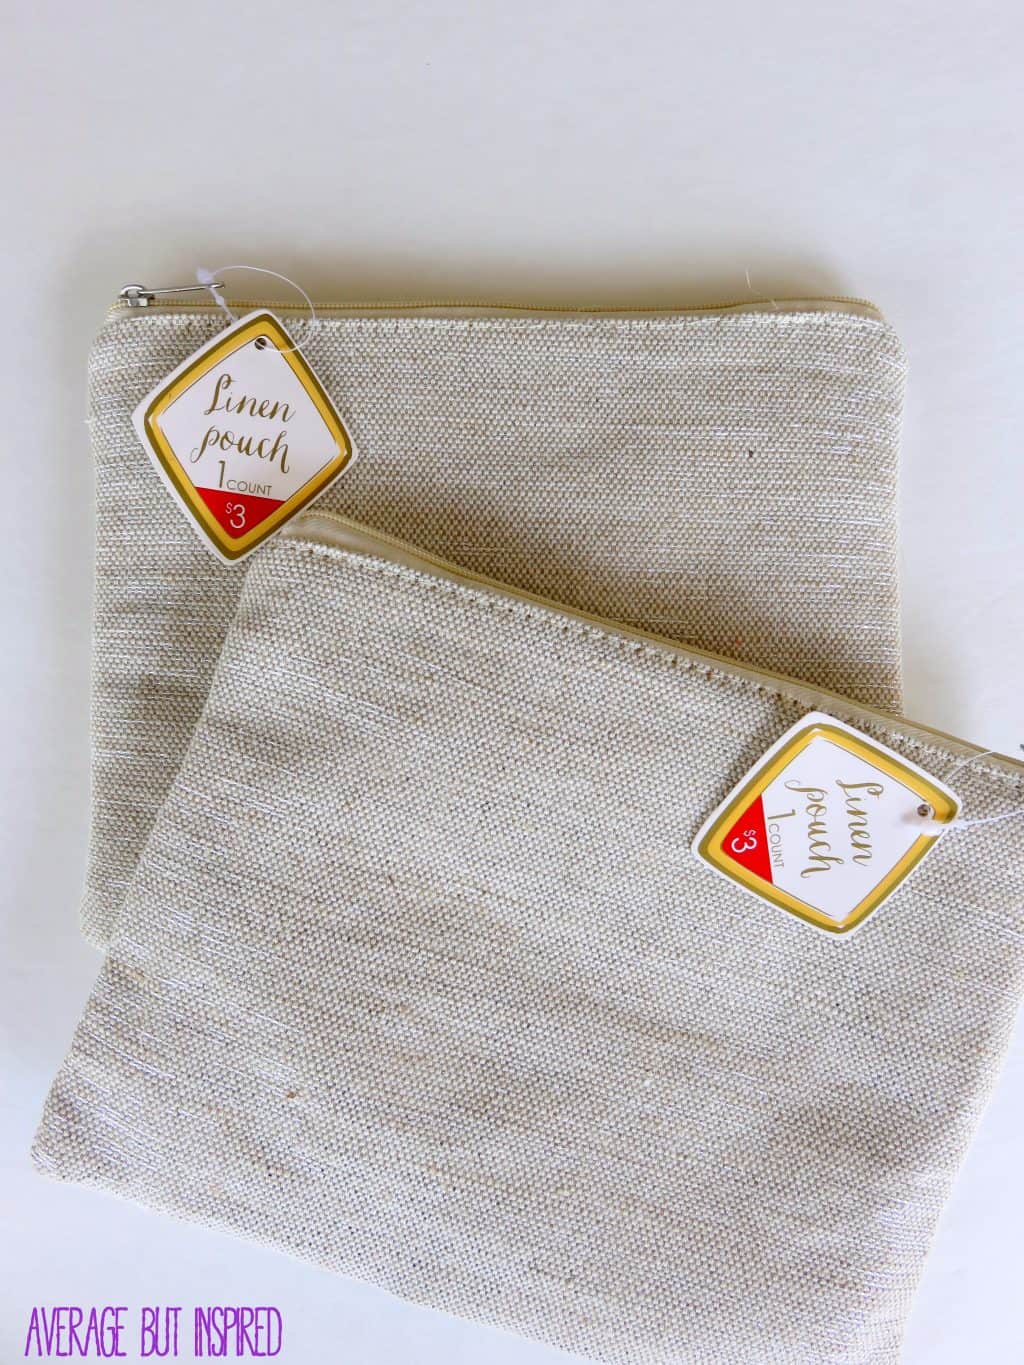
I easily could have left them as is, but come on . . . what fun would that be? With a little paint, I gave them a totally fun new look!
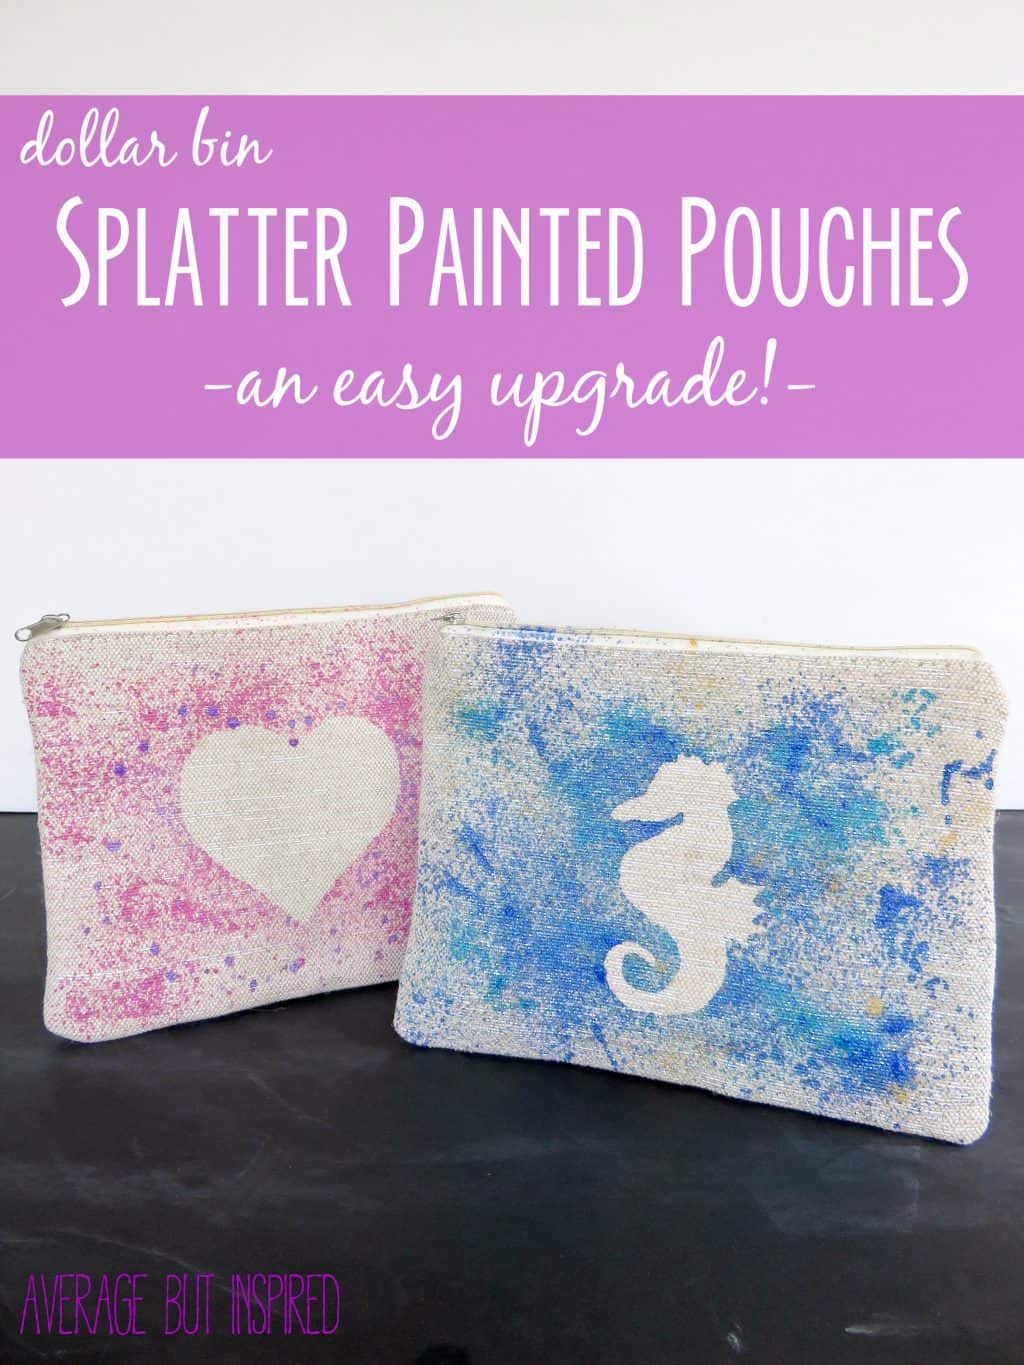
  Fun project!  Customize plain pouches with splatter paint for a fun new look!  Great project for kids, too!

 SUPPLIES

You don’t need many supplies for this fun paint splattered pouches project!  To help you with your shopping, I’ve included links to some of the products.  They are affiliate links, which means that if you purchase though them, I will receive a small commission at no added cost to you.  (THANKS!)

  • Plain canvas or linen pouches
  • Tulip fabric spray paint
  • Freezer paper
  • Pencil
  • Iron
  • Scissors

HOW TO MAKE A PAINT SPLATTERED POUCH

First, I Googled free clipart images for designs I wanted on my pouches.  I chose a heart and a seahorse, copied and pasted them into a Word document, and printed them out.  Fun project!  Customize plain pouches with splatter paint for a fun new look!  Great project for kids, too!
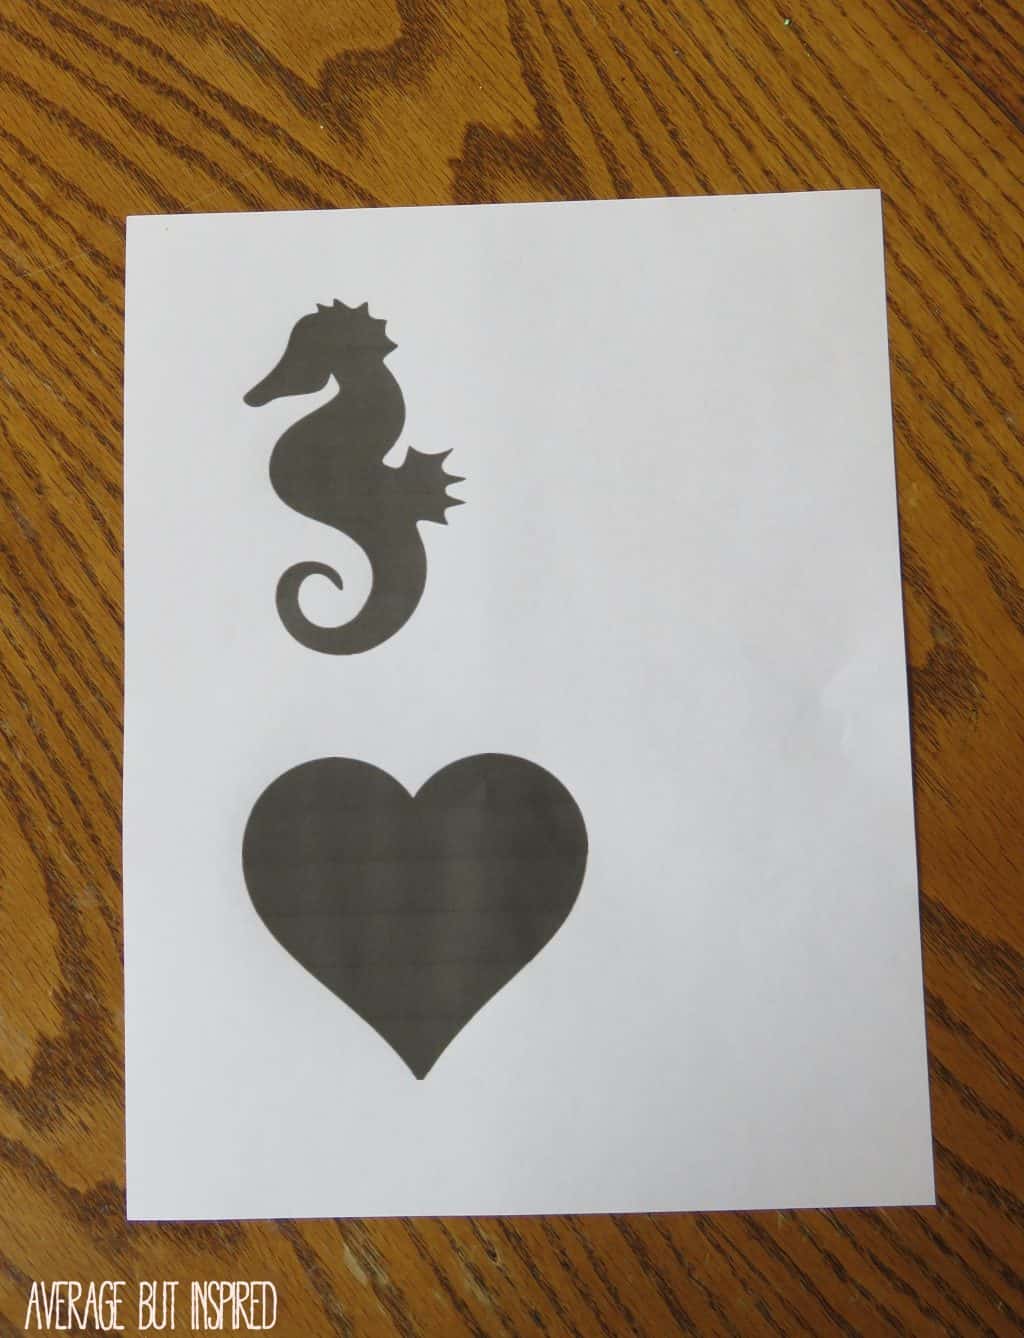
Next, I cut a sheet of freezer paper and placed it on top of my printed clipart, shiny side down. I traced the outline of each shape onto the freezer paper and then cut them out.  Fun project!  Customize plain pouches with splatter paint for a fun new look!  Great project for kids, too!
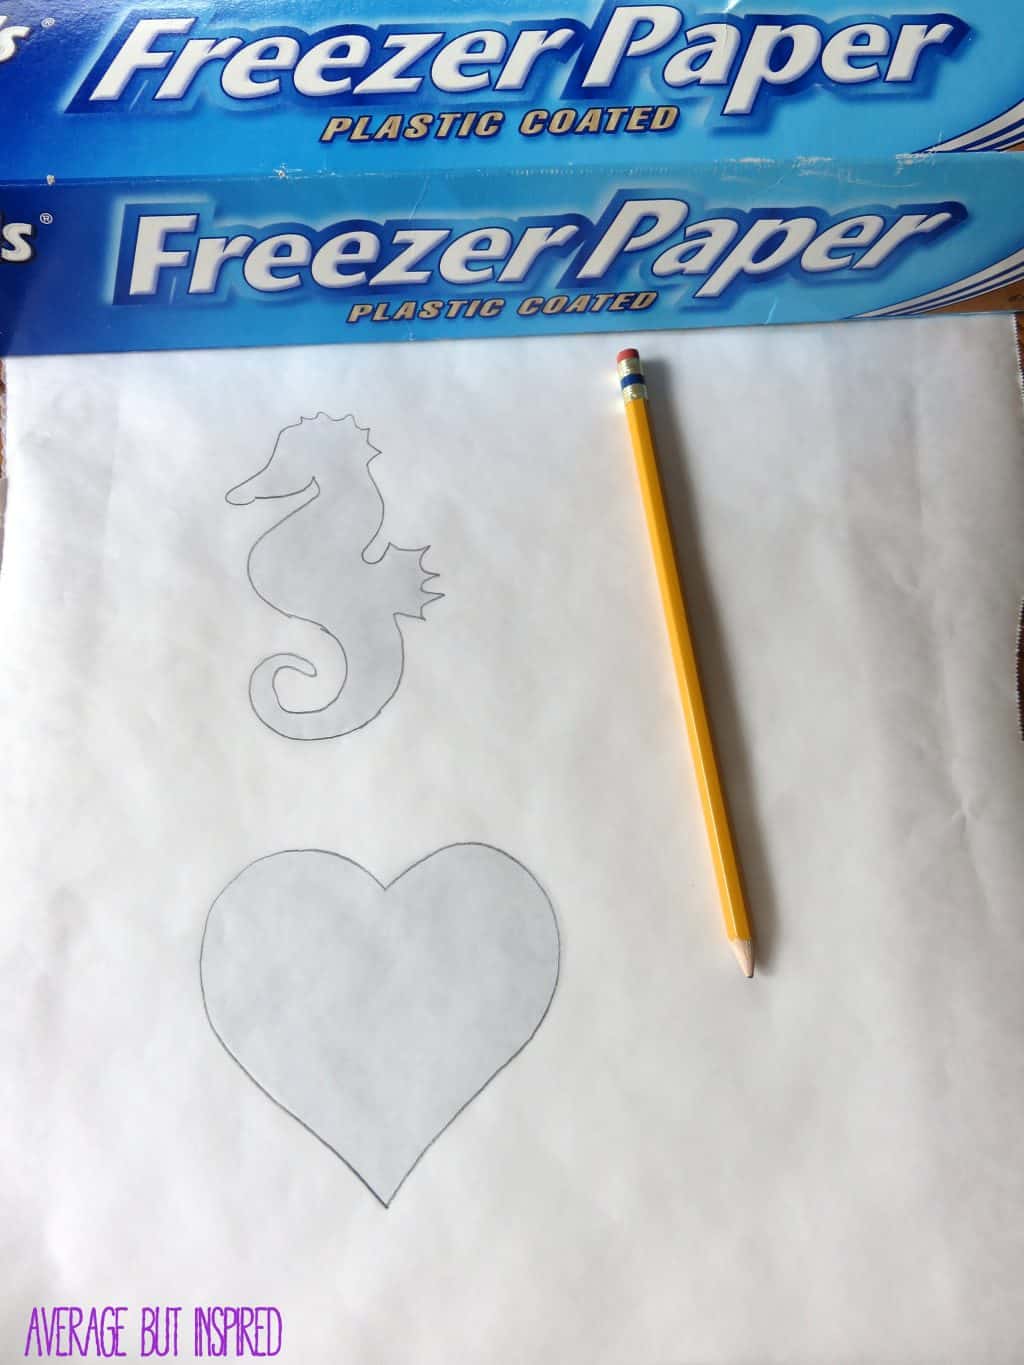
After that, I dusted off my iron (I really only use it for craft projects. Homemaking WIN!), and ironed each design, shiny side down, onto my pouches.  Fun project!  Customize plain pouches with splatter paint for a fun new look!  Great project for kids, too!
Then it was time for the fun to begin. I covered my work surface and got out my fabric spray paints. I just started spraying all over the pouches. I felt like a total rebel graffiti artist. (Not really.)  Fun project!  Customize plain pouches with splatter paint for a fun new look!  Great project for kids, too!
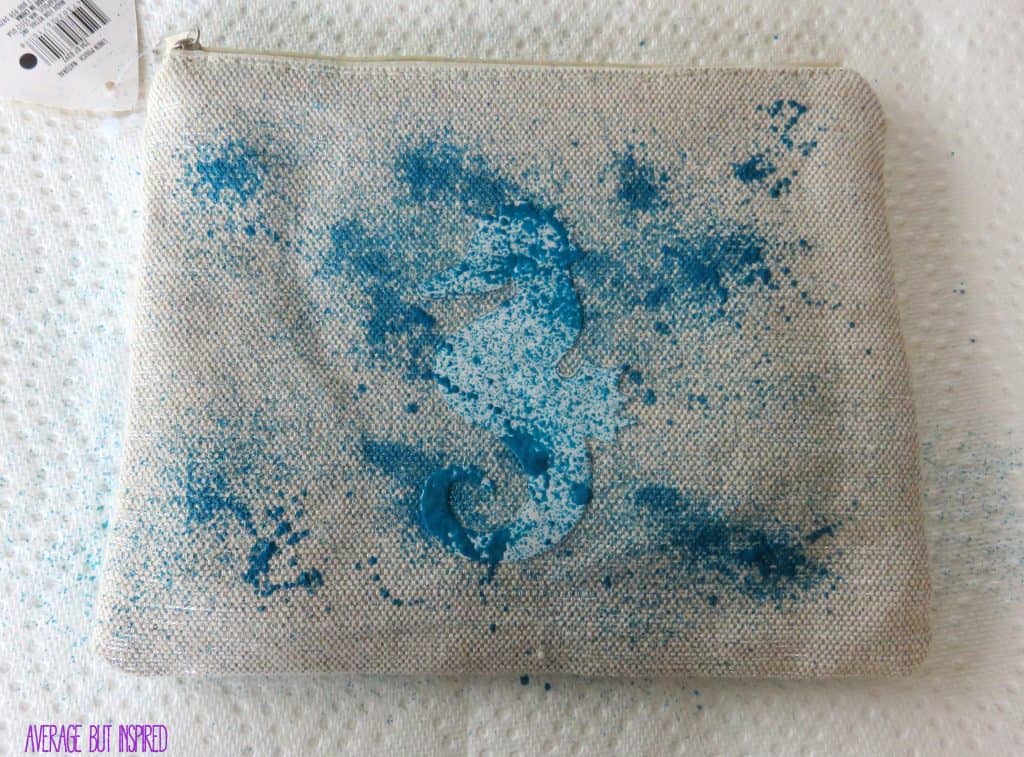
Once the paint dried, I peeled off my freezer paper shapes! Fun project!  Customize plain pouches with splatter paint for a fun new look!  Great project for kids, too!
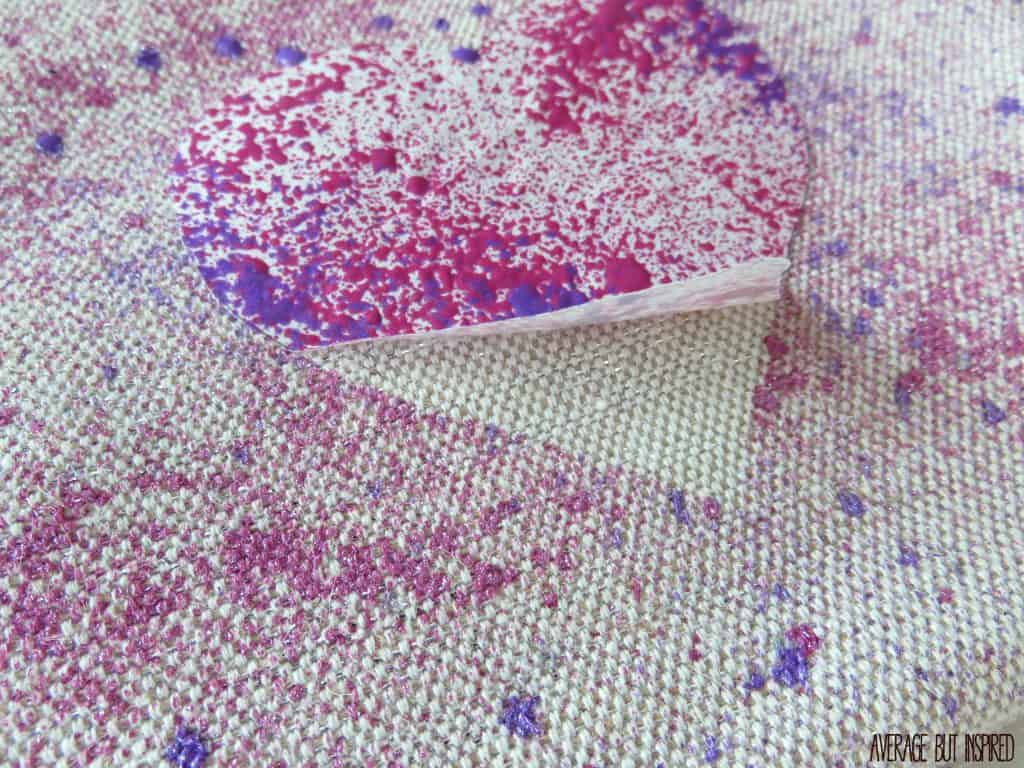
I think these are super fun! Fun project!  Customize plain pouches with splatter paint for a fun new look!  Great project for kids, too!
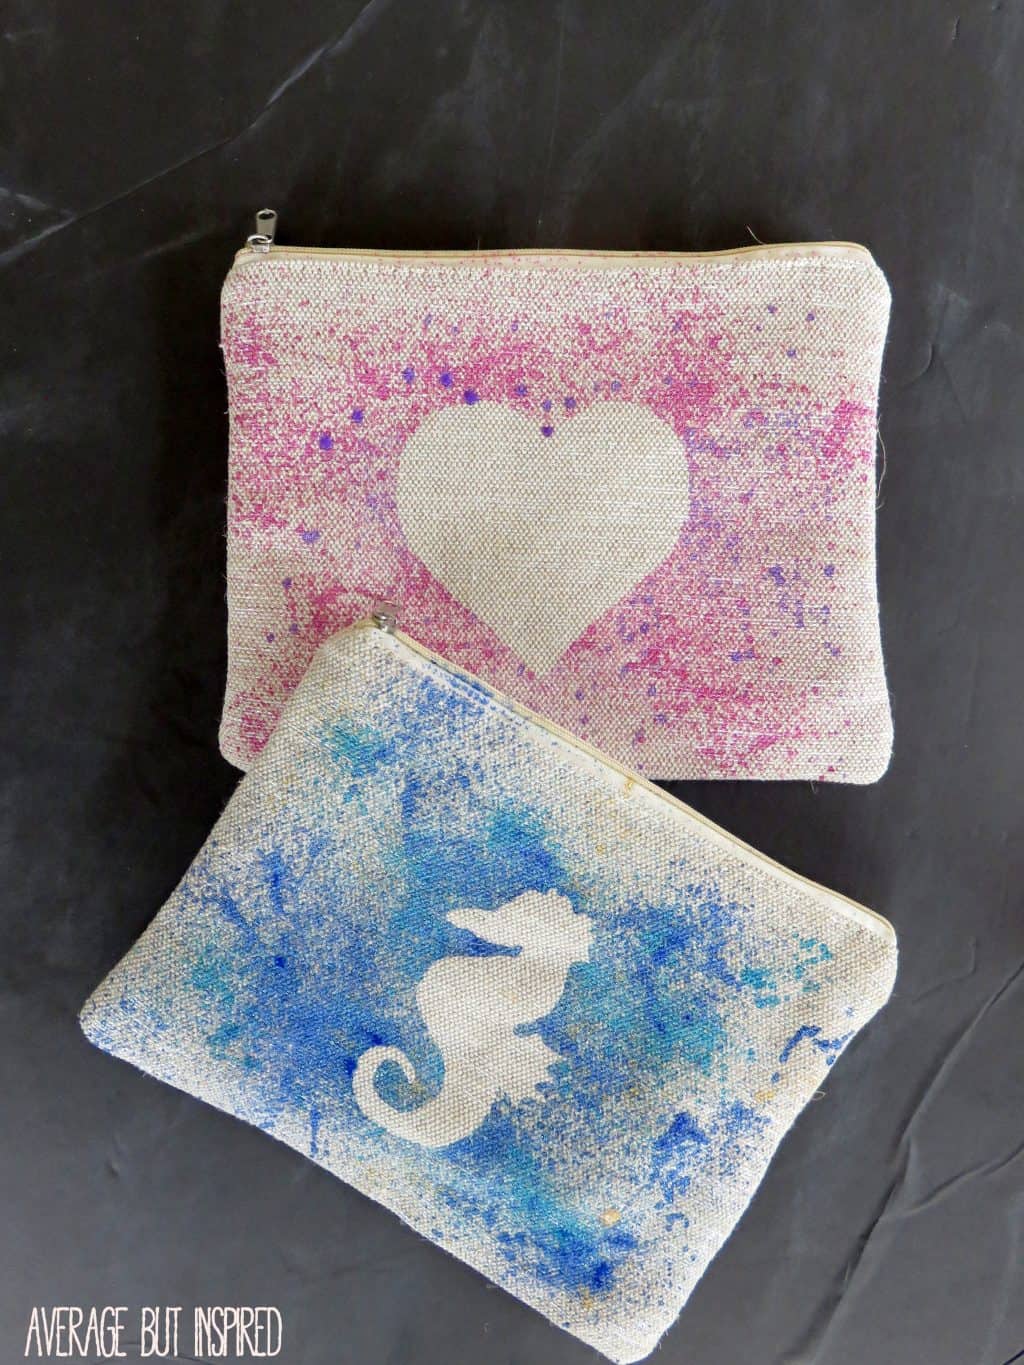
Hopefully they’ll keep my purses a little more organized, too. . .Fun project!  Customize plain pouches with splatter paint for a fun new look!  Great project for kids, too!
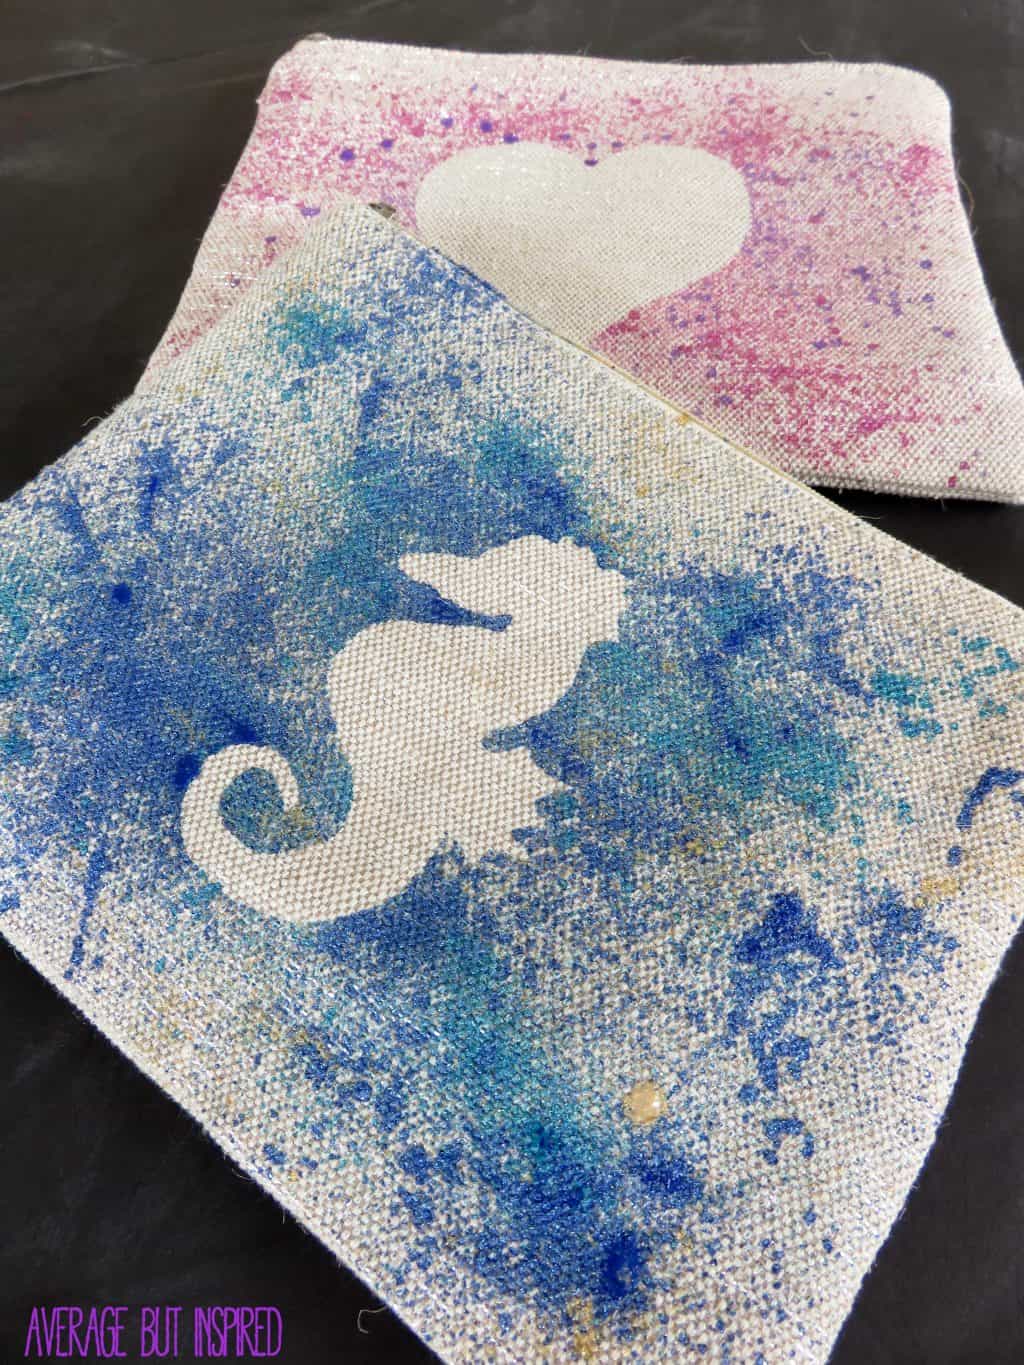
Do you suffer from the same Dollar Spot weakness that I do? What is your favorite find from those big red bins?

– Bre

To see where I may be sharing this post, please click here.

❮❮ Previous Post
Next Post ❯ ❯

Comments

  1. Kristi says

    April 21, 2015 at 7:55 am

    LOVE this idea!!! Who knew freezer paper would stick to the fabric with just a bit of heat?! BRILLIANT!

    Reply
    • Bre says

      April 22, 2015 at 8:49 pm

      Kristi, it’s the BEST! You can do so much with freezer paper that I never would have guessed! 🙂 Way more than just wrapping meat.

  2. Christine says

    April 21, 2015 at 9:38 am

    So cute! Tyson calls the Dollar Spot the “free section.” I must admit I have a certain weakness for it!!

    Reply
    • Bre says

      April 22, 2015 at 8:50 pm

      Hahaha well when you’re a high-roller like Tyson, dolla’ bills are probably like “free.” LOVE the Dollar Spot!

  3. Sarah Nenni Daher says

    April 21, 2015 at 3:56 pm

    You must have a good dollar spot – I’ve never seen those pouches at ours. I love it for getting little things for the kids – will have to keep my eyes out for these because this is a great idea. Pinned!

    Reply
    • Bre says

      April 22, 2015 at 8:50 pm

      Thanks, Sarah! I swear, sometimes mine is amazing and sometimes it’s the WORST! Totally hit or miss. Hope you are well!

  4. Seana Turner says

    April 22, 2015 at 6:49 am

    I even have a roll of freezer paper that I’ve been thinking of pitching. I think this could make a fun graduation gift if you used the school’s colors, or even the colors of the college/university the grad is planning to attend… maybe with an initial?

    Reply
    • Bre says

      April 22, 2015 at 8:51 pm

      Seana, I think you need to start another blog – a creative blog! You always have such wonderful ideas. I’m sure you don’t have enough to do already, so why don’t you get right on that? 🙂

  5. Jenny @ Refresh Living says

    April 22, 2015 at 9:55 pm

    What a fun update!! I understand the pull to the dollar section. Of course, they place it right in the front. There’s no avoiding it, unless, of course, I walked in the other door, but then I would miss the dollar section!

    Reply
    • Bre says

      April 25, 2015 at 9:33 am

      Hahaha I know!! One of the Targets I go to only has ONE door, so we HAVE to walk by the dollar spot! Ugh, the WORST. 😉 Hope you have an awesome weekend, Jenny!

  6. Samantha says

    April 23, 2015 at 9:48 am

    So fun and cute! What a great idea! Isn’t the Target dollar spot so dangerous? My husband calls it the $10 spot. 😉

    Reply
    • Bre says

      April 25, 2015 at 9:33 am

      Hahaha, Samantha, your husband is so right! I never spend JUST a dollar! 🙂 Hope you have a great weekend!

Leave a Reply Cancel reply

Your email address will not be published. Required fields are marked *

Let’s Connect!

  • Facebook
  • Instagram
  • Pinterest
  • Twitter
  • YouTube
Bre of Average But Inspired

Hi, I'm Bre! Thanks for visiting my blog. I hope you'll find ideas to inspire your creativity and beautify your home here.

Love DIY & Decor? Join the Fun!

    How Can I Help You?

    blank

    How to Build a Backyard Fire Pit

    blank

    How to Organize Digital Photos Using Amazon Photos

    blank

    How to Create a Faux Antique Brass Finish with Paint

    blank

    7 Tips for Hosting a Party on a Budget

    Looking for Something?

    blank

    The Easiest DIY Under Cabinet Lighting

    As I’ve been talking about non-stop, I painted my oak kitchen cabinets and freshened up the space! Part of the kitchen makeover was enhancing the lighting, and I’m pumped to show you the EASIEST DIY under cabinet lighting that absolutely anybody can add to his or her kitchen for a little mood lighting and general […]

    blank

    Dollar Tree House Valentine’s Day DIY

    If you follow any Dollar Tree crafters on Instagram or YouTube, you know that the Dollar Tree house is one of the most popular crafting items around! Only available in-store and online once in awhile, these cute wooden houses are the perfect craft blanks to update for any style of decor or season!  I gave […]

    blank

    5 Furniture Makeover Mistakes to Avoid {Lessons From a Failed Furniture Flip}

    One hot summer night I sat in front of the TV, watching reruns of an intellectually stimulating show (most likely Real Housewives of Dallas or some other random city), while mindlessly scrolling through Facebook.  Suddenly, a post showed up in my newsfeed of someone selling a gorgeous and antique roll top desk in my local resale group . . . […]

    blank

    Modern Vintage Dining Room Makeover

    It took me almost three months, but I’ve finally finished putting together the dining room in our new house!  It is no longer being used as our virtual learning classroom (thank goodness!), but instead is a beautiful modern vintage dining room that we love! This post contains affiliate links.  To read my full disclosure policy, […]

    Copyright © 2013-2021, Bre Eggert (Average But Inspired). All rights reserved.

    Pretty Chic Theme By: Pretty Darn Cute Design