Over the past couple of years, I’ve developed a real love of scouring thrift shops for treasures that I can use in my home. The prizes that I bring home almost always get a makeover. Rarely do they go out on display in their original condition, although that certainly would lead to an interesting look in my home.
Picture frames are one of the best things to pick up at thrift shops because they are so easily modified to fit any style of decor. With a little paint and plywood, I updated a simple square frame from Goodwill (complete with 1980’s seahorse art), and turned it into a beautiful boutique-style frame. 
Supplies 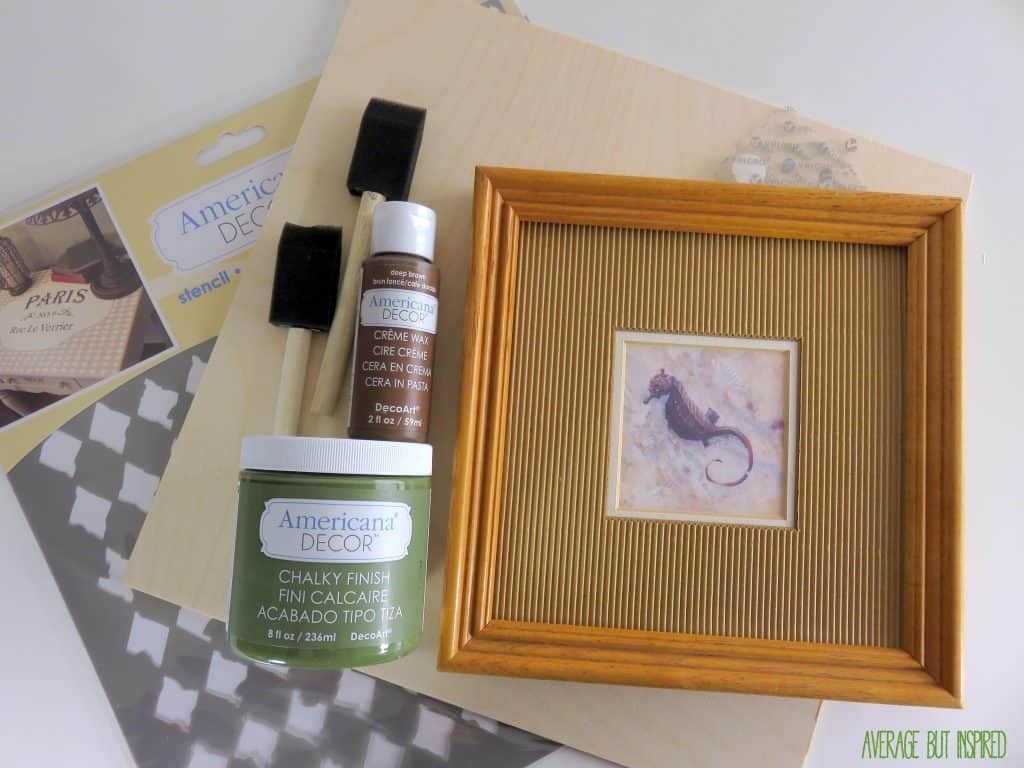
A huge thanks to DecoArt, Inc. for providing the paint and wax that was used in this project. The project and opinions are my own. Products marked with an asterisk are affiliate links, which means I receive a small commission if you purchase through these links. To read my full disclosure policy, please click here.
- Thrift Shop Picture Frame
- Plywood or craft wood cut to desired size (make sure it is thick enough to accommodate a sawtooth picture hanger)
- Furniture Tacks*
- Americana Decor Vintage French Stencil*
- Wood Glue*
- Sawtooth Picture Hanger
- Paint Brush
- Painters Tape
- Stencil Brush* (optional)
- Hammer
- Americana Decor Chalky Finish Paint (I used Parchment, Enchanted*, and New Life*)
- Americana Decor Creme Wax in Clear*
- Americana Decor Creme Wax in Deep Brown*
How To Do Your Own Thrift Shop Picture Frame Makeover
First, give your thrift shop frame a good cleaning. Remove the built up dirt and grime, and get it shiny and clean. Once it’s dry, paint it the color you want. I used a mix of Americana Decor Chalky Finish in Enchanted and New Life. Then paint your plywood base piece. I painted mine Americana Decor Chalky Finish in Parchment. 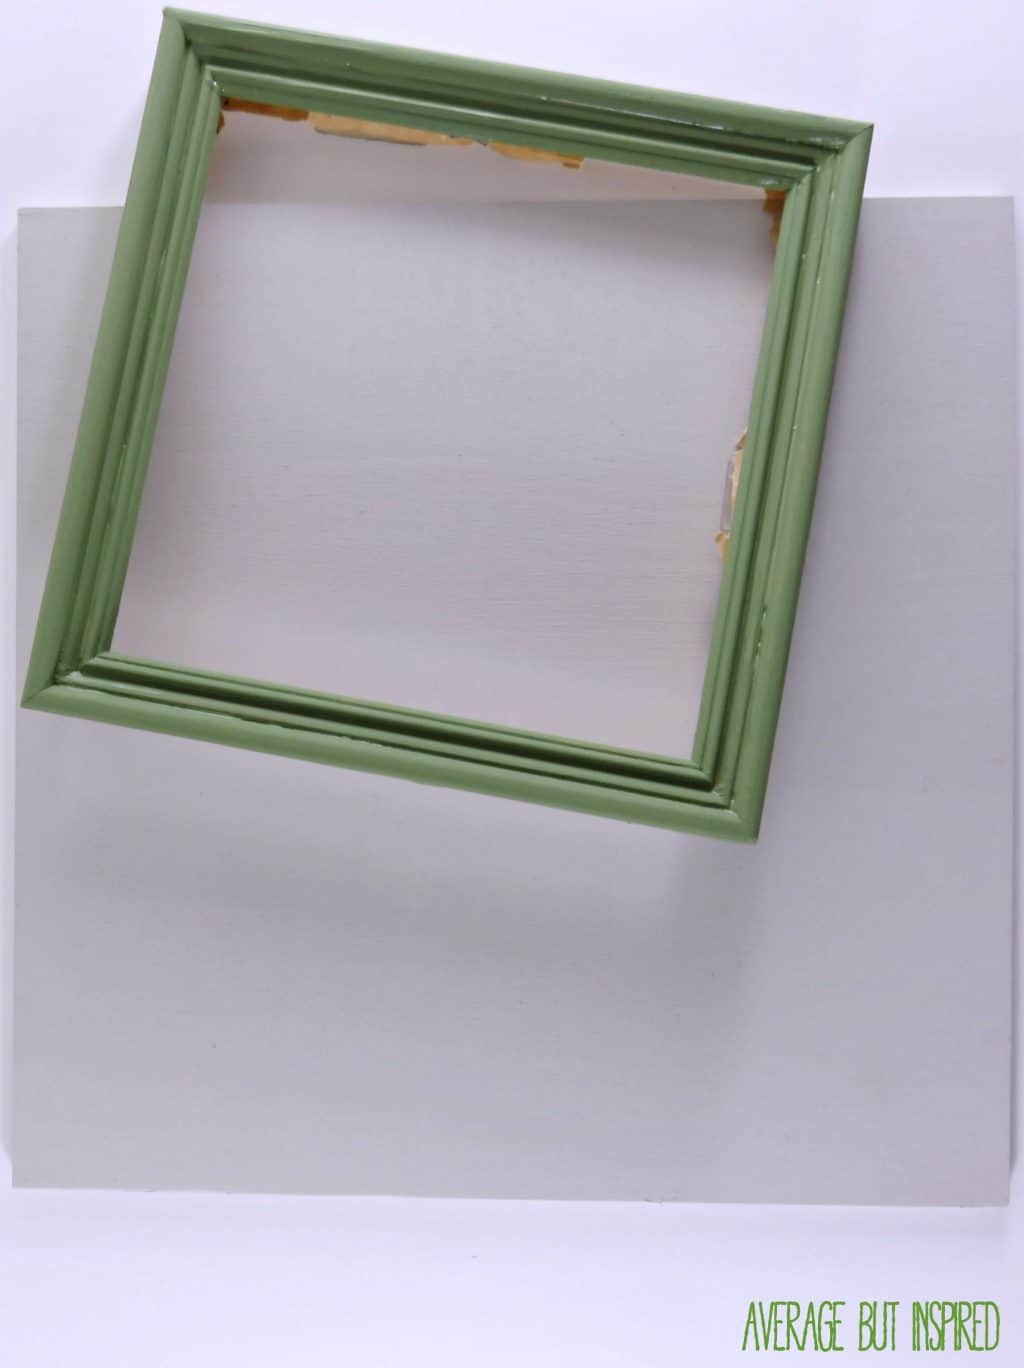
Once dry, tape your stencil to the plywood and apply a layer of paint in the color of your choice. 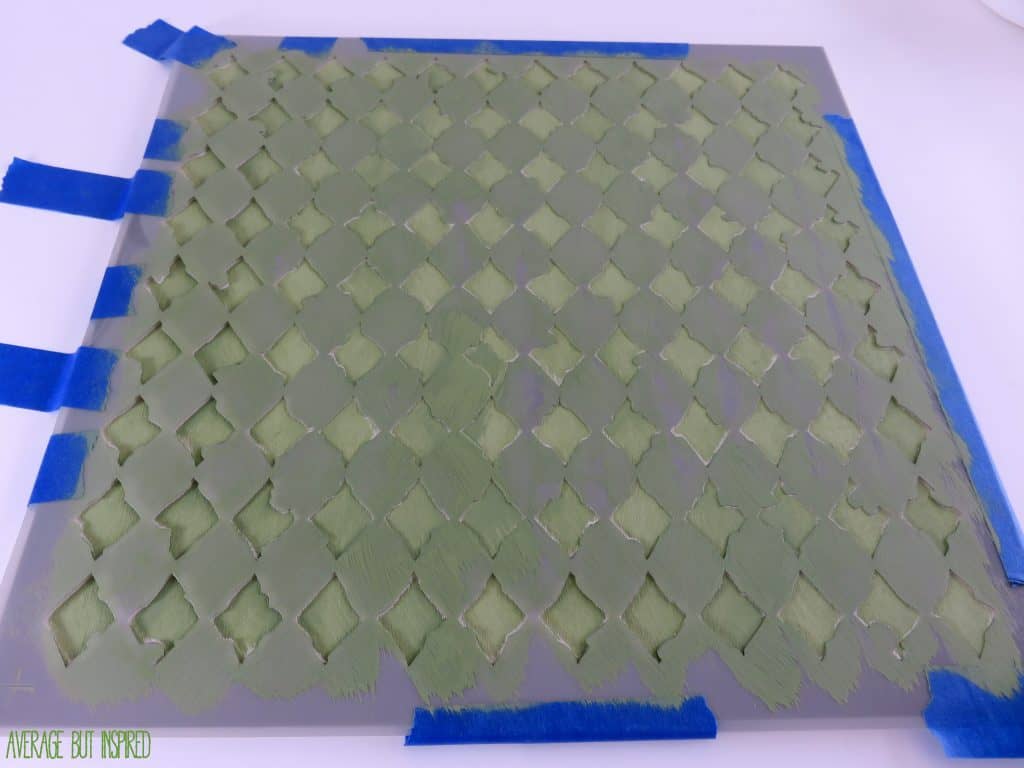
Once the plywood and frame are dry, use a stencil brush or clean, lint-free cloth to apply a layer of Americana Decor Creme Wax in Clear to both pieces. Once dry, buff to a dull shine with an unused portion of the clean, lint-free cloth. 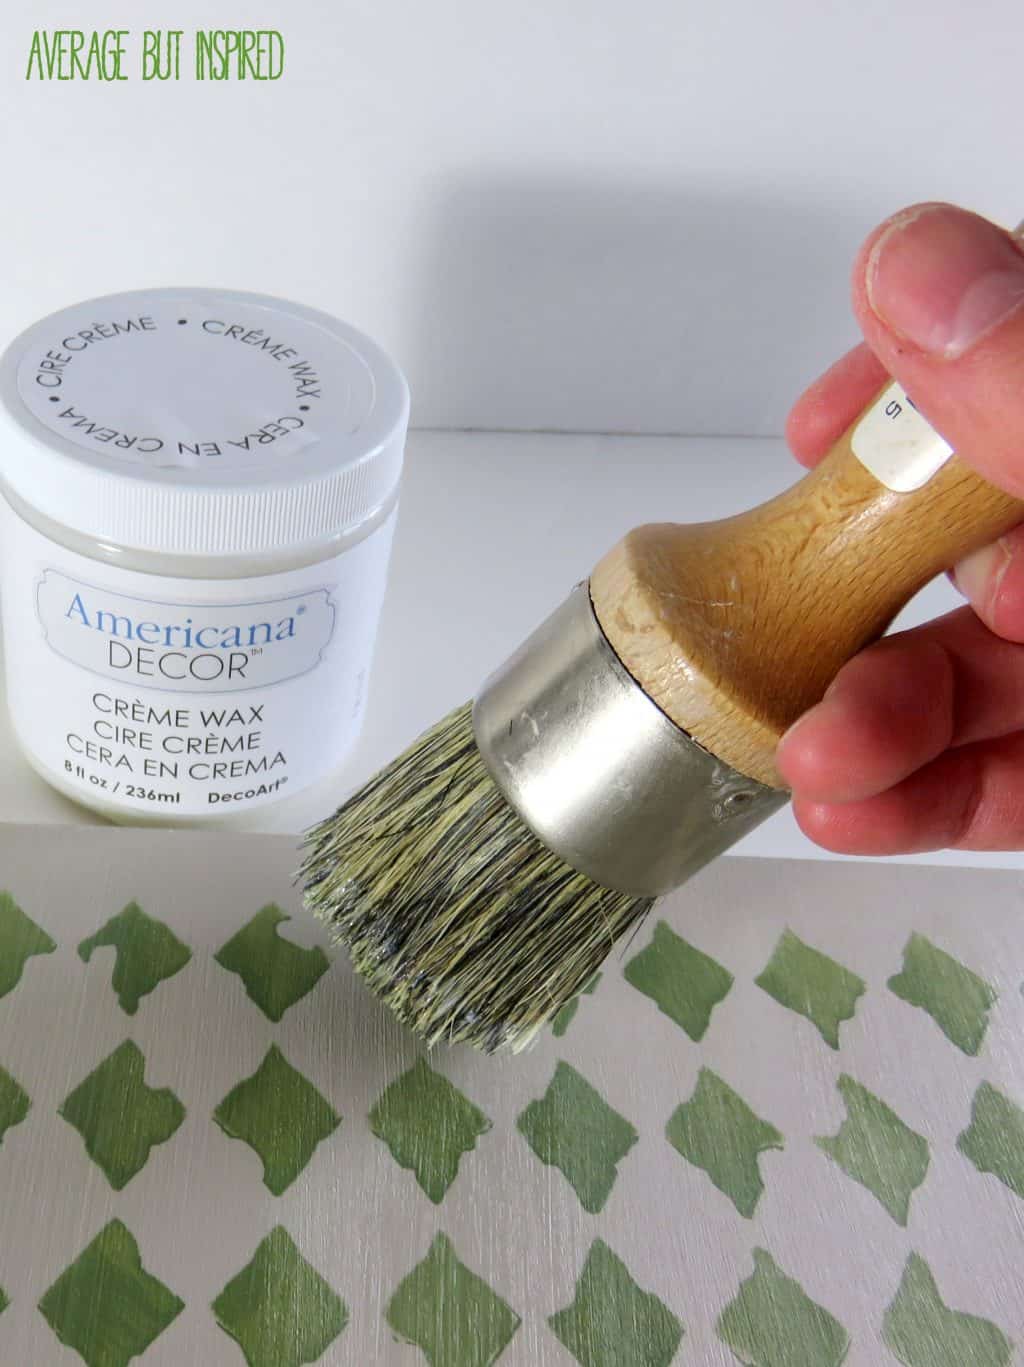
Next, use a stencil brush or clean, lint-free cloth to apply a layer of Americana Decor Creme Wax in Deep Brown to the pieces. This will create an antique look. Once dry, buff to a dull shine with an unused portion of the clean, lint-free cloth. 
If you plan to hang your new frame on the wall, add a sawtooth picture hanger to the back. If not, you can skip this step.
Next, apply a thin layer of wood glue to the back of the thrift shop frame and glue it to the front of your newly-painted plywood piece.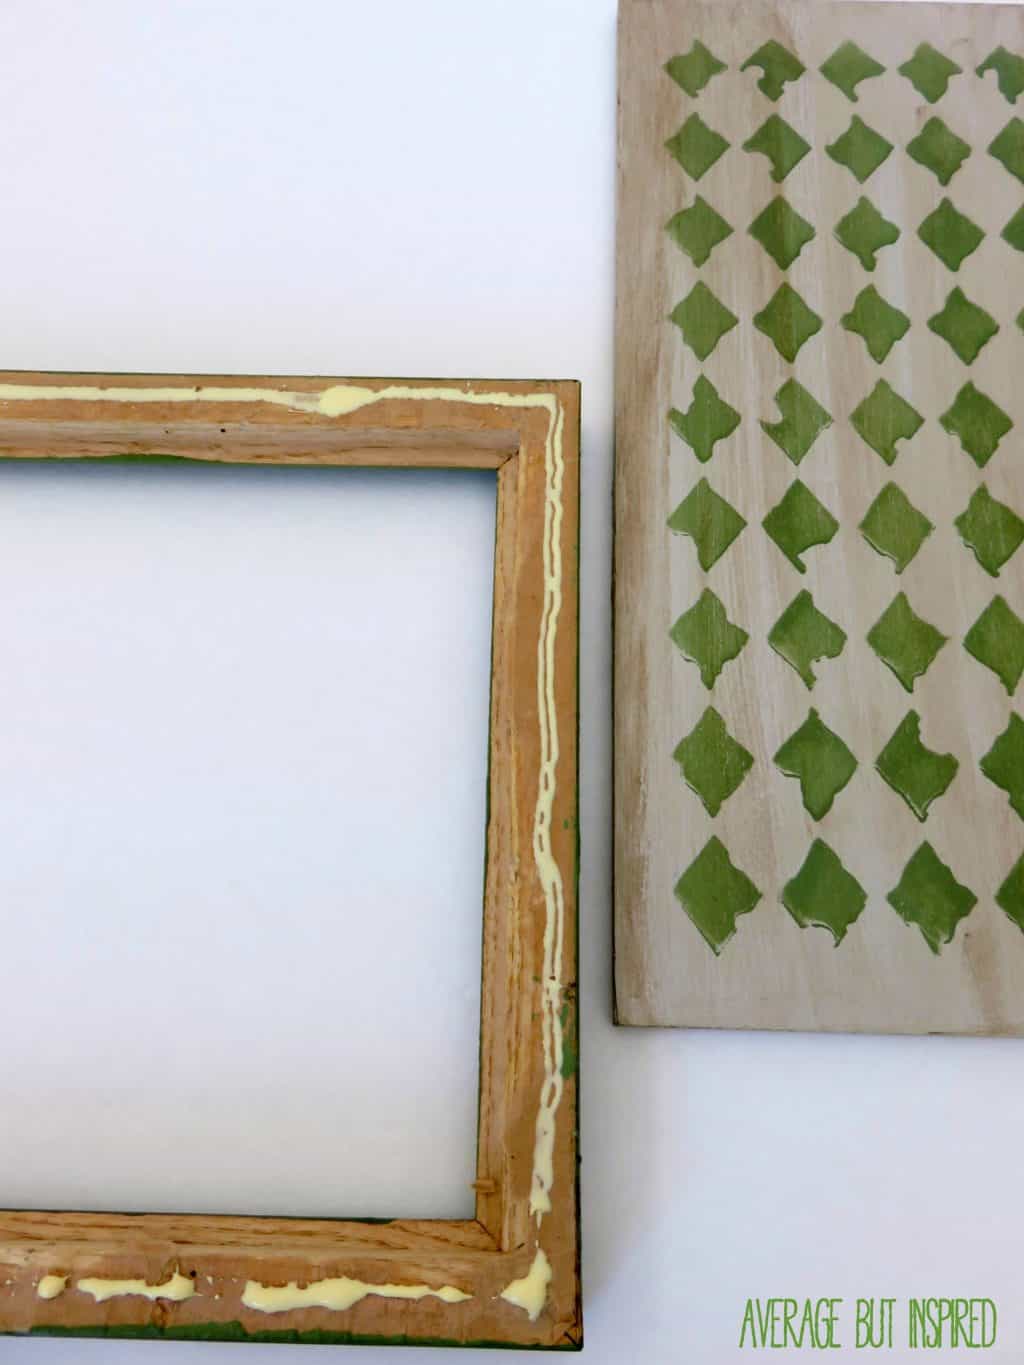
Once the glue has dried and the frame is secure on the plywood, place a photo of desired size inside of the frame and mark just outside the left and right edges of the photo. Lightly tap a nail into these holes to serve as guides for your furniture tacks.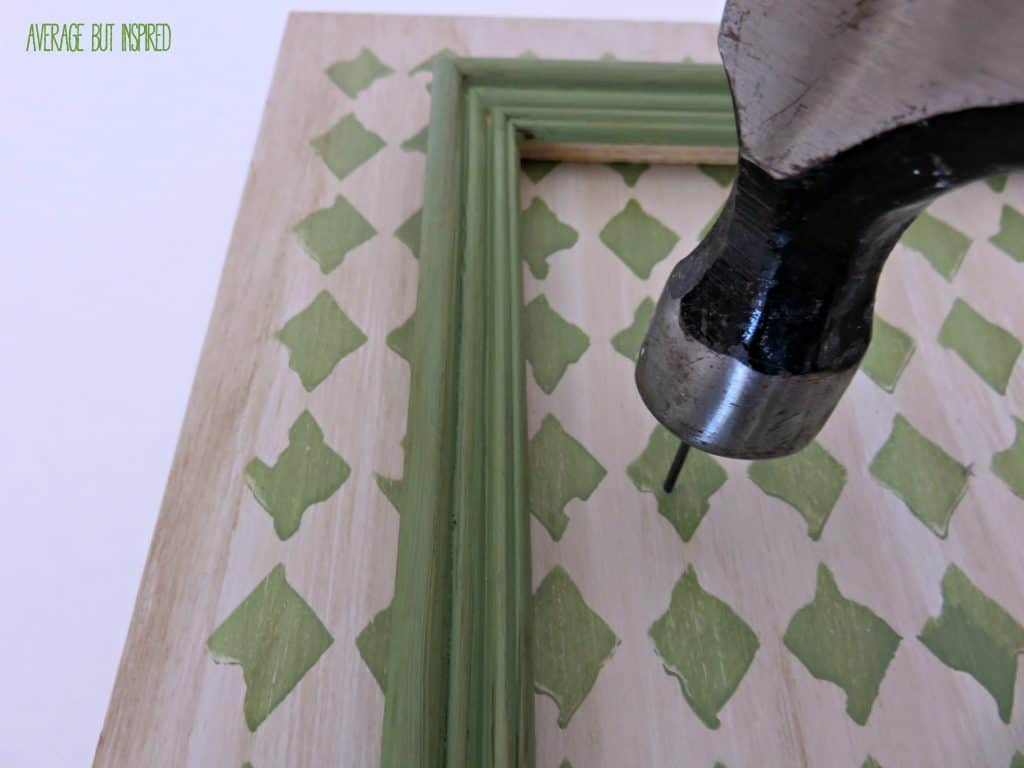
Now, put your furniture tacks into the holes and lightly hammer them into place. Insert your photo by placing the left side of the photo under the left furniture tack, and then sliding the right side of the photo under the right tack. 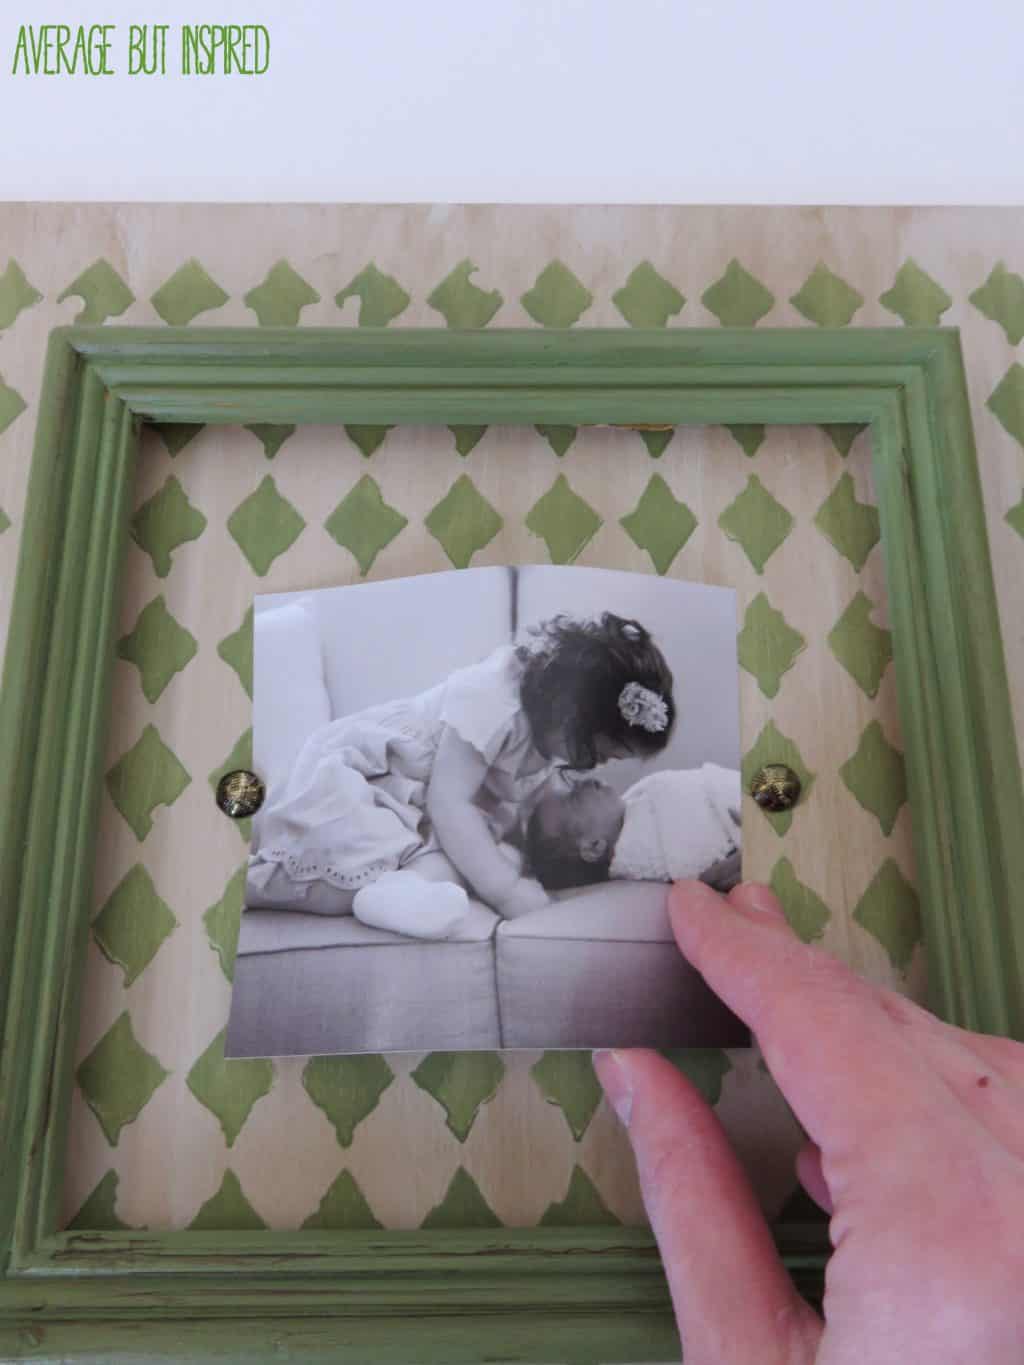
And that’s it! No more 1980’s seahorse art. (Yay!) Instead, you have a custom frame that looks like it came from a high-end boutique. 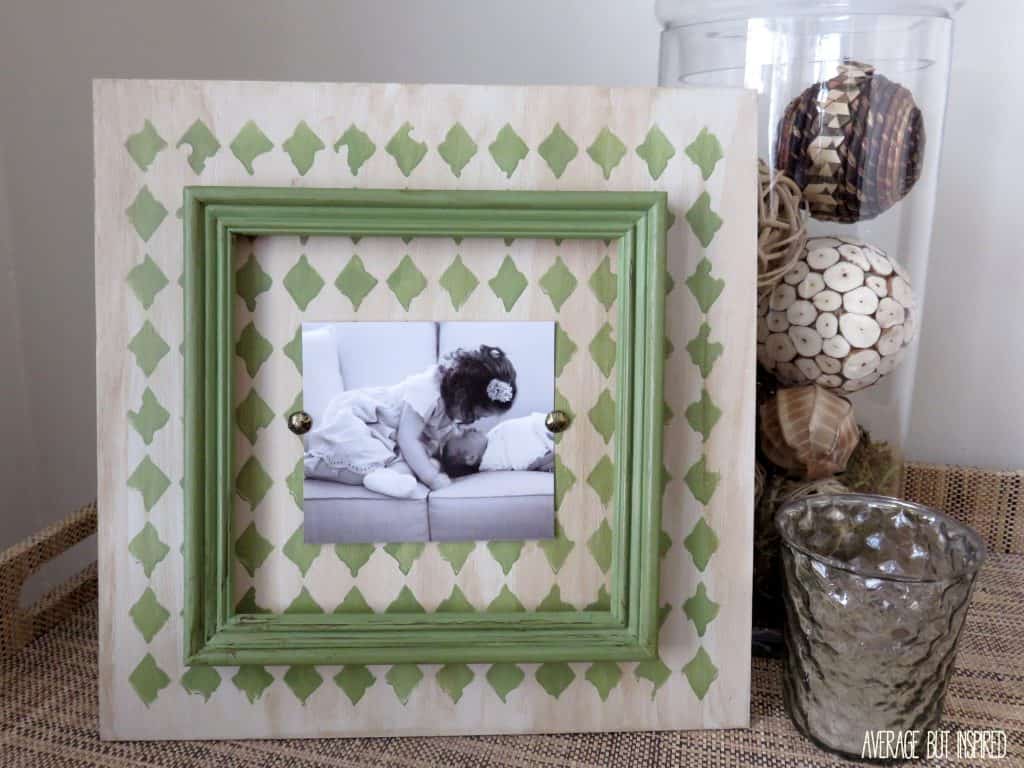
– Bre
To see where I may be sharing this post, please click here.
Sarah @ Little Red Brick House says
Oh my goodness, this is so adorable, Bre! I love the stenciled background. So cute!
Bre says
Thanks, girl! 🙂 xo
Katie @ Little House of Four says
I love that you added the frame on top another piece of wood, such a great idea!
Bre says
Thank you, Katie! I foresee another pallet project in your future! 🙂
Erica says
Oh my goodness, what a gorgeous frame!! It really does look like it came from a fancy boutique! That green is perfect and that picture is just the sweetest!
Bre says
Thanks so much, Erica! I’ve seen those layered frames in cute boutiques all over so I knew I had to make my own! 🙂 Hope you’re having a great holiday weekend.
Breanna says
Bre this is the cutest!!!
Bre says
Aw, thanks, Bre! Hope you’re having an amazing holiday weekend.
Kristi says
SUCH a cute idea Bre! LOVE it!
Bre says
Thank you, Kristi! xo