Whether you’re a sewing fanatic or a run-of-the-mill crafter, chances are you have some scrap fabric lying around.
And, chances are also that you’re in need of scrap fabric project ideas to help pare down that fabric stash.
I’ve got you! Why not make a braided fabric sign? It’s a great scrap fabric project that you can customize to fit your taste and needs.
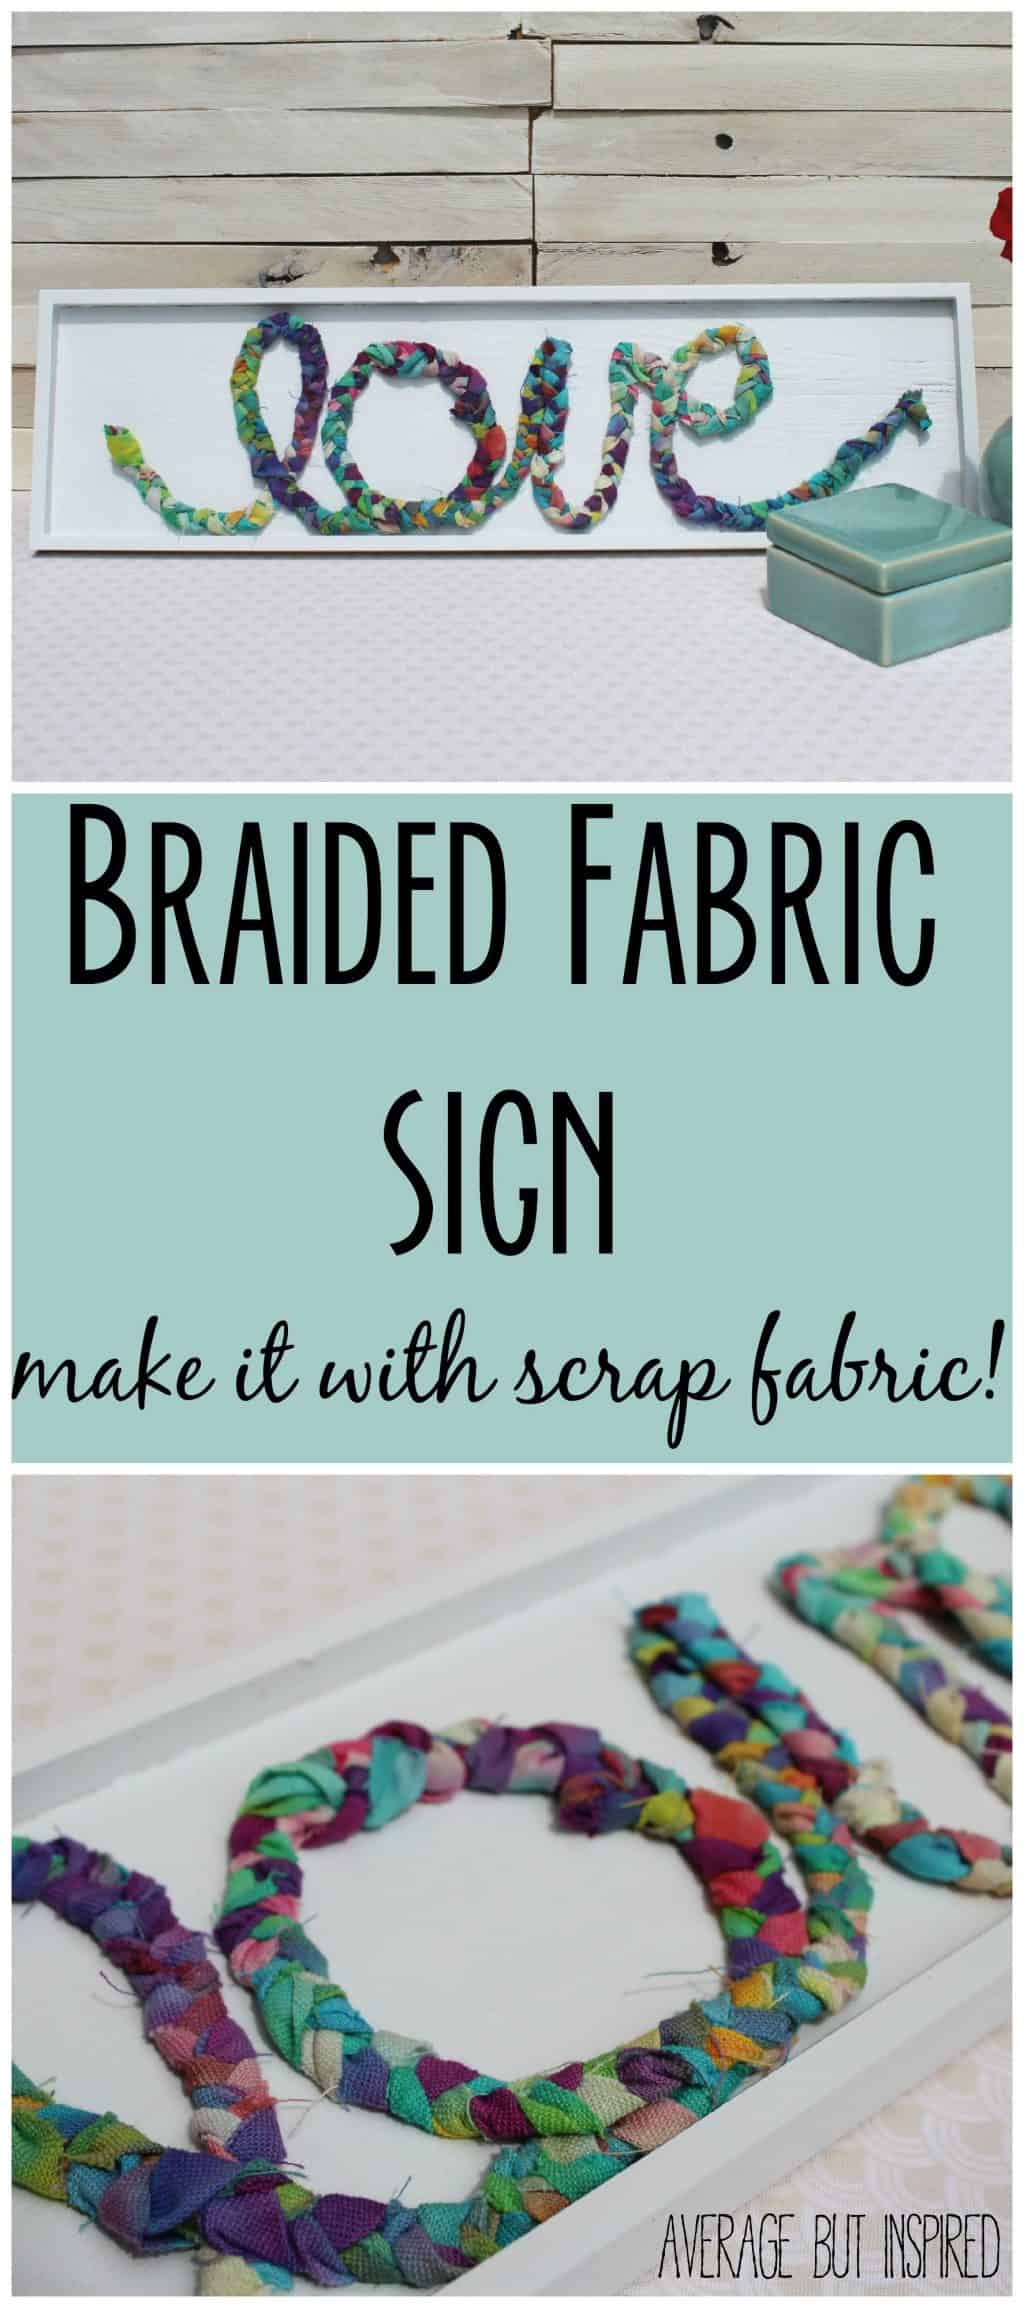
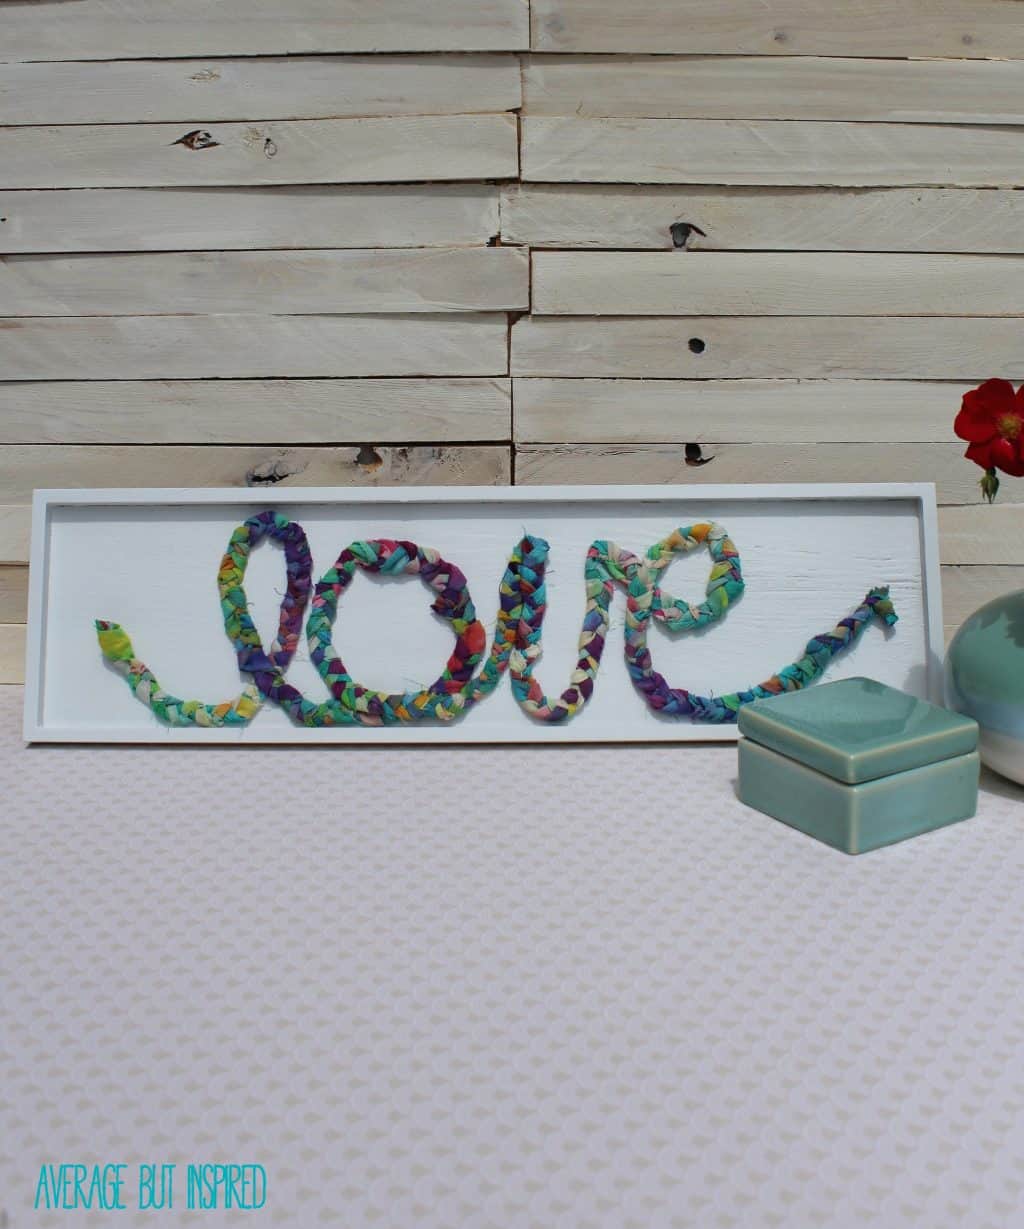
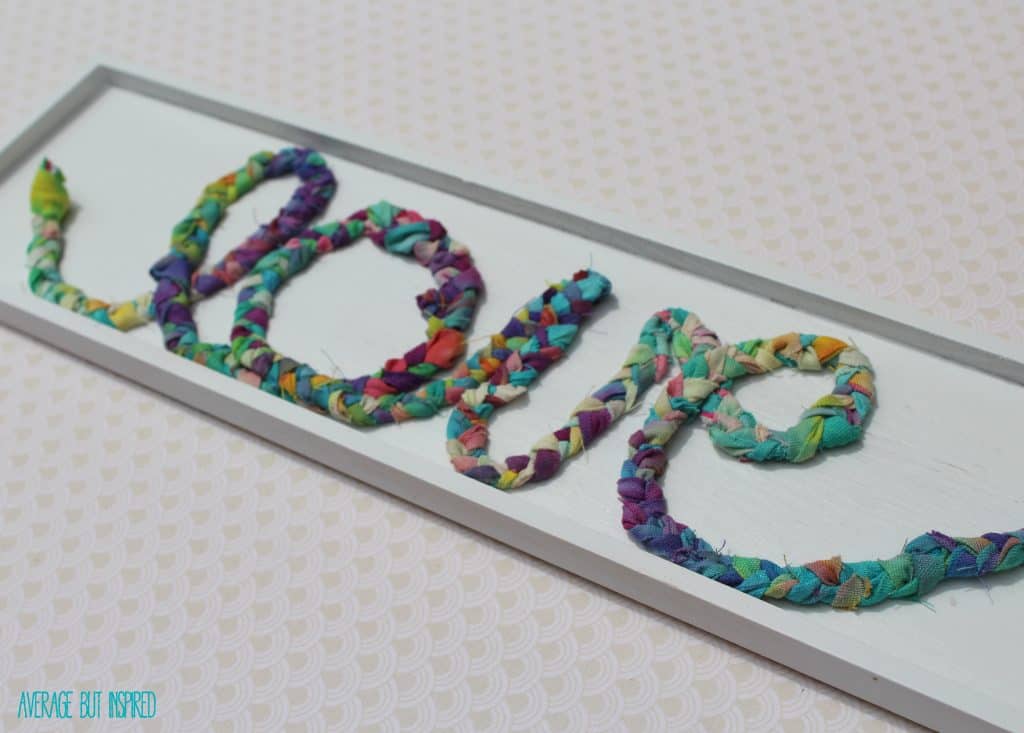
I created this adorable braided fabric scrap sign with some leftover fabric that my kids tie-dyed a few weeks ago.
This cute braided fabric scrap sign is already hanging in a gallery wall in my basement. It is the perfect addition to the wall, and I love that it brings some texture and dimension to the arrangement!
Scrap Fabric Project Supplies
This post contains affiliate links. Please read my disclosure policy for more information.
- Unfinished wood sign
- White acrylic paint
- Approximately 1/3 yard of fabric
- Glue that bonds fabric and wood
- Fabric scissors
- Pencil
Instructions to Make a DIY Fabric Scrap Sign
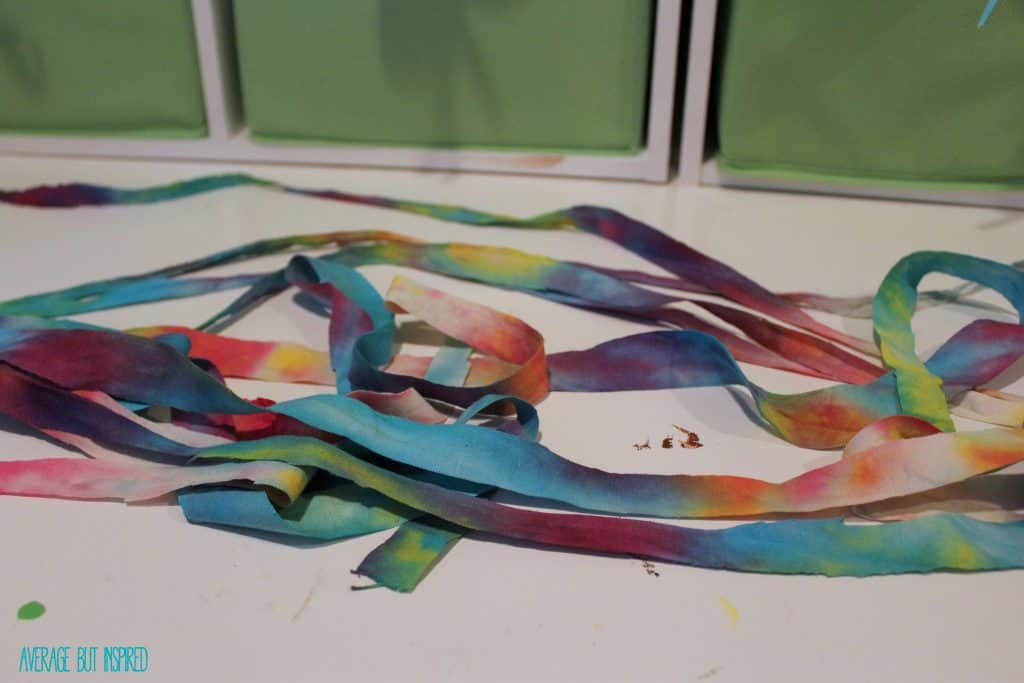
So first off, you’ve got to find some scrap fabric. If you want a colorful, tie-dyed look like I have, then I recommend you find yourself some kids to do the dirty work for you.

Luckily, I had two that were more than willing to dye my plain, linen fabric after they’d finished making themselves some t-shirts. Notice that in addition to dyeing the fabric, they dyed their skin. Super.
Once you’ve selected the fabric, cut a big pile of fabric strips that are pretty darn long.
And then (shocker), braid them. Yep, tie a knot at one end, braid them, and then tie a knot at the other end.
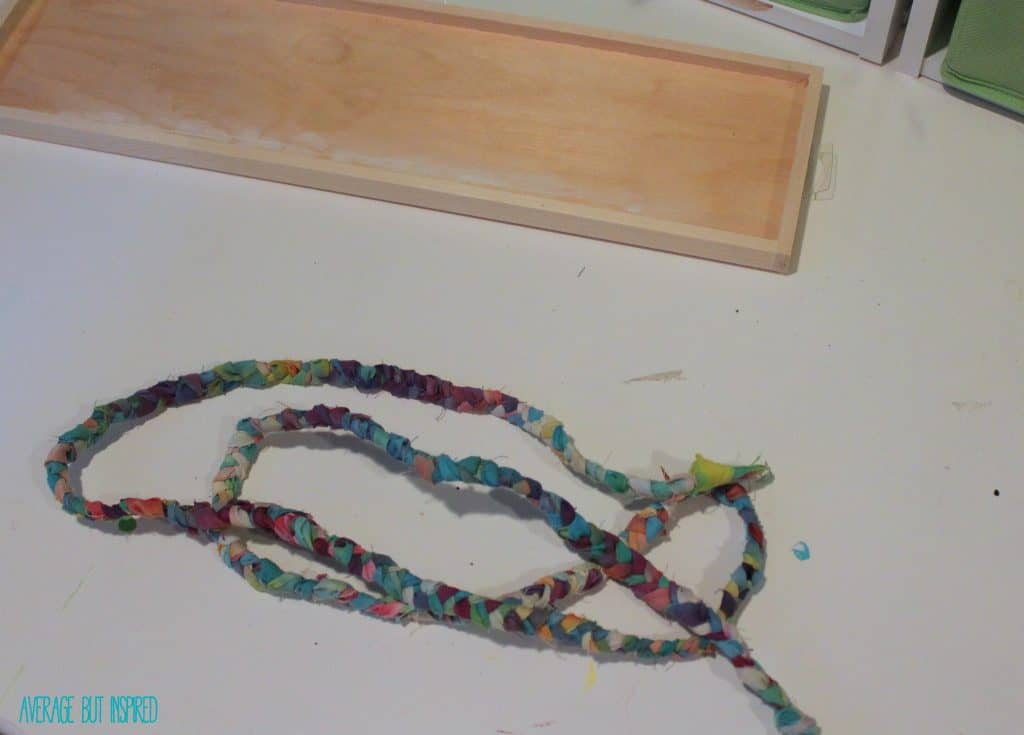
Once you’ve got the fabric part of this project together, spray paint (or brush paint), your unfinished wood sign however you like!

Once the paint has fully dried, lightly write out the word you want on your sign. I tried to photograph this, but my writing was so light you couldn’t even see it.
Then, work in small segments and lightly cover your written letters with a thin, even coat of glue. Press the braided fabric down onto the glue as you go.
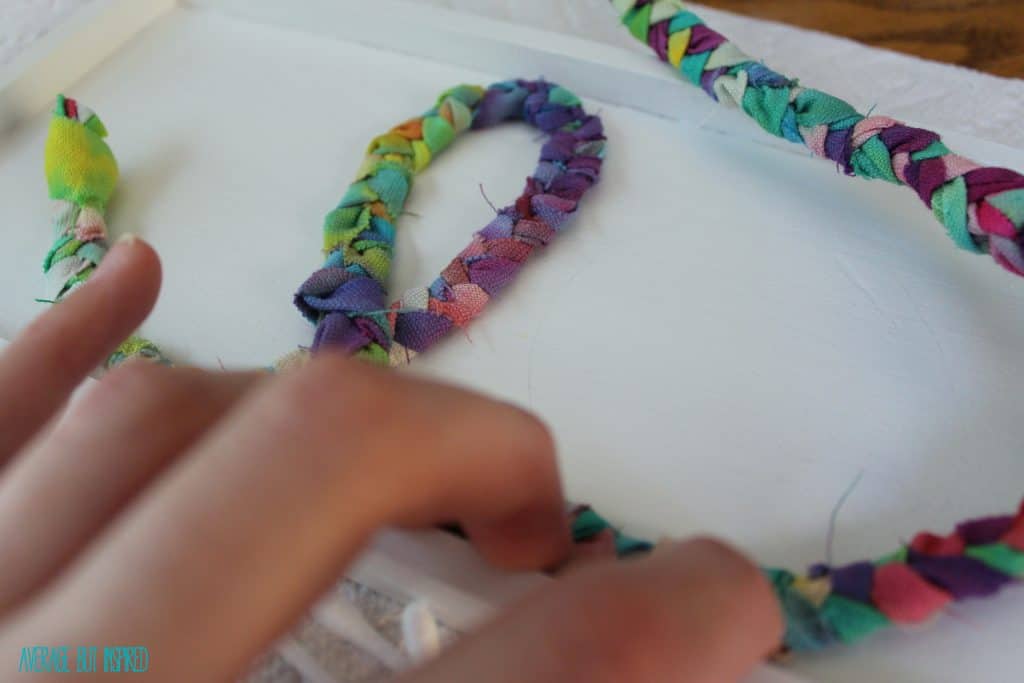
To help keep the letters in place and attach them to the wood board, use small, heavy objects. These full food cans worked perfectly for me!

If you end up with braided fabric that is too long for your sign, just untie the knot at the end, tie a new knot, and cut off the excess fabric. Easy!

Make sure to let the glue thoroughly dry before hanging. You don’t want the letters falling off!
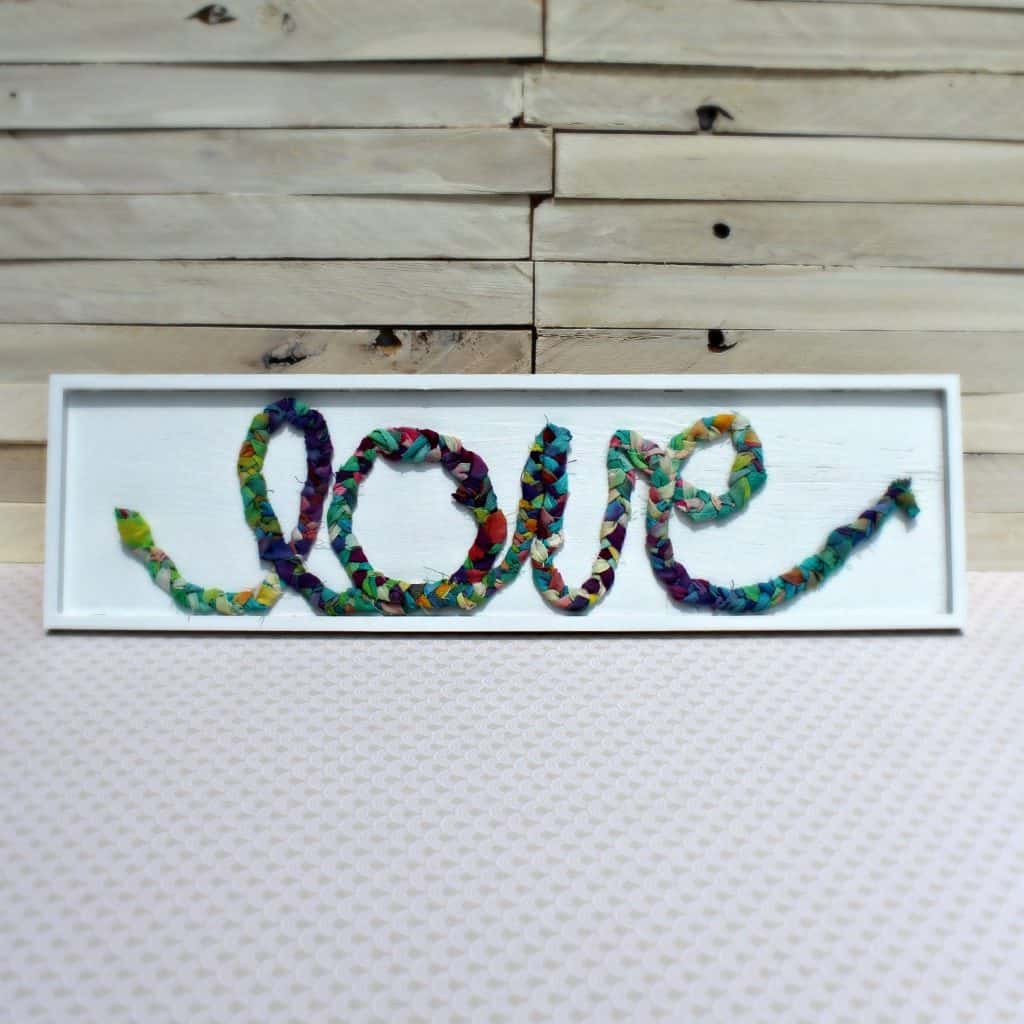
This project is really pretty and a perfect way to use up any scrap fabric that you have lying around.
Margaret says
Hi, I realize this question is years after the original post…. but how do you get such long braids? I’m assuming you join some strips, but how? Thanks.
Your sign looks cute and professional. 🙂
Bre says
Hi, Margaret – thank you! I just knotted the ends of fabric together. When I braided them you couldn’t even see the tied off ends. Hope that helps!
Teresa Pulleyn says
Thanks, Bre. This is the first time I have been to your blog but I will certainly be back. I understand the need for advertising but some site have so much of it I almost dread opening the e-mail I get because of what I will have to weed through to get to the desired info. Yours is perfect ! Thank you for being considerate of my interest (or lack there of) and keeping the needed adverts in their place. Like I said at the beginning, i will be back. Thanks!!
Teresa P.
Bre says
Hi, Teresa – well isn’t this the sweetest note?!? Thank you SO much! I genuinely appreciate that you took the time to leave me this feedback. Thanks so much for stopping by. I hope you have a great rest of your day!
Cindy says
Love this idea I just inherited a box of scraps. Have you done other words? I want to try my grandson name so was curious
Bre says
Hi, Cindy! I haven’t done other words, but I am SURE it would work absolutely fine! I think the key is to set something heavy on top of the fabric while its drying onto the board (and to make sure you’ve used really great glue). I hope your project turns out amazing!!
Kim~madeinaday says
Such a pretty pic! I love this it is so unique. I love the kids did the dying, I would of not had the patience, lol. They did a great job! Thank you so much for sharing this pin on the P3 party Board! We loved your pin and it will be featured this Friday on Made in a Day! So expect a little traffic from me on Social Media tomorrow.
Kim
Bre says
Aw, thank you, Kim!! 🙂 As soon as I started letting the kids do tie-dye, I regretted it. 😉 My daughter’s knees were stained for days. I really appreciate the feature! Hope you had a great weekend.
Erica @ Dwell Beautiful says
Whaaaaatttt this is SO. CUTE! I just love the tie-dye and how it looks braided together. Absolutely brilliant! <3
Bre says
Thanks, Erica!
Sarah @ Little Red Brick House says
Oh my goodness, Bre! So, so cute and original! I love that the kiddos got involved too. This has my wheels turning for my little guy’s room makeover.
Bre says
Oh fun, Sarah! Is he getting a tween bedroom makeover? I bet he’s excited.
Breanna says
Aw how cute is this! Love that the kiddos helped out. Such a fun project for them!
Bre says
Thank you, Bre!
Erin says
Holy! This is freaking adorable! I really want to do this in my office now. Great work and cute helpers:-)
Bre says
Thanks, Erin!
Ashley ~ 3 Little Greenwoods says
I L-O-V-E this artwork! And I’ve got an old, thrift store frame that will be perfect for this project!
Bre says
Hahaha, thanks, Ashley! And awesome – I hope you love it, if you make it! xo
Kristi says
Oh my goodness! I absolutely LOVE this! SUCH a fun idea and the kids must have had a blast helping out!!!
Bre says
hahaha, Thanks girl! Yes, they had fun getting SUPER messy to help out! 🙂
Seana Turner says
My grandmother used to make rag rugs, although I think she used genuine rags instead of these colorful scraps. Your children are ADORABLE! I love this idea, so cute. Would be nice for a dorm room.
Bre says
Oh, Seana, that is so sweet about your Grandma! I just love hearing about those times when people let nothing go to waste, including old rags. 🙂 Thanks re: the children, and you’re totally right that this would be great in a dorm room!
Nicole B. says
This is such a cute way to use fabric scraps! You totally just gave me some inspiration!!! Also… I am ashamed to say I have a collage wall I’ve been working on for a year too! Oopsy! Where does the time go?!?! 🙂 🙂
Bre says
Thanks, Nicole!! OH goodness, you made me feel better about my gallery wall now. My husband has been giving me SUCH a hard time about its unfinished state (rightfully so, most likely). I really need to get my booty in gear!