This post contains affiliate links. To read my full disclosure policy, please click here.
Last month I tested out spray chalk paint and blogged about my experience with it here. Much to my surprise, a lot of people liked that post (yay!), and wanted to know all about the product. Because of that, I figured that people might also want to know about spray wax and spray topcoat that can be used for finishing projects painted with spray chalk paint or hand painted with chalk paint. So once again, I got to work testing it out and am sharing all the details on spray wax finishing for chalky finish paint projects. 
For those of you who may not be overly familiar with chalky finish paint, wax is a commonly used sealant or topcoat on pieces that have been painted with chalky finish paint. It’s popular because it seeps into the paint to form a protective finish and produces a really beautiful and subtle sheen on the surface.
Wax typically comes in a tub (like this – my usual brand of wax) and is applied with a special wax brush (like this), or sometimes a lint-free rag (though that usually results in an uneven application). It dries to a haze and then must be buffed to get a beautiful shine.
To me, wax didn’t seem like something that can be sprayed. Because of that, I first decided to test out the Krylon Spray Wax on a dud of a project (a painted thrift store tray), in case it wasn’t going to work. Most recently, I tested out the Rustoleum Chalked Protective Topcoat on a stool I painted with Rustoleum Chalked Spray Paint. Although it is not a true wax product, it is a spray topcoat suitable for chalk painted projects. Here are my thoughts on both of these products! 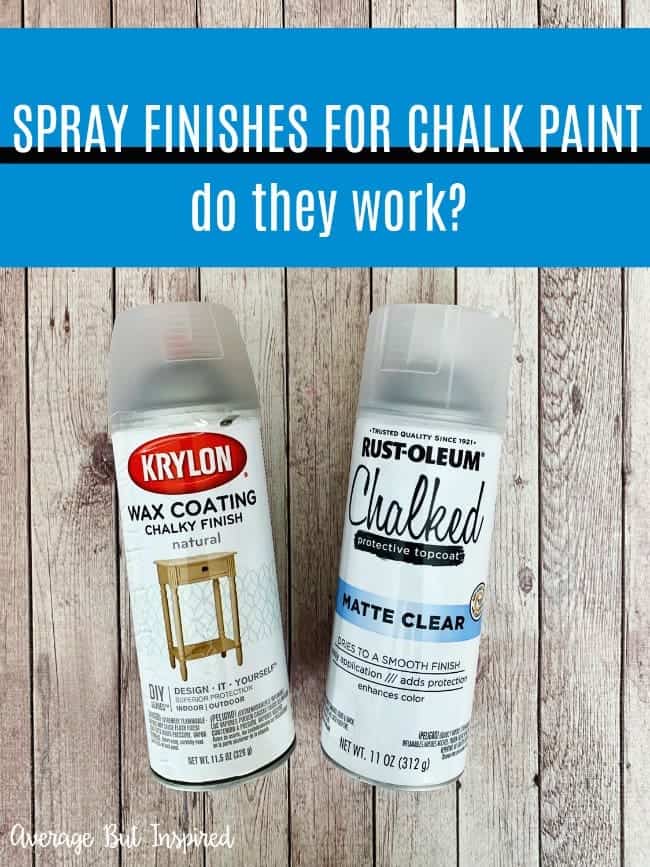
Odor
The wax I usually use STINKS. I’m talking “plug your nose because it smells like you doused your house in gasoline” stinks. And that odor sticks around for a couple of days. (Some other brands of wax like this have virtually no odor.)
Conversely, the Krylon spray wax did not smell nearly as bad. While it DID have an odor, the smell dissipated after a couple of hours as opposed to a couple of days.
The Rustoleum Chalked Protective Topcoat had no real odor.
The bottom line is you will still need a well-ventilated area if you’re going to use spray wax or spray topcoat.
Application
Spray wax and spray protective topcoat could not be easier to apply. It comes out of the can so smoothly and evenly. A bonus of application of spray wax is that you do not need to purchase another supply – the wax brush.
There is definitely some overspray, however, so surrounding areas should be covered. That’s not really an issue with regular wax. If you spray paint regularly, you may want to purchase this awesome pop up spray shelter, which protects your projects from debris flying onto them. I love mine!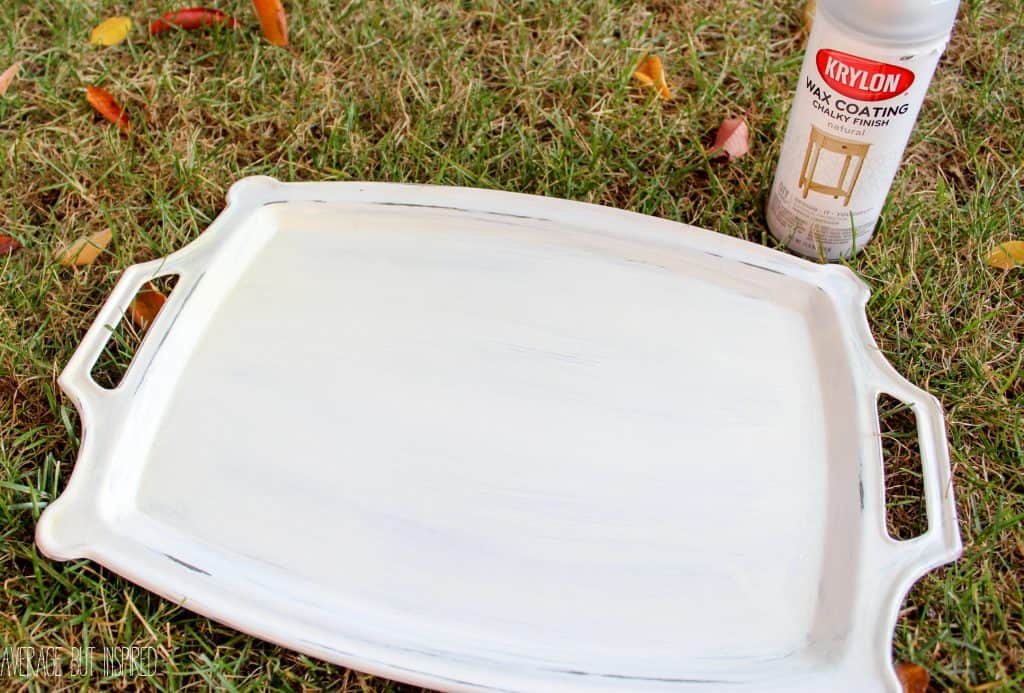
Time
I don’t think that applying wax by brush takes an extraordinarily long amount of time. That being said, spray wax or spray topcoat may take slightly less time to apply. (But any time saved may be negated during the buffing process (if applicable – see below.)
Sheen
Like regular wax, spray wax does have a slight sheen. To me it didn’t seem as rich and velvety as the sheen that’s produced by brush-on wax, but it does give a nice look that’s not achieved with poly products.
I tried to capture the sheen achieved with the Krylon spray wax in this photo. You can kind of see it in the top right corner, but it’s not the best photo. 
The Rustoleum Chalked Topcoat in matte gave a beautiful finish with a hint of sheen – not too dull and not too shiny.
Buffing
All waxes, once dried to a haze, must be buffed to produce a sheen. To me it seemed that buffing spray wax was much more difficult than regular wax. The finish felt stickier than regular wax (once dried), and it took a lot more buffing to remove the excess wax. This could be a huge pain on a larger piece that’s been sprayed. I really did not like this aspect of the spray wax.
Conversely, with the Rustoleum Chalked Topcoat, no buffing was required. The finish dried nice to the touch with no stickiness, and the sheen was beautiful.
Discoloration
Although the Krylon spray wax appeared yellow on parts of the white paint to which I’d applied it, once buffed there was no visible discoloration of the finish. In this photo you can sort of see the yellow I’m talking about (prior to buffing). My experience with regular wax is the same.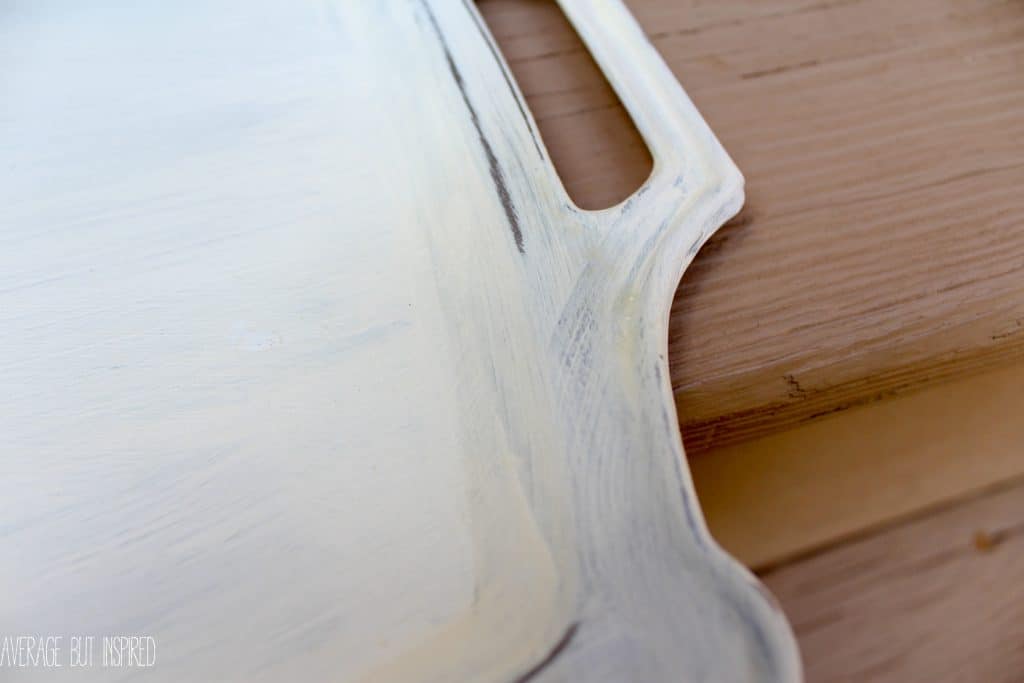
I tested the Rustoleum Spray Protective Topcoat on a blue piece and did not notice any discoloration.
Spray Wax Durability
Wax is never the best finishing choice for pieces that will be getting a lot of use – like a table top. With that being said, spray wax seems to be as durable as regular wax. I tried scratching some of the sealed finish off, and it withstood my attempts.
And similarly, the Rustoleum Chalked Topcoat also seems to be quite durable, though I haven’t used it on a heavy-use piece.
The Bottom Line
So here’s where I ultimately come out on these products:
If you’re not regularly using chalky finish paint and don’t want to invest in a wax brush, spray wax or spray protective topcoat is probably perfect for you. You will be able to get several projects sealed with one can (depending on the size of the projects, of course), and likely be happy with the finished product.
If you’re a chalky finish paint fanatic like me, you’re probably better off using your regular wax. Since you already have the wax brush and maybe even a drill buffer, the cost will be less to continue using your wax and you will get the gorgeous finish you’re accustomed to – even if you’ve painted the piece with the Rustoleum Chalked Paint or the Krylon Chalky Finish Spray Paint.
Have you tried Krylon’s Spray Wax Coating or Rustoleum’s Chalked Protective Topcoat? What do you think of it? Let me know – I love to hear from you!
Bre
Paula Goode says
I have used the Krylon Wax Coating in Natural fr years. It is NOT clear, but it does warm up your pieces color. I can tell that people who comment may not understand the best way to use this product. I also use this to thin the dark brown wax in the same line.
This product produces the smoothest finish ever, but you have to apply it, rub it in, and when it’s dries for a while hit is with fine steel wool. Magic! I redo old furniture and this stuff makes my work a top seller in my local consignment store. It will ‘cure’ and be a very durable surface, and due to the nature of the product (not waterbased) it will have a little ‘tack’ for a short period of time.
Bre says
I had no idea about the steel wool!!!! Thank you so much, Paula!
Lara says
Thank you very much for your reply! I will use the wax paper and glue it to white card stock and punch holes in it and put it in a duotang so she can add more pages and also put a zippered pencil case in it so she can store extra stickers she doesn’t want to put in the album! Thank you for your response and for saving me money! Lara
Bre says
You are SO welcome! Hope your project is going well!
Lara ("Lex") Kinast says
I want to make an old fashioned sticker album where the stickers can be put on and peal off. The old school ones had a wax-like finish. If I was to spray this on cardstock (and then punch the card stock out with a 3-hole puncher and put in a poly duotang with 3 prongs) would that work to make a sticker book where the stickers can be removed, or would it be better just to glue wax paper to the card stock on both sides? Thank you!
Bre says
Hi, Lara! That sounds like such a cool project! As I’m understanding it, this paint definitely will not work for what you’re trying to do. I think you’d be much better off using the wax paper method or finding a coated paper to use! You might find something that will do the trick online. Good luck!
Jenny says
Hi Bre, thanks for the great reviews. Here is my question…I bought a chandelier with glass that looks like candles. I washed 2 and noticed that the paint on the glass started peeling! Oh no! My daughter suggested I paint the glass and think that will save it, but I’m not sure what to use. The unpeeled glass pieces seem chalky and flat finish. Any suggestions?
Bre says
Hi, Jenny! It sounds like chalky paint could definitely work on this! DecoArt actually makes a chalky paint specifically for glass now, too! You can learn more about it here: https://decoart.com/glass-paint/chalky-finish-for-glass You might not get as smooth a finish as you would with a spray chalk paint though. If you need a really smooth look, I’d try the spray chalk paint. Note: I would refinish the entire candle – not just the parts that have peeled – otherwise you’ll probably get an uneven look. Good luck!!
Sami says
Hi Bre!
I found your blog on Pinterest and I must say I love it!! I bought an old planting table a few months ago that was painted a really pretty green color (there were various shades of green, it looked so cool) but I unfortunately the green compltely clashes with my “coastal cottage” apartment decor! So I spray painted it using Krylon ColorMaster Primer in the color “All Purpose Gray”. I have a satin finish top coat that I was thinking about spray painting on top, but I’m not so sure now. I’m re-purposing it into a bar cart for my apartment. It has these really awesome gold ball wheels and a latch on the cabinet beneath the table top is what drew me to the piece in the first place. I’ll be redoing the latch, wheels, and hinges an oil rubbed bronze look.
I’ve never re-purposed anything before so this is a bit exciting and daunting all at the same time. I really like the distressed look and I want to keep the bar cart in the gray color family, but I have no idea what to do next! Is my gray primer okay? Can I spray the chalky paint on top of that and then distress it? Will my gray primer show through? I don’t want to distress all the way down to the green paint (I did 3 layers of the primer). I really like how on your tray you can see color under the white. Is that because of application or did you distress that? Did you use regular chalk paint or chalky spray paint? It’s a medium sized piece, so I’m not sure if I should paint or spray paint it. I don’t mind investing in quality supplies.
Oh, also, I’m not sure if I should finish it with a wax or if I should use a poly coat. It’s going to be mostly decorative but if I do feel like pouring drinks at it, I want to be able to quickly wipe up any spills with no damage to the piece. What do you suggest?
Sorry this comment is a million words long! Thank you for any help, suggestions, or tips that you can give me!
Bre says
Hi, Sami! This sounds like such a fun project!!!! Just dive right in. Even if you make a “mistake,” it’s just paint and you can fix it!
Since you’ve already primed with a gray primer, I would pick a darker or lighter shade of paint to topcoat with, if you’re wanting to distress it in places. It’s good to have some contrast in the underneath layer when you’re distressing. For my tray that you mentioned, I did distress it and that’s why you can see some color underneath. I used the spray on that piece. If your cart is on the larger size, I would definitely recommend painting by hand. The spray chalk paint is $$$ and you definitely don’t get a lot out of one can.
As for topcoat, since you’re going to use it for drinks, I would at the very least do a polyacrylic on the top. You could do wax on the legs if you prefer (I like wax better because I think it’s easier to get a flawless finish), or you could poly all over so you’re not buying two finishing products!
Anyway, the key is to experiment. You will get it right and it will be awesome! Good luck and let me know how it turns out!!
Margot says
Hi! In the article, you mentioned wax isn’t the best finish for pieces that will get a lot of use. I’m just getting started with chalk paint and am wondering what you’d recommend to finish pieces that you’d use a lot? Thanks for your help!
Bre says
Hi, Margot! When I’m refinishing a table top, for example, I use a water based sealer like polyacrylic. It is harder than wax and usually holds up a bit better for surfaces that are used a lot! I will still do the legs and other parts of the table with wax, just because I like it better and think it’s easier to apply. I hope that helps!
Annette Paukovitz says
I do a lot of chalk painting and have finished with wax and polycrylic. I can’t understand why anyone would choose waxing over polycrylic. Waxing can yellow white paint, a good polycrylic won’t, waxing has to be reapplied every 6 months or so, polycrylic or polyurethane never needs to be reapplied, and the poly products are so much more durable than wax, you shouldn’t wax but should poly a table top that will be used. Poly is so easy to apply over chalk paint, you can control how even the application is, and no buffing afterwards. Plus you have a choice of sheens depending on the effect you want.
Bre says
Hi, Annette! Thanks for sharing your thoughts! I actually really dislike poly! I ALWAYS have a hard time applying it, and on more than one occasion it has yellowed the paint! I have found that SC Johnson’s paste wax works amazing on furniture! I have tables that I haven’t rewaxed ever! (And they’ve been in high use for at least three years.) For table tops I like to do a varnish and then top it with wax. I think it’s great how everyone has their own preferences!
Samantha says
Hi! I’ve just found your blog and I currently have some dining room chairs drying with the Krylon Chalky Finish spray paint in white. I hadn’t even thought about sealing them! I’m not the best hand painter (which is why I love spray paint) but I do have 3 small kids running around… should I finish the chairs with wax or polycrilic? Thanks for your help- I’m new and confused! 🙂
Bre says
Hi, Samantha! Aaaah I’m so glad you asked about this!! Since they’re chairs, I think you should DEFINITELY seal them (unless you’re OK with a super chippy look, which is sure to happen over time if not sealed)! Those will get a lot of wear and the paint will chip off much more easily if they’re not sealed. If you painted them white, I’d stick with spray wax, as poly can yellow the white color (even the water-based polyacrylic). If they’re darker, you might prefer poly spray as it is more durable (I think) than spray wax. Spray wax will work, however! I just used the Rustoleum Chalked spray wax and actually liked it better than the Krylon spray wax, so you might want to try that instead. It sprayed much easier and was not sticky the way the Krylon spray wax was. OK hope that helps! Good luck with your project!! I love giving old things new life with paint! -Bre
Samantha says
Thanks so much for getting back to me so quickly! I have another, probably ridiculous, question! I only have a Lowe’s in my area and they don’t carry the Rustoleum Chalked Spray Wax, but they do have Rust-Oleum Painter’s Touch Ultra Cover Matte Clear Spray Paint – I’m sure they are different since one is a paint and one’s a wax… But do you think the paint would be somewhat protective? Or would it do what poly sprays do with the yellowing, or damage the original chalk spray paint? I’m super excited about this project but now have decision paralysis. Thanks again for your help! 🙂
Bre says
Hi, Samantha! Ugh, unfortunately I can’t answer your question. I think your best bet would be to email Rustoleum’s customer support team and ask – they will DEFINITELY know! I would hate to steer you in the wrong direction. Best of luck!!!
Samantha says
Thanks for getting back to me! After reading more of your blog (love it by the way!) I’m thinking I might just get a HomeRight hvlp sprayer (I have 8 chairs to do and had only painted 2 before getting distracted by reupholstering all the cushions first – whoops) since we want to do other projects like doors, kitchen cabinets, and pretty much anything else that’s not nailed down…I seriously have a paint problem! Your post about painting your radiators is what got me thinking about doing that!
Bre says
Samantha I have a paint problem, too! HAHAHA!! You will LOVE that sprayer – seriously – it makes everything go so much faster!! And, the sprayer plus paint is much cheaper over the lifetime of projects than buying individual cans of paint! Good luck!! 🙂
Angela says
I just bought the krylon slate grey at Michaels. We used it on terra coast pots & it was really easy for my daughter to decorate with bright craft paint on top. I have older dressers of my mother in laws that are laminate wood looking. I was thinking of making the tops of each dresser & nightstand grey (perhaps that chalk spray paint?) and make my own white chalk paint w the plaster of Paris, paint & water mix on the rest of the body of the dressers. Has anyone done anything like this? I need them durable bc I bang around a lot & have lots of beauty products on top of the furniture. Should I use the wax top coat or something more durable?
Bre says
Hi, Angela! For the dressers I would totally go chalk paint, but the paintable kind – not the spray paint. You will go through so many cans of that so fast. It will be much more economical to use paintable chalk paint. My very first chalk paint makeover was with a homemade chalk paint. I sealed the table with SC Johnson Paste Wax and it has held up absolutely perfectly! It’s a high use table in my entryway and I have no complaints. You’ve got this! Good luck!
Shannon A says
I love chalk paint but have yet to try the sprayable type. I have about 16 fabric storage cubes that I want to change the color of. (The kind that come with units like the IKEA expedition/Kallex wood,cube storage systems). The fabric on the bins is like a thin, canvas kind of material (backed with cardboard). Do you think spray chalk paint would work for this project? If so how would you recommend sealing it?
Bre says
Hi, Shannon! YES – I think this paint would definitely work on the fabric cubes, and no, you don’t need to seal it. There is also fabric spray paint, but it’s not as pretty. 🙂 Also, sorry for the delayed response – I am having problems with my comment system!
courtnee says
I just discovered your blog through Pinterest! I just read your review of this and chalk paint spray. Both were great! Thanks for taking the time to do them. I have an old brass trunk that was headed for the trash. I think I’m going to try it out on that and see how it works. If I mess it up it’s not a big loss but if it looks good, I’ll have a new coffee table for budget living room spruce up!
Bre says
Hi, Courtnee! That’s awesome! I really hope it turns out well for you. I’m sure it will, and then you will be so happy with your trunk’s new look!! Good luck!
Gina says
Hi! Im very new to refinishing! I am a very crafty person but painting is not my forte. I purchased an old wooden toy box bench to refinish white for my first niece due this October! I bought a white chalk paint because I heard it required minimal prep. So I plan to use it but it never occurred to me that I would even have to seal it…. I really don’t want to mess it up but I think the simplest route will be best for me paint wise. I wonder if I could use the spray wax? It’s not a huge piece just the size of an average toy chest. The buffing is making me nervous. What do I even buy to buff it? Is it a big buffing block or something? I’m clueless at refinishing but would love to learn! Thank for any tips!
Bre says
Hi, Gina! Congrats on the upcoming arrival in your family. So exciting!!! You can totally refinish the toy box. Chalk painting is the easiest, I promise! As for a sealer for the toy box, I highly recommend it because it will get a lot of use and toys will be banging on it a lot. You don’t want your finish to chip off! You could definitely try the spray wax, but in all honesty I don’t really love it. I think a brush on wax would be easier, if that’s the route you want to take. You just use a thick stencil-type brush, and then buff it to a shine with a lint-free cloth. It’s super easy! Alternatively, you could use a topcoat like polyacrylic, which will be even more durable than a wax. That is something you brush on, and any can you purchase would have directions on how to apply it. Good luck with your project and fee free to email me if you need help! averagebutinspired@gmail.com
Donna says
Hi, I came across this product and wondered if you know anything about it.. I am one of those people who has difficulty with holding a paintbrush and I find wax especially difficult to apply and buff. This product it says needs NO buffing! And it comes in colors! I think I would be nervous using it to age an item ( A dark wax) since it seems to me spray would be more difficult to control for that purpose. http://heirloomtraditionspaint.mybigcommerce.com/heirloom-traditions-wax-dark-umber-soft-or-spray/#PhotoSwipe1468614698839
Bre says
Hi, Donna! I have not seen that product! I definitely looks very cool! I totally agree that I’d be nervous to use it to give an aged look – I wonder how you could properly control the spray?!? Just so you know, since I wrote the review of the Krylon Spray Wax, I have used it to seal an entire table. I tried to follow the directions and buff it after spraying, but it totally did not work. It still hardened and gave a decent-looking finish, however, so I think it worked – minus the buffing. So it may be worth a try for you! Good luck!
Leslie says
So glad to find your blog. I’m just starting my very first chalk paint project I’m doing a large brass chandelier and using the spray Krylon paint. Just spray-painted it in a soft gray and about to start spraying with the dark wax! Exiciting. The chalk paint went on beautifully!!
Bre says
YAY! That sounds like a PERFECT project for this product!! I hope it turned out amazing. How did you like the spray dark wax? I still haven’t tried it but an curious. 🙂
Carol says
I had been debating whether to try it or not. So thank you for your time. It’s good to know if I buy it, it’s not wasted money
Bre says
Yes, definitely!!! I am glad this post was helpful to you. I hope that if you buy a can, your project turns out amazing. Thanks for stopping by, Carol!
Nicole says
I recently discovered the chalky finish spray paint. I didn’t know you had to seal it afterwards. I did notice that after it dried it rubbed off onto my fingers. Is that common? Do you have to deal it with the wax no matter what?
Lori says
Nicole, I just finished a kids table with the chalky paint and am experiencing the same issue! I didn’t realize it would rub off after it dries! I’d love to know too. Thank you for asking your question. Can’t wait to hear the answer. Lol.
Bre says
Hi, Lori! Like I just said to Nicole, that is so strange! Did you seal your table? If you did not, you definitely should, especially on a high use item like a kids’ table. A polycrylic would be best (as opposed to wax or spray wax), because that will provide a more durable finish for a high traffic piece. Chalky paint is meant to be easily distressed, so if you’re seeing some paint removal that could be normal in the absence of a top coat or sealer. If it’s just rubbing right off when you touch it, it’s possible that the table had something on it that’s preventing the paint from sticking. Just my guesses though!
Bre says
Hi, Nicole! That is very strange! I did not experience that with the cans I have used. Did the product come off completely – like there was nothing left on the item you spray painted? It could be that the item you sprayed had something on it that prevented the paint from sticking. But regardless, sealing is always a good idea, in my opinion, because it does help it adhere better (whether it’s spray chalky paint or brush on).
Tonya says
Thank you. Very helpful.
I’m working on my first chalk paint project.
Bre says
Awesome! I’m glad you found it helpful. Thank you so much for stopping by! Good luck with your project. I hope it goes well and that you become a furniture painting addict! 🙂
Jae says
I have never heard of any of this before! I accidently came across your blog on Pinterest. I read both your chalky paint and wax review. Chalky paint is just descibing how it appears, it is not the same as that chalkboard paint you can write on, correct? This paint is exactly what I needed for the look I am going for on a project but had no idea it existed! Side note, do you think it would be a good idea/look good if I used white chalky paint on cheap plastic black picture frames? Thanks!
Bre says
Hi, Jae! Hooray!! I am so happy this was helpful to you! Thanks so much for reading my posts and leaving such a nice note! So I absolutely think the chalky spray paint will be perfect for cheap plastic frames. They will look so different!!! And yes, you’re totally right that chalky paint describes how it appears (and actually also what it is comprised of; it typically contains calcium carbonate, which makes up chalk!), and that it is not the same thing as chalkboard paint that you can write on. It produces an ultra matte finish, though if you seal it you can add some shine (depending on the sheen of the finish you select). Good luck with your project and I hope it turns out amazing for you! 🙂
April says
Hello your work is beautiful. My question is chaulk paint really necessary ? Couldn’t you just use flat paint to achieve the same look and it’s less expensive?
Bre says
Hi, April – thank you for your note! So you’re right that flat paint may give you the same look as chalky paint. The reason I LOVE chalky paint, however, is that it is virtually prep free. Unlike with latex paint, there is no priming needed, and most times you don’t need to sand before painting either! It also has much better coverage than latex paint. So that is why I love it SO MUCH!! Instant gratification. 🙂 Hope that helps!
Jill Anderson says
Thanks for the review. Just a little heads up for you. I love the Annie Sloane wax. It’s a bit more expensive, but there is little to no odor and a little goes a long way! Give it a try!
Bre says
Thank you SO much, Jill! I have heard that the Annie Sloan wax is virtually odorless. When I run out of my paste wax I think that will be my next wax purchase! The Americana Decor wax is also almost odor free. The consistency is much runnier than the paste wax though, which I’m not sure how I feel about. Anyway, thank you again for the tip!
Kate says
Thanks so much for this post! I have some vintage owl wall art my mother gave me that I want to refinish in probably an off white. There are many little crevices. The spray chalk paint and wax seem like the perfect products to use for this project.
Bre says
Hi, Kate! I am so glad this post helped you! It sounds like this product will be perfect for your owl wall art! I love that you can make it your own while keeping it in the family. 🙂 Best of luck!
Michelle says
I LOVE this spray wax and use it almost exclusively(the dark wax too) for all of my projects!
Bre says
Hi, Michelle! Awesome! I am curious about how the dark wax works! Since I always apply dark Briwax sparingly with a cloth, I can’t fathom how the dark wax would work. I think I need to test it out! 🙂
Michelle says
Hi Bre. I spray the wax on and then wipe it off like you would a stain. I like the antiqued/aged look on most of my pieces so this works well for me. If you apply a second coat or more though it does tend to pull the darkness off(which sometimes is a good thing :D) but if you keep wiping with your rag the residual left on the rag will still allow the darker wax to be applied. It’s kind of hard to explain.
It also will dull down the brightness of colors somewhat to give that aging look. So if you want your colors to stay vibrant you would want to use the natural wax since it doesn’t add any color. It will really set the color tones.
What I also like about it is sometimes I may not have the exact shade of a color I am wanting(particularly red) but the dark wax will usually help give me the tones I want.
It’s wonderful product for me.
Bre says
This is so good to know! Thank you so much for sharing your experience and tips with me! I really appreciate it and am looking forward to trying out the dark spray wax soon. Thanks again!
terri says
Love your articles, well written and informative. When you are talking about using wax , are you meaning paste wax that comes in a can? I use it often, my son introduced me to it from his high school woodworking teacher. I am not familiar with what kind of brush you use…but it sounds much better than a cloth!!!!! I am also wondering about chalk paint….mainly why you use it often. What is the difference between finishes of regular spray paint or acrilyic …..thanks so much !!
Bre says
Hi, Terri! Oh thank you for this kind comment! So first off, yes I am talking about paste wax. I totally love the stuff and it sounds like you’re a fan, too! And if you use it often you will definitely want to get a brush to apply it. It is SO much easier than using a cloth for application!!! Here is a link to one so you can see what I mean (it’s an affiliate link, which means I earn a small commission if you purchase it). As for why I use chalk paint so much, it’s because of the ease of use. There is virtually NO prep work involved! Minimal if no sanding, quick dry time, very low odor, and it adheres to almost any surface. It’s so awesome! It’s a super matte finish, unlike regular spray paint or acrylic paint. In my opinion, it is the best! 🙂
Karen BN says
I really like Briwax paste wax for wood projects because it comes in several colours as well as clear so you can subtly darken a piece that you are working on if you want.. However, I have found that over the years, the wax has to be applied as it tends to disappear after a while, leaving the surface looking dull and lifeless. For permanence and a lovely glow that can be satin or shiny, I love wipe on poly. It is permanent and it seals well. Often I mix the shiny and satin to get a look that isn’t too much one or the other.
Bre says
Karen these are such great tips! I also love the wipe on poly, especially for my stained pieces, but I have never mixed the gloss and satin finishes – that is a really awesome idea! Thank you!
Lane says
Your ideas are great.
Bre says
Well thank you, Lane! I think you’re great – thanks for stopping by and leaving a nice comment. Happy holidays!
Denise says
This sounds like a fantastic option for small things! I have been leery of trying the spray chalk paint. I think I might have to give both a try. Thanks for the review!
Bre says
Hi, Denise! Yes, it truly is wonderful for small objects! I hope you love using it, as well as the spray chalk paint. Thanks so much for stopping by and leaving a comment!
michelle james says
I love chalky finish paint and wax. I have purchased the spray on both and am planning to use it on a metal office type storage piece. It has about 4 drawers. Do you think the brush on wax would be better? I thought it would be perfect for the metal. I am hoping I was right. I loved your review!
Bre says
Hi Michelle – thank you!! So I actually think the spray wax would be perfect for a metal filing cabinet because it will leave a smoother finish, which is kind of what I would expect on a filing cabinet. I hope it works out amazing for you! I appreciate you stopping by and leaving a note. Have a great day!
Susie says
I love the unbiased review! I use this product regularly for my mason jars and glass that is painted with chalky or acrylic paint. It can be absolutely wonderful or the bad ending to a good jar! Small wood projects are great too, but I find that it soaks up and dries too quickly in bigger wood pieces and the buffing can be grueling and even futile when too dry! On jars, wipe off lightly after spraying entire jar and leave for 10-30 mins in warm area. Cold is bad for wax! Perfect drying time means a minute or so of buffing and all done. The jar feels like velvet! Too long and yellow areas are hard to get rid of, sticky, paint pulls off, etc…. It’s all about a good coating and just right drying time! Thanks for sharing this!
Bre says
Oh, Susie – these are great tips! Thanks so much for taking the time to share your thoughts on this product, too! I will definitely use my leftover spray wax on small projects like you’ve mentioned. I agree that larger projects would be too difficult to use this on. Thanks again!
Jan Scarbrough says
Will the spray wax work on material?
Bre says
Hi, Jan – I don’t think so. You wouldn’t be able to buff it and I’m not sure it would be the best choice because I don’t think it could properly penetrate the fabric to seal in the paint. You’d probably be better off with a mod podge sealer for fabric or a spray sealer that specifically says it works with fabric.
Valerie says
i chalk painted my hutch and had no clue I was suppose to buff it after I waxed it. Now it’s already in my dining room. Is it a bad thing that I didn’t buff it out?
Oooooh man. Hahahaa im still learning. Thank you!
Valerie
Bre says
Hi, Valerie! Oh gosh . . . hmm I don’t know! You might want to try buffing it just to see what happens. If it is totally hardened, apply some fresh wax over it and then wipe it. It might wipe off all the old and new wax and then you can start again. This article looks like it might be helpful: http://www.antiquerestorers.com/Articles/SAL/pastewax.htm. Good luck!!
Julie says
Hi, I just finished painting a dining room table with chalky paint (my first attempt using it) I have not waxed it yet, and am wondering if I have made a mistake painting the table with chalk paint, as the finish seems like it will not clean up well. Is it the wax that makes it more cleanable, or have I made a mistake using chalk paint on a piece that will get so much use? Any advice you have on how I should proceed would be greatly appreciated. I found you above article very helpful, but see now that I need more advice. 🙂 Thanks for your help!!
Julie
Bre says
Hi Julie! Yay! I hope you’re loving how your table is looking! You definitely did not make a mistake in using chalky paint. You’re right that the topcoat is what will make it more cleanable and durable! I would say that you shouldn’t use wax on your table – spray or regular. Because it’s a high-use piece you should use something that will protect it better, like polycrylic (water based product- not to be confused with polyurethane, which will yellow your white finish). General Finishes makes a great high performance topcoat, and I like Spar Varathane products too (a Rustoleum brand). I hope this makes sense. . . Let me know if you need any more help! You can comment or email me at averagebutinspired@gmail.com.
Amy | Canary Street Crafts says
Great review, Bre! I never would have guessed this stuff worked at all, but it sounds like it could be a good option for some projects or for people who have trouble applying wax the traditional way. I know a few people who have trouble applying wax with a brush because of arthritis or other medical conditions and this could be a game changer for them.
Bre says
Amy that is so smart! That never even dawned on me, but you’re totally right that this product would be perfect for people who have trouble with a brush!! You should definitely tell the people you know about this spray wax! Thanks for reading!! xo