Make a pretty DIY indoor herb garden planter box and enjoy your favorite herbs year-round!
The CRAZIEST thing has happened in my household. My kids have become thrift shop lovers – I’m talking “Mama, can we please go to Goodwill today” thrifting junkies. In our house we call it treasure hunting, and I couldn’t be happier that my kids are hopping on the treasure hunting train.
On a recent trip they each scored some cool jewelry boxes (my son calls his a treasure box), and I got some random stuff, including this nasty wooden box.
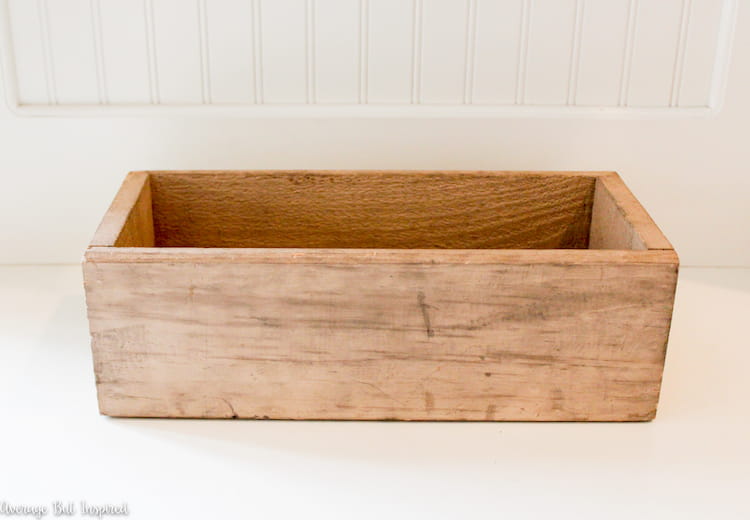
Why did I buy this ugly box? I don’t know. I just did. My kids were buying stuff and I wanted in on the action. So I picked this lame-o thing.
And as the story goes, it sat there on my craft desk for many days until one night the idea popped into my head to turn that beat up wooden box into a cute DIY herb garden for my kitchen.
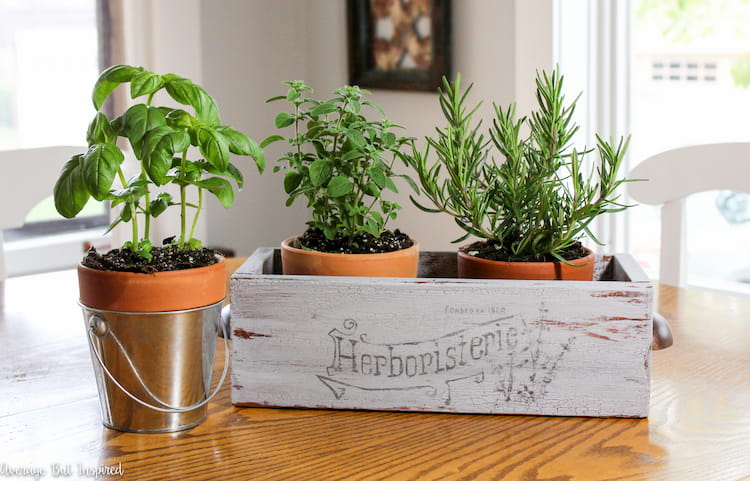
Since we are in the midst of a perpetual winter in Chicago, we’re turning to growing herbs indoors this year. And now, my ugly wooden box is a refreshed and cute mini herb garden!
Supplies Used to Make an Indoor Herb Garden
This post contains affiliate links. Please read my disclosure policy for more information.
- Wood box (if you don’t find one while thrifting, you could purchase this new wood planter box)
- Paint: Rustic Brown chalk paint; Yesteryear (gray) chalk paint; Relic (dark gray) chalk paint
- DecoArt Crackle Medium
- Foam Brushes
- Cup pull drawer pulls
- Drill
- Herboristerie graphic
- Freezer paper
- Herb plants or herb seeds
- Potting soil / potting mix
- Optional: terracotta pots, sandpaper
How to Make an Indoor Herb Garden
Whether you’re starting with a premade box or building your own, these steps will be the same.
Clean the wood box (if needed). Once it’s dry, paint it with brown chalk paint.

Next, I paint on some crackle medium and let it dry. This will give the planter box an especially aged look.
Once the crackle medium is dry, paint on a coat of light gray chalky finish paint.
It is so fun to see the paint finish crackle right before your eyes as it dries. This gave the box a really weathered and old look, which I love!
Next, download this awesome graphic from The Graphics Fairy, and transfer it to the outside of the box using the freezer paper transfer method.
If you’re not familiar with the freezer paper transfer method, it’s a way of getting a printed image (or typography) onto another surface by transferring the ink jet printed image to that surface. It’s very cool, especially if you’re after a handmade or vintage look.
It came out much lighter than I wanted, so I grabbed some of the dark gray chalky finish paint and went over the transferred graphic in certain spots. I used a tiny artist paintbrush and painted right over it in parts.
Once that dried, I lightly sanded the text to give it a weathered look.
Next, add hardware to the sides of the box for a fun look.
Finally, it’s time to add some awesome herbs to grow in your kitchen (or wherever)! Plant them in terracotta pots like I did, or drill drainage holes in the bottom of the planter box and fill it with potting soil to plant them right in the box.
The great thing about this DIY herb planter box is that it can easily be moved. Sometimes I’ll put it in the kitchen window for direct sunlight, and other times I’ll move it to where it’s not as bright light. I’m still learning where herbs grow best in my home, and this planter box is making it easy to experiment.
This was a great project for my kids to watch because they saw me transform one of our thrift shop treasures into something else that’s awesome and that can be used in our home!
They’re also super excited about growing edible plants right in our kitchen!
I really hope this means they’ll want to eat the food I cook that uses the herbs.
If you enjoyed this thrifty upcycle, please pin or share it! And, if you’re looking for other herb garden ideas, check out my outdoor hanging herb garden project!
Samantha says
Love this! I just bought a long wooden box yesterday and was thinking of painting it. Thanks for the inspiration!
Bre says
Thanks, girl! Yes – paint it!! Paint all the things. 😉 Can’t wait to see what you do with yours! xo
Laura / Pet Scribbles says
OMG this is the SWEETEST herb planter ever! I love how you transformed the sad drawer into something so perfect!
Bre says
Hi, Laura! Thank you!! That is so nice of you to say. 🙂 Hope you have a great day!
Kristi says
SUPER cute Bre! I’ve been dying to make my own herb garden, love how this one turned out!
Bre says
Thank you, Kristi! I am surprised how much I’m liking having my little herb garden!
Seana Turner says
You could sell those, Bre. What a nice Mother’s Day gift it would make!! I’m ready for summer out here in CT as well…
Bre says
Aw, thanks, Seana!! 🙂 I guess I will just need to hope that someone donates more of them to Goodwill (or I have to learn how to use the saw and make my own. ;-)).