Next time you go on vacation, make sure to be prepared with a DIY Travel Laundry Bag. It’s the perfect solution for keeping those dirty clothes organized in your suitcase while traveling!
And, I have a feeling you’ll be amazed at how easy it is to make a travel laundry bag.
OK, now I know you’re excited to see how I made this laundry bag because laundry is such an interesting topic! 😉 Just kidding. But I promise you’ll love this project; it is so easy and turns out so cute! So let’s get started . . .
Supplies Needed for a DIY Travel Laundry Bag
Some of these links are affiliate links. To read my full disclosure policy, please click here.
- White cotton pillowcase
- Wide ribbon (at least 1.5″ wide)
- Fabric scissors
- Needle and white thread
- Safety pin
- Optional: pinking shears
- Optional: Silhouette machine and heat transfer vinyl OR inkjet printable iron on transfer sheets
How to Make a DIY Travel Laundry Bag
You guys will not believe how easy this project is to make! 
Begin by unfolding your pillowcase and making two small vertical cuts in the top layer of the fabric and on either side of the seam, near the top of the pillowcase. 
Next, use the needle and thread to sew along the inner edges of the cuts. You are doing this to prevent the fabric from fraying – not to sew the pieces back together.
Next, cut a piece of ribbon to a length long enough to wrap around the top of the pillowcase, with a little extra. Then pin a safety pin through the end of the piece of ribbon.
Guide the ribbon into one of the holes in the pillowcase, safety pin side first, and bring it all the way through the other side and out of the other hole.
If the seam on the other side of the pillowcase is sewn shut and you cannot thread the ribbon through, use the fabric scissors to make a small cut in the outer layer of fabric at the seam. Then loosen the inner seam so that you can thread the ribbon through. After you’ve gotten the ribbon all the way through you can sew that little hole.
And that is really all you have to do to turn a pillowcase into a laundry bag!
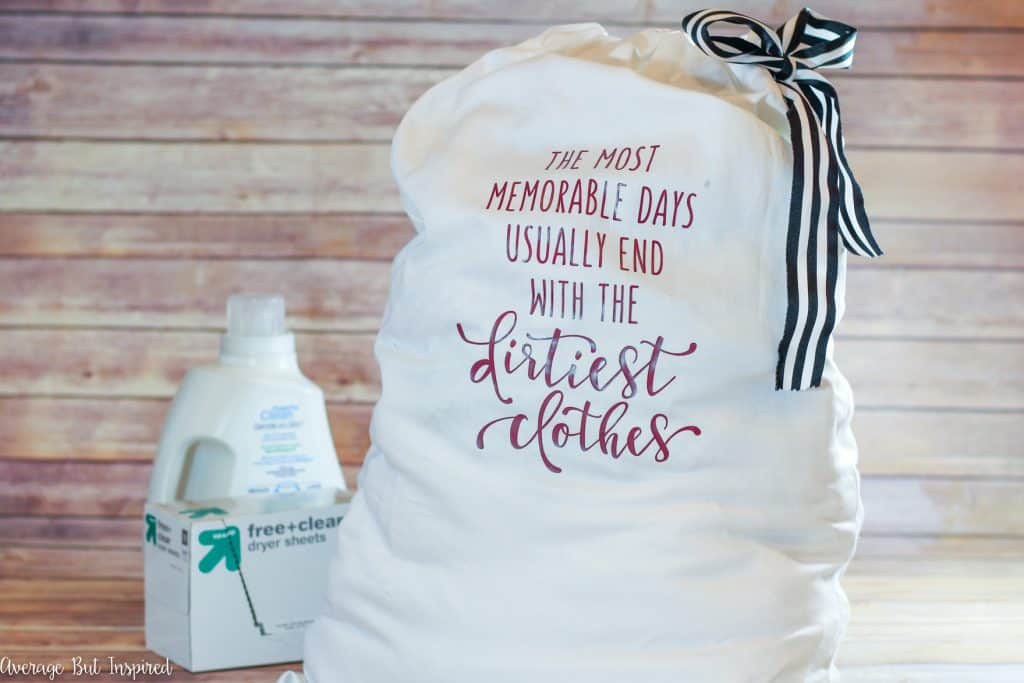
But, if you want to make your travel laundry bag even cuter, consider adding a design or pattern to the front of it. I found this cute design for my Silhouette Portrait (the most basic of all the electronic cutting machines, but it works like a charm!), and cut it out onto some purple heat transfer vinyl.
Then I ironed it onto the front of my laundry bag (this is really the only time I use the iron, friends), and that was it!
If you don’t have an electronic cutting machine, you could easily add a design with inkjet iron on transfers or iron on letters! Or grab a stencil and paint a design!
I honestly am so glad to have this bag! I usually forget to pack any type of dirty clothes bag and end up using a trash bag or grocery bag for my yucky clothes. This is so much cuter!
And I just love that most of the sewing is done for you, thanks to the use of the pillowcase! No need to get out that sewing machine!
If you’re a fan of easy projects like this, I’d love for you to ‘pin’ this post to share!
Cindy says
I would come back to your site but there are TOO MANY ads in the way and it makes me nuts.
Bre says
Hi, Cindy! Oh no – I am truly sorry about this! Unfortunately I have to run ads on my site to help pay for the projects and tutorials I share free-of-charge with my readers. However, I would NEVER want the user experience to be so awful! I have emailed my ad provider to see if there is a way to limit the amount of ads being shown. I have noticed that some of the in-image ads are taking over the entire photos for periods of time, and that is very frustrating! That being said, I hope you’ll consider giving my blog a second chance. 🙂 I would love to have you as a reader. Thank you for letting me know about this problem and have a great day!
Samantha says
Gosh Bre, I love creative ideas and I love the idea of using pillowcases for other purposes! Such a brilliant idea making a laundry bag, we travel a lot and this would come in so handy!! The font you chose is perfect too!!
Bre says
Hi, Samantha! Thank you! 🙂
Angie ~ ambient wares says
I love this, Bre! Such a great idea and love how simple it is along with the different routes you could go to achieve the same results 🙂 Pinning & sharing!
Bre says
Thanks so much, Angie! 🙂
Lidia says
That is crazy cute!!! Love everything about what you did, including that gorgeous ribbon you chose!
Bre says
Thank you, Lidia! I appreciate it!
Kendra @ www.joyinourhome.com says
Such a great idea, Bre! I’m always looking for grocery bags to out all our dirty clothes in! Love that saying too! xo
Bre says
Thanks, Kendra! 🙂
Erica @ Dwell Beautiful says
This is such a brilliant idea! I never know what to do with my dirty clothes with I’m traveling – this bag will make it so much easier! Thanks for the great tutorial! 🙂
Bre says
Thanks so much, Erica!
Amy | Canary Street says
Bre, this is such a cute project! I usually bring a garbage bag to throw all our dirty laundry in for the trip home but this is a much better solution!
Bre says
Thank you, Amy!
Kelsey says
Hmm I know you lead off with saying no need to get out the sewing machine…but this got me thinking about button holes to feed the ribbon through. I’m not confident in my ability to hand sew a hole, but I’ve gotten pretty decent at button holes (what a weird and useless skill-right? ha!)
This idea has so many possibilities! I’m thinking that of Christmas gift sacks for oddly shaped presents? But it may be entirely too soon to mention Christmas…my apologies! lol
Thanks for the idea! 🙂
Bre says
OK I am envious of your button hole sewing skills! I have never learned how to do that! AND, BRILLIANT idea re: Christmas gifts!!! I am totally doing that the next time I have a weirdly shaped gift. THANK YOU!!
Kristi Mercer says
What a brilliant idea Bre! LOVE it!
Bre says
Thanks, Kristi!