In life it is inevitable that all good things will come to an end, and while it’s always sad to see the good things go, it’s best when they go out on top. Thus, while I’m sad to announce that this is the last edition of the Monthly DIY Challenge, I am happy to be ending it on a high note, with my friends and with some beautiful projects that all use metal label holders, including my DIY Labeled Picture Frames.
Before I show you my project, I need to pretend like I’m at the Oscars and give a quick thank you speech. First, I need to thank the original mastermind of the Monthly DIY Challenge years ago, my friend, Kristi from Making it in the Mountains. Our first challenge happened in 2014 with the “Great Crate Challenge,” and being a member of this monthly challenge is probably the reason I am still blogging! I also need to thank Nicole from The Inspired Hive, who put together our link up every single month – even while juggling a full-time nursing job and raising two little ones. Bre from Brepurposed, who designed our graphics and media kit, also deserves a HUGE shoutout. I also can’t forget to thank Emily from Table & Hearth who was our lead hustler in terms of making contact with sponsors and connecting us with some of the fabulous brands we’ve worked with. All of the other ladies in this group who pushed me each month to create something unique (and many times out of my comfort zone) – you all hold a special place in my heart! And finally, all of YOU who have visited these posts over the past three years – thank you! Okay, I hear my exit music playing so that’s my cue to get to the project now.
Okay, so my project this month is completely easy and completely customizable depending on your tastes! In other words, it’s the best kind of project! You can whip up a bunch of these DIY Labeled Picture Frames in no time – seriously. 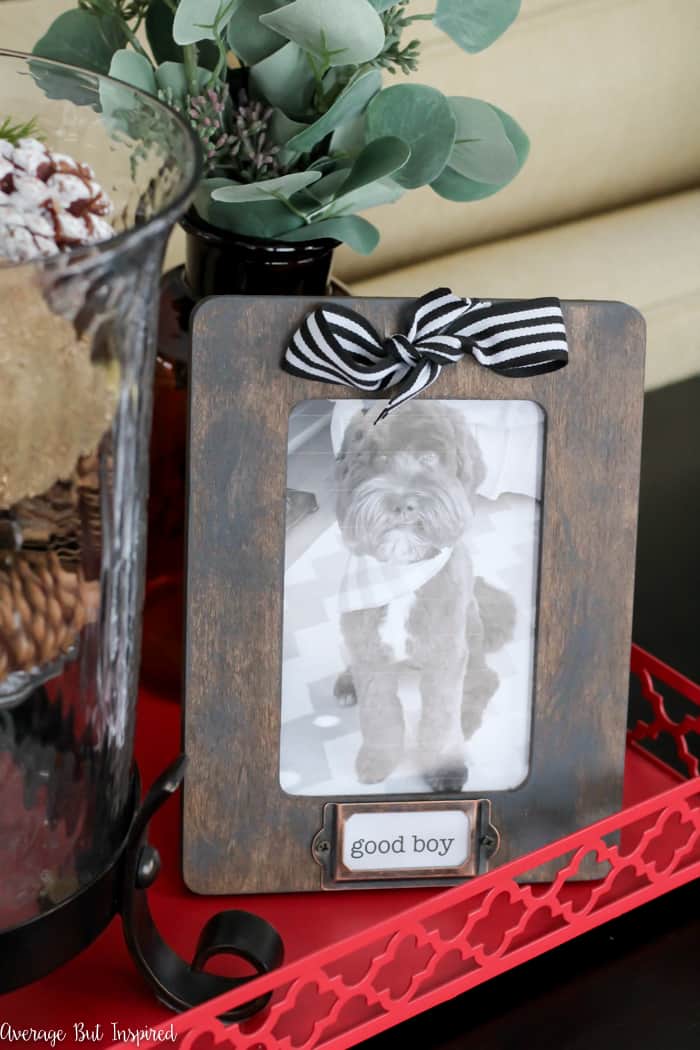
This post contains affiliate links. To read my full disclosure policy, please click here.
Supplies Needed for DIY Labeled Picture Frames
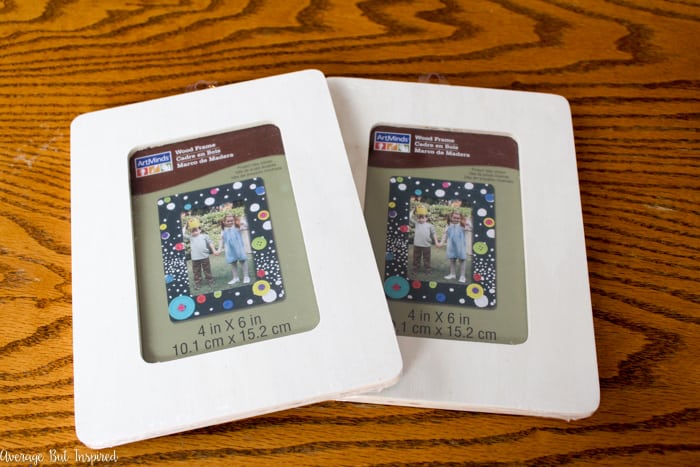
- Wood picture frames (I used these $1 frames from Michaels. Such a bargain!)
- Wood stain cloths
- Acrylic paint or chalky finish paint
- Chip brush
- Drill
- Ribbon
- Scotch Tape
- Metal label holders
- Screwdriver
How to Make Labeled Picture Frames
Start by drilling two holes at the top of your frame. I used a 3/16″ drill bit. 
Next, stain the picture frame (if that’s the look you’re going for). If you don’t want a natural finish, you could totally paint your frame instead! I used my FAVORITE staining option (LOVE these cloths because they don’t smell at all and the color dries really fast) on the front and back of the frame, as well as the little peg that holds up these inexpensive frames.Once my frame dried, I dry brushed some dark gray chalky finish paint over the surface of the frame to give it a weathered look.
Then I attached a cute metal label holder to the bottom of the frame.
Finally, I threaded ribbon through the holes in the top of the frame by using Scotch tape on the ends to help me pull the ribbon through. I tied the ribbon into a little bow and pressed it into place with some more Scotch tape.
I popped a picture of Jasper, my labradoodle, in the frame and added a “Good Boy” label to the label holder.
You might think it’s crazy for me to have a framed photo of my dog, but I am the woman who went to a class about how to paint your dog’s portrait. So there’s that.
Plus, Jasper and I kind of look alike, so it just gets weirder from there. (Note: yes, I need a new photo printer. Those lines in his picture are terrible!)
Shortly after I put this project together, Jasper ate one of my son’s favorite stuffed animals. The first thing he yelled in his anger was “you need to change that picture frame to ‘bad boy!'” I think they’ve made up now, so I will be keeping the “good boy” designation in the frame . . . for now.
Clearly you could frame a photo of anything you want and make these frames in whatever color scheme you like. The possibilities really are endless! Because of that, I’d love for you to “pin” this project to share the idea with others!
Now that you’ve seen my last ever Monthly DIY Challenge project, please visit my friends to see their ideas for metal label holders, too! I know they’d love to have you swing by.
Thank you for your support of the Monthly DIY Challenge over the years!
-Bre
Ruth says
So pretty! I love this picture frames!
Bre says
Thank you, Ruth!
Amanda Fettig says
I love this, Bre!! Such a cute idea! And totally not weird to have a picture of your dog. 🙂 It’s been a pleasure doing this challenge with you these past few months! 🙂
Bre says
Thanks, lady!! 🙂 I have loved doing the challenge with you, too. You always had such cute ideas! Happy New Year. 🙂
Nicole @ The Inspired Hive says
These are so cute! And I always forget that stain cloths are a thing! WHY have I not tried them yet?!?!? Thanks for the shout out <3 and thank YOU for always being inspiring!!! 🙂
Bre says
THANK YOU, Nicole!! xo I am so appreciative of all that you did for us and the challenge over the years, and always without complaint. You are amazing. And yes, girl, get yourself those stain cloths. You will be so glad to have them because you’ll be able to do more even with those little babies around. No smell!
Norma Rolader says
Oh my how adorable
Bre says
Thank you, Norma! I hope you and your family have been having a wonderful holiday season! xo
Erica @ Dwell Beautiful says
Awww, your thank you speech got me all choked up! I’m really going to miss the MDIYC, but I love all the projects and memories we’ve created along the way! And don’t worry, having framed photos of your pet isn’t weird at all! Or if it is, then I’m weird too 😉
Bre says
Aw, I am going to miss it too, Erica! And I’m glad you don’t think I’m a weirdo with the pet photos. HAHAH! Happy New Year, friend!
Charlee says
Love this project and the fact that you used your dog, endears it to me even more (I am a dog mom and do not think it’s weird that you framed a picture of your dog! Of course I have 4 dogs and have pillows with everyone’s silhouette and name, so who am I to judge?) I think I’ll just adopt this little project , as I have pictures of my 4 horses in BORING black frames.. I think that’s about to change…………….: )
Bre says
Hi, Charlee! Aw, I’m so glad you stopped by and left me this note! It sounds like your dogs are very well loved, and your horses, too! So much furry fun at your house! 🙂 Thanks again and I hope you have a wonderful holiday season! 🙂
Leigh Anne says
I loooooove this!! you’r pooch is such cute.
Bre says
Thanks girlie! He is a cutie, but sometimes very naughty! 🙂