One of the most rewarding DIY projects my husband and I have completed is building a fire pit in our family’s tiny backyard. Spending time together relaxing, roasting marshmallows, and eating way too many s’mores is the perfect way to enjoy the yard. It was not a difficult project, and I can’t wait to show you how to build a backyard fire pit of your own!
Supplies Needed to Build a Backyard Fire Pit
This post contains affiliate links. To read my full disclosure policy, please click here.
Fire Pit Supplies:
- 36″ Galvanized Metal Fire Ring
- Landscape bricks (we used approximately 65 of these mini flagstone bricks)
- DAP DynaGrip Adhesive
- Caulk Gun
- Paver base
- Paver sand
- Pea gravel
Tools:
- Tamper
- Level (long length)
- Hammer
- Mallet
- Chalk
- Knife
Optional:
How to Build a Fire Pit in Your Backyard
Before Building a Backyard Fire Pit – Things to Consider
Before you build a fire pit in your backyard, there are a few things to take into consideration. The first is whether there are any buried cables in the area that you need to be careful of when digging.
The second is whether your city, town, village, or whatever has any codes or regulations that will impact your project.
And the third is whether your fire pit will negatively impact any neighbors (smoke sensitivities, etc.). Think about all of this before beginning work to ensure a happy fire pit experience!
Phase One: Clear the Land
Once you have those things figured out, the first step in all of this is to clear out the area where you’re placing the fire pit. As you can see from this picture, we had a lot of plants (namely, giant hosta, which are difficult to remove), to clear.

Once the plants were removed, we got to work raking up the area and getting the ground level. The kids got involved in this part of the project, which was fun!

We used our level to make sure we got the ground as flat and as even as we could, and then we laid down the landscape weed barrier fabric to prevent vegetation (like those darn hosta), from growing up around our eventual fire pit.
Next, we figured out where we wanted the fire pit, and used chalk to make a circle several inches wider than the galvanized fire ring. Then we cut that circle out of the landscape barrier.
You might be wondering why we used a galvanized fire ring in our fire pit construction when many other fire pit tutorials do not use one. The main reason is that we wanted our fire pit to be extra durable, and also for the landscape bricks not to get charred by the flames.
One other benefit of using the fire ring is that you can purchase accessories, like grill grates and fire pit spark screens, that fit perfectly over the fire ring.
Finally, we also thought it made it easier to create a perfect circle with the landscape bricks. While this added a little extra cost to the construction, it was worth it in our minds.
Phase Two: Preparing the Ground for Landscape Bricks
The next step was to fill in the circle with paver base. Once that was poured, my husband got to work with the tamper, pounding it down and getting a level surface that was slightly lower than the surrounding ground.
Next, we poured paver sand around the perimeter of the circle – so where the galvanized fire ring and the landscape bricks would sit. We again used the tamper to make that paver sand flat.
Then we placed the galvanized fire ring into the paver sand, using a mallet to pound it into the paver sand, paver base, and ground ever so slightly, and we laid our first row of landscape bricks around the fire ring.
NOTE: it’s important to leave a space of about 2.5″ between the fire ring and the landscape bricks because if you place the landscape bricks right against the ring, by the time you get to the top row of landscape bricks, they will be too close to the fire ring and will be jutting out farther than your base row of bricks. You will have to disassemble and start over.
(Prior to gluing our bricks together, we stacked all four rows to see how this would work, and it didn’t! That’s how we knew to put that space between the fire ring and the landscape bricks at the bottom.)
Once the first row of landscape bricks was laid, it was time to move onto the next row. We used DAP DynaGrip adhesive to hold our bricks together. We simply applied it to the stones and pressed them down, making sure to stagger them rather than laying them directly one on top of the other.
We repeated this process two more times, making our fire pit four rows of landscape bricks high. Note that once the landscaping went in, the first row of bricks was essentially “underground.”
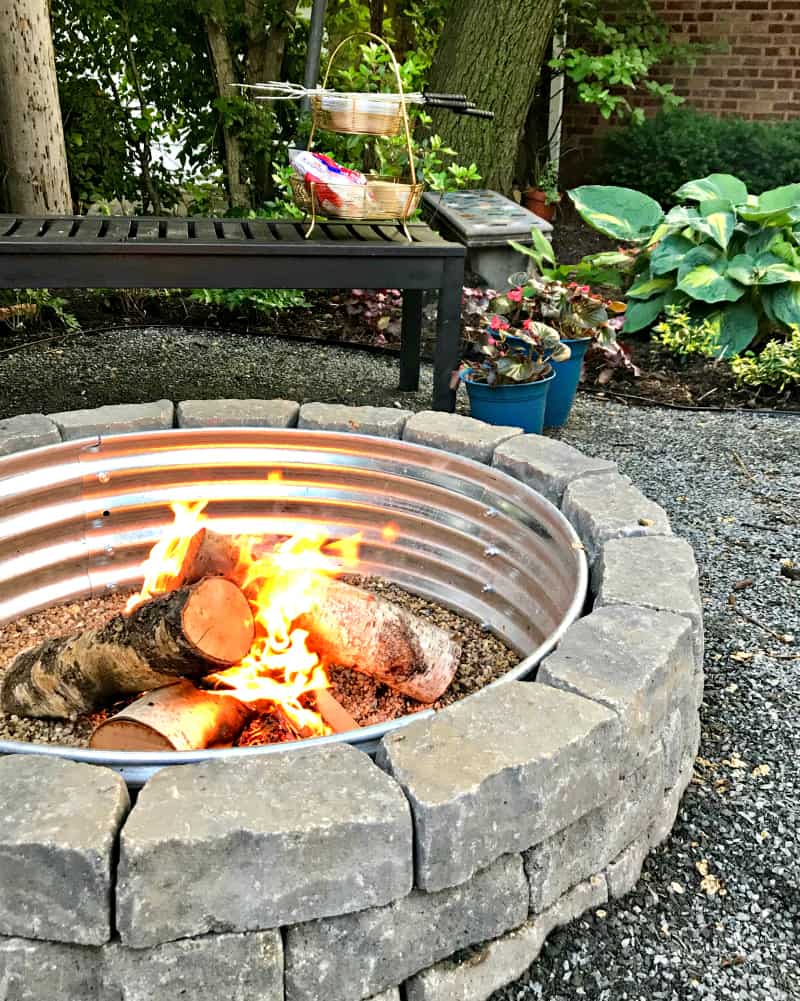
We added inexpensive pea gravel inside the fire pit, and with that, our backyard fire pit was complete!
Over the following weeks, I spent time landscaping around the area to make it look nicer.
This project took us about 8 hours to complete, and that included ripping out all the pre-existing landscape and running to Home Depot a few times for extra supplies.
At the end of the day, I can honestly say that if you’ve ever thought about adding a fire pit to your backyard, you should go for it! It brings a huge element of fun to your outdoor space and is a wonderful memory maker for your family and friends.
I’d appreciate it if you’d pin this post to help others find out how to build a backyard fire pit!
Once you’ve done that, come over and roast a marshmallow with me! 🙂
-Bre
Andrew says
I am glad I found your post. I had purchased a 36 inch fire ring from tractor supply with the plans of just using it by itself. Then started to wonder about building an actual fire pit using the ring as a liner. After a google search of DIY fire pits using the tractor supply ring I found your plans. I love how it looks and am now planning on starting this build this weekend! I am excited to see how it turns out! Thank you for your ideas and plans!
Bre says
Hi there! Oh my gosh, that’s awesome!! Thank you so much for letting me know! I hope your fire pit turned out amazing and that you’ve been enjoying many nights around it! 🙂
Barbara Gold says
We are doing the same tomorrow. Had to drive an hour each way to find a tractor supply that actually had the fire ring I wanted in stock. Very excited.
Kellie Robinson-Scott says
This is amazing I can’t wait to build ours!!! I’m having a 40th bday backyard bonfire party and this will be perfect!!!! Thanks for sharing!!!’
Bre says
YAY! That sounds like such a fun party idea!!! Good for you! I hope you have a blast. 🙂
Cream Furniture says
Amazing ideas. I love this. Everything looks very beautiful. Thanks for sharing this post.
Bre says
Thank you so much!
Erin says
The pit turned out great! I’m glad it was worth all the toil and achy joints! I need all the DIY landscaping help I can get and this is perfect…right now we just have some rocks around a hole in the ground LOL
Bre says
Aw, thank you, Erin!!! You have so much going on right now; you’ll get to your landscaping in time! When we bought our house the backyard was a jungle – everything takes time! 🙂