This is an easy hardwood floor scratch repair technique that you can do yourself!
If you have hardwood floors, you know how frustrating it is to see scratches marring their beauty. After lots of trial and error, I have figured out the easiest way to fix scratches in a wood floor, and it doesn’t involve ANY sanding at all!
I can’t tell you how excited I am about this hardwood floor fix. It may seem dumb, but I lived with unsightly white scratches on my hardwood flooring for years before finding this solution. It takes about 20 minutes and costs hardly anything to fix.
Supplies Needed to Fix Scratched Hardwood Floors Without Sanding
This post contains affiliate links. To read my full disclosure policy, please click here.
- DAP Wood Blend Sticks (get the color that matches your wood floor most closely. There are packs for dark wood and light wood)
- Clean, dry, lint-free cloth (tip: I like to use cut-up men’s undershirts for this)
- Clear Paste Finishing Wax (if your floor is not finished with glossy poly or in an ultra-matte finish)
Hardwood Floor Scratch Repair with a Wax Stick
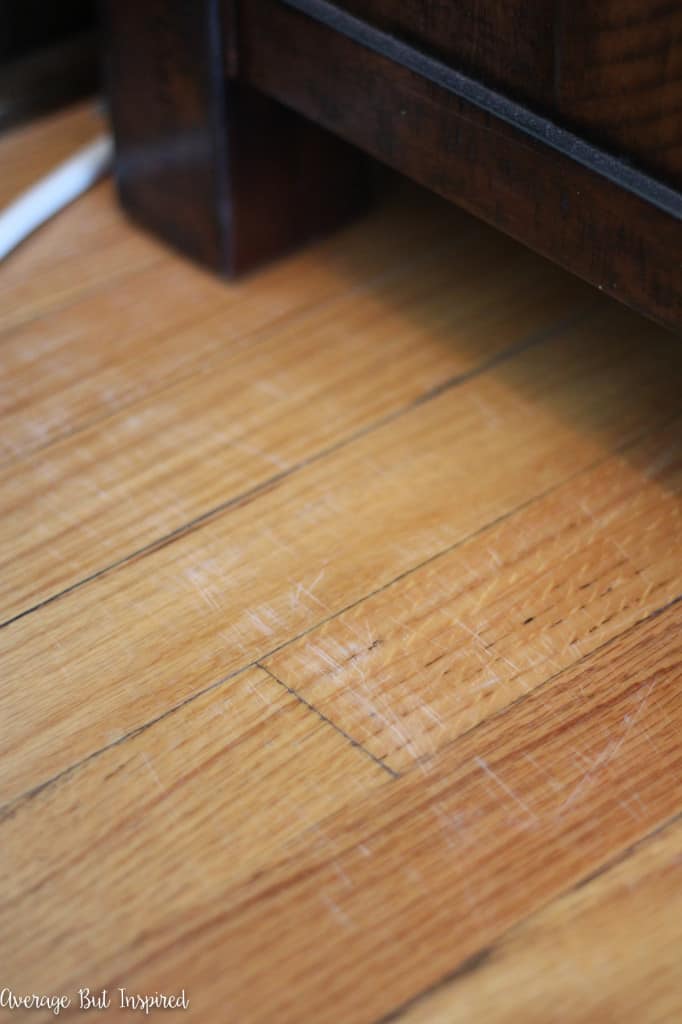
After replacing some furniture in my living room, the scratches left on the floor from the old furniture were really starting to bother me. There were large sections of white marks that stuck out like a sore thumb all over the place.
Then one day, while digging through my utility drawer (aka the “who knows what’s in there drawer”), I found a pack of DAP Wood Blend Sticks. I have no idea where these things came from. I have no memory of buying them, and neither does my husband. But I digress.
Anyway, I decided to see if they would work for wood floor scratch repair.
Step One: Rub the Wax Sticks on the Hardwood Scratches
I cleaned up the section of the floor where I needed to work, and then I started rubbing the wood blend sticks over the scratches – kind of like I was coloring on the floor. (My three-year-old was watching me the whole time, and I just know that I’m going to find Crayola crayon drawings on the floor sometime soon.)

I used several of the colors that came in the pack, since my floors vary in tone from place to place.
Step Two: Buff off the Excess Wax
After I applied a lot of blend stick to the scratches, I let it sit for a couple of minutes. Then I grabbed a lint-free cloth and got to work buffing the areas I’d colored.
I had to use a lot of elbow grease to get all of the excess wax stick off the floor. It was easy to tell when I’d removed all of the excess blend stick from the floor because the cloth moved over those spots easily, and it no longer felt sticky to the touch.
The scratches looked much less pronounced after I’d done that, but it wasn’t totally perfect yet.
Step Three: Apply Paste Wax
I then grabbed the clear Paste Wax that I love to use on my furniture refinishing projects, and I applied a thin layer over the scratched areas.
NOTE: Since publishing this post, the SC Johnson Paste Wax I show in the photos has been discontinued by the manufacturer. However, the linked paste wax is a substitute you can use.
You can apply the wax with a wax brush, plastic putty knife, or by rubbing a clean cloth into the wax and then transferring that to the floor.
Once it had been on there for about twenty minutes, I buffed the excess off and was SO EXCITED to see that the scratches on my hardwood floors were virtually invisible now! Everything blended together so nicely, and the floor looked beautiful once again!
Of course, if you put your face right up to the scratches, you can see them because there are still the scratch indentations there (I didn’t sand anything down after all). But, to a person who isn’t checking the floor out with a microscope, it looks beautiful.
(I’m not sure if this would be true for very deep scratches, however.)
This little trick for fixing scratched hardwood floors without sanding has made a big difference in the look of my floors. And it is so inexpensive (compared to refinishing!), and easy!
If you need to get scratches out of a wood floor, I recommend giving the DAP Blend Sticks and Paste Wax a try. Remember to only use the Paste Wax if your floors have a finish of a subtle sheen (as opposed to gloss or matte).
Kara P. says
That wax paste is a lifesaver! My toddler started scratching up all our kitchen cabinets with a spoon (of all the things) and they got scratched up pretty bad. We ended up sanding them and getting a professional cabinet painting done. (as I said- it was really bad) Some parts of our floors still had some little scratches and we used this paste and it helped a ton! Thanks for the tips!
Steven says
My partner and I got a new dining room set and it scratched up our floors pretty badly… We didn’t know what to do so we ended up just getting a hardwood floor refinishing done. it helped a lot just we still get some scratches from time to time. we put those little felt pads on the bottoms of the legs so that’s helped a lot too. I will definitely be referring back to your post when (not if lol) we get another scratch! Thank you!
Best wishes from Wappingers Falls, NY!
Pat says
Does this work on laminate floor as well?
Bre says
Hi, Pat – I am not sure – I’m sorry! I haven’t tried.
Teresa says
Any recommendations for water spots. I just stained and as I stained I ended up with dark spots.
Bre says
Oh, shoot! Unfortunately my only water spot tricks work for painted surfaces. I’m sorry I don’t have any suggestions. I hope Google can help you!!
Sarah Kite says
Amazing results! Thank you for the suggestions!
Bre says
You’re so welcome! Thanks for stopping by to let me know it worked well for you!
Monique says
Rubbing a walnut (yes a walnut) on any scratched wooden surface works wonders. One walnut goes a long way & incredibly inexpensive + oh sooo easy! My mom, who would be over 100 yrs old, used this trick many times!!! Hope some of you will try this!!
Bre says
Hi, Monique! WOW!! I have never heard this tip!! I am definitely going to give it a try. Thank you!
Sandy B says
Hi Just curious..what part of the walnut do you use ?
DJ says
Hi Bre. Just wondering how this has held up after a year? Also, do you know if this will work on old wooden furniture? Thanks.
Bre says
Hi, DJ! Thanks for stopping by. I have to say that the spots I fixed up with this method still look great! I am so pleased with this technique! As for old furniture fixes, this would probably work, but you might be better off with a furniture marker. Anyway, good luck with your project if you try this!
Craig Leidel says
One downside to this method of repairing scratches on your wood floor is now you can’t recoat the floor without completely sanding the floor down and starting over. The paste wax will not allow a new coat of polyurethane to attach to the old. Many times you can recoat your exisiting finish by buffing it down and applying a new coat over the old. The pro’s will call it a buff and recoat. Much less expensive and invasive. Using a wax, furniture polish or other kinds of products will cause an adhesion issue for new polyurethane (it will bubble and peel off like a sunburn). This is why most reputable wood floor finishing pro’s will ask you what type of cleaners you use on your floor before recoating. If you tell them you have repaired scratches with this method, they will not touch your floor without completely resanding to bare wood.
Bre says
Hi, Craig – thank you for your insight!
Vineta @ The Handyman's Daughter says
Wow, that looks great! Our house has the original hardwoods from 1946, so there’s a lot of wear in the high traffic areas. I’ll have to give this a try!
Bre says
Hi, Vineta – thank you for your note! So sorry for the delay in my response. Anyway, I hope this works for you! My floors are original from 1923 so I feel you on the wear and tear. This definitely has lessened the appearance of fine scratches on my floors. Now I need to find something to bring back the shine!
Samantha says
Never even heard of these before! Must try! Our wood floors are in horrible shape and there are several spots I need to do this on. Thanks for the tip!
Bre says
I hope it works for you, Samantha! It’s definitely worth a try, I’d say. They can’t do any damage at the very least!
Rebecca says
I love blend sticks. With kids and hardwood floors, we get scratches a lot. They have fixed my floors many times.
Bre says
I am so glad you’ve had a good experience with them, too! They (plus the Paste Wax) have made SUCH a difference for my floors! 🙂
Seana Turner says
That’s a pretty great result, Bre! My floors are starting to show some wear and tear, especially in the kitchen. Might have to give this a try.
Bre says
Thanks, Seana! I am so happy with this fix – it really helped cover an eyesore. And the price cannot be beat!
Amy | Canary Street Crafts says
This is a great tip! There’s a really long scratch in my foyer where one of my kids pushed something across the floor and it drives me nuts. Now if you can find a way to fix the big scratch one of them just put on the stainless steel dishwasher that would be awesome :).
Bre says
OH NO! My house is a banged up, scratched up mess – if it makes you feel any better! I’ve got nothing on the stainless steel but I hope you find a solution!