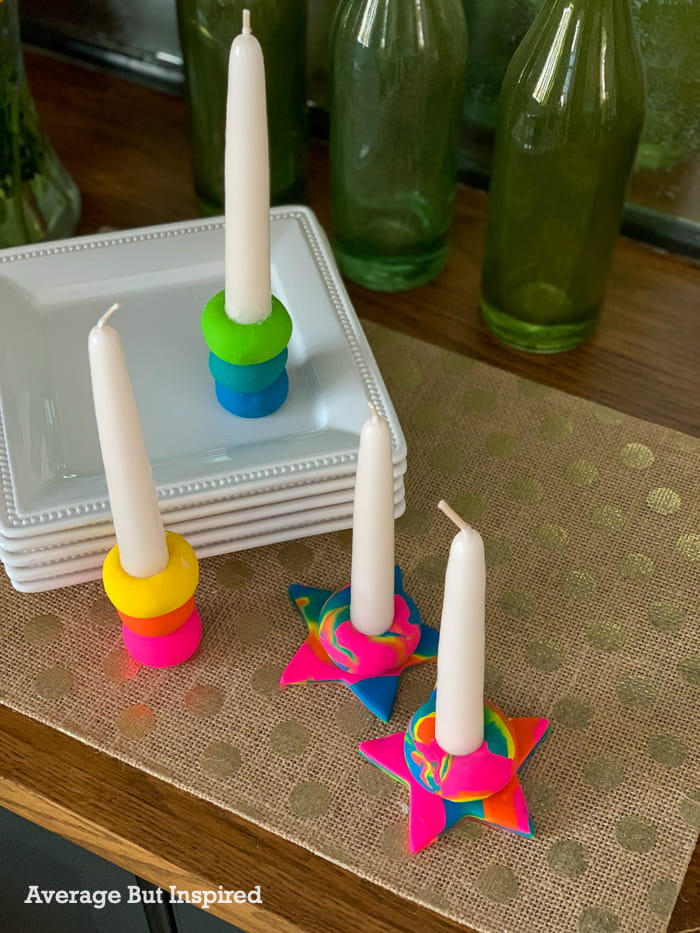
I tend to decorate with neutrals, but sometimes I need a blast of color to wake things up or brighten my mood. Making rainbow polymer clay candle holders fulfilled both of these needs. Not only were they super fun to make, but DIY rainbow decor makes everything happy!
This post is sponsored by Polyform Products. The project and opinions are all my own.
Not to mention, rainbow decor works for a wide variety of celebratory occasions: St. Patrick’s Day, Pride celebrations, birthday parties, and more. Because of that, I think everyone needs to make these clay candle holders!
Materials Needed to Make Polymer Clay Candle Holders
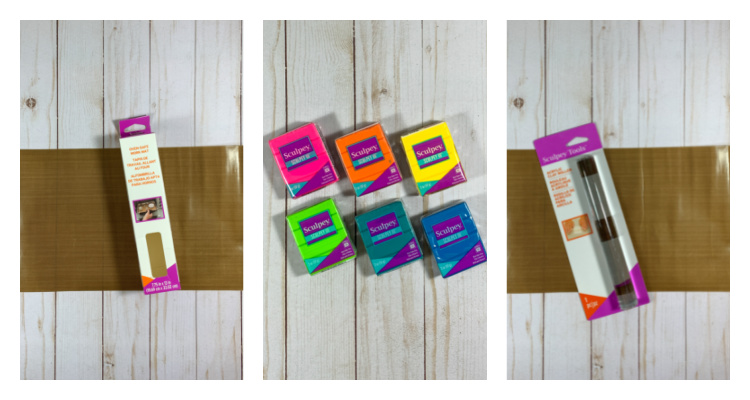
These are the materials I used to make the clay candle holders as shown in this post. Feel free to substitute colors to make them just how you like!
- Sculpey III oven-bake polymer clay (2 oz.) in Candy Pink, Just Orange, Yellow, Granny Smith, Teal, and Turquoise
- Sculpey Tools Acrylic Clay Roller
- Sculpey Tools Oven Safe Work Mat
- Knife with serrated edge
- Toothpicks
- Cookie cutter or shape cutter
- Cookie sheet or baking pan
- Oven
Why Use Oven-Bake Clay?
The clay I used for these DIY candle holders, Sculpey III, is oven-bake polymer clay.
There are two main reasons to use oven-bake clay over other types of clay. First, unlike air dry clay, Sculpey III stays pliable for as long as you need to work with it. In other words, you have as much time as you need to get the project just right. It will not harden until you bake it in the oven. This means you can smooth surfaces, tweak designs, and more – all without feeling the pressure of the clock ticking!
The second reason to use Sculpey III is that the colors are amazingly vibrant and they do not change when baked! So whether you want a totally neutral look or a bold look like in these rainbow candle holders, you can be certain that the colors will remain true after baking. This is definitely not the case with air dry clay, which either dries to a different color or has to be painted to add color upon drying.
How to Make Rainbow Clay Candle Holders
I had so much fun working with Sculpey III polymer clay that I got a little crazy and made two different types of rainbow candle holders. I’ll show you how to make both of them!
DIY Rainbow Ball Candle Holders
The first set I made would look awesome on a dinner table (think about at a St. Patrick’s Day corned beef feast, for example)!
Start by breaking each 2 oz. Sculpey III brick in half. You’ll use 1 oz. of each color to make two rainbow ball candle holders.
Roll each of the 1 oz. pieces into balls. Get them as smooth as you can – you don’t want to have cracks or ridges in the balls.

Next, gently press the Sculpey Tools Acrylic Clay Roller onto the top of the ball that will be the base of the candle holder. This will help flatten the bottom of the ball, and it will also flatten the top of the ball slightly.
Here I’m working on the Sculpey Tools Oven Safe Work Mat, which protects the work surface, gives a clean work space for the clay, and goes right into the oven for baking (protecting the baking sheet).
Using a knife with a serrated edge, rough up the top of the base clay ball (the flat part you just made), and then rough up the bottom of the clay ball that will go on top of it. Press the two balls gently together, with a toothpick in between them, and then repeat this process.
Next, gently press the end of a taper candle into the top clay ball. Make the impression slightly larger than the base of the taper candle, because the clay will shrink a bit during baking.
Repeat this entire process with the other three Sculpey III balls. When both candle holders are constructed, place them (still on the Sculpey Tools Oven Safe Work Mat), onto a baking sheet. Bake at 275 degrees Fahrenheit for approximately 45 minutes. The rainbow clay candle holders will be hard when they’re finished baking.
DIY Rainbow Shape Candle Holders
When I finished making those cute taper candle holders, I had half a brick of Sculpey III clay left for each of the colors. Of course I could’ve saved them for another day, but what fun would that be?
Instead, I used a star-shaped cookie cutter to make a different clay candle holder set. And these are equally as easy to put together!
Begin by mixing 1 bar of each of the Sculpey III colors together in small pieces, and then using the Sculpey Tools Acrylic Roller to flatten them.
Cut out a star shape (or use any other shape cutter you like)!
Take the last bar from each of the Sculpey III colors, and roll them together to form a ball. Carefully press the end of a taper candle into the ball, and move it around to create a slightly larger opening than needed.
Use the end of a serrated knife to rough up the top center of the shape cutout, and the bottom of the candle holder piece.
Press the two pieces together and repeat the process to create additional candle holders. Place the candle holders and the Sculpey Oven Safe Mat into the oven, and bake at 275 degrees Fahrenheit for approximately 45 minutes.
These rainbow candle holders are so adorable and the perfect addition to any bright decor or celebratory looks you might be styling in your home.
You can find Sculpey III oven-bake clay in-store at most craft supply stores, and online at Sculpey’s website.
thanhcongcraft says
These DIY rainbow polymer clay candle holders are an absolute delight! The vibrant colors and creative shapes make them perfect for adding a touch of joy to any celebration, from St. Patrick’s Day to birthday parties. The detailed step-by-step instructions and tips for using Sculpey III oven-bake clay ensure that anyone can create these charming pieces with ease. Kudos to Bre for such an inspiring and cheerful project! 🌈🕯️
Caryn says
You are 100% correct about being concerned with world events while also needing respite for our brains and emotions. This project is easy enough to do even for someone who might consider themselves as not having any artistic skills! It’s nice to have some bright spots of color in our home environment too!
Bre says
Thank you so much! Yes – this is a perfect “beginner” project, and then you get to enjoy it for years to come! We have to take care of our minds, too! Crafting is one of my favorite ways to do that. 🙂
Mary C. says
Honestly, I need craft inspiration now more than ever. With so much external stress and conflict, and so many worries about shortages and rising prices, the few minutes of “me time” I get to spend crafting are my way of finding a bit of calm in the midst of all the storms. So please keep the ideas coming!
Bre says
Hi, Mary- thank you for this kind note! I completely get where you’re coming from. I will definitely keep sharing ideas. Thank you so much for your support!