Let’s face it: with the ease of online shopping, we are all drowning in cardboard boxes! You can toss them in the recycling bin, or you can transform some by finding clever cardboard box ideas online, like this upcycled cardboard wall organizer!
I made this cardboard organizer all the way back in 2013! Because of that, you’ll have to forgive me for the poor image quality and sizes. (Thankfully I’ve improved a lot since that time.) The idea and instructions are still good, though!
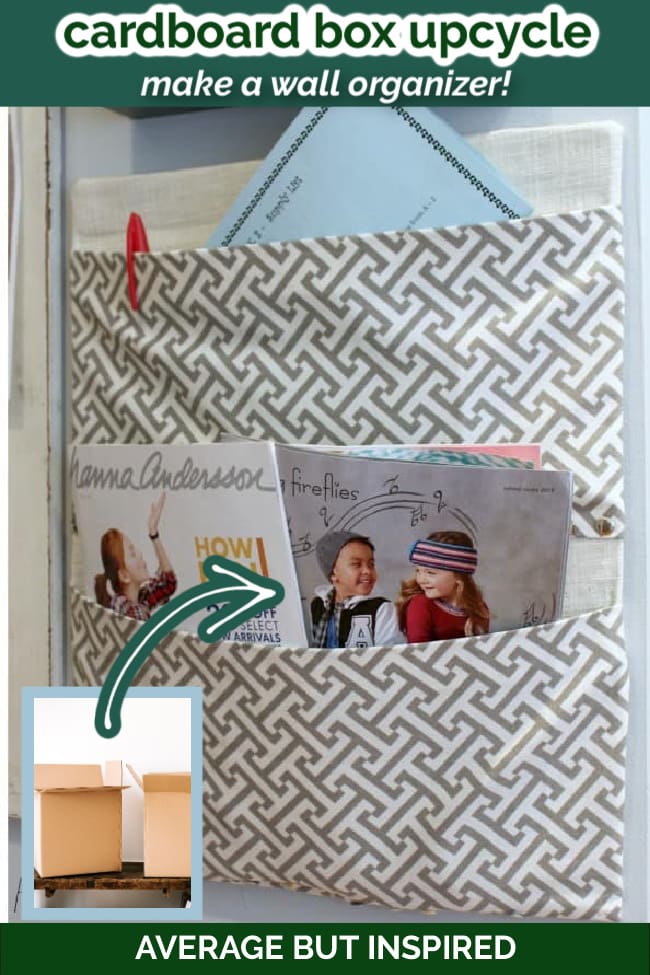
This idea hit as I was hauling yet another empty jumbo box of diapers to the recycling bin – use a diaper box to DIY a fabric wall organizer! Smart, right?
Hey! Here’s another great idea for using a cardboard box: use it as a template to create a cool DIY accent wall!
Cardboard Wall Organizer Supplies
These are the supplies I used to turn a cardboard box into a decorative and functional wall pouch. Some of these links are affiliate links, and you can get more information about that in my disclosure policy.
- Empty cardboard box
- Sharp scissors or utility knife (these electric scissors making cutting through cardboard a breeze!)
- Spray adhesive
- Hot glue and hot glue gun
- Fabric (you need enough fabric to cover one side of your cardboard plus 2″ extra on all sides. Then you also need enough fabric to create pockets to fit your cardboard, plus 2″ extra on all sides.)
- Iron
- Command Picture Hanging Strips
- Optional: flat thumbtacks
Instructions for Making a Cardboard Wall Pouch
Think you want to give it a try? Here are my instructions for creating your own cardboard wall pouch!
Making the Cardboard Base
First, cut a flat piece of cardboard to the desired size. This will serve as the base of the wall organizer.
Next, cut the fabric that will cover the base piece by laying that fabric on top of the cardboard and cutting so that approximately 2″ of fabric hangs over each side.
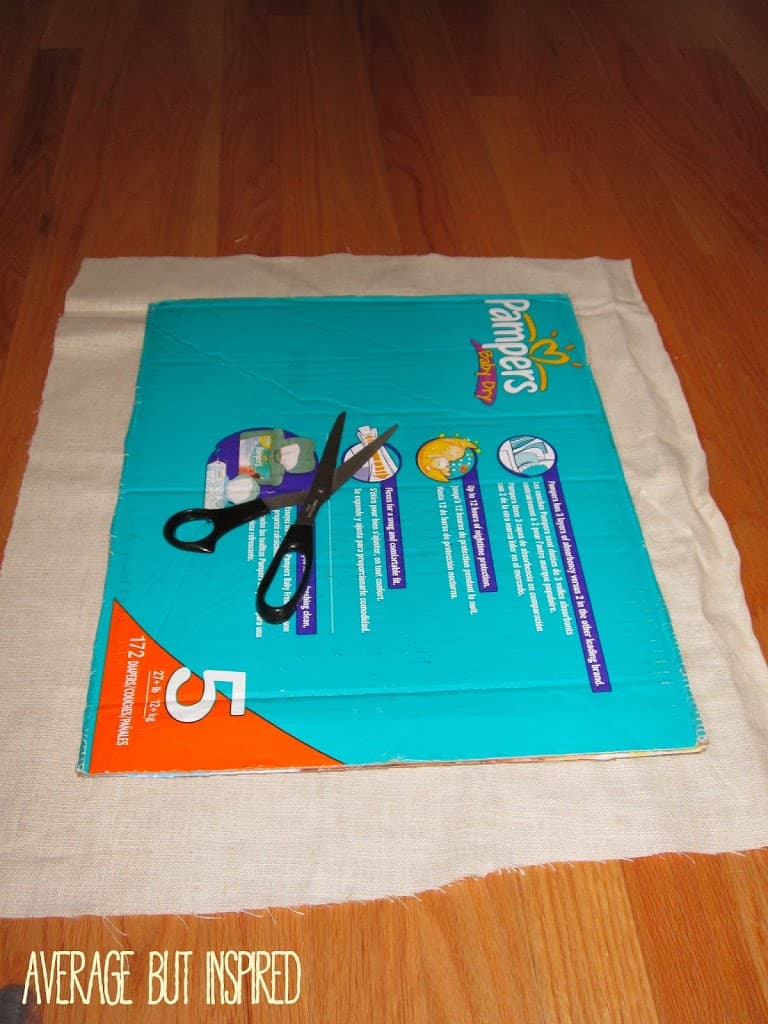
Using the spray adhesive, spray the front side of the cardboard with the adhesive and smooth the fabric over it. I recommend doing this outside. The excess fabric will be hanging over each side, with no adhesive on it.
Then, cut a diagonal slit in each corner of the excess fabric. This will allow you to fold the fabric inwards for gluing much more easily.
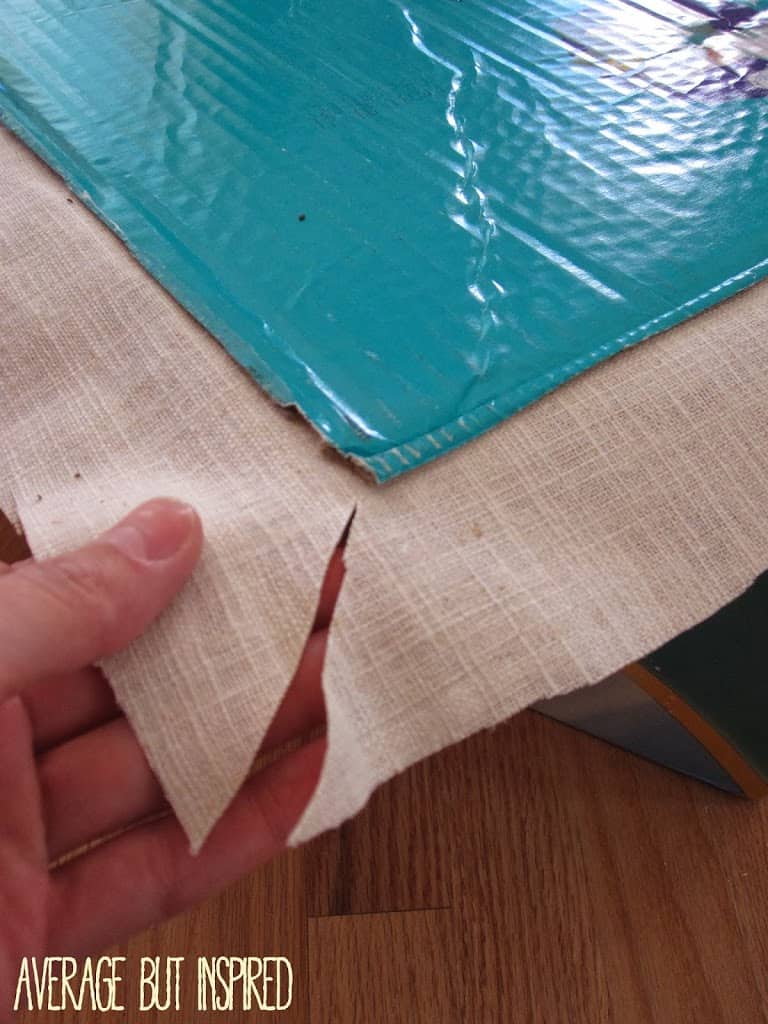
Use the hot glue gun to fasten the excess fabric of your base piece to the back of the base cardboard.

Making the Wall Organizer Pockets
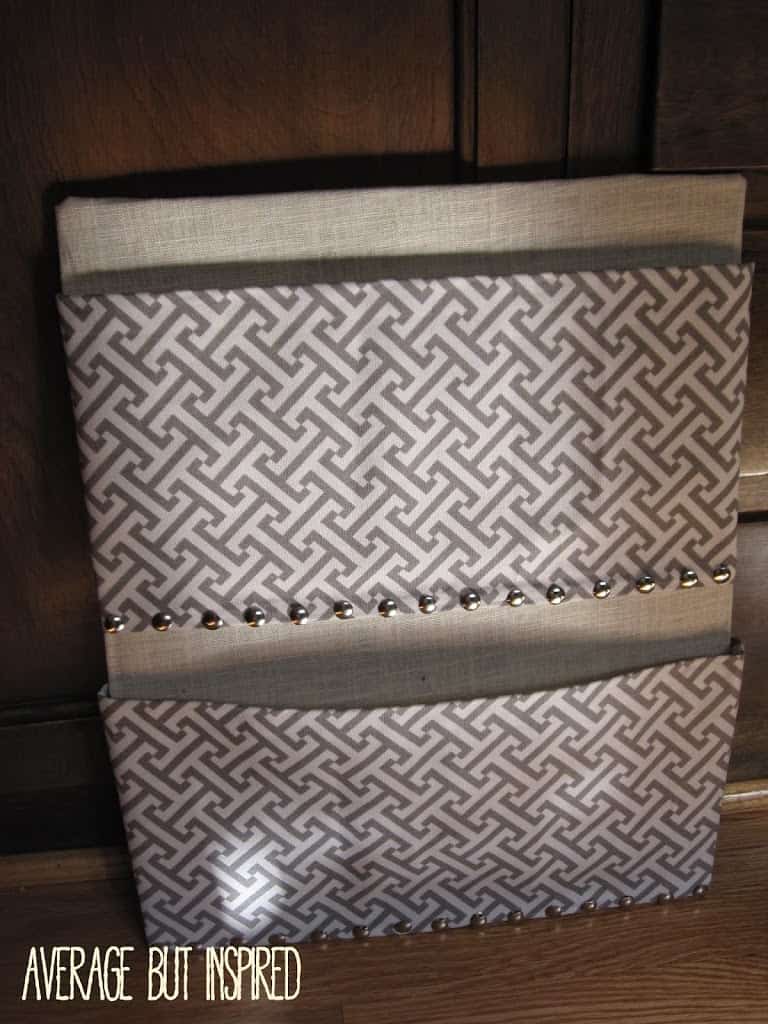
Next, determine how large you want the fabric pockets to be. Mine are approximately 8″ tall, so I cut my fabric 9.25″ tall by the width of my box plus 2″.
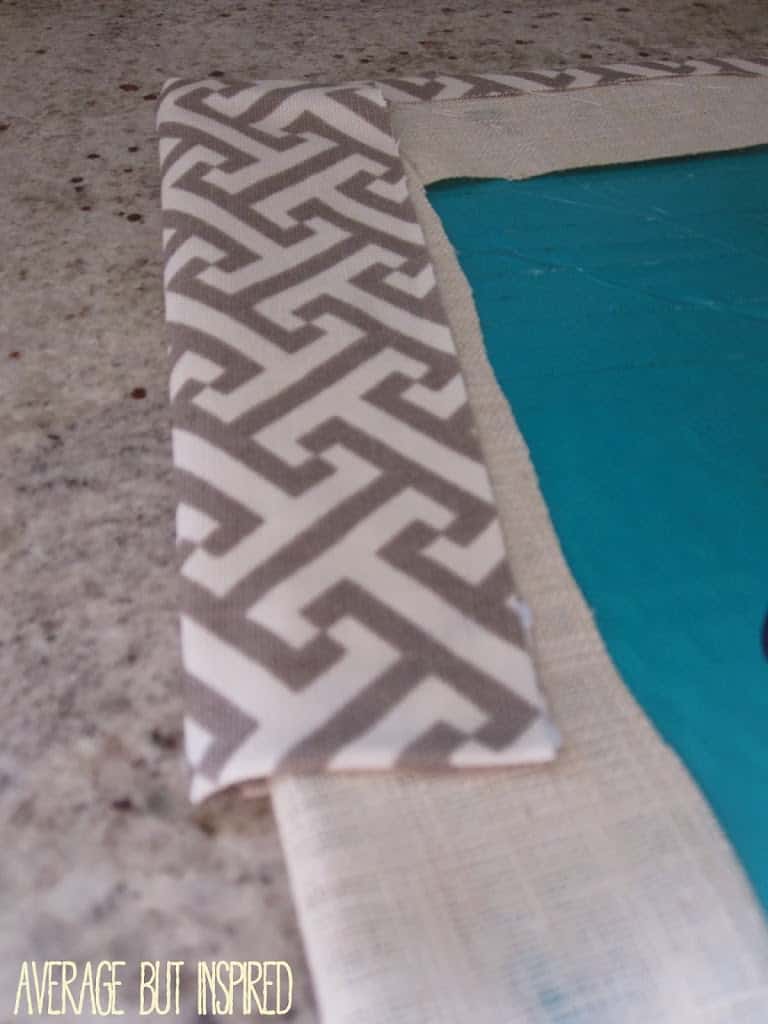
To create a nice edge, fold the bottom of the fabric in approximately .5″ and iron it flat.

If you’re creating two pockets, repeat that process on the second piece, and also do this to the top of that fabric pocket.
Next, glue the ironed seams down with hot glue.
Attaching the Pockets to the Base Cardboard
Once the pockets are glued, hot glue the bottom pocket to the fabric-covered base board. I took the un-ironed side and hot glued it around the base of the cardboard.
Next, wrap the pocket sides around and hot glue them down. I pulled the fabric tight at the base and left a little more of a gap at the top in order to make the pocket a bit roomier. You can see the gap in the photo below.
Take the fabric piece that has both the top and bottom seam glued down. Hot glue the bottom edge finished seam to the front of the base board. Then, repeat the process of wrapping the fabric around the sides of the cardboard and hot gluing. The back of your board will now look like this:

For added style, press in metal thumbtacks around the base. These look like nail heads and add a cute touch.
I hung this directly on my wall with 3M Command Picture Hanging Strips. I seriously love those things.
This is such a great cardboard box idea, and an awesome way to help your countertop or desk stay clutter free! Let me know if you have any other great cardboard upcycling ideas to share, too! I love to hear from you in the comments and on my social media!
Average But Inspired says
Awesome! Yes, it really comes in handy and is super useful. Thanks for taking the time to comment – enjoy the rest of your weekend!
dramaqueenseams says
I love it!!! This will work great for our house. Going to have to make one soon.
Average But Inspired says
Gracias!
Caryn says
Darling!
Average But Inspired says
Hi there! Oh, good! It really is so easy. When you get started on yours, let me know if any of my directions are unclear and I’ll be happy to help. Thanks for taking the time to comment! :).
Inside Me: Nikki Thomas says
This is on my list. I’m working on my office space now, and this would be a great storage project. Thanks for the inspiration!