Is anyone else shocked at how expensive large art is? Of course “real” art has a hefty price tag, but even large artwork from Target isn’t cheap!
I needed large art for a wall in my living room, and decided to save some money by doing a modern thrift store art makeover instead of buying “real” or new artwork at the store.
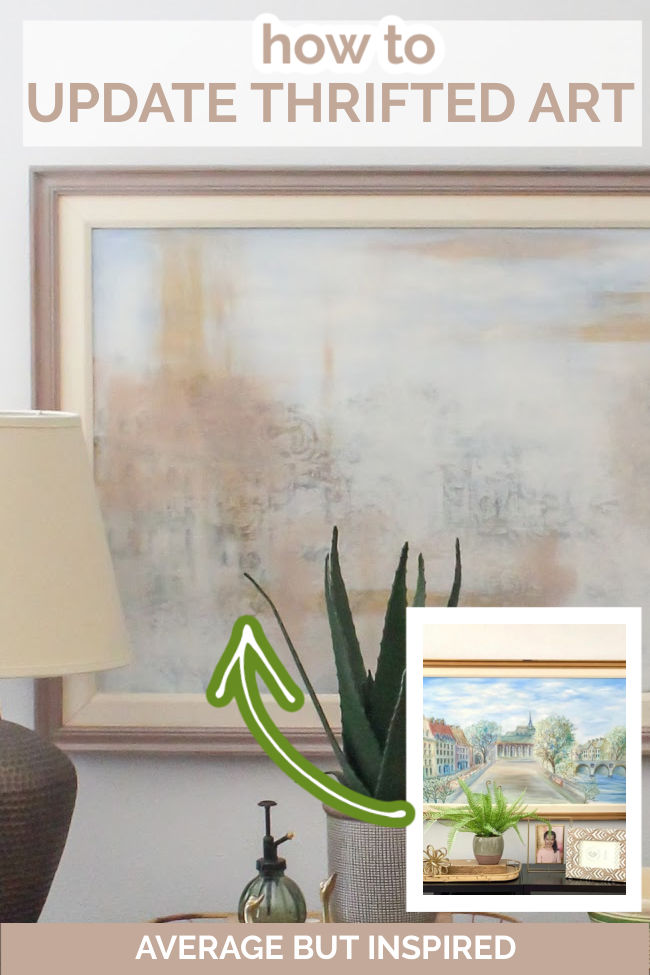
It was the PERFECT way to get that fancy-pants look of original artwork without the expensive price. Love that!
I know some of you want original artwork in your homes, too, so I figured it would be helpful for me to show the process of this thrift store painting makeover. You may be saddened to learn that you need ZERO artistic talent to pull this off. So really, anybody can do this!
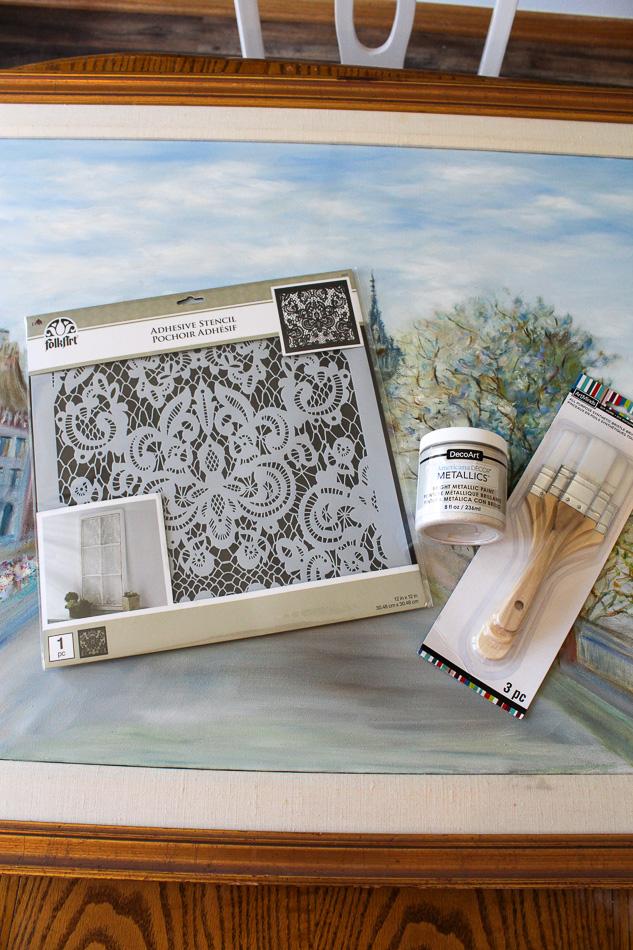
Supplies Needed for a Thrift Store Art Makeover
This post contains affiliate links. Click to read my full disclosure policy.
- Thrifted painting – it doesn’t really even matter what it looks like! Just find a painting on canvas and you’re good to go.
- Large-scale stencil (I used this FolkArt Delicate Lace Stencil)
- Iridescent paint
- Acrylic craft paints in desired colors
- Paintbrushes
Also, if you’re new to buying thrifted home decor, check out my blog post on 8 Home Decor Essentials to Buy at the Thrift Store. It will really help you!
How to Give a Thrift Store Painting a Modern Makeover
Before we start, I have to reiterate that I am not an artist and certainly am not a painter! So if you’re an artist, please don’t judge my work too harshly. Understand that this tutorial is for people who just want to modernize a thrift store painting and not create a world-renowned work of art!

Now that I’ve got that disclaimer out of the way, let’s jump in and update this painting!
Step One: Tape Off the Frame and Place the Stencil
Because I wanted to keep the frame that came with the artwork, I taped it off to protect it from getting paint on it.
Next, I set down a lace pattern stencil in the center of the artwork.
I started with the stencil in the middle of the painting because that made the most sense to me. I don’t think it really matters if you put the stencil elsewhere.
Step Two: Stencil Over the Painting with Iridescent Paint
My goal for this next step was to dull-down or mute the original painted image. I didn’t want to totally cover it; I just wanted to obscure it.
To accomplish that look, I used an iridescent paint in a pearly white color. It was a little translucent so the cityscape painting could show through a bit.
I repeated the stenciling process until the entire canvas was covered with the lace pattern.
Step Three: Blend the Painted Stencil Edges
As you can see in the photo above, there is a line where the stencil edges meet. That doesn’t look great, so I dipped my brush in the same iridescent paint and then wiped most of it off. Then I gently brushed at each of the stencil seams to soften that edge.
I also did this along the border of the painting and the frame.
When this part of the thrifted art makeover was complete, the painting looked like this:
It was okay, but not the exact look I was hoping for. The underlying landscape image was still too visible for my taste, so I got back to work.
Step Four: Add Brushstrokes of Different Color
To really take this thrift store art in a modern direction, the next step was key!
Here I chose three additional acrylic paint colors to add to the canvas. They were all in the same general color family, but different enough to stand out from the iridescent painted stencil pattern.
I added a little bit of each color to a paint brush and added lines across the canvas.
I also finished things off by painting the frame. The original gold had a lot of dings and damage, so painting it was a good option.
The Completed Thrift Store Painting Makeover
Once I finished, I was so happy with my thrifted artwork update!
Notice how the stenciled pattern shows through in certain places, as does some of the original painted artwork on the bottom layer.
A thrift store art makeover done the way I did it lets you keep some of the original look while giving it a fresh spin!
Lorna Reyna says
This is fantastic and brilliant! I picked up some large, inexpensive unframed canvas art pieces. Two pieces are set that can be used hung tightly together to make one picture or used separately. I liked the theme of the art but when I got it home it looked flat and dull. It needs help!!! I have a third piece that is a bit ugly but I know I know for sure I can do something great with it. Thank you so much for sharing this!
Bre says
Hi, Lorna! YAY! That is so awesome. Thanks for letting me know. Good luck with your project!!
Laurie says
!!!Oh my gosh Woman!!! This is genius and so great looking. I’ve been looking for months and not seen anything I like better, at any price. Thank you ❤️ for sharing your technique.
I’m anxious to try this myself.
Bre says
Hi, Laurie – thank you!!! Glad this sparked an idea for you!!! Good luck with your project. 🙂
Christie says
This is amazing! I have a large canvas in a frame I was hoping to do this on, but the original artwork is all very, very dark. So, I’ll have to save this for another day. Beautiful work!
Bre says
Hi, Christie-
Thank you!! I’m so glad this method might work for your large canvas. Best of luck with your project!
susan martin says
Will have to try this! I’m looking for a large piece of art also and it is sooo expensive! What color did you paint the frame?
Bre says
Hi, Susan! Thank you! Yes – keep your eyes peeled when you’re out and about. I paid $19 for this huge framed artwork, so there are deals to be had! The color of the paint on the frame is Gray Taupe in Americana Decor Satin Enamels paint. 🙂