Of all of the DIY projects I’ve done, THIS one is my favorite. This wood slat fireplace – our DIY fireplace makeover – transformed an unusual 1970s fireplace in our bedroom into a gorgeous focal point that complements our home’s style.
I am so excited to share our fireplace renovation with you. If you attempt any fireplace renovations of your own, make sure to check local fire code first and abide by all requirements!
Fireplace Before: 1970s Brick Fireplace with Quirks
We thought it was pretty cool that our bedroom has a fireplace, but we didn’t love the way it looked.
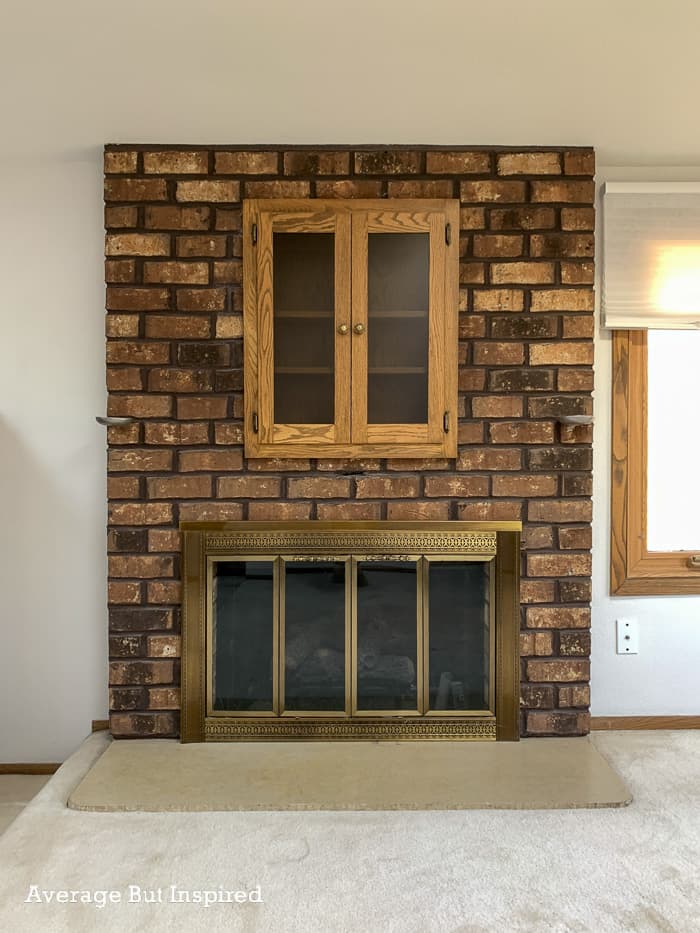
On the left side was a small built-in candle holder, on the right was a small built-in ashtray (we think!), and then there was that shallow cabinet in the center.
The brass fireplace screen was identical to the one on our living room stone fireplace that I limewashed shortly after we moved in.
This fireplace was dated and made the whole room sad. Really.
The Fireplace Makeover: DIY Wood Slat Fireplace
We decided to reface our fireplace as a DIY project, because we received quotes ranging from $10,000 – $23,000 for this job. (The $23,000 quote included removing the step up into this part of the room – something we did not even want to do.)
Is that crazy or what?
Needless to say, we were determined to save that money and do it ourselves. And . . . here’s how we did it!
P.S. check out my blog post on 15 fireplace refacing ideas for more DIY inspiration!
Part One: Demolition and Electrical
Day one of this project was 100% in my husband’s domain. I left him to remove the candle holder, ashtray, cabinet, and brass fireplace screen. When he was finished, the fireplace looked like this.
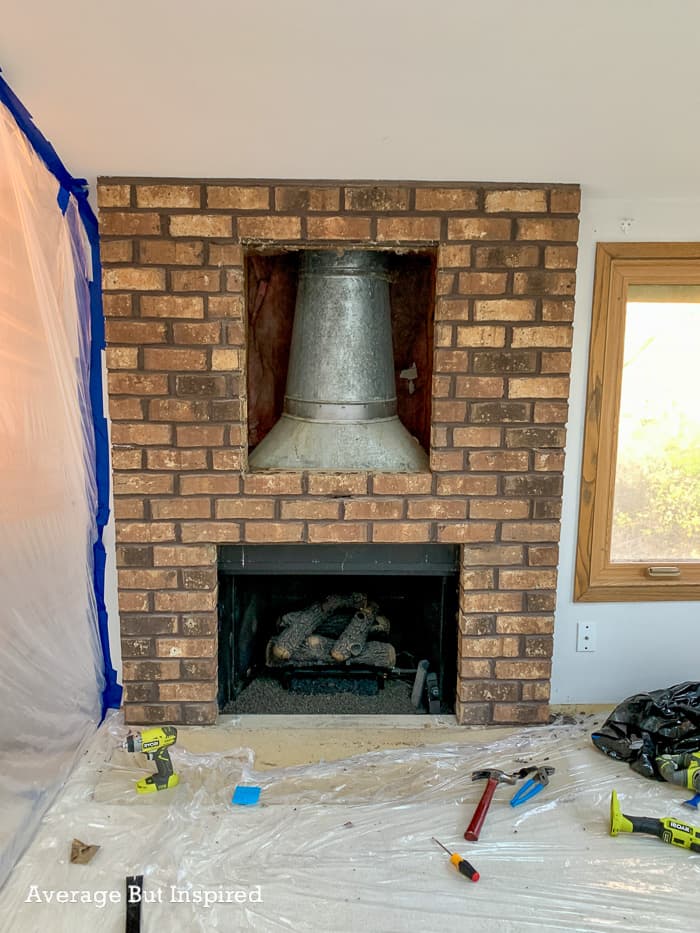
He then ran electrical for the tv we would eventually be mounting.
He removed the baseboards running next to the fireplace, cut out the drywall there, and ran wiring from a nearby outlet up the side of the fireplace and into the box where the cabinet was.

This post contains affiliate links. For more information, please read my disclosure policy.
Part 2: Staining Wood Slats and Building a TV Box
In the freezing cold garage, I stained 35 wood slats. The slats we chose were pine lattice moulding measuring 11/16″ x 1 5/8″, and I used Varathane Premium Wood Stain in Dark Walnut, because this stain dries quickly and only needs one coat for great color.
While I was busy staining, my husband was filling in the gap left in the fireplace by the cabinet. He built a box to house the TV mount and plug, and then also added studs.
Part 3: Painting the Brick
The next day, I painted the brick surrounding the firebox with two coats of masonry paint. Our local code requires 6″ of non-combustible material on the sides of the firebox, so I made sure to paint the entire bottom half of the fireplace to be safe.
I used Behr masonry paint in a flat/matte finish in the color Carbon Copy. It’s a dark gray that has a lot of warmth to it. The coverage of this paint was great and it was easy to use.
Part 4: Covering the Brick with Underlayment
Then we measured the right front side of the fireplace and cut 3/16″ underlayment to fit over that section. Our Kreg AccuCut was essential for getting these cuts straight with our circular saw.
We attached the underlayment to the brick with a combination of construction adhesive and Tapcon Concrete Screw Anchors. We did our best to guess where slats would be going, and to put the screws in those spots we thought would be covered. (Spoiler alert: we didn’t guess right 100% of the time.)
Cutting and attaching the underlayment took a longgggggg time. And because brick isn’t totally flat, it was impossible to get the underlayment completely flat in all spots.
You might be wondering why we didn’t attach slats or studs to the brick and then attach the underlayment to that in order to get a flat surface. The reason is that per local code, if our facade stuck out a certain distance past the firebox, we would need more than 6″ of non-combustible material on the firebox sides. This would have made our slat design look really funny, so we needed to keep the underlayment as close to the brick as possible!
This made us a little nervous for how the slats would lie flat on top of the underlayment, but we got it to work out. I will fill you in on that later!
I then caulked all the seams and painted the underlayment the same color as the brick – Behr Carbon Copy.
Notice that I also painted along the ceiling. I did this because I learned from my friend Bre at Brepurposed that the slats will look funny along that edge if you see the white ceiling instead of the dark paint. I am SO THANKFUL I read Bre’s blog post and didn’t have to find that out the hard way.
Part 5: Attaching the Slats to the Fireplace
The following weekend is when the magic really started to happen. Attaching the wood slats to the fireplace is when our vision came to life!
We started by using a laser level to show a straight line at the far left edge of the fireplace. The straight line was not the same as the line of our underlayment!
To make sure everything looked straight when finished, we followed this laser level line and used brad nails only to attach our first wood slat. (For all of the other slats we used Liquid Nails and brad nails. Brad nails alone for the first slat gave us better control over the precise placement we were after.)
Next we attached our second slat where the underlayment and brick meet on the left side.
And then we did the third slat in between those two, and repeated this process on the other side.
This gave us the slat spacing we needed to work with for the rest of the fireplace. It was just about 3/4″, and we used the rubber end of a clamp as our spacer! It was the perfect size.
To get the slats to lay flush with the underlayment where there were protruding screws, we colored the screws with colored sidewalk chalk. Then we pressed the slat on top of the screw to transfer the chalk to the back of the slat. This gave us the precise placement of the screws on the slats.
Then we used a drill stop collar to make shallow indentations on the back of the slat where the screw would meet the slat. This was the perfect solution for getting the slats to lie flat on top of the screws that attached the underlayment to the brick!
Despite our best efforts, there were two spots where the screws were visible between the slats. To hide those, I filled them with wood filler, and then painted them to blend with the underlayment. I promise that you cannot see them at all.
We spent the entire day measuring, cutting, and attaching wood slats. In a few spots we used shims to accommodate for the uneven underlayment, and that worked great.
When we finished, I was ecstatic. It already looked so good!
Part 6: Painting the Hearth
The beige/yellow hearth didn’t work with the fireplace’s new look, and I decided I wanted a hearth that looked like soapstone. So, using the same process I used to paint my fireplace hearth in my living room, I got to work!
I painted a faux soapstone finish, and all of the details are in that linked post. Look how beautifully this turned out!
Part 7: The Finishing Touches
My husband found a super thin tv that works well in bright rooms (we have a skylight and two windows in here). He mounted it with an articulating tv mount that lets us pull the tv away from the fireplace and turn it any direction we like.
Note: tv’s can suffer heat damage if the fireplace gets too hot and if the tv is too close to the firebox. if you plan to hang a tv above a fireplace, make sure to tape a thermometer to the wall where the tv will hang, and then run the fireplace for at least an hour. Check the wall temperature to see if it’s too hot for the tv to hang there.
While he did that, I attached these pretty brass sconces to the sides of the fireplace to give it a more of a feminine feel. (To see my trick for using sconces without running any electrical, watch my TikTok video on magic light bulbs!)
DIY Wood Slat Fireplace Reveal
With all of that finished, our wood slat fireplace was all done!
I love it just like that, but it makes me REALLY happy to pop some vintage artwork on the TV and make it look like a painting! (Check out Vintage Art TV on YouTube to turn your own TV into a painting!)
We need a little side-by-side comparison action, don’t you think? (I didn’t paint the wall or ceiling; it looks different because I took the photos in different light. I did paint the window trim though!)
I’d love to hear what you think of this project. We worked so hard on it and are just thrilled with the results! Please reach out to me in the comments below or on social media!
Stacy says
You both should be so proud of yourselves ! It looks beautiful!
Bre says
Stacy, thank you!! We really appreciate your kindness!
Monica Spella Ostdick says
Fantastic as always, Breezy. I couldn’t picture your vision at first. The end result is stunning!
Bre says
Hi, Monica! Thank you!!!! I’m just very thankful the vision came together!! There’s always a time of doubt in these projects – ha!!
Naomi L Hutchinson says
Can I ask what the cost of material was?
Bre says
I’m sorry – I truly do not remember.