Looking to update a fireplace hearth without spending a ton of money? Learn how to paint a fireplace hearth with the instructions in this post!
I recently shared the first makeover in my new house – my limewashed stone fireplace – and I am thrilled with the impact it made in the living room! As part of that makeover, I also had to paint the fireplace hearth because it stuck out like a sore thumb once the orange stone on the fireplace facade was limewashed.
See what I mean in this before picture? 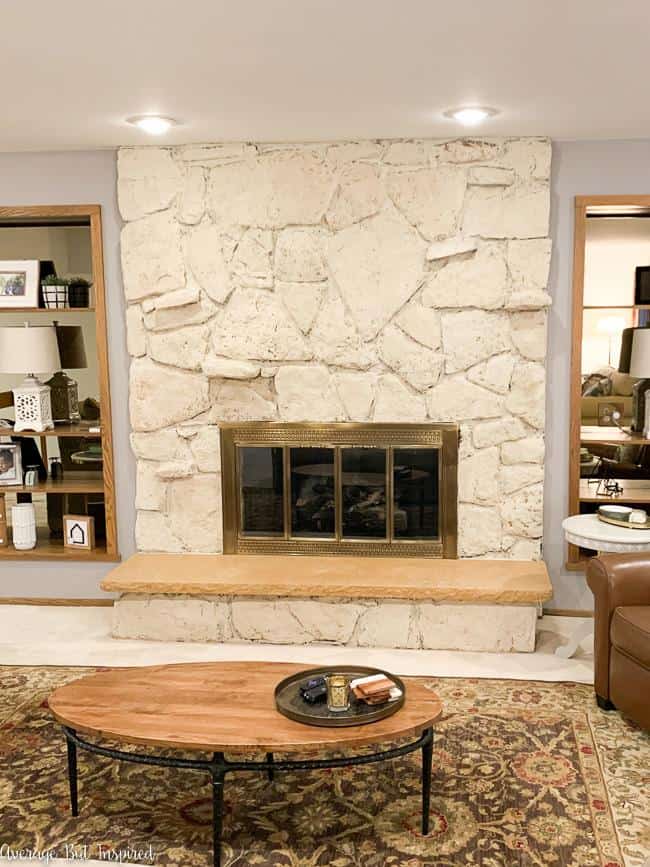
Painting the marble hearth was a little risky because I wasn’t sure if it would actually work, but I painted and stenciled the tile hearth in my old home, so I decided to chance it here, too!
I’m happy to report that the painted marble finish is beautiful and it’s holding up fantastically. 2024 UPDATE: We have fires in here regularly in the winter, and there have been no issues with paint bubbling, peeling, or cracking!
This painting process will work on hearth surfaces other than marble, and will also work on marble, tile, and concrete fireplace surrounds.
This post contains affiliate links. To read my full disclosure policy, please click here.
Supplies Needed to Paint a Fireplace Hearth
This post contains affiliate links. For more information, please read my disclosure policy.
These are the materials I used to paint the marble fireplace hearth shown in this post. The good news is that even if your hearth is a different surface, the same supplies will work! The key is in the adhesion primer, which will allow the paint to stick to many surfaces.
- Behr Multi-Surface Primer
- Americana Decor Satin Enamels Paint (I used the color Neutral Beige. And note: in early 2024 the company changed the name of this paint at some retailers to “Your Home.”)
- Small foam roller and tray
- 1.5″ paint brush
- TSP
- 120 grit sandpaper
How to Paint a Fireplace Hearth
It was so easy to paint my fireplace hearth, and it only took four steps. You can do this project in a matter of hours! The hardest part is waiting for the paint to dry.
Step One: Sand the Hearth
As with all painting projects, the first step is preparation. Preparation is so important for getting a quality finish!
I always want to get to the “pretty part,” but for a slick surface like marble, this step is not to be missed. So, make sure to use a finer grain sandpaper (I used 120 grit) and lightly rough up the marble hearth.
Sanding is also important for any other hearth surface you may be painting: granite, tile, concrete, and more.

Step Two: Clean the Hearth
Next, you need to clean the hearth. Think about the gross stuff that accumulates on a hearth over time. Dust, dirt, ash . . . the list goes on and on. And, with the roughed up surface you’ve just created by sanding, you definitely don’t want to skip this step.
Mix up some TSP, which is a great cleaner to use before painting (it even says so on the box – ha!), and wash the entire hearth.
Check out this other painted fireplace hearth project! I painted it to look like soapstone!
Step Three: Prime the Marble Hearth
Next up comes priming! Because marble is porous and slick at the same time, you MUST PRIME before painting! I don’t care if you’re using paint that tells you don’t have to prime (like chalk paint), you absolutely must prime the hearth prior to painting it.
This is true for any surface your hearth may be: concrete, tile, and more.
For this project, I used Behr Multi-Surface Primer because it specifically says that it works on glossy surfaces. I wanted to make sure that the primer and paint I used didn’t wipe right off, so I gave the product a try.
First I applied a thin coat of primer with a brush along the rough edges of the hearth.
Then, I applied a thin coat on the top of the hearth with a tiny foam roller, and it worked wonderfully.
I let the primer dry for a few hours until I was sure it was ready for a topcoat. The fireplace looked better with just primer on it.
2024 UPDATE: This multi-surface primer is my go-to primer now. I used it for just about everything. The fact that it adheres to just about everything and also blocks stains at the same time is fantastic.
Step Four: Paint the Marble Hearth
Finally, the moment you’ve been waiting for! The actual paint gets to be applied!
For my marble fireplace hearth, I chose to use Americana Decor Satin Enamels Paint in Neutral Beige. I used this paint because it’s a multi-surface paint that self-seals – meaning it doesn’t need a topcoat!
I previously used this paint on my blue painted bathroom vanity makeover and in my mom’s bold powder room green vanity makeover, so I knew it has a durable finish with a sheen that I like.
I used the same process of painting the edge of the hearth with a brush and rolling the paint on the top of the hearth with a foam roller.
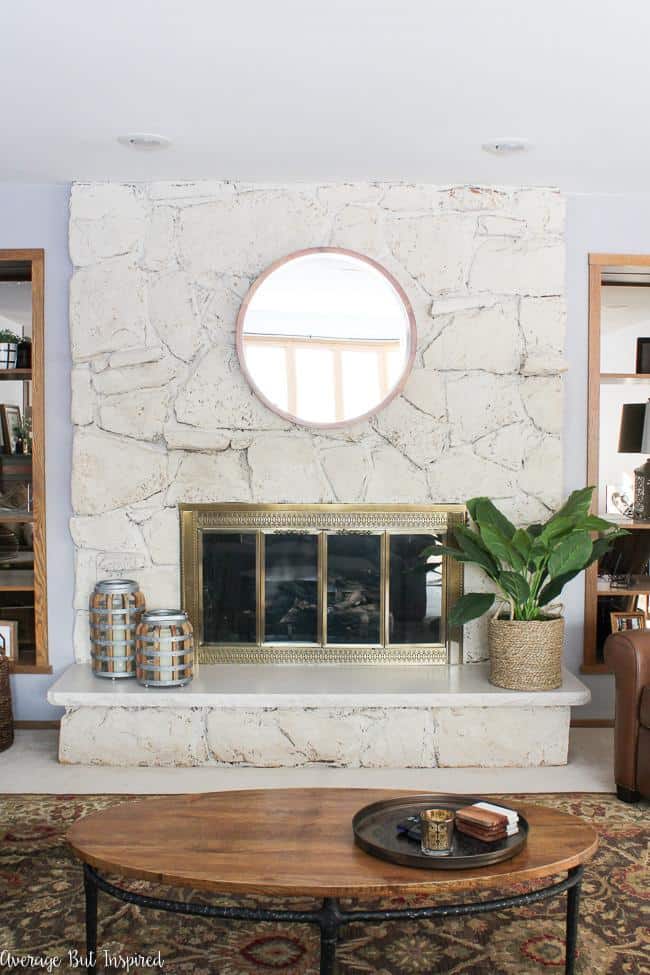
After two coats of paint the marble was flawless and looked amazing with the newly limewashed fireplace stone. Thank goodness the orange hearth was gone!
I know marble is not typically a surface that gets painted, but in this case, I just had to update it.
I have a feeling there are others out there living with dated marble fireplace hearths or ugly marble fireplace surrounds, too, who are hesitant to paint their marble. I say just jump in and do it! This is an easy project with a huge return.
Next up, I will be showing you the makeover I’m giving the built-ins that flank this fireplace! They’re looking beautiful so far!
Christina says
Do you use your fireplace? I’m curious about the durability with the elements? We hav an insert but it still gets really hot
Bre says
Hi! Yes, we actually do use it! I’d say 5 times per year? We have not had any problems at all. The paint is heat resistant and while your hearth gets hot, I can’t imagine that it gets hot enough to be dangerous (like where it would cause a problem with the paint)!