Average But Inspired

Inspiring creativity with crafts, DIY, and home decor projects.

  • About Bre
  • Contact Me
  • Disclosures
  • Policies
  • Home
  • Shop
  • DIY
  • Crafts
    • Dollar Store Crafts
  • Seasonal
    • Patriotic & Summer
    • Valentine’s Day
    • Easter & Spring
    • Fall & Halloween
    • Christmas & Winter
  • Home Decor
  • Furniture
  • Organization

July 23, 2019 by Bre

How to Get Your Bathroom Ready for Guests in 5 Easy Steps!

Thank you Angel Soft® for sponsoring this post. Ditch the spray and switch to Angel Soft® with Fresh Lavender-Scented Tube.

Welcoming family and friends into your home is an act of generosity and grace. Whether you host friends and relatives frequently or infrequently, it’s important to go the extra mile to make your visitors feel comfortable.

That doesn’t mean you have to stress out about hosting, however! With some easy advanced preparation, you’ll be ready for visitors with any amount of notice. And, the five helpful tips I’m sharing in this post for preparing your bathroom for guests will have them feeling cared for and welcomed!  SO helpful! Read this post to get five tips for getting your bathroom guest ready! No stress, no fuss - it's easy to have a great guest bathroom!

Anytime visitors are in your home, you can count on them spending some time in the bathroom. Because of that, you want to make your guest bathroom as relaxing, functional, and luxurious as possible! How do you do that? Let me help you!

TIP ONE: DEEP CLEAN THE BATHROOM

Let’s face it – some visitors are nosy: sifting through the medicine cabinets and giving your spaces the white glove test! Even if no guest actually does that, I like to pretend that anyone who visits my bathroom is going to be inspecting every surface for cleanliness. Because of that, I deep clean it much better than I do for my own family. (#truthbomb)

I also put away any personal items that don’t need to be seen by others, and make sure the drawers and cabinets are not hiding a disaster inside. I just assume that nothing is off limits!

If you have a dedicated guest bathroom that is rarely used, make sure to check the shower curtain and shower curtain liner (if you have these objects), for mold and mildew. You’d be surprised how many nasty shower curtains I’ve been greeted by in my day, simply because the bathrooms weren’t used regularly and the issue was unknown to the hosts!

TIP TWO: MAKE IT SMELL GOOD

Of any place in your home, the bathroom is the one that needs the most help smelling fresh. It’s just the reality of life! But attempts at masking unpleasant odors can be embarrassing in and of themselves, especially when you’re not in your own home! Don’t put your guests through that embarrassment!

The perfect solution for this age-old problem is Angel Soft® with Fresh Lavender-Scented Tube, which has an amazingly soft-but-effective fresh lavender scent applied right in the tube.  Angel Soft with Fresh Lavender Scented Tube makes your bathroom smell amazing without sprays!

I personally LOVE this toilet paper, not only for its soft texture, but also for its ability to make my bathroom smell fantastic at all times without the need for candles or sprays.

A nice lavender scent goes a long way toward making my guest bathroom feel luxurious, and is another special way to make guests feel welcome.

TIP THREE: PUT AWAY THE RATTY LINENS

While you might be able to overlook your faded, threadbare towels and washcloths, your guests probably won’t enjoy using those linens during their visit. Just thinking about the history of old linens leads the mind to some scary places!

So, do your guests a favor and provide them with clean, stain-free, and plush towels, washcloths, and hand towels – and enough of them! If you don’t have quality linens already, consider purchasing inexpensive new ones at any big box store. You’re bound to find them on sale somewhere!  Make sure to give houseguests fresh towels! Read this post for other helpful tips on getting your bathroom guest ready.

If your guests happen to be staying longer than a couple of days, change out their towels and washcloths for them during their stay. Just like you enjoy that when staying at a hotel, your guests will enjoy that when staying at your home!

TIP FOUR: GIVE THEM WHAT THEY NEED

Another great way to make your guests feel welcome in your home is to stock the bathroom with things they might need during their stay.

Set out a small basket with travel-size toiletries in case they forgot any essentials. Some guests are too shy to ask to borrow something, so make it easy on them and have it there already! You can even fill this basket with travel-size items you’ve picked up on your travels – no need to go buy new ones.  Having a basket of items that guests may have forgotten to bring is a nice touch for a guest bathroom. Read this post for more great ideas on getting your bathroom ready for guests!

A small hair dryer and iron tucked in a drawer or cabinet is also a nice touch, if you have the space!

And of course, make sure there is PLENTY of toilet paper! Can you imagine being in someone else’s bathroom only to discover that you’ve run out of toilet paper? So embarrassing! Keep an extra supply of Angel Soft® with Fresh Lavender-Scented Tube in plain sight to prevent that situation from happening and to keep your bathroom smelling delightful at all times.  Make sure to have plenty of toilet paper for your guests! Read this post to get the other great tips for making your bathroom ready for guests. It's so easy to create a welcoming space for guests.

TIP FIVE: ADD FRESH FLOWERS

The last thing to do before turning over your bathroom to any guests is to add some fresh flowers to the space. It might sound silly, but popping even one flower in a vase shows your guests that you were thinking about them and their visit, and that you care! Cut some flowers from the yard or grab a $3 bouquet at the grocery store – either way will be beautiful and be the final touch in a space that will impress even the pickiest of houseguest!  Putting out fresh flowers is just one of the five tips for getting your bathroom guest ready! Read this post to find out the other four. You'll have a great guest bathroom in no time.

With these five tips for prepping your bathroom for houseguests, you’ll be well on your way to successfully hosting even the most demanding visitors. I know I’ll be doing all of these things in anticipation of my family’s arrival for my sister’s wedding this week!

When are you next expecting houseguests? Pin this image so you can easily find this post again before they get there!  SO helpful! Read this post to get five tips for getting your bathroom guest ready! No stress, no fuss - it's easy to have a great guest bathroom!

-Bre


July 15, 2019 by Bre

How to Clean an Outdoor Rug (Without Bleach)

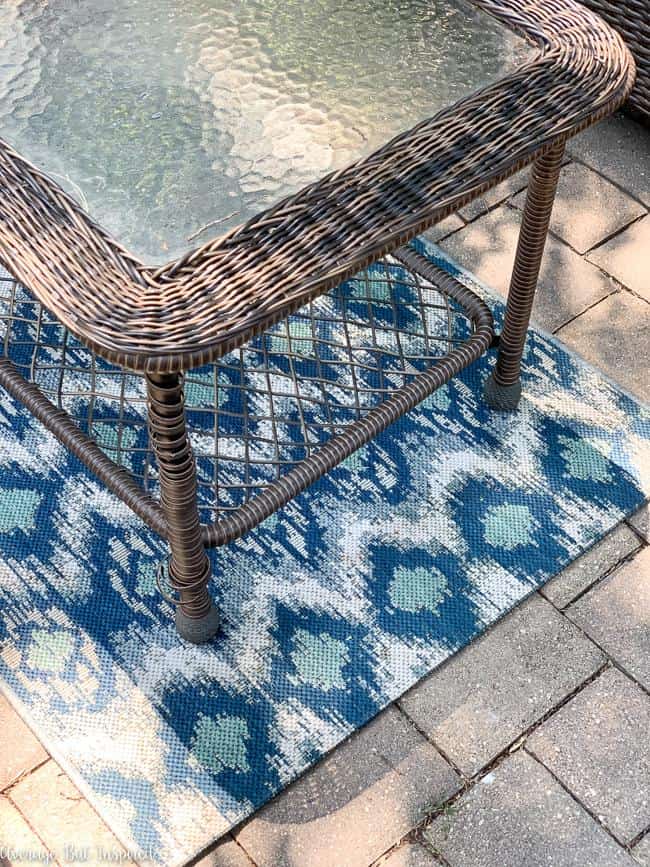
Outdoor rugs are an amazing way to add color and style to a deck or patio – when they’re clean, that is!  Not surprisingly, outdoor rugs can go from fabulous to forlorn (and even disgusting) in no time, since they’re exposed to the elements. 

My outdoor rug was totally nasty: covered in mildew and completely discolored.  But I figured out a way to get it looking brand new again, and I’m happy to share with you how to clean an outdoor rug without bleach! 

Even an outdoor rug covered in mold and mildew can be cleaned! See how to get your outdoor rug looking brand new with this cleaning technique.

Step 1: Sweep Off The Outdoor Rug

In order to get my outdoor rug clean again, I started by sweeping off all the loose debris and marveling at all of the nasty mold and mildew spots covering the rug.  This rug was truly disgusting!

Gross! This nasty outdoor rug may seem impossible to clean, but this post will show you how to clean an outdoor rug and get it looking brand new!

Step 2: Mix a Batch of OxiClean Versatile Stain Remover

Next, I mixed up a batch of OxiClean Versatile Stain Remover in a small plastic bucket.  Getting specific, I measured 16 ounces of hot water and poured it in the bucket, and then used the scoop that came in the OxiClean bucket to fill it to the line marked 1. 

I mixed the solution together and headed outside.  (Note: make sure to read package directions if you purchase OxiClean.  If you purchase a type different from the kind I used, the instructions may be different.)

Mix a solution of OxiClean to get an outdoor rug clean.

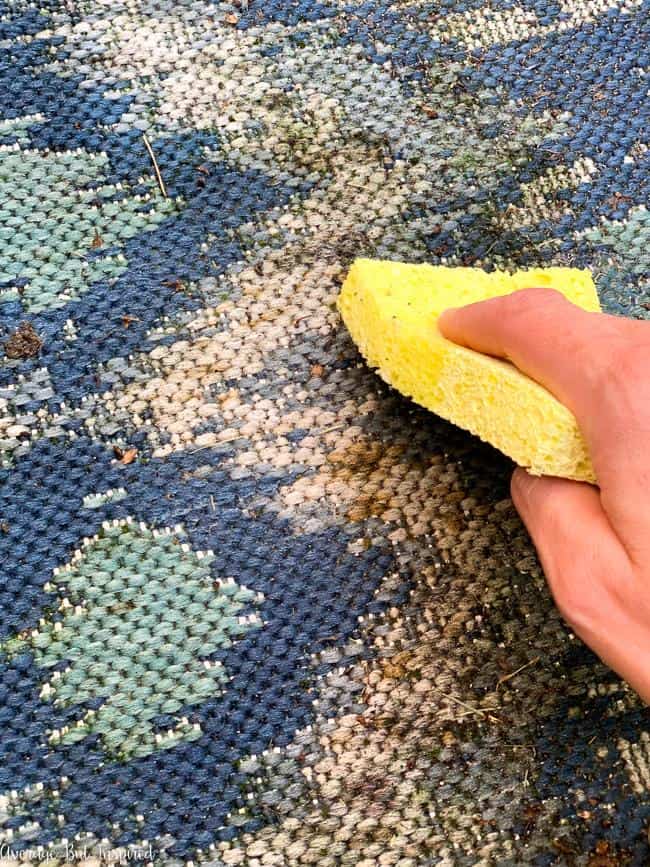
Step 3: Apply the OxiClean to the Outdoor Rug

From there, I liberally applied the OxiClean solution to the rug with a sponge.  Of course, I made sure to do this in an area where it didn’t matter if OxiClean seeped through the rug and onto the surface below.

Scrub an outdoor rug with OxiClean to get it clean!

I let the OxiClean solution sit on the rug for about an hour.  Then I hosed it off to reveal a rug that was cleaner, but not yet pristine! 

In order to properly clean an outdoor rug, it may take two times with cleaning solution.

Because there was still some mildew and/or staining on the outdoor rug, I repeated the process of mixing up the OxiClean solution and liberally applying it to the rug.  And this time, I rubbed it in to the rug even more – making sure to pay special attention to the green spots.

I again let the rug sit with the OxiClean solution for approximately one hour, and then I hosed it off again.  The second time was a charm!  The outdoor rug was clean and bright and fresh! 

Step 4: Let the Outdoor Rug Dry in the Sun

I pulled it over to a sunny spot in the driveway to start drying out. 

When cleaning an outdoor rug, let it dry in the sun for at least 12 hours.

It took about 12 hours to fully dry (which was really surprising to me), so keep this in mind if you plan to wash your outdoor rug! 

Once it was dry, I pulled it back over to the lounge area of the patio and admired how bright the whites were and how there was no more mildew on my outdoor rug!

Get your outdoor rug clean with help from this blog post! This method takes care of mold and mildew stains, too!

Make your outdoor rug look brand new with this easy method for cleaning outdoor rugs!

This rug cleaning process really made a difference in the look of my outdoor space! 

blank

Now when we enjoy making s’mores out here in our DIY Outdoor Fire Pit, we won’t be thinking how the patio is so nice EXCEPT for the nasty rug. (HA! I’m pretty sure I was the only one thinking that.  My family definitely does not notice those types of things.)   

Thank goodness for this easy way to clean an outdoor rug without bleach!  Please make sure to save this image to Pinterest if you agree!

This is SO helpful! See how she cleaned her outdoor rug and made it look brand new again! No bleach involved. This is a great way to get rid of mold, mildew, and other stains on outdoor rugs!

-Bre

January 29, 2016 by Bre

How to Fix Scratched Hardwood Floors in No Time!

If you have hardwood floors in your home, you know how frustrating it is to see scratches all over, marring their beauty.  After lots of trial and error, I have figured out the easiest way to fix scratched hardwood floors in no time at all!

If you have scratched hardwood floors, you need to read this post! Learn how to fix scratched hardwood floors yourself, with just two products! It's an easy DIY hardwood floor fix that anybody can do.

I can’t tell you how excited I am about this recent discovery.  It may seem basic and silly, but I lived with unsightly white scratches on my hardwood floors for years before finding this solution.  It takes about 20 minutes and costs hardly anything to fix.  

Supplies Needed to Fix Scratched Hardwood Floors

This post contains affiliate links.  To read my full disclosure policy, please click here.

  • DAP Wood Blend Sticks (get the color that matches your hardwood floors most closely.  There are packs for dark wood, light wood, and red wood.)
  • Clean, dry, lint-free cloth
  • S.C. Johnson Paste Wax (if your floor is not finished with glossy poly or in an ultra-matte finish)

How to Fix Scratched Hardwood Floors

After replacing some furniture in my living room, scratches left on the floor from the old furniture were really starting to bother me.  There were large sections of white marks that stuck out like a sore thumb all over the place.  

You don't have to live with scratched hardwood floors! There is a super easy way to fix shallow scratches and it doesn't cost a lot!

Then one day while digging through my utility drawer (aka the “who knows what’s in there drawer”), I found a pack of DAP Wood Blend Sticks in the red wood tone.  I have no idea where these things came from.  I have no memory of buying them and neither does my husband.  But I digress.  Anyway, I decided to see if they would fix my scratched wood floors problem.

Hardwood Floor Fix Step One: Use the Wood Blend Sticks

I cleaned up the section of the floor where I needed to work, and then I started rubbing the wood blend sticks over the scratches – kind of like I was coloring on the floor.  (My three-year-old was watching me the whole time, and I just know that I’m going to find Crayola crayon drawings on the floor sometime soon.)  

You don't have to live with scratched hardwood floors! There is a super easy way to fix shallow scratches and it doesn't cost a lot!

I used several of the colors that came in the pack, since my floors vary in tone from place to place.  

Fixing Scratched Floors Step Two: Buff off the Excess

After I applied a lot of blend stick to the scratches, I let it sit for a couple of minutes.  Then I grabbed a lint-free cloth and got to work buffing the colored areas.

I had to use a lot of elbow grease to get all of my handiwork off of the floor.  It was easy to tell when I’d removed all of the excess blend stick from the floor because the cloth moved over those spots easily and it no longer felt sticky to the touch.

The scratches looked much less pronounced after I’d done that, but it wasn’t totally perfect yet.  

You don't have to live with scratched hardwood floors! There is a super easy way to fix shallow scratches and it doesn't cost a lot!

Hardwood Floor Fix Step Three: Use Paste Wax

I then grabbed the S.C. Johnson Paste Wax that I love to use on my furniture refinishing projects, and I applied a thin layer over the scratched areas.  

You don't have to live with scratched hardwood floors! There is a super easy way to fix shallow scratches and it doesn't cost a lot!

Once it had been on there for about twenty minutes, I buffed the excess off and was SO EXCITED to see that the scratches on my hardwood floors were virtually invisible now!  Everything blended together so nicely and the floor looked beautiful once again!  

You don't have to live with scratched hardwood floors! There is a super easy way to fix shallow scratches and it doesn't cost a lot!

Of course if you put your face right up to the scratches you can see them because there are still the scratch indentations there (I didn’t sand anything down after all), but to a person who isn’t checking the floor out with a microscope, they look beautiful once again.  

You don't have to live with scratched hardwood floors! There is a super easy way to fix shallow scratches and it doesn't cost a lot!

This little trick for fixing scratched hardwood floors has made a big difference in the look of my floors.  And it is so inexpensive (compared to refinishing!), and easy!  

If you have any hardwood floors that are in need of touching up, I recommend giving the DAP Blend Sticks and Paste Wax a try.  Remember to only use the Paste Wax if your floors have a finish of a subtle sheen (as opposed to gloss or matte).  

You don't have to live with scratched hardwood floors! There is a super easy way to fix shallow scratches and it doesn't cost a lot!

Bre 


August 21, 2014 by Bre

The Secret to Making Your Stainless Steel Shine!

**Thank you to Viva Vantage and Walmart for sponsoring today’s post and helping me make my stainless steel sparkle and shine!**

Hello, friends!

When we remodeled our kitchen three years ago, I was excited to step into the “new millennium” and get stainless steel appliances.  But my love affair lasted about four days and promptly ended once I realized how kid unfriendly they are.  They show every.single.handprint and constantly look streaky and grimy, even after I clean them.  Gross.

blank
blank

I’m not a total clean freak, so I usually just go about my day, ignoring the streaks and spots.  But upcoming visits from friends and relatives prompted a closer cleaning of my home, including my appliances.  And I’m happy to report that, in the process, I found the solution to the stainless steel disgustingness problem!!!!  Best part?  It’s an easy and inexpensive solution.

blank

First off, you need some olive oil.  Yep, plain old olive oil.

Next, you need some super high-quality paper towels like Viva Vantage paper towels, which are available at Walmart.  I used to be a generic, store brand paper towel girl myself, but no more.  These towels were amazing for all of my cleaning needs (and I have a lot with kids ages 4 and 2),  and especially for making my stainless steel shine.
blank
For this task, Viva Vantage paper towels are definitely the best choice because:
  • their thickness and sponge-like absorbency is essential for containing the olive oil.  Trust me, you don’t want that all over your hands while you’re trying to clean;
  • Viva Vantage paper towels also have a special V-Flex Weave, which gives them superior stretch and scrubbing power – perfect for removing stuck-on messes; and
  • they have perforations, which allow you to select the perfect size towel for your task, big or small.
So, pour a generous amount of olive oil on your paper towel and get to work!
blank
blankDon’t believe me that this will make a WORLD OF DIFFERENCE on your appliances?  Here’s an “in progress” comparison for you!
blank
The one small section of Viva Vantage towels I used held up through several applications of olive oil and repeated scrubbing of a strange peanut butter-like substance on my refrigerator’s handles.  I even used the same piece to shine my dishwasher and oven!
My old paper towels would have shredded apart after even a minute of scrubbing, and my refrigerator would look NOTHING like it does now!
blank

Moral of the story:  don’t let handprints and unidentified substances mar the beauty of your appliances; pick up some olive oil and Viva Vantage paper towels next time you’re at Walmart or Walmart.com and make your stainless sparkle and shine!

– Bre

Let’s Be Social!  Facebook // Pinterest // Twitter // Google+ // Bloglovin’ // Etsy
Linking Here:
Monday:  Frugal Crafty Home //  Inspiration Monday  // Your Designs This Time
Tuesday:  Do Tell Tuesday  // Hit Me With Your Best Shot // Sugar Bee Crafts // Brag About It  // The Makers
Wednesday:  Creative Spark // Make Bake Create // Work It Wednesday // Wow Me Wednesday
Thursday:  Artsy Corner Thursday //  Create It Thursday//  Cook It! Craft It! Share It! //  Inspiration Gallery //   Live Laugh Linky // Thursday S.T.Y.L.E.  
Friday:  Frugal Friday  //  Link Party Palooza // The Party Bunch 
Saturday:  Show Stopper Saturday  // Six Sisters’ Stuff  // Showlicious Craft & Recipe Party
Sunday:  DIY Sunday Showcase //  Link it or Lump it // That DIY Party

Let’s Connect!

  • Facebook
  • Instagram
  • Pinterest
  • Twitter
  • YouTube
blank

Hi, I'm Bre! I believe in working with what you've got to create a home you love. I hope to inspire you to do the same!

Love DIY & Decor? Join the Fun!

    How Can I Help You?

    blank

    How to Build a Backyard Fire Pit

    blank

    How to Organize Digital Photos Using Amazon Photos

    blank

    10 Dollar Tree Craft Supplies You Need

    blank

    7 Tips for Hosting a Party on a Budget

    Looking for Something?

    blank

    How to Fix Paint Bleed Through When Painting Cabinets

    When painting cabinets or furniture, nothing causes a queasy feeling faster than seeing stains or discolorations bleeding through the primer or paint.  But never fear – I’m here to show you how to fix paint bleed through when painting cabinets or furniture.  Best part?  It’s easy! This post contains affiliate links.  To read my full […]

    blank

    Sponge Painting Terracotta Pots

    There’s something charming about aged terracotta flower pots.  Layers of color and hairline cracks evoke memories of seasons past spent digging in the dirt and watching the fruits of your labor bloom.  When you don’t have old pots lying around, sponge painting terracotta pots is a really easy way to get that authentically vintage look. […]

    blank

    A Tired, Worn and Scratched Coffee Table Gets a New Look

    Last September I purchased a small coffee table for $5.  I had been bitten by the furniture painting bug and was scooping up forlorn pieces, like this one, left and right. And then I stacked those pieces in my garage.  And they sat there.  Through Chiberia and Polar Vortex 2013/2014, through the mess of my […]

    blank

    Modern Vintage Dining Room Makeover

    It took me almost three months, but I’ve finally finished putting together the dining room in our new house!  It is no longer being used as our virtual learning classroom (thank goodness!), but instead is a beautiful modern vintage dining room that we love! This post contains affiliate links.  To read my full disclosure policy, […]

    Copyright © 2013-2021, Bre Eggert (Average But Inspired). All rights reserved.

    Pretty Chic Theme By: Pretty Darn Cute Design