Make a set of adorable DIY Bunny Topiaries for your spring and easter decor! This post shows you the step-by-step instructions for making them.
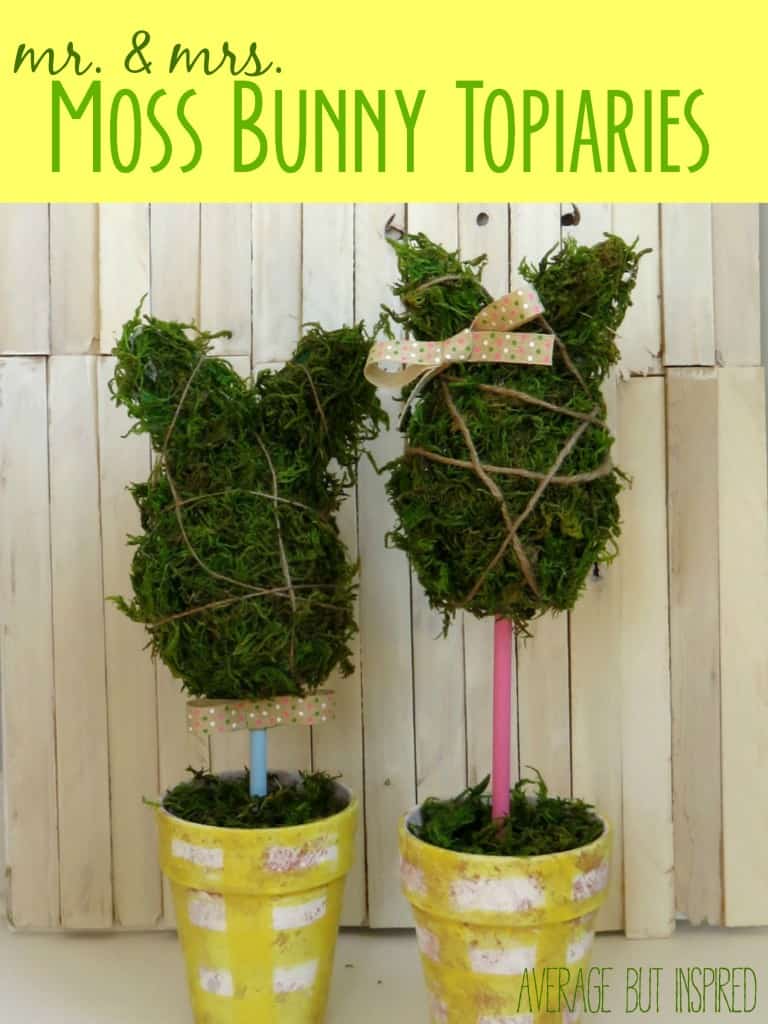
When you think of spring, I bet you think of bunnies and greenery, don’t you? This craft combines those things into total cuteness: a DIY bunny topiary that’s SO easy to make, and even cuter when displayed as a pair of Mr. and Mrs. Moss Bunny Topiaries!
Topiaries are a staple in traditional decor styles, so why not mix it up and make some ultra-cute ones for your spring decor?
DIY Bunny Topiary Supplies
This post contains affiliate links. Please read my disclosure policy for more information.
- Foam egg
- Floral foam
- Foam core board
- Acrylic paint (colors: green, blue, pink, and whatever color you want for your pots)
- Terracotta flower pots
- Wooden dowel
- Toothpicks
- Craft moss
- Hot glue & glue gun
- Twine
- Ribbon
- Pencil
- Craft knife / utility knife
How to Make DIY Bunny Topiaries
No need to hunt down a premade bunny form – we’re going to make our own to create these adorable bunny topiaries!
Make the Bunny Ears
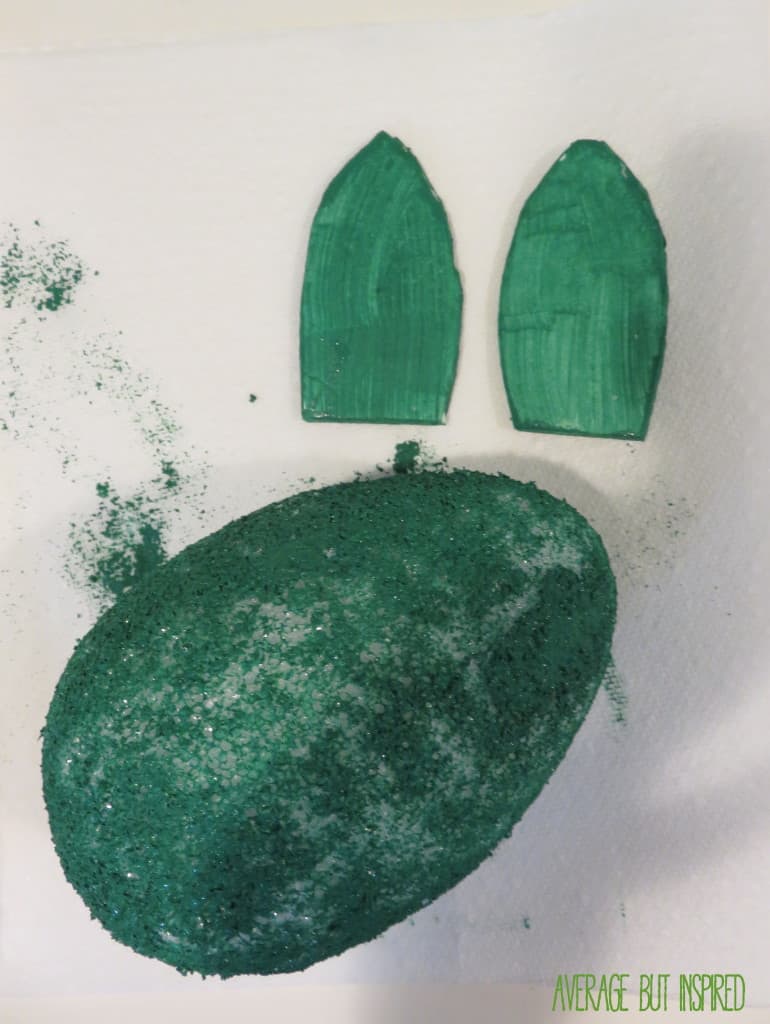
First, draw bunny ears onto the foam core board. Then use a craft knife or utility knife to cut them out.
(The ears don’t have to be perfectly shaped because any imperfections will be hidden by the moss. So . . . don’t stress about this!)
Next, paint the bunny ears green. This will help mask any bare spots you have once you’ve glued on your moss.
Go ahead and paint the foam egg, too, while you’ve got the green paint out.
Make the Base of the Bunny Topiary
Once dry, gently push a toothpick into the bottom of each foam board ear.

Then push each ear into the foam egg.
Already looking a little bunny-ish, don’t you think?
Apply Moss to the Bunny Form
Now you’re ready to apply your moss! To do this, hot glue the heck out of the egg and stick moss EVERYWHERE!
Since I used loose moss, I made a GIGANTIC mess. Be prepared for a fun clean up. Ha!
I also added twine around my bunnies for a rustic look and to help keep some of the moss in place.
Push Dowels Into the Base of the Bunnies
After everything is “mossed,” push one dowel into the bottom of each foam egg. You could leave the dowels natural color, or paint them like I did!
Then, push the other end of each dowel into floral foam in the bottom of terracotta pots.
I painted the flower pots in a cute yellow and white gingham pattern, but you could paint them however you like or leave them plain.
Finally, fill the flower pots with leftover moss.
With that, your DIY bunny topiary is complete!
Since I’m “extra,” I made a two bows for my bunny topiaries; a hair bow for the Mrs. and a bow tie for the Mr. (Notice how the boy bunny is shorter than the girl bunny? I did that on purpose. Girl Power – ha!)
I couldn’t be happier with these little moss bunny topiaries hanging out on my mantel.
They are so cute up there, especially paired with Spring Bunny Gumball Machine decor.
Alexandra says
Such a cute Spring project!
Theresa @DearCreatives says
This is an adorable spring project! Feel free to drop by and share your diy at my weekly party if you like. Thanks for the tutorial.
Bre says
Hi, Theresa! Thank you! And thanks for the invitation to your party – I will try and remember to check it out!! Hope you have a great day.
Ashley ~ 3 Little Greenwoods says
Such a fun DIY Easter project! Great job with the tutorial!
Bre says
Thanks, Ashley! 🙂 My moss bunnies and your moss easter basket should get together and make a cute mossy Easter tablescape, don’t you think? ;-P
Izabela Kumar says
So cute! Good idea for Easter! 🙂 #thecreativecollection
Bre says
Thank you, Izabela! I appreciate it! 🙂 Thanks for stopping by!
Kim~madeinaday says
These topiaries are too cute!! Lovin the cute mossy bunny trend this year! Thanks so much for pinning to the P3 Party Board! You are being featured on my blog & social media tomorrow!
Kim
Bre says
Hi, Kim! THANK YOU! You are the sweetest. I appreciate the feature! Loving your Pinterest Party. Hope you had a great weekend!
Laurie says
Bre, I know I already commented, but I wanted to pop over and say thank you so much for sharing these at VMG206 Brag About It! These are so “brag-worthy” and I will be featuring these at next weeks party!
~Laurie
Bre says
Hi, Laurie! Oh my goodness – thank you!! SO exciting and I really appreciate it! 🙂
jess says
OMG I am so in love right now! I would love to invite you over to my blog to join our party!! I would love to have you there linking up your amazing projects!!
Happy St.Pattys Day
Jess
Bre says
Hi, Jess! Thanks for your note! I will check out your party. I appreciate the invitation. Hope you had a lovely weekend!
Amanda @ Dwelling in Happiness says
These are SO CUTE!! I love the ears, and the bows! Adorbs!!
Bre says
Thanks, girl!!
Ginger says
Love, love love this project! Really – there are no words. And those yellow plaid pots just push it over the edge! Thanks for sharing at Show Me Saturday.
Bre says
Hi, Ginger! Thank you SO much! 🙂 This was a fun project, that’s for sure. Thanks for hosting a great party and for stopping by to comment!
Shannon Churchill says
So dang cute, Bre!! Nice job!
Bre says
Thanks, girl!! 🙂 Have an awesome weekend!
Sarah Nenni Daher says
These are adorable and surprisingly easier to make than I thought they’d be.
Bre says
Sarah – thank you!! Yeah, they weren’t bad at all, except for all the stupid loose moss that I bought. I wish I would’ve bought the right kind of moss sheets! Would’ve made it ten times easier!! Have a great weekend!
Laurie says
Love these so much!! Thank you for sharing 🙂 Pinning and hopefully making some for myself.
Bre says
Thank you, Laurie!! You should totally make them – they weren’t bad to make at all! Enjoy your weekend!