Trinket dishes are one of my favorite additions to my home decor because they’re SO useful (hello, great place to keep rings and jewelry, and catch-all for random tiny things!), and because they can be so darn cute!
I have them near every sink that I use regularly and in other spots like on my dresser. I decided to try my hand at a DIY Trinket Dish recently and had so much fun making this quick and easy but oh-so-darling craft, that I couldn’t wait to share it with you!
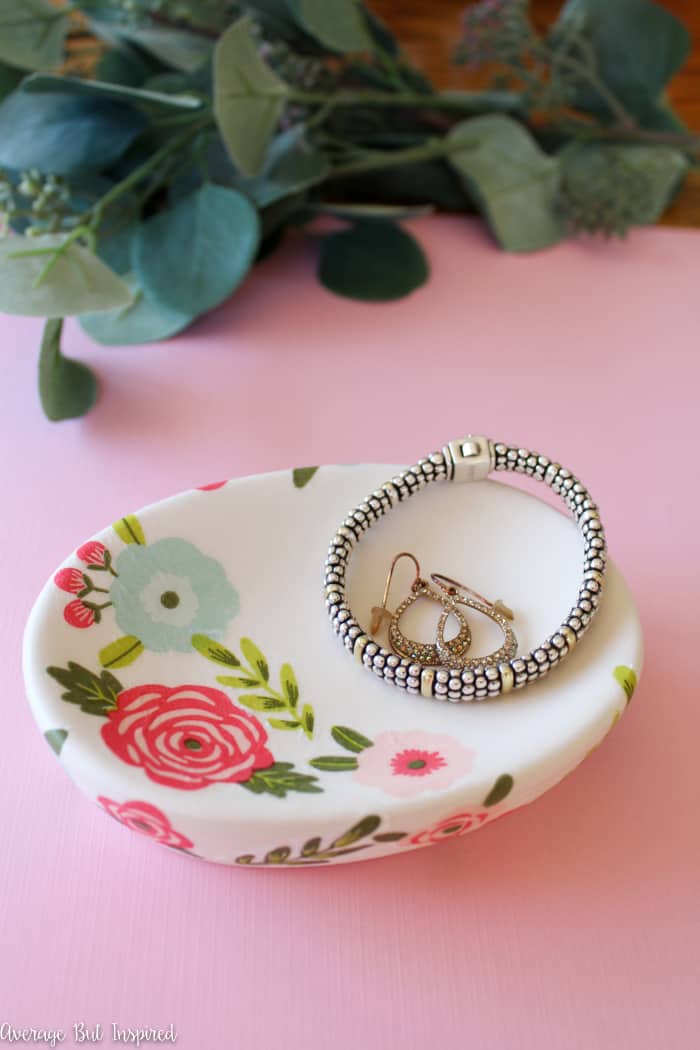
Not only is this DIY Trinket Dish cute, but it is so useful! The best part is that it was very quick to make and required only a few inexpensive supplies.
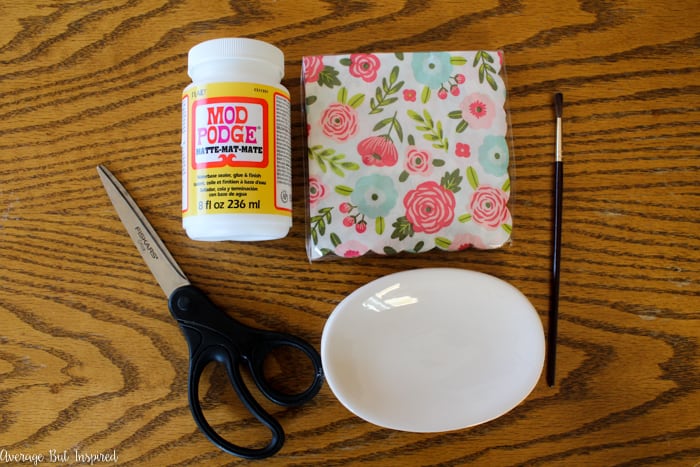
Supplies Needed for a DIY Trinket Dish
Some of these links are affiliate links. To read my full disclosure policy, please click here.
-
- Porcelain soap dish or small bowl
- Pretty paper napkins
- Mod Podge
- Scissors
- Paintbrush
How to Make a DIY Trinket Dish
You’ll love making this project!
DIY Trinket Dish Step One: Cut Up the Napkin
Begin by cutting apart a paper napkin with whatever elements of the design you want to use on the trinket dish. You can see I tried to cut as close to the printed design as I could – leaving off as much white space around the design as possible.

Next, make sure to remove the second layer of the paper napkin. All you want for this project is the top, printed layer of the design!
Step Two: Mod Podge the Dish
Once you’ve done that, spread a thin layer of Mod Podge onto the part of the soap dish or bowl where you’ll be placing your napkin pieces. You should probably only do a little part of the dish at a time to prevent the Mod Podge from drying before you’ve placed anything there.
Step Three: Lay Down the Napkins
Gently place the napkin pieces where you want them and make sure to gently smooth the pieces down to remove any ripples. Be careful not to rip the napkin!
Once you have the soap dish or bowl decorated just how you like it, let the pieces dry.
Step Four: Topcoat with Mod Podge
After about twenty minutes/when everything is dry, cover the entire dish with another coat of Mod Podge. It will look funky for a little bit, but it will dry clear!
Once the Mod Podge is completely dry, the white parts of the napkin blend in with the dish, and the printed design looks like it’s printed or painted right on there!
If you’re not careful to remove the second layer of the napkin though, it won’t look as good! I accidentally left the second layer on that green leaf on the side of the trinket dish (pictured below), and you can absolutely see the white around the leaf. Bummer! Oh well, the name of this blog is Average But Inspired – not Perfect But Inspired. 😉
Wouldn’t this make a fun ladies’ craft night project with your friends? Anybody can do this and it’s so inexpensive! Get that on the calendar! You’ll be glad to spend time with your friends and walk away with a cute place to put your jewelry and trinkets.
-Bre
Veronica says
Made these and they turned out so cute!!!
Bre says
I LOVE THAT!!! Thanks so much for sharing!
Anna Penner says
hi! is this washable after?
Bre says
Hello! I would only gently wipe it with a soft cloth (damp). If you’re using regular ModPodge and not the dishwasher safe kind, it should not be washed, per se.
Karen says
I thought this was so cute and useful. I tried one first to see if my grandaughter could make them. It was going fine until I put on the final coat. It dried totally streaked and looks awful. I followed the instructions.
Bre says
Oh bummer. It sounds like maybe the ModPodge was applied too thick?
Lori says
Can I ask where you got the darling napkins?
Bre says
Hi, Lori! I got those at Target years ago. Unfortunately I don’t think they have the same ones anymore. I’m sorry!
Lauren says
Love this cute little craft for an upcoming ladies night to celebrate a sweet friend!!! I don’t craft much but I looked up some modge lodge to order for it and was given a few options, gloss, matte etc… which is best for this project?
Bre says
Hi, Lauren! That will be SO FUN!! So the finish of Mod Podge really doesn’t matter – it totally depends on your preference. I like matte or satin the best. The gloss finish is really glossy. I hope that helps!
Pam Lewis says
Hi Bre! I love love love this project and plan to have six friends make a trinket dish in June (2021), but I looked on Freshmint Paperie and did not find where napkins in this adorable print can be ordered. Were your napkins from Freshmint Paperie? If not, would you so kindly share where you purchased them?
Thank you so much for the information and this adorable project!
Pam
Bre says
Hi, Pam! Your trinket dish party sounds SO fun! I love that idea! I purchased the napkins at Target, but I just checked this morning and they no longer carry them. However, there are lots of pretty floral paper napkin options on their website now, so hopefully you’ll find something you like. Thank you so much and have fun at your party!
Rabiah says
Can I use ceramic bowls instead?
Bre says
Totally! That will work great!
Audrey Stokes says
I have done something like this. We cut off the bottom of an empty dish soap bottle, decorated it, and glued a golf tee in the center for the rings. Great place to put your rings while doing dishes
It was a lot of fun. Any age can do this.
Bre says
Such a CUTE idea!!!
Nancy says
Just found this and I love this idea to do with my girlfriends! Do the dishes need to be porcelain? Or can you use another material such as plastic? Thanks 🙂
Bre says
Hi, Nancy! So sorry for the delayed response! I was in the middle of a move, and then the holidays! Anyway, no they do not need to be pocelain. Mod Podge works on lots of surfaces, including plastic, so you would be good to go! Have fun. 🙂
LAURA says
Does it work with print paper instead of tissue paper? Thank you!
Bre says
Hi, Laura! Mod Podge will work on paper that’s been laser printed, but if you use ink jet printed paper it will smear! Good luck!
Melody D Briggs says
Where did you find the soap dish? I’m struggling to find any like that. Thanks so much!
Melody
Bre says
Hi, Melody!! I got it at Dollar Tree! I am not sure if they currently have the exact same style as their products change from time to time, but it’s worth a shot to check. Thank you!
Christine says
I get most of mine if thrift shops.
Bre says
Awesome! Great spot to look for them.
Christine says
I LOVE this idea! 💕 thanks for sharing.
Tricia says
What a great idea! So cute but simple to do! Love it!
Bre says
Hello, Tricia! Thank you! It really is totally simple!! So happy you love it. Thanks for stopping by!