Spring break is coming up soon, and my family really hoped to take a vacation to escape the unusually cold winter weather! Unfortunately for us that won’t be happening, but it did get me dreaming of jetting off to some place fabulous (or even somewhere lame – basically just going anywhere!). With wanderlust in my heart, I created some cute DIY Glitter Luggage Tags for my future travels. These are such a simple project that will add a fun touch to any suitcase, travel bag, or purse! 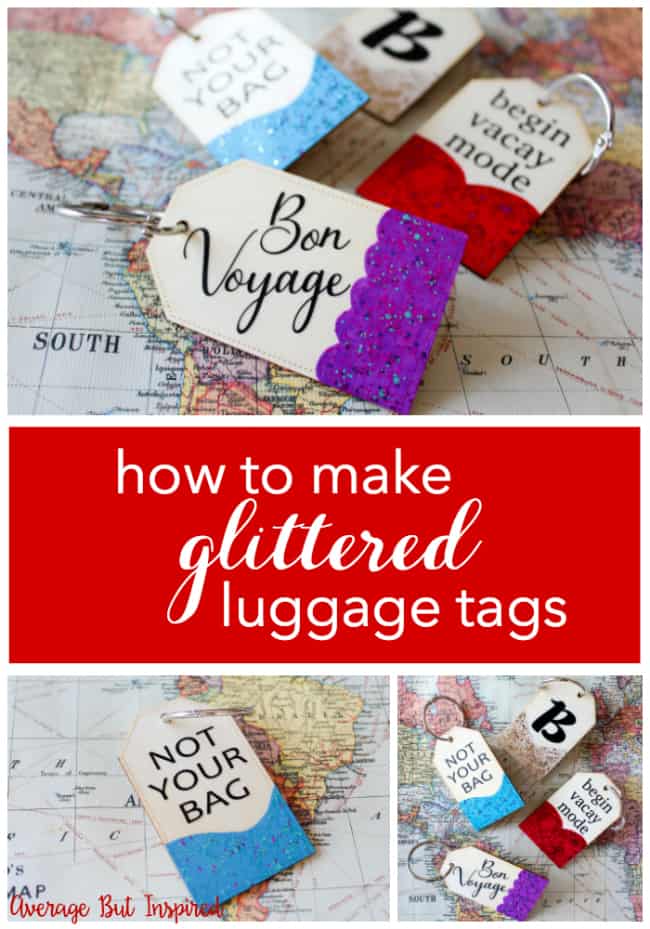
Supplies Needed for DIY Glitter Luggage Tags
This post contains affiliate links. To read my full disclosure policy, click here. Also, thank you to DecoArt for giving me the paint used in this post.
- Unfinished wood tags
- DecoArt Galaxy Glitter paints in colors of your choice
- DecoArt Americana Acrylics paint in complimentary colors to the Galaxy Glitter paints used (they have a chart on their site that helps you match up colors)
- Paint brush
- Electronic cutting machine and vinyl OR letter stickers or phrases stickers from the scrapbook aisle at the craft store
- Book rings
How to Make DIY Glitter Luggage Tags
I love a dash of glitter on a project, but sometimes the mess is not worth it. Because of that, I was excited to see a new line of mega-glittered craft paints from DecoArt that give you the intense glitter look without the mess of actually working with glitter. I decided to test them out on this project!
First, I painted designs with Americana Acrylics paint onto my unfinished wood tags. 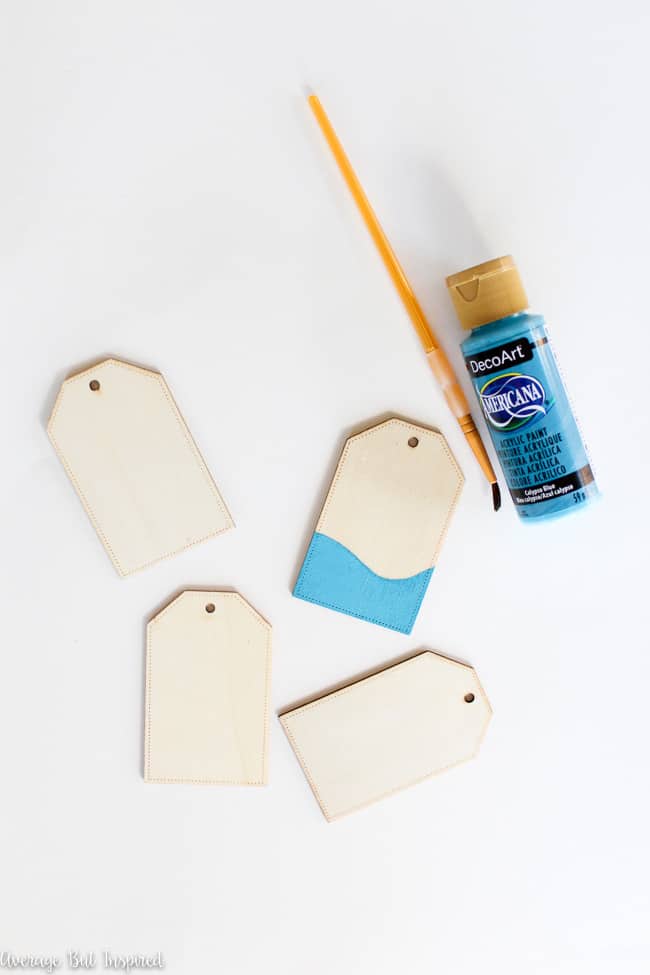
Once the paint dried, I added a topcoat of Galaxy Glitter paint in a shade that coordinated with the base coat color. This made the glitter in the paint stand out even more! 
After the paint dried, I used my ancient (by today’s standards) Silhouette electronic cutting machine to cut out some cute travel-related phrases and the initial of my first name.
If you don’t have a fancy-schmancy cutting machine – no worries! You can get the same look with letter stickers or travel-related scrapbook stickers from the craft store. Once your words are ready, stick them onto the front of the luggage tag.
Finally, add a book ring through the hole in the top of the tag so that you can attach the tag to your luggage! Or, if you don’t want to use a book ring, a key ring or key chain will do the trick.
Won’t these make an adorable addition to my luggage?
Now . . . I just need to save up enough cash to actually go somewhere! Do you have any fun travel plans in the near future? Let me know in the comments!
-Bre
You May Also Like Making These DIY Air Dry Clay Keychains
Leave a Reply