Learn to make a wood bead garland with jingle bells – it’s the perfect, simple Christmas decor!
In my humble opinion, Christmas decor feels even more special when it’s handmade. The time and care that goes into making the decor elevate it to a new level.
One of the simplest and most festive pieces of handmade Christmas decor you can make is a garland, and this Jingle Bell Wood Bead Garland is a versatile piece that can be used anywhere!

Wood bead garlands are a decor staple these days, but the addition of jingle bells and festive holiday ribbon to a regular garland makes this wood bead garland extra special for Christmas!
Plus, it is oh-so-easy to put together, and it’s a great project to get your children to help with. It’s really that simple!
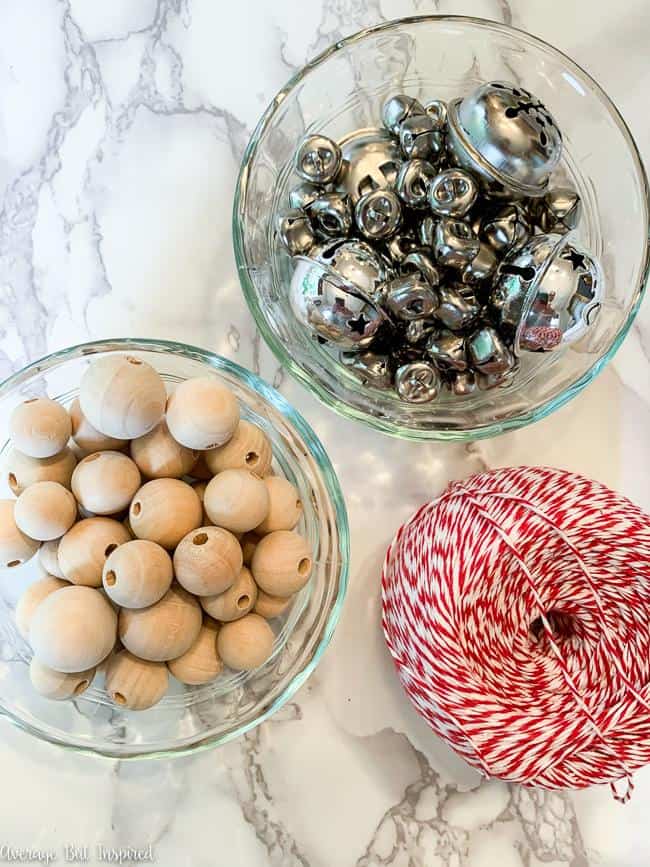
Materials Needed for a Wood Bead Jingle Bell Garland
This post contains affiliate links. Please read my disclosure policy for more information.
- Wooden beads in varying sizes
- Jingle bells in varying sizes
- Baker’s twine
- Needle with large eye
- Christmas ribbon
- Scissors
How to Make a Wood Bead Jingle Bell Garland
Begin by folding a long piece of baker’s twine in half and threading it through a needle with a large eye. (You want to fold the baker’s twine in half to give it more strength once you start stringing the wood beads and jingle bells.)
I chose red and white baker’s twine because it is so Christmasy! It reminds me of a candy cane.

Once the needle is threaded, tie a knot at the opposite end of the twine to hold the pieces together.
Next, begin stringing wooden beads onto the twine. I used a mix of sizes of wood beads, and I alternated them.
Using a needle was essential for getting the twine through the beads. I don’t honestly think you could make a wood bead garland without a needle!
Then, I also added in different sizes of jingle bells to the garland. For my garland I strung four wood beads, then a bell, and alternated that pattern all the way down the length of the twine.
When I got to the end of the twine, I tied off that end. Then I got to work making ribbon tassels to add to the ends of the wood bead garland.
Love a Handmade Christmas? I Think You’ll Like This Idea, Too!
Making the ribbon tassels was so easy! Just cut four pieces of Christmas ribbon, stack them on top of one another, fold in half, and tie a piece of baker’s twine around them near the top to secure and form a tassel.
Once the tassels are made, loop the ends of the baker’s twine through the loops in the tassels and tie to secure.
After that, the garland is complete!
Depending on how long you make it, it would look beautiful on a Christmas tree or Christmas mantel!
If you opt for a shorter version, you could put it around a vase, on a tiered tray decorated for Christmas, or simply laid on a table as part of a Christmas vignette.
The wood bead garland I made has 40 wood beads, 10 bells, and measures 34″ long, excluding the tassels. Those figures might help you calculate how many of each supply you need to make a shorter or longer wood bead garland.
So what are you waiting for? Grab the supplies you need and get to stringing! And make sure you pin this image on Pinterest so you can easily find this tutorial again when you need it.
Seana Turner says
I really love this one, Bre! I need a new garland for my tree, and I think this would look so cute:) Thanks for sharing.
Bre says
Thank you, Seana! It’s the perfect garland to make while watching TV or sitting at a kids’ sport practice or something like that! Pretty mindless but with beautiful results. Thanks so much, friend!