
• Skip to primary navigation
  • Skip to main content
  • Skip to primary sidebar
Average But Inspired logo - DIY and craft

Average But Inspired

Craft a home you love. DIY and craft tutorials.

  • About
    • Contact Me
    • Disclosures
    • Privacy Policy and Copyright Policy
  • DIY
    • Furniture
  • Crafts
    • Dollar Store Crafts
    • Seasonal
      • Patriotic & Summer
      • Valentine’s Day
      • Easter & Spring
      • Fall & Halloween
      • Christmas & Winter
  • Home Decor
    • Organization
  • Shop
    • DIY Guides
  • Home

Christmas

Dollar Tree Stackable Presents: Transform Them Into Beautiful Christmas Decor

November 11, 2024 by Bre 6 Comments

Get your hands on the Dollar Tree stackable presents and give them a makeover! Here’s how to transform these stacked gifts into beautiful Christmas decor.

In 2023, I transformed the viral Dollar Tree stacked pumpkins into a pretty pumpkin topiary. It has been one of my most popular crafts since then!

So, I was REALLY pumped to find that Dollar Tree introduced a whole new line of stackable holiday decor this year: a stackable snowman, a stacking Christmas tree, and stacked presents.

All are priced at $5, and the stacked snowman and stackable presents are my favorites! (I have seen some cute ideas for using the Christmas trees as kids’ toys / in kids’ activities, though.).

Dollar Tree's stacking presents decor can be given a beautiful makeover for Christmas decor!

I was lucky enough to find two sets of the stacking presents, and of course, I had to give them a makeover!

I ran into some snags along the way, so you’ll want to read about that if you’re also looking to transform this Dollar Tree Christmas decor for yourself!

Dollar Tree Stackable Presents Makeover Supplies

This post contains affiliate links. Please read my disclosure policy for more information.

  • Stacked presents decor (note: while these are “Plus” items, they weren’t located in the Plus aisle of my store! So, look all around any Dollar Tree you visit because they could be anywhere! As of publication, they’re not available online.)
  • Dollar Tree tag ornament
  • Rustoleum Universal Metallic Spray Paint in Pure Gold
  • Plaid wired ribbon, 1.5″ wide
  • Glue Dots permanent dots
  • Cricut Joy machine and white permanent vinyl OR white dot stickers and white Christmas tree stickers
  • Scissors

Stacked Presents Makeover: How To

Just like last year’s stacked pumpkins, the stacked presents are totally plastic. They’re a little cheap-looking, to be honest.

The red paint on the “ribbon” portion of the gifts was sort of chipped or missing, and the colors of the present boxes were kind of “meh” in my opinion.

These Dollar Tree stacked presents are begging for a makeover! See how they turn into gorgeous Christmas decorations.

Spray Paint the Present Boxes

Because of that, I decided to paint them. I wanted to have each gift box be a different color: one gold, one green, and one off-white.

But . . . I quickly found out that my favorite spray paint, Rustoleum 2X (which works on plastic), absolutely did not work on these plastic stacking presents!

The green and off-white presents immediately looked AWFUL. The paint didn’t stick to them at all!

Rustoleum 2x spray paint did not work to cover the Dollar Tree stacked presents.

The present box I spray painted gold with a different spray paint, Rustoleum Universal Metallic Spray Paint, worked much better!

Rustoleum Universal Metallic was the spray paint that worked for painting the stacked presents.

A couple of days later, I tried to spray over the green and off-white presents with the gold spray paint, but the paint immediately bubbled and cracked. It was not working!

So, I opened up the other set of stacking presents and sprayed two boxes from that set with the gold spray paint. (Note: the “bow” on top of the gift stack is removable, so I took that off for painting.)

Rustoleum Universal in Pure Gold is the spray paint that successfully covered the Dollar Tree stacked presents.

Two coats of paint were all it took for good coverage. Unfortunately, the spray paint did run in places. It’s almost like the metallic flakes in it settled strangely in spots. BUT, I was able to cover those problems for the most part! (See more below!)

Attach Ribbon to the Stacked Presents

For the next part of the project, I attached real ribbon to the present boxes. I started with the bottom gift box and cut 1.5″ wide wired ribbon to the length needed to cover each section of plastic ribbon on the box.

I pressed Glue Dots permanent dots to the “ribbon” on the box, and then pressed the real ribbon onto that. I used Glue Dots instead of hot glue because hot glue and plastic don’t always play well together.

Glue Dots were used to hold the ribbon on the presents.

You could try a different type of glue, but it might be hard to hold the ribbon in place while the glue sets up or hardens. The Glue Dots gave an instant hold, which I liked for this project.

Once I had the base present finished, I attached ribbon to the other two present boxes. For the top box, I cut two very long pieces of ribbon and wrapped them over the top of the gift box.

Plaid ribbon pressed onto the face of the stacked presents adds a festive touch.

Then I made a bow out of the same ribbon and hot-glued that to the overlapping ribbon on that top box.

A real bow takes the place of the plastic bow on the Dollar Tree stackable presents.

Hang a Gift Tag From the Box

Next, I hung a Dollar Tree ornament that looks like a gift tag from the bow on the top of the box.

It’s the perfect size for this present stack decoration!

I Think You’ll Love This Other Dollar Tree Christmas Craft, Too!

Dollar Tree DIY Candy Cane Wreath

Add Details with Vinyl or Stickers

Because I wanted my stacked presents to be multiple colors, I didn’t love the solid gold look of my project.

So, I cut permanent vinyl with my Cricut Joy into dots and Christmas Trees. Then I stuck that onto the bottom gift box and the middle gift box to help them look like patterned wrapping paper.

Adding vinyl cutouts to the stacked presents helps them look like they are wrapped in gift wrap.

I did not use transfer tape as I was worried that would rip off the spray paint from the presents. So, I just eyeballed the placement of each vinyl cutout and applied them like stickers.

Using these vinyl shapes was also a great way to hide the spray paint imperfections on these painted gift boxes!

DIY Stacked Presents Decoration

All in all, I’m pretty happy with how this stacked present decoration turned out. It’s definitely not perfect, but it’s not horrible either.

I originally thought I would use this outside, but it’s pretty lightweight and I’m worried it might blow away. So, it will stay inside. 🙂

The Dollar Tree stacked presents got a beautiful new look for Christmas! This stackable presents decor makeover is a must see.

Have you found these adorable stacked presents in your Dollar Tree store? How do you plan to decorate them?

Filed Under: Christmas, Dollar Tree

DIY Holiday Simmer Pot Gift

December 20, 2023 by Bre 2 Comments

Make a DIY Christmas simmer pot gift jar for neighbors or friends!

If you’re looking for a DIY gift that a neighbor or friend will appreciate this holiday season, try making a DIY holiday simmer pot gift jar!

Around the holidays, my neighbors usually stop by for a quick visit, and they always bring a thoughtful gift. During a time of year when people are so busy, it feels extra special to know that they’ve thought of me and my family!

Because of that, I also try to have a small gift to give the neighbors and friends we are so grateful to have.

This year, I decided to try a gift that would fill their homes with the scents of the season: a holiday simmer pot or stovetop potpourri jar!

blank

By drying common items from the grocery store in the oven and assembling them into pretty packages, I created lovely gifts that I think they’ll appreciate.

You can make these Christmas simmer pot gifts even if you don’t have time to dry the ingredients! You can make a fresh simmer pot gift or stovetop potpourri by making minor substitutions with fresh ingredients, as noted in the recipe card at the end of this post.

Also, if you’d like to attach a gift tag with instructions for using the jar’s contents, you can print the gift tags I made. They are linked in the recipe card at the bottom of the post.

A couple of things to note: Dollar Tree has jars that are perfect for packaging up your simmer pot contents! And at just $1.50 per jar, they’re very budget-friendly.

Another thing to note is that you can substitute ingredients and quantities to work with what you have on hand (or can easily acquire).

Make a DIY Christmas simmer pot gift jar for neighbors or friends!

DIY Holiday Simmer Pot Gift

Yield: 4
Prep Time: 10 minutes
Active Time: 10 minutes
Additional Time: 4 hours
Total Time: 4 hours 20 minutes

If you're looking for a thoughtful and unique Christmas gift for a neighbor, friend, or hostess, you'll love this DIY holiday simmer pot recipe! Make it with dried or fresh ingredients and enjoy the aromas of citrus and spices.

No Ratings

Materials

Gifting Supplies

  • Glass Jars with Lid (4)
  • Ribbon
  • Printable Gift Tag and Simmer Pot Instructions

Simmer Pot Ingredients

  • Naval Oranges (4)
  • Fresh Rosemary (at least 8 sprigs)
  • Cinnamon Sticks (2, 1 oz. containers)
  • Dried Cranberries (12 oz.)
  • Whole Cloves (4 tsp.)
  • Allspice (4 tsp.)
  • Nutmeg (optional) (4 tsp.)

Tools

  • Scissors
  • Knife
  • Oven
  • Baking Sheets (2)
  • Parchment Paper

Instructions

  1. Preheat the oven to 250 degrees Fahrenheit. While the oven is warming, line a baking sheet with parchment paper.
  2. Cut four naval oranges into slices that measure approximately 1/4" thick. Lay them onto the parchment paper-covered baking sheet.
  3. Put the oranges in the oven for one hour. After one hour is up, flip each orange slice over, and let them bake for another hour. Repeat this process at least one more time. (Oranges should be in the oven for at least three hours.). Once the oranges are removed and have cooled, touch them to see if they have retained any moisture. If they have, let them sit out for at least 24 hours so that they can finish drying.
  4. Line another baking sheet with parchment paper and place the rosemary sprigs onto it. Bake the rosemary at the lowest temperature possible for 45 minutes. Check to see if the rosemary has dried. If not, put it back into the oven to cook for an additional 15 minutes. Repeat this process until the rosemary is dry.
  5. Once the oranges and rosemary are cool and dry, you can assemble the simmer pot gifts. Begin by pouring the dry spices into the bottom of the jar (Allspice, Whole Cloves, and Nutmeg and Star Anise (if using)). Then, pour in 1 - 1.5 cups of dried cranberries. Place four dried orange slices into the jar, and then add in four cinnamon sticks. Lastly, put the dried rosemary into the side of the jar, taking care not to smash it or break off its leaves.
  6. Replace the lid on the jar, and tie a festive ribbon around the lid to add a pretty holiday touch. If desired, print these Holiday Simmer Pot Gift Tags and attach one to the jar, signing your name on the back. This will help the recipient know how to use the gift.

Notes

If you don't have time to dry the oranges and rosemary, it's no problem! Substitute small mandarin oranges for the naval oranges, and enclose one full mandarin orange in place of the four orange slices. Also, use fresh rosemary sprigs and fresh cranberries in place of dried. Make sure to gift this version of the Christmas simmer pot right away, with instructions that it should be used within three days of receipt.

© Bre
Project Type: Crafts / Category: Christmas
blank

I hope you like this DIY gift idea. Please let me know in the comments if you do, and also if you have any questions!

Filed Under: Christmas

How to Make a Custom DIY Snow Globe of Your House

December 11, 2023 by Bre 8 Comments

blank

If you’re looking for a keepsake or a personalized gift to make this holiday, look no further because I’ve got you! Wait until you see how easy it is to make a DIY custom snow globe of your house (or anybody else’s house)!

This waterless snow globe idea is just PERFECT as a neighbor gift, realtor closing gift, for someone who moved to or from a home this year, and more!

Learn how to make a custom snow globe of your house! It's easy to make a DIY home snow globe with this tutorial.

It doesn’t take a lot of skill or time to make, and you’re sure to show the person to whom you give it that you care!

Hey, you might like these other DIY Snow Globe Ideas, too!

DIY Snow Globe Gift Card Holder

DIY Snow Globe Candle

DIY House Snow Globe Supplies

Here are the supplies I used to make the custom house snow globe as shown in this post. Feel free to supplement supplies to make this project your own!

Also, some of these supplies can be purchased at Dollar Tree, but they’re out of stock online at the time of publication, so I’ve linked alternates. Some of these are affiliate links; you can learn more in my disclosure policy.

  • Waterless snow globe
  • Mini bottle brush Christmas trees
  • Faux snow
  • Snowflake stickers
  • Ribbon
  • Photo of house (I printed on an inkjet printer, sized at 3″ x 3″)
  • Cardstock
  • Glue stick
  • Clear multi-surface glue

How to Make a Custom House Snow Globe

I’m showing you how to make a snow globe of your house, but you could really do this with any photo! Think special vacation spot, a family photo, your cherished pet, and more.

Step One: Photograph the House

If you don’t have a photo of the house handy, go take a picture or be a creeper and look up the address on Google. You’ll either find listing photos of the house from the last time it was up for sale, or you’ll find a street view image of the house on Google Maps.

Then, size the image to print on your home printer (I printed at 3″ x 3″), or upload the image and send it to a local drugstore like Walgreens to print.

If you print at home, mount the picture on cardstock so that it has some stability. I used a regular glue stick to attach the photo to the cardstock.

Print a photo of the house and mount it on cardstock.

If you printed the image on photo paper, it will be sturdy enough to skip this.

Step Two: Cut Out the House

Next, cut along the outline of the house image, taking care to leave about a 1/4″ strip at the base of the house.

Then, cut notches on both sides of the base strip in order to create a lip piece or flap at the bottom of the house.

Cut out the picture of the house and make a flap at the bottom.

Fold that flap backwards with a sharp crease.

Fold over the flap.

Step Three: Fill the Snow Globe

Now, put clear multi-surface glue along the bottom of that flap, and glue the house picture onto the inner lid of the snow globe. (Note: if your snow globe only has one lid and not an inner seal, that is fine, too!)

Glue the picture of the house into the snow globe base.

Glue some mini bottle brush Christmas trees in places that won’t obscure the view of the house picture, and then put glue all over the snow globe base and sprinkle faux snow all over that.

For the actual globe part of the snow globe, press snowflake stickers with clear backings all over the inside of the globe. If you have a Cricut, you could cut snowflakes on vinyl and use those instead!

Press clear snowflake stickers inside the globe part of the snow globe.

Step Four: Attach and Adorn the Lid

Finally, screw the lid onto the snow globe and tie ribbon around it for a festive touch.

Tie ribbon around the base of the waterless snow globe.

You’ve now turned your house (or someone else’s house) into a snow globe! How fun is that?!?

Learn how to make a custom snow globe of your house! This DIY snow globe of your home will be a keepsake to last a lifetime.

I’d love to hear what you think of this project in the comments below! And if you enjoyed this idea, please share it on Pinterest!

Filed Under: Christmas

DIY Snow Globe Candle

October 31, 2023 by Bre Leave a Comment

blank

Transform a waterless snow globe into a beautiful DIY snow globe candle that’s perfect for your Christmas decor or to give as a DIY holiday gift!

Stop in at any craft store or Dollar Tree around this time of year, and you’ll find waterless snow globes. These are perfect for Christmas crafting!

You might be looking for ideas on what to make with these empty snow globes, and I’ve got an idea for you!

Transform a Dollar Tree waterless snow globe into an adorable monogram snow globe candle! This Christmas craft is inspired by the Anthropologie monogram snow globe candle.

This post contains affiliate links. Please read my disclosure policy for more information.

I was inspired by the CUTEST Anthropologie snow globe candle. I’ll call my snow globe candle the poor (wo)man’s version of Anthropologie’s. 🙂

DIY Snow Globe Candle Supplies

These are the supplies I used for this Christmas candle craft. You can substitute with anything that works for you!

  • Craft snow globe
  • Mini bottle brush Christmas trees
  • Faux snow
  • Mini wood snowman
  • Small jar candle (I purchased mine at Aldi for $2.49)
  • Wood letter
  • Glitter paint
  • Paint markers
  • Glue: hot glue and multi-surface glue
  • Holiday ribbon
  • Optional: spray paint – I spray-painted my lids, but you probably don’t need to.

Now listen, if you don’t own some of these supplies already (like the spray paint, paint markers, etc.), it may make more sense to buy the candle from Anthropologie than to make your own!

But, if you own several of these supplies already and/or are making this project with a group, the economics work out much better!

How to Make a Snow Globe Jar Candle

Get all of your supplies ready to go, and decide if you want to spray paint the candle jar lid and the snow globe lid. If you do, now’s the time to do it, so they have plenty of time to dry.

If you have ribbon that’s thick enough to cover these lids, you could probably skip this step.

Paint the Wood Letter and Snowman

To make the unfinished wood letter look like the letter in the Anthropologie candle, I watered down some brown craft paint and applied it to the letter like stain.

Then I painted a strip of glitter paint on the diagonal at the top, and added silver polka dots with a paint marker on the rest of the letter.

Paint a small wood letter with glitter and silver polka dots to look like the monogram letter in the Anthropologie snow globe candle.

I realized that the serif part of the “E” would not allow the snow globe to close around the lid, so I cut that off with a hand saw.

If you’re using another small wood embellishment (Anthropologie’s candle uses a house; I used a snowman), decorate those at this time. I used paint markers to give the snowman a black hat and carrot nose, and a ribbon to give him a scarf.

If you love Christmas crafts ideas, check these out!

  • DIY Custom House Snow Globe
  • Dollar Tree Candy Cane Wreath
  • Dollar Tree Christmas Cloche

Glue the Lids Together

Next, using a combination of hot glue and multi-surface glue, glue the flat part of the snow globe lid to the flat part of the candle lid.

Glue the lids of a jar candle and a snow globe together.

The reason I used two glues is that the multi-surface glue will provide a long-lasting hold, whereas the hot glue will keep the two lids together in the short term so you can work on the project faster (without waiting for the multi-surface glue to dry).

Add the Embellishments

Now, fasten the embellishments to the snow globe lid. I started with the wood letter and glued that in with the multi-surface / hot glue combo.

Then I added two mini bottle brush Christmas trees, the tiny wood snowman, and faux snow all around the base.

Place small embellishments into the base of a waterless snow globe to create a snow globe candle.

Once those were set in place, I screwed the globe part onto the base or lid.

Watch this video for a waterless snow globe gifting idea!

Fasten Ribbon to the Lids

To help hide the candle jar lid and snow globe lid, glue festive ribbon around them. Make sure the ribbon you choose doesn’t make it so that you can’t unscrew the candle jar lid!

Glue ribbon around the lid of the candle and snow globe for a pretty and decorative touch.

And that’s all it takes to make your own Christmas snow globe candle inspired by Anthropologie!

Make a DIY snow globe candle with a waterless snow globe from Dollar Tree and a jar candle from Aldi.

Happy holidays and happy crafting!

Filed Under: Christmas

DIY Marbled Nail Polish Ornaments

November 10, 2022 by Bre 7 Comments

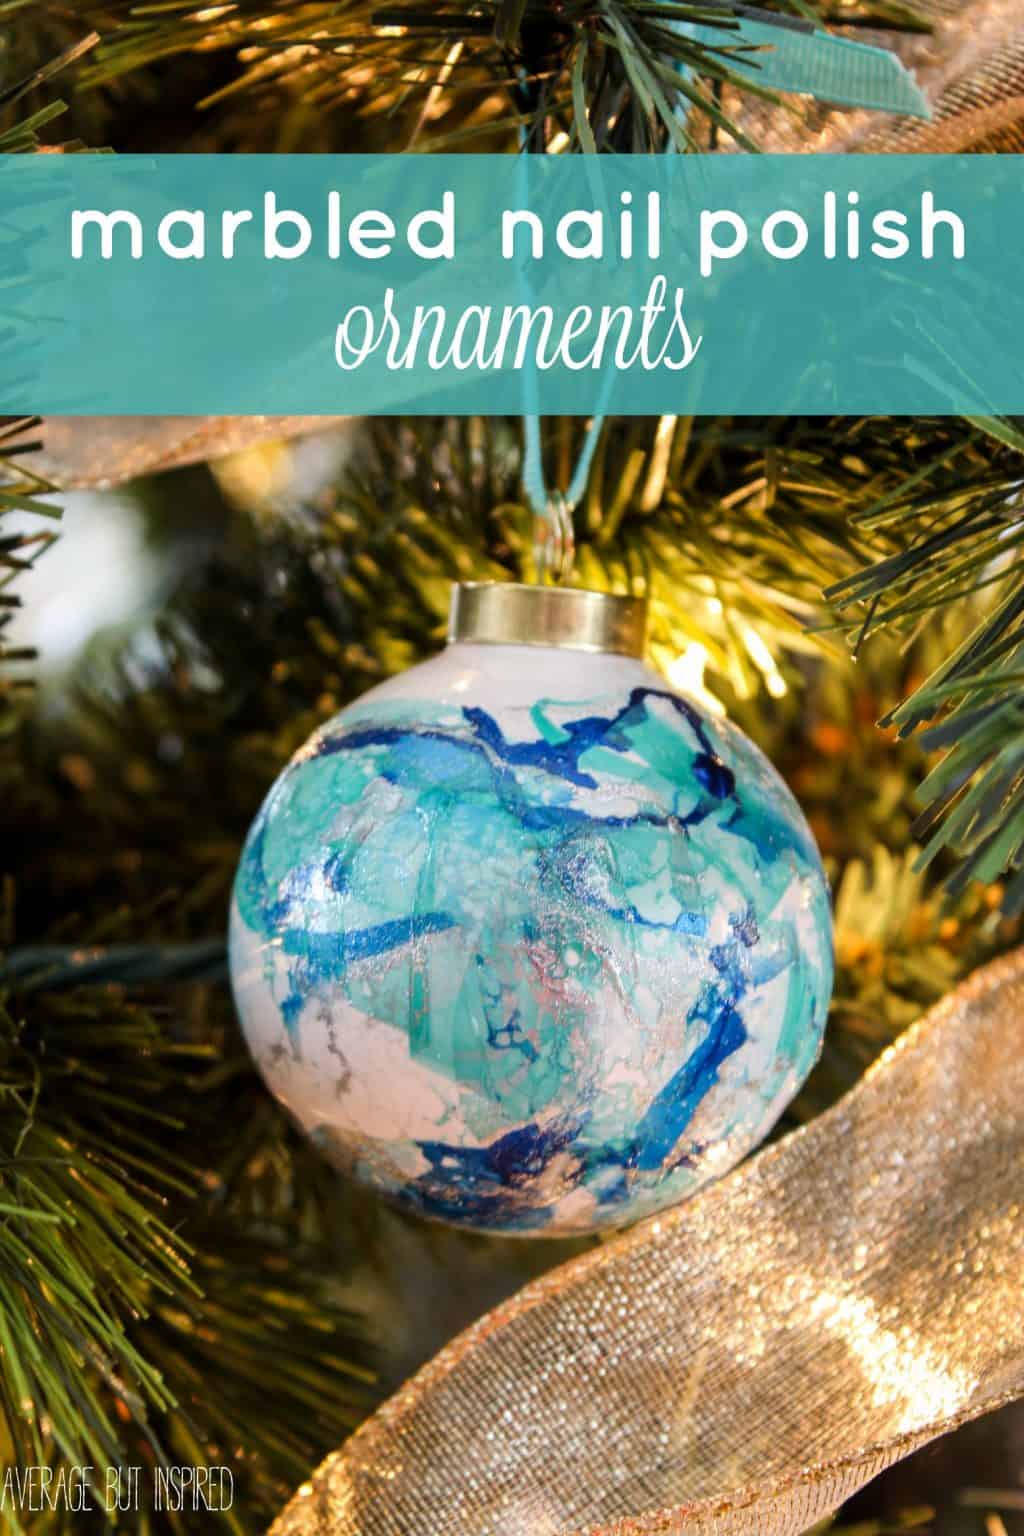
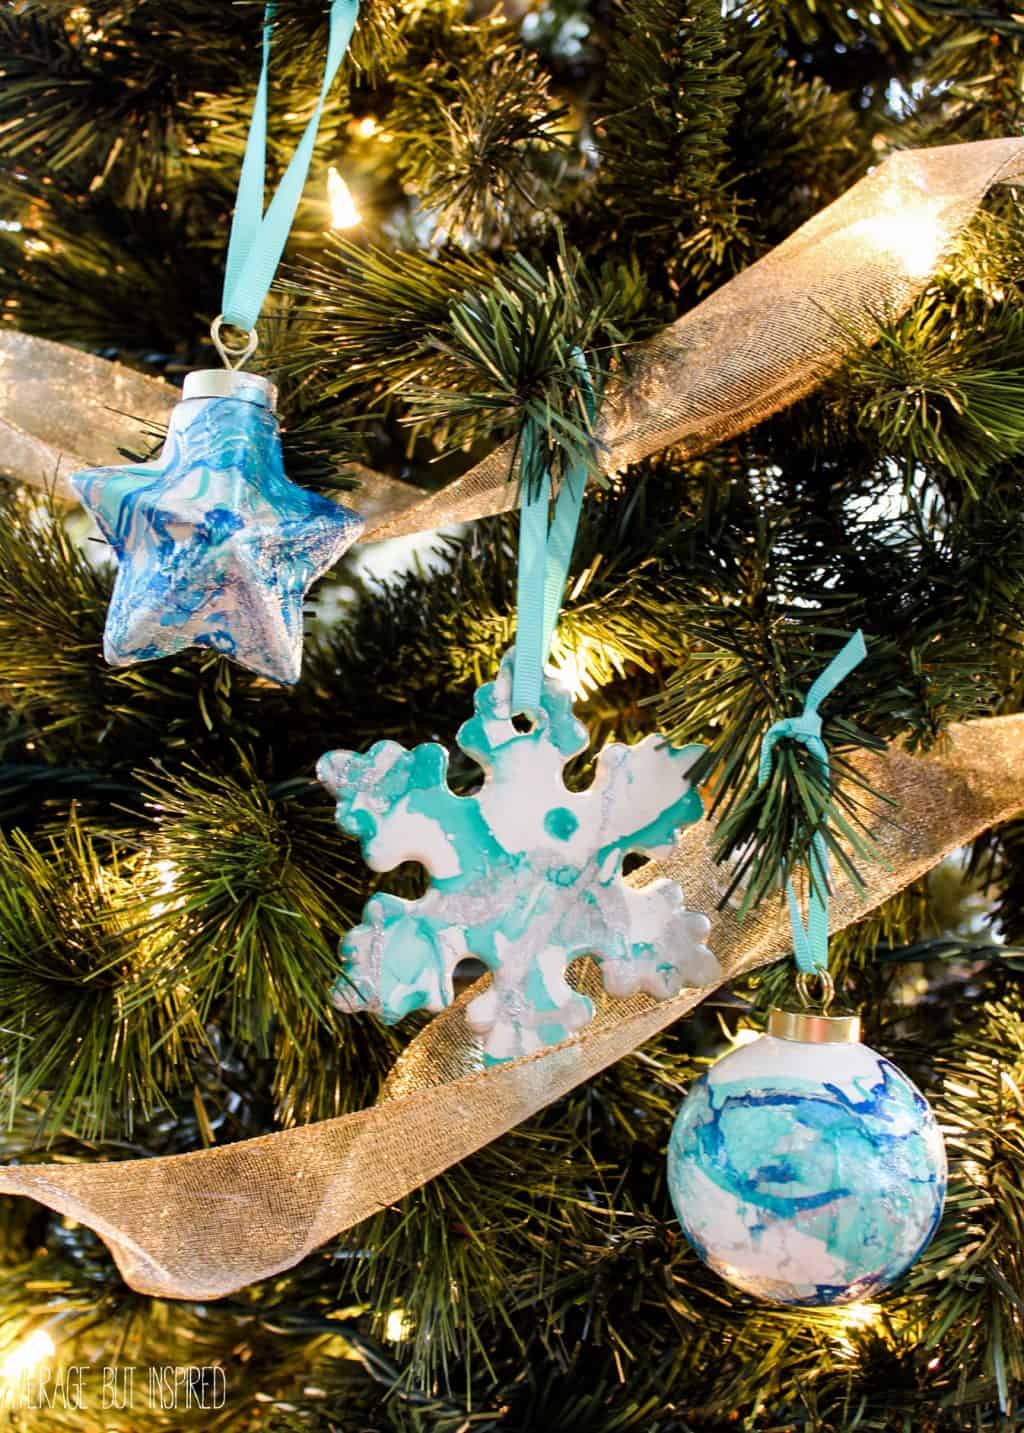
Learn how to make nail polish ornaments! This nail polish marbling technique is so easy.

If you want to make gorgeous DIY Christmas ornaments, you must make some DIY marbled nail polish ornaments!

Nail polish marbling has been floating around Pinterest for a long time now, and it’s one of those things that I’ve always wanted to try.  But it kept getting pushed down the list because I couldn’t find just the right thing to marble.  (Or really because I just kept forgetting to do it.)  

Marbled Nail Polish Ornaments are a quick project with fabulous results! Get the full tutorial here and learn how to make them in any shape or color combo!

But then I found some plain ceramic ornaments and I finally had a reason to give the old nail polish marbling technique a try.  

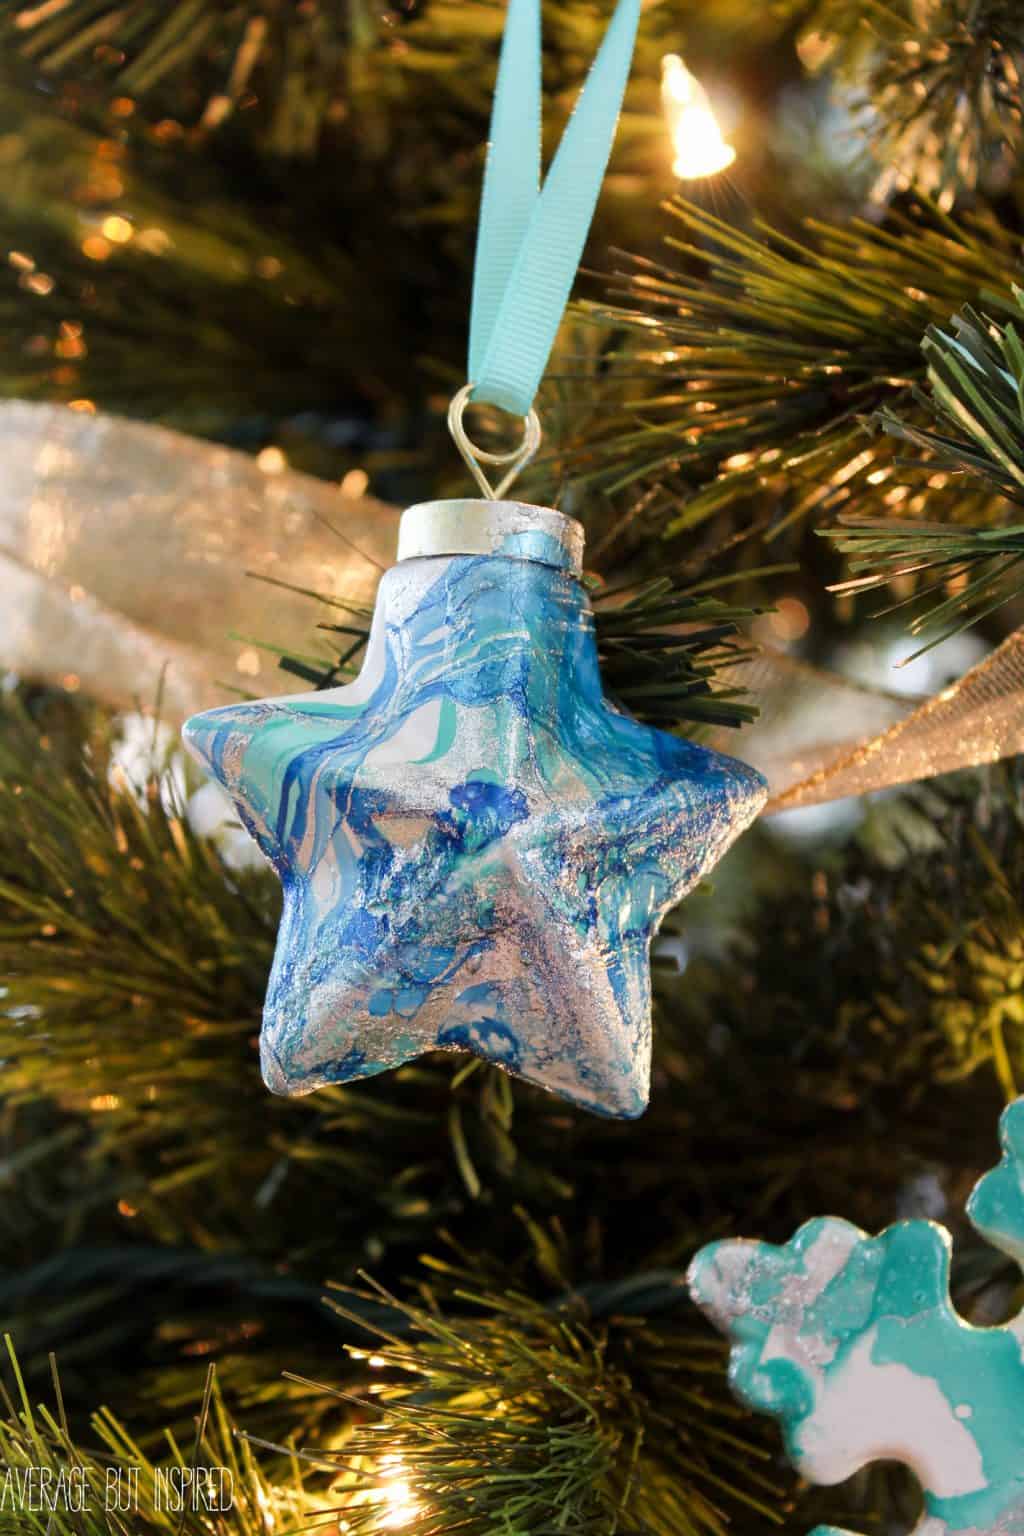
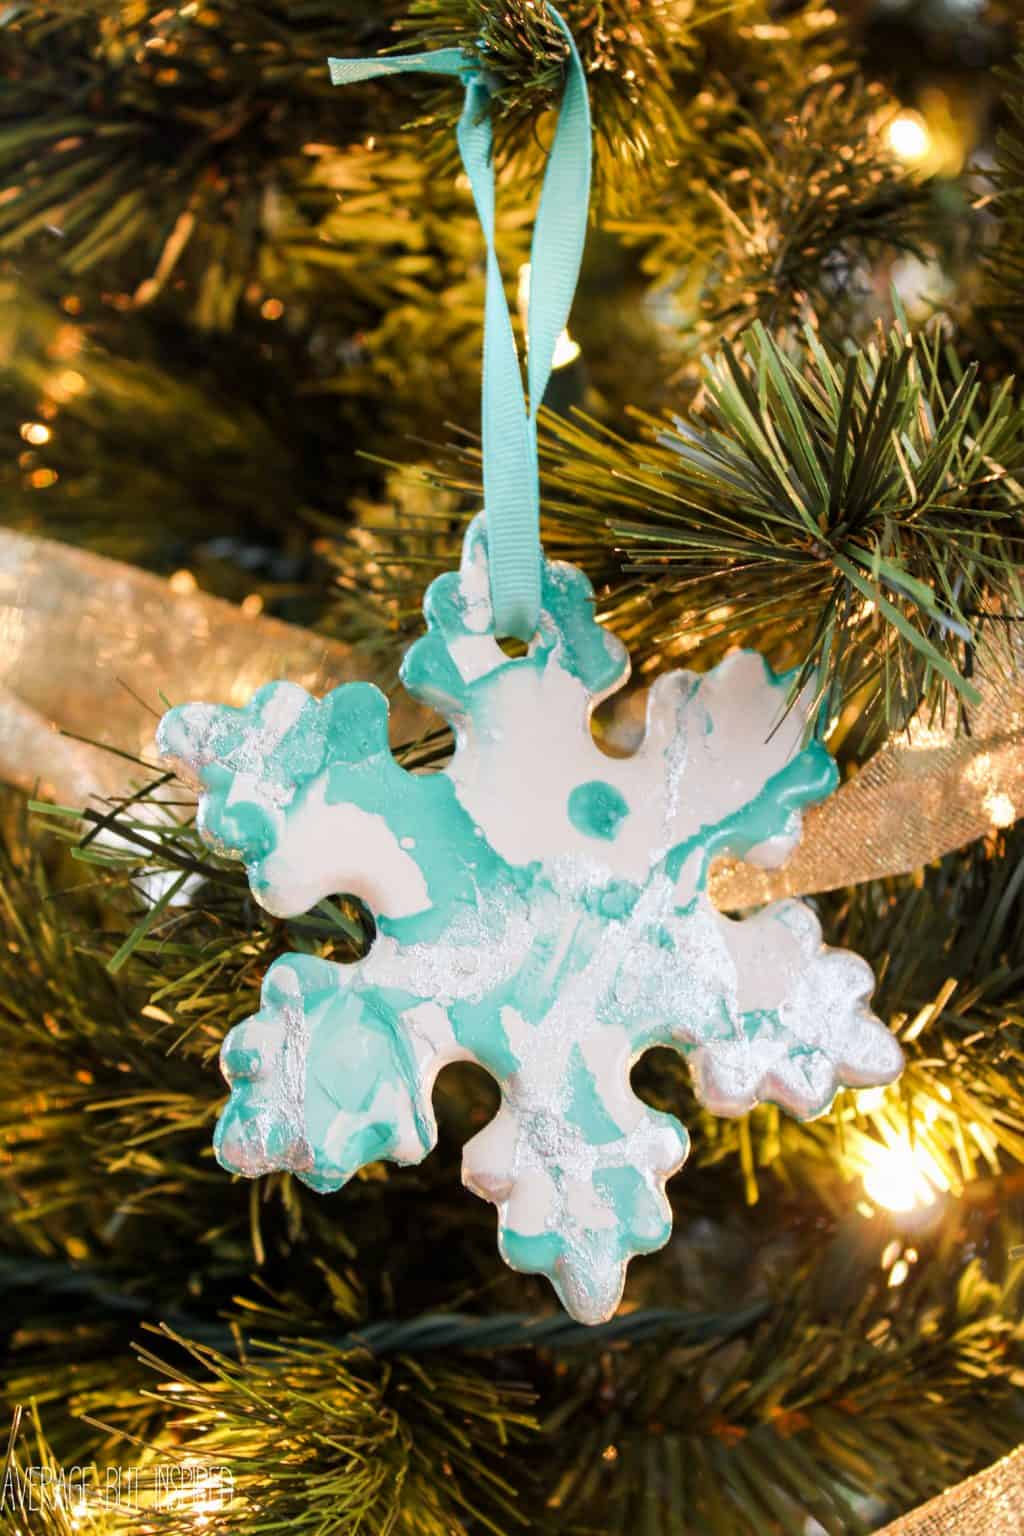
Now I have some GORGEOUS nail polish ornaments adorning my tree, and I love them!    

I have to tell you that this project was SO fun, although a bit stinky.  I recommend doing it outdoors, if at all possible, but at the very least in a well-ventilated space. Otherwise, you’re going to feel like you were trapped in a nail salon – minus the pretty nails.

DIY Nail Polish Ornaments Supplies

With that caveat, here’s what you need to nail polish marble your own ornaments!  Please note that this post contains affiliate links – you can read my full disclosure policy.

  • Nail polish – NOT quick dry!
  • Blank ceramic ornaments
  • Popsicle sticks (or other stirring tool that can be thrown away)
  • Pretty ribbon
  • Disposable gloves
  • Plastic soaking tub or container
  • Rubbing alcohol
  • Paper towels
  • Water

How to Make DIY Nail Polish Ornaments

First up, wipe off the entire ceramic or porcelain ornament with rubbing alcohol.  This will ensure that it doesn’t have anything on it that will prevent the nail polish from sticking.

Next, fill a plastic container with water.  (And hey, you might want to also watch my “how to do nail polish marbling” video tutorial!)

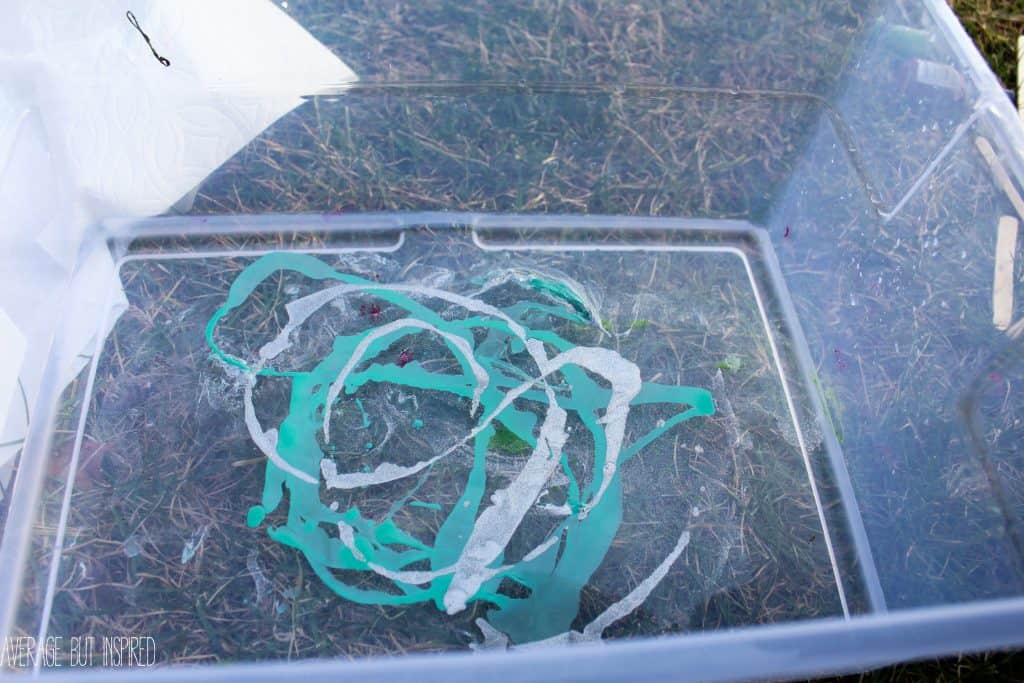
Holding the nail polish close to the surface of the water, gently pour it onto the water.  

Marbled Nail Polish Ornaments are a quick project with fabulous results! Get the full tutorial here and learn how to make them in any shape or color combo!

TIP: do not pour the nail polish from too high above the water, as it will hit the water too hard and sink to the bottom of the plastic container. You want it to stay on the surface.

Next, use the popsicle stick to gently stir the colors together to create a marbled effect.  

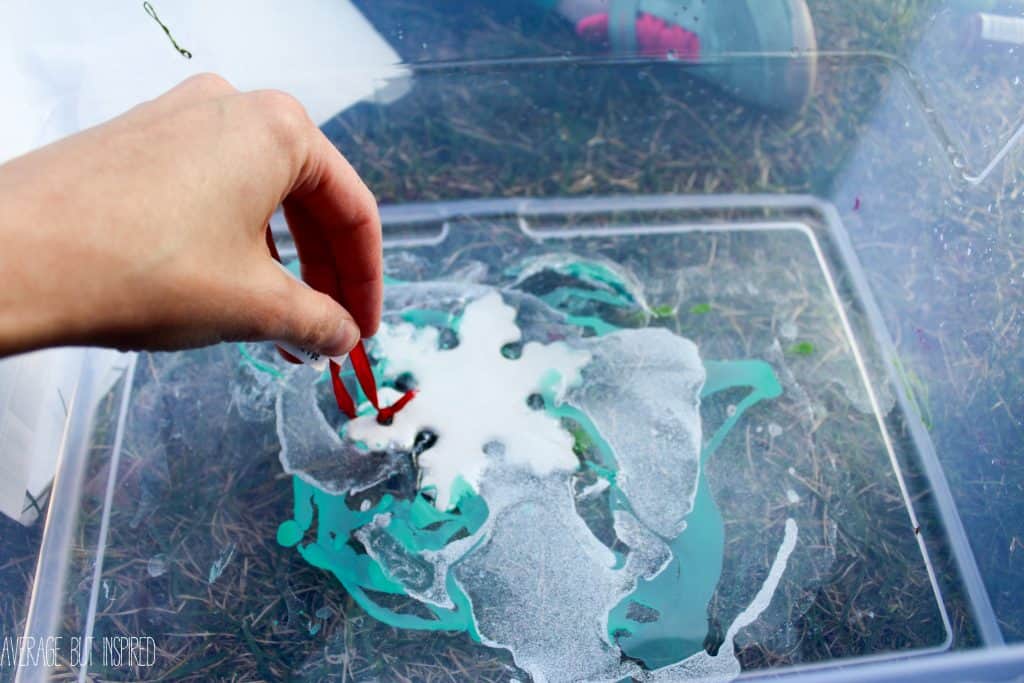
Quickly place the clean ornament onto or into the nail polish.  

Marbled Nail Polish Ornaments are a quick project with fabulous results! Get the full tutorial here and learn how to make them in any shape or color combo!

Remove the ornament from the plastic container and try to shake off the water.

Marbled Nail Polish Ornaments are a quick project with fabulous results! Get the full tutorial here and learn how to make them in any shape or color combo!

Once it’s had a couple of minutes to dry, use a paper towel to gently blot off the excess water droplets. BE CAREFUL because the polish will not be totally dry yet, and you don’t want to ruin your beautiful marbling!  

Hang the ornament to dry somewhere.

Marbled Nail Polish Ornaments are a quick project with fabulous results! Get the full tutorial here and learn how to make them in any shape or color combo!

Cut off the ribbon that came with the ornament and replace it with a pretty ribbon or ornament cording that matches the colors used in the nail polish marbling.

Marbled Nail Polish Ornaments are a quick project with fabulous results! Get the full tutorial here and learn how to make them in any shape or color combo!

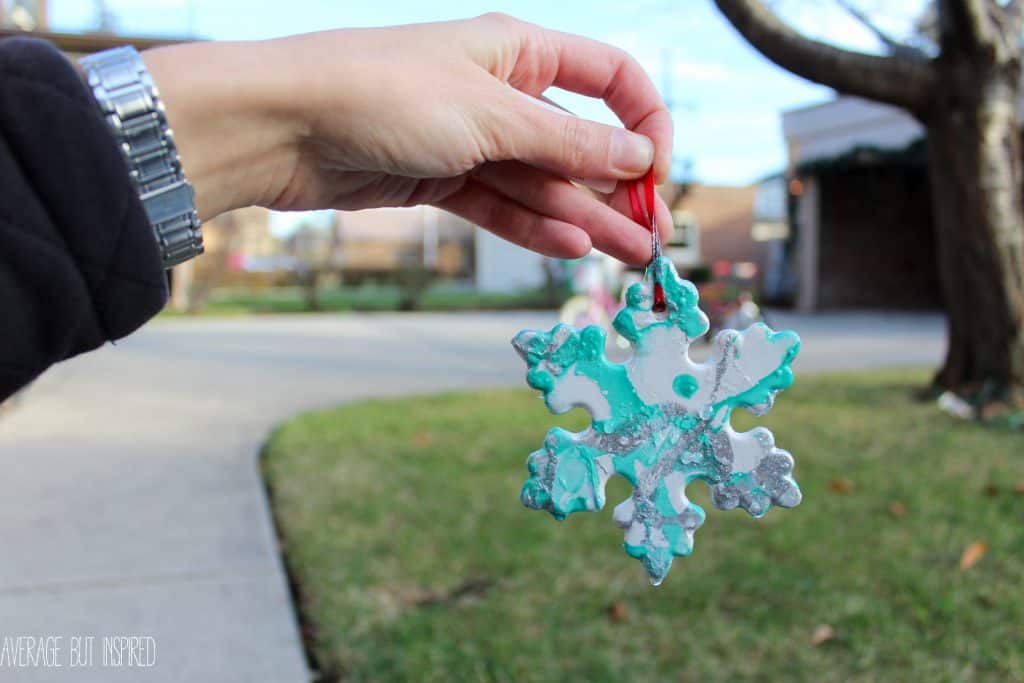
TIP: For my snowflake, I used two colors.  My kids used three colors – including a really bold blue – and I think theirs look better.  I would recommend three colors in the same family, as I think that’s what works best!  

Marbled Nail Polish Ornaments are a quick project with fabulous results! Get the full tutorial here and learn how to make them in any shape or color combo!

ANOTHER TIP: If you plan to give these as a gift, give yourself a couple of days’ lead time. They need to air out a bit before gifting.  

Marbled Nail Polish Ornaments are a quick project with fabulous results! Get the full tutorial here and learn how to make them in any shape or color combo!

These nail polish ornaments are really pretty though. I think the best part about them is that each one is totally unique!

This project would also be a great way to use up some of that old polish in your stash!  

Filed Under: Christmas

Dollar Tree Candy Cane Wreath: DIY Christmas Wreath

October 26, 2022 by Bre 7 Comments

Dollar Tree wreath forms and socks are turned into an adorable candy cane wreath!

If you’re looking for a simple, cute, and easy Christmas wreath or Christmas door hanger project, look no further! This DIY Dollar Tree Candy Cane Wreath holiday decor checks all the boxes.

Learn how to make a Dollar Tree candy cane wreath to dress up your front door this Christmas!

This post contains affiliate links. For more information, please read my full disclosure policy.

My favorite part about this project is that it uses a totally unexpected supply: socks! Yes, socks. Can you believe it?

This is not your typical wreath made out of candy canes!

The minute I spotted these red and white striped cozy socks at Dollar Tree, I knew exactly what to make with them.

And I’m excited to show you just how to use them, too! (Unless you want to wear them as socks. No tutorial here for that. Wink wink.)

DIY Candy Cane Wreath Supplies

Here are the supplies I used to make this candy cane wreath as shown in this post. Feel free to substitute anything to make this project your own!

I did buy the supplies at Dollar Tree, but they’re no longer available online, and I can’t always find the socks in-store. I’ve linked product from alternate sources for your convenience.

  • Two Dollar Tree metal candy cane wreath forms. (NOTE: these are not always available. Purchase alternative candy cane wreath forms online.)
  • One pair of red and white striped cozy socks
  • Frosted greenery
  • Wide burlap ribbon
  • Floral wire
  • Hot glue gun
  • Ornament
  • Twine or ribbon
  • Scissors
  • Optional: needle with large opening

DIY Dollar Tree Candy Cane Wreath Instructions

This Christmas craft comes together so effortlessly that I know you’re going to love it!

Step One: Cover the Wreath Forms with Socks

Start by sliding one striped sock over one of the candy cane wreath forms. I started at the curved tip of the candy cane so that the toe of the sock was at that end, and the open part of the sock was at the bottom of the candy cane.

Take the next candy cane wreath form and flip it over. Then, repeat the process of putting the wreath form in the sock.

Use Dollar Tree's candy cane wreath forms and plush socks to make an adorable DIY candy cane wreath.

The socks are a little bit wider than the wreath forms – especially at the top curved part (where the foot would go in the socks).

To deal with that, flip over each of the candy canes and use hot glue to fold over and press down the extra fabric.

Then, hot glue the bottoms of the socks together. (Well, actually, it would be the top of the socks if you were putting them on your feet!)

Check Out These Other Dollar Tree Christmas Crafts!

DIY Snow Globe Candle

DIY Stacked Presents Decor

DIY Fake Snowballs

Step Two: Add the Embellishments

Next, place hot glue in the middle front of one of the candy canes, and press them together so they’re criss-crossed.

Wrap burlap ribbon around the candy canes OR cinch a piece of ribbon with floral wire and attach it to the candy canes.

Then attach greenery stems to the ribbon – also with floral wire.

Dollar Tree supplies like the candy cane wreath form and striped socks come together to make an adorable DIY Christmas wreath.

Attach a cute ornament with twine or floral wire. Bonus points if you find one that’s candy cane-related!

Add embellishments like faux greenery and a Christmas ornament to make this candy cane wreath special.

Step Three: Add a Wreath Hanger

Finally, thread a needle with twine or embroidery floss, and create a loop at the top of the candy canes so that you can hang this festive candy cane wreath on your door!

Learn how to make a DIY candy cane wreath with Dollar Tree supplies! This blog post teaches you everything you need to know.

I swear, these striped socks were just screaming to be saved from being on someone’s stinky feet!

Pretty greenery and an ornament dress up a dollar store DIY wreath.

Let me know what you think of this project! Is this one of the cutest DIY candy cane wreaths you’ve seen? If not, fill me in on those other candy cane decoration ideas you’ve spotted!

I love to hear from you in the comments and on my social media!

Filed Under: Christmas, Dollar Tree

  • Page 1
  • Page 2
  • Page 3
  • Interim pages omitted …
  • Page 6
  • Go to Next Page »

Primary Sidebar

Let’s Connect!

Hi, I’m Bre! Thanks for visiting Average But Inspired, where I show you how to work with what you’ve got to create a home you love.

Bre of Average But Inspired - a DIY and craft blog

Love DIY? Subscribe to Get Posts E-mailed!

How Can I Help You?

blank

How to Paint a Door to Look Like Wood (It’s Easier Than You Think!)

blank

My DIY Kitchen Makeover Reveal!

blank

How to Create a Faux Antique Brass Finish with Paint

blank

How to Paint Over Tile

Looking for Something?

Copyright © 2013-2022, Bre Eggert (Average But Inspired). All rights reserved.
  • Home
  • DIY
  • Crafts
  • Home Decor
  • Privacy Policy and Copyright Policy
  • Disclosures
  • Contact Me