Last year I helped my sister give her original 1950’s kitchen a budget-friendly but impactful makeover – complete with new and painted cabinets, new countertops, and new flooring. She later decided she wanted to add a backsplash, but she wasn’t sure she wanted to spend the time or money to install a real tile backsplash.
After researching options, we decided that a Smart Tiles peel and stick backsplash would be the perfect solution. We liked Smart Tiles because, unlike other peel and stick tiles we’d seen, Smart Tiles look like real tile.
They’re thicker than a sticker or wallpaper, they are easy to clean, won’t mold, and don’t yellow or crack. They also have been around the longest of the peel and stick options, and there are tons of reviews online singing their praises.
I reached out to Smart Tiles, and they generously agreed to donate the product for this project.
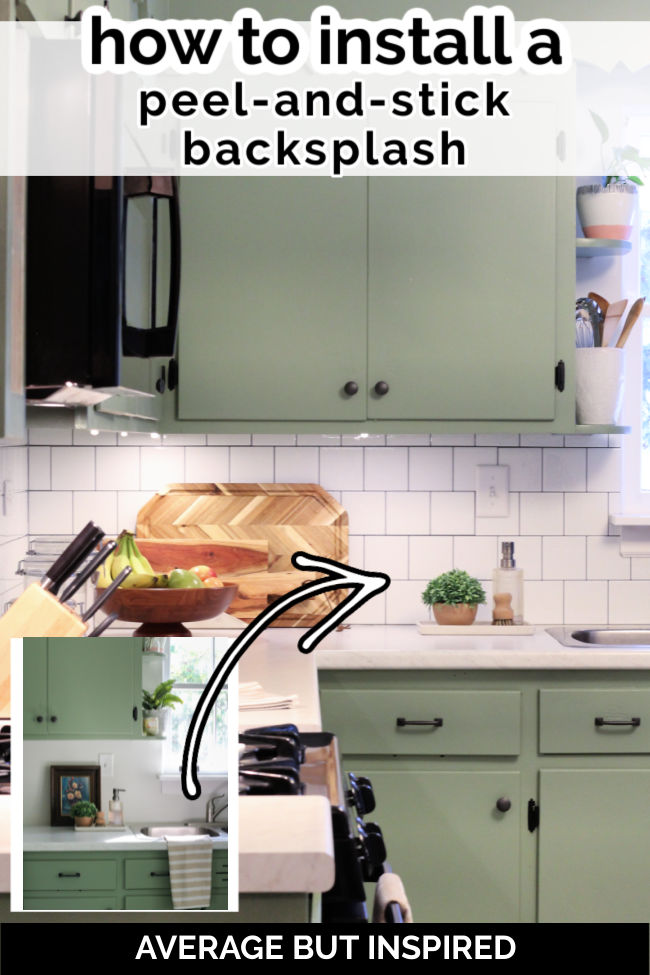
My sister chose the Smart Tiles Square Velden pattern, and in just one day we installed her new peel and stick kitchen backsplash. This new backsplash upgraded the look of her 1950’s kitchen even more, and I can’t wait to give you all the details!
(PS: Smart Tiles is giving Average But Inspired readers 15% off with code BRE15 !)
How Do You Install a Smart Tiles Peel and Stick Backsplash?
Installation of this peel and stick backsplash was fairly straightforward. Here are the tools and supplies we used (note that some of these links are affiliate links. You can read my disclosure policy for more information.):
- Smart Tiles Peel and Stick Tile
- TSP or Krud Kutter
- Level
- Pencil
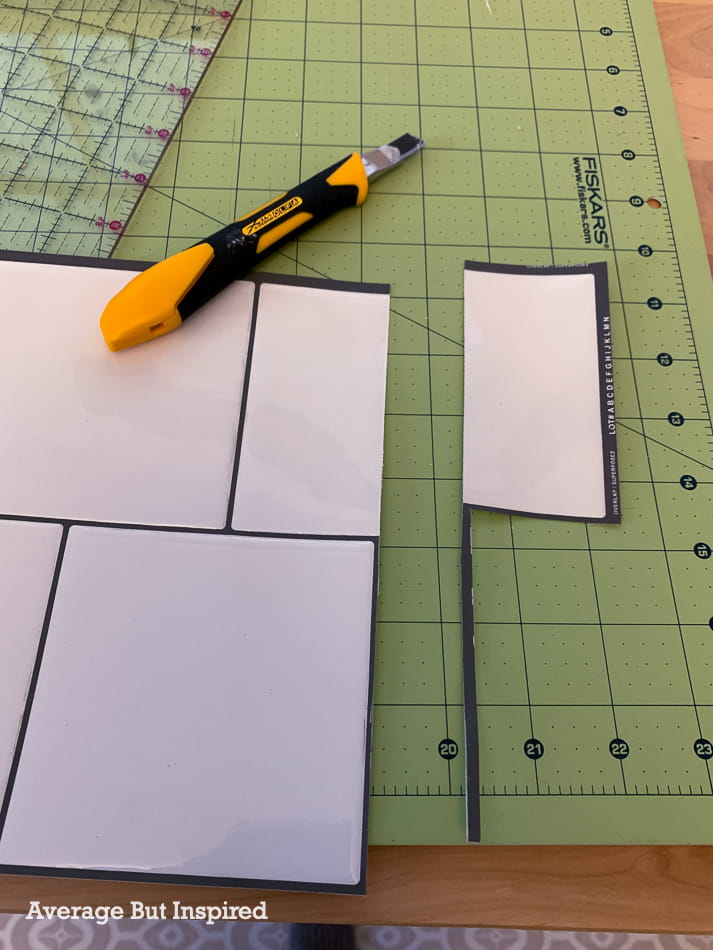
- Utility knife with new/sharp blade
- Scissors
- Self-healing cutting mat
- Non-slip ruler
- Printer paper
- Tape
Peel and Stick Tile Preparation
My sister cleaned the walls with Krud Kutter before I arrived, giving them enough time to thoroughly dry before we installed the tiles.
We then checked the countertops to make sure they were all level, which they were. Had they not been level, we would have drawn a level line on the wall in the location where the top of the first row of tile would stick. This is to ensure that the peel and stick tile is level on the wall.
Starting in the Corner
Since this backsplash needed to go on two walls, we started the Smart Tiles installation in the corner. In order to get the appearance of a grout line running down the center of the corner wall, we started by trimming off the inner edge of one set of tile so that it looked like this:
When we put it on the wall, it looked like this:

We then put the next set of tiles on the adjacent wall, and it looked like this:
You can see that the “half tile” on that second row is missing. At the end of installation, we cut a half piece, with a grout line, and stuck it in the gap. This created the look of the grout line running down the corner of the wall. You will see that in the completion pictures later in this post.
Once we had the corner tiles installed, we worked our way down the walls – installing as many full pieces as possible, and overlapping the edges with Smart Tiles’ awesome overlap system that helps ensure you get a properly spaced look upon installation.
Cutting the Peel and Stick Backsplash
When it came time to cut peel and stick tiles to accommodate outlets and around things like the windowsill, we used computer printer paper to create templates that we taped onto the tiles and then cut directly through. My mom was actually the rockstar template maker, and this helped installation go really fast!
Depending on the shape we needed to cut, we alternated between using the utility knife and scissors for cutting the Smart Tiles.
Finishing the Peel and Stick Tile Edges with Smart Tiles Smart Edge
One of the other reasons my sister and I chose a Smart Tiles backsplash is because of the corresponding Smart Edge strip pieces that you can use to finish the edges of a peel and stick backsplash. Instead of just being left with raw edges, the Smart Edge pieces trim out the ends just like on a real tile backsplash!
These Smart Edge pieces were easy to cut with scissors. I cut mitered edges for the corners, and they really finished off the backsplash ends nicely.
The Finished Smart Tiles Backsplash and Frequently Asked Questions
In several hours on a Saturday (including a nice Jimmy John’s and cupcakes lunch break – ha!), we added this beautiful peel and stick backsplash that looks good and functions well. This project was a total win!
I know there are a lot of questions surrounding Smart Tiles peel and stick tile backsplashes, so I’ll do my best to answer them.
Are Smart Tiles removable or renter-friendly?
During the installation process, we were able to move the Smart Tiles around as needed. However, in certain spots they did remove some of the paint when we lifted them up. Because of that, I wouldn’t say that they’re totally renter-friendly the way a tile sticker might be, for example.
The adhesive on these is strong so that they will stay on the wall and not fall off over time. They’re not meant to peel off the way a window cling comes off of a window, for example.
The beauty of Smart Tiles is that when you’re ready to remove them, you can easily do so without causing significant damage to your wall (like my husband and I did during our DIY Kitchen Remodel!).
Are Smart Tiles Waterproof?
Smart Tiles are not waterproof, but they are water-resistant in that they keep water off the wall. They are also heat and humidity resistant, which is perfect in a kitchen!
You would not want to install these in a very wet place like a bath tub or shower, however!
Do Smart Tiles Stick to Textured Surfaces?
A huge positive of this peel and stick backsplash is that the walls were not totally flat in all places. At one point there was a pass through in the wall to another room, and the patch that covered it was good but not seamless. The Smart Tiles covered those variations with no problem.
Also, I brought home a leftover Smart Tiles piece and stuck it on mosaic tile in my powder room to see how it would work to cover tile. It sticks perfectly and you cannot even see the texture of the tile beneath! I was shocked. So yes, Smart Tiles work to cover textured walls and tile.
Where Can I Buy Smart Tiles?
As I mentioned, we received these Smart Tiles direct from the manufacturer. You can visit the Smart Tiles website to check out all of the patterns and also to place an order.
Good news for Americans is that certain Smart Tiles patterns are also available at home improvement stores like Home Depot and Lowes!
My sister is so happy to have her new backsplash to complete her kitchen, and I am always happy when she’s happy. If you have any questions about Smart Tiles peel and stick backsplashes, please leave me a comment below or send me a DM on Instagram!
Ashli willis says
How are they holding up now that it’s been 1.5 yrs? Did any peel off?
Bre says
Hi! They’re amazing!! Nothing has peeled off. My sister has no complaints whatsoever. 🙂
Renee Jumper says
Some Renters like me who are on a budget, can buy self adhesive wall tiles at Family Dollar and Dollar Tree. I bought my Kitchen wall tiles at Family Dollar and my tiles for my laundry room at Dollar Tree. Family Dollar has better looking tiles for your kitchen and bathroom that are the same patterns you can find at Amazon, Lowe’s and Home Depot but way less expensive.
Bre says
Yes! Peel and stick everything is a game changer for renters and budget-friendly updates! The best!
Juanita says
Can these SMART TILES be put over other tiles? I’d like to put them over my kitchen tiles which would be an improvement. Thank you.
Bre says
Hi, Juanita! Yes, they can! I put them over the tiles in my bathroom to see how they’d work, and there was no texture at all! I would suggest ordering one or two sheets of them and trying – just to make sure they work with your tile beneath.