One of the biggest negatives of my house was the narrow master bathroom or primary bathroom.
Don’t get me wrong: we were very happy to have an en suite bathroom.
But in our case, the bathroom seemed to be an afterthought in the design process. It was incredibly narrow and cramped (especially as compared to my kids’ giant bathroom! Check out the modern vintage bathroom makeover I gave it!)
Not to mention, it was falling apart. Literally. Tiles were coming off the wall, the ceiling was totally cracked, and there was a giant hole in the wall where the door handle smashed into it.
Because of that, we had to do a gut renovation (as opposed to my usual “lipstick on a pig” approach to all things home!).
We hired professionals to do this because we did not have the time or skills to take on a project of this scope.
With their help, we maximized this narrow small bathroom layout and upped the style points significantly!
Before: The Small Master Bathroom with Leaking Shower
Every good renovation post starts with some before photos. You have to get an understanding of what we were working with!
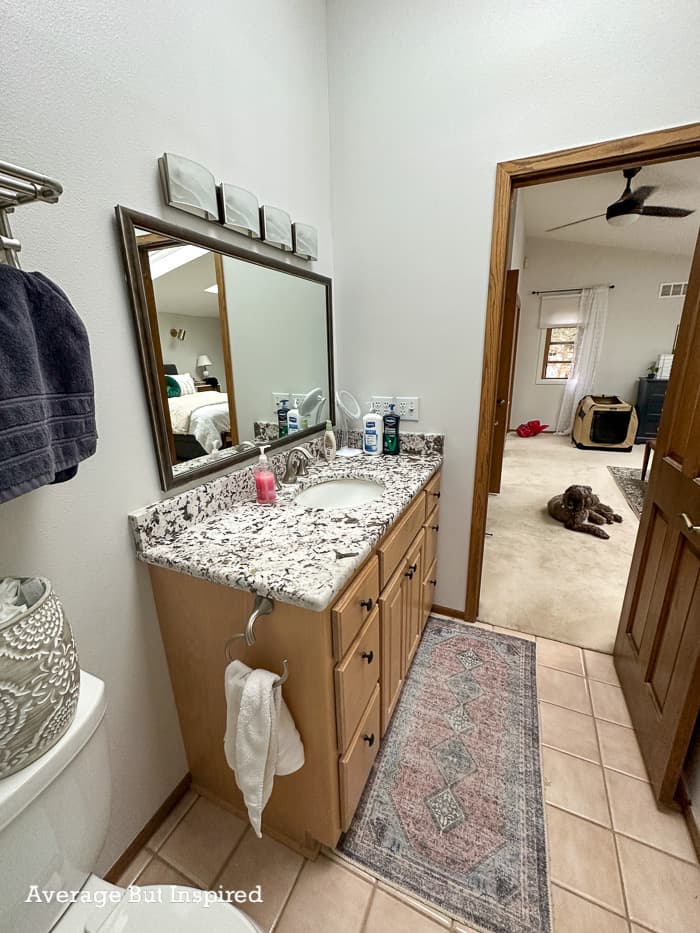
In this photo you see the single sink vanity with lights and mirror hung too low (my husband couldn’t see the top of his head. Maybe that was a good thing for him – not sure – LOL).
And here was the super small shower. It was like a telephone booth and very claustrophobic! Despite the bathroom having incredibly tall and angled ceilings, this shower had a soffit in it that made it about 6.5′ tall.

The shower pan was tilted improperly, too, which caused water to pool in one corner instead of drain. We had to shove water over to the drain after every use, and there were still problems with leaking in that corner and tiles falling off. The shower was a mess.

The Bathroom Renovation Plan: Add Some Space
Directly outside of this primary bathroom was a closet. From the moment we moved in, we wondered if we could someday make the closet part of the bathroom.
We decided to never use that closet so we wouldn’t become dependent on it. (Well . . . except to store some random shopping bags and a gnome stuffed animal.)
After consulting with three design / build firms throughout the summer of 2022, we decided that there would be enough space to annex the closet as part of the bathroom (and not negatively impact the bedroom layout).
We signed our remodeling contract in October 2022, and started picking finishes in December 2022.
I knew that I wanted dark hexagon floor tile (to coordinate with the hex tile in the kids’ bathroom), a walnut vanity (to coordinate with the slat wall fireplace in the bedroom that we had just finished), and stacked tile going all the way to the ceiling in the shower.
A designer at the firm we worked with helped us get all of our choices together, and helped design (what would become and what I think is) the most gorgeous vanity ever. 🙂
The Renovation Process
On May 8, 2023 our bathroom renovation officially began! In one day all of demo was finished. We couldn’t believe it! (Compare that to the four days of demo in the kids’ bathroom and master bathroom renovation at our old house!)
For the most part, work went smoothly. The only hiccup was when we realized the floor tile had been sent in two different dye lots. There was a distinct line that looked terrible.
While I wish the contractors would have checked the tile boxes prior to installation, I’m thankful they were able to take it out and fix it with the correct tiles!
Near the end of June the bulk of the work was finished, and thank goodness because our dumpster could not take anymore!
On July 17, 2023 our shower glass was installed, and that was the official end of this bathroom renovation!
The Completed Renovation: A Long, Narrow Bathroom With Style
I have included product links in this post in case you’re interested in the products used (see complete list at the end of the post). Some of these links are affiliate links. You can read my disclosure policy for more information. Also, thank you to Tokeshimi for providing the gorgeous, tall mirrors and Kichler Lighting for providing the beautiful brass lighting.
To sum it up, we are in LOVE with our new bathroom.
Eliminating the closet and moving the entrance door to the adjacent wall gave us more space to add a second sink and larger vanity.
Because the bathroom is quite narrow, making the entrance door a pocket door really helped, too. The extra inches of not having a door open into the room really count!
This walnut vanity exceeded my expectations. It is the perfect depth for our bathroom, and because it was assembled on site (delivered in multiple boxes), it was not an issue to get it up the tight stairs.
And, as for the shower . . .
running that tile all the way up the tall, angled ceiling and enclosing it fully in glass really helped it feel so much larger! We chose a sliding glass door because of the narrow space: no swinging door protruding into the room.
I didn’t want a niche in the wall to hold our toiletries (I don’t really know why, but I’m not a huge fan of shower niches), so we opted for slotted corner shelves instead. I like how the water drains through them instead of pooling.
One other compromise we made for this narrow space is using a standard toilet instead of an elongated toilet. It would have stuck out too far into the room.
Even though we have a small, narrow master bathroom as compared to many others, we are so thankful to have an en suite bathroom, and now, one that looks like this!
Shoppable Product List
In case it helps, here is a list of the materials used in our bathroom. If you have any questions or something is missing from this list, drop me a comment!
VANITY AREA
- MCM-style walnut bathroom vanity (custom design)
- Brass drawer knobs
- Quartz countertop
- Tall matte black bathroom vanity mirrors (measure 30″ x 40″ but come in multiple sizes)
- Brass vanity lights with fluted glass shades
BATHROOM ACCESSORIES
- Vintage Green Runner Rug
- Wood In-Shower Corner Shaving Bench
- Matte Black Dual Towel Bar
- Matte Black Robe Hooks
- Matte Black Toilet Paper Holder
- Brushed Gold Hand Towel Holder
- Framed Landscape Art
- Green Fluted Glass Soap Dispenser
TILE AND PLUMBING
- Charcoal hexagon floor tile
- Square mosaic shower floor tile
- Elongated subway shower wall tile
- Kohler Hydrorail
- Shower Hose
- Kohler Rain Shower Head
- Kohler Hand Shower Head
- Matte Black Sink Faucets
- Toilet
***
Thanks for checking out our primary bathroom renovation! I hope you found something you like in this space!
Dee says
Beautiful job. I like the black floor with the walnut vanity! We are about to begin the process. Can you share the dimensions of the space? We are stealing from a closet too and the final dimensions we have to work with are 7.5 wide by and 11 feet 8 inches.
Rebecca Chan says
I LOVE how your bathroom turned out. It is so beautiful. I am currently renovating my bathroom and I hope it turns out as good as yours did. We are getting cabinet refacing done next week. Then we will be close to being done. Woot woot!
Bre says
How exciting!! Good luck with your project!
Josee Paquin says
beautiful
Bre says
Thank you so much, Josee! Appreciate it!
Sharon says
LOVE IT!
Bre says
Hi, Sharon – thanks! Me too! So thankful that it’s not falling apart anymore. LOL!