If you’re looking for a creative way to upcycle cabinet doors, look no further! This DIY headboard is a great way to repurpose cabinet doors in a stylish way.
The stack of cabinet doors sat in my basement for almost five years.
And about every six months my husband would ask, “do we really need to hang onto these doors?”

I had removed them back in 2020 when I refinished our built-in china cabinet and replaced them with an updated style. But I hung onto them “just in case.”
I promised him I’d think of something to use those old doors for . . . I just didn’t say when.
Well . . . finally . . . at the end of 2024 I had an idea for two of them. I would turn them into a wall-mounted twin headboard for the loft space at our cottage!
I loved this idea because it would help “furnish” a really tricky spot in the cottage (low and slanted ceiling), and hardly cost a thing!
Supplies Used to Create an Upcycled Cabinet Door Headboard
This post contains affiliate links. Please read my disclosure policy for more information.
- Cabinet doors (you can find these at Habitat for Humanity ReStores or salvage shops)
- 1×2 pine board
- Wood glue
- Wood filler
- Clamps
- Mending braces
- D-ring hangers
- Paint
- Screws
- Electric sander (220 grit sandpaper)
- Drill
- Circular saw (or hand saw and miter box)
How I Made a DIY Headboard from Cabinet Doors
I started by cleaning and lightly sanding the cabinet doors with my electric sander and 220-grit sandpaper. I did this to scuff up the existing finish so that the doors would be better prepared for paint.
Next, I figured out that a standard twin-sized headboard is 41″ wide. Two of my cabinet doors together were a little over 39″ wide. So, I put a scrap 1×2 in between them and cut it down to the same height as the doors.
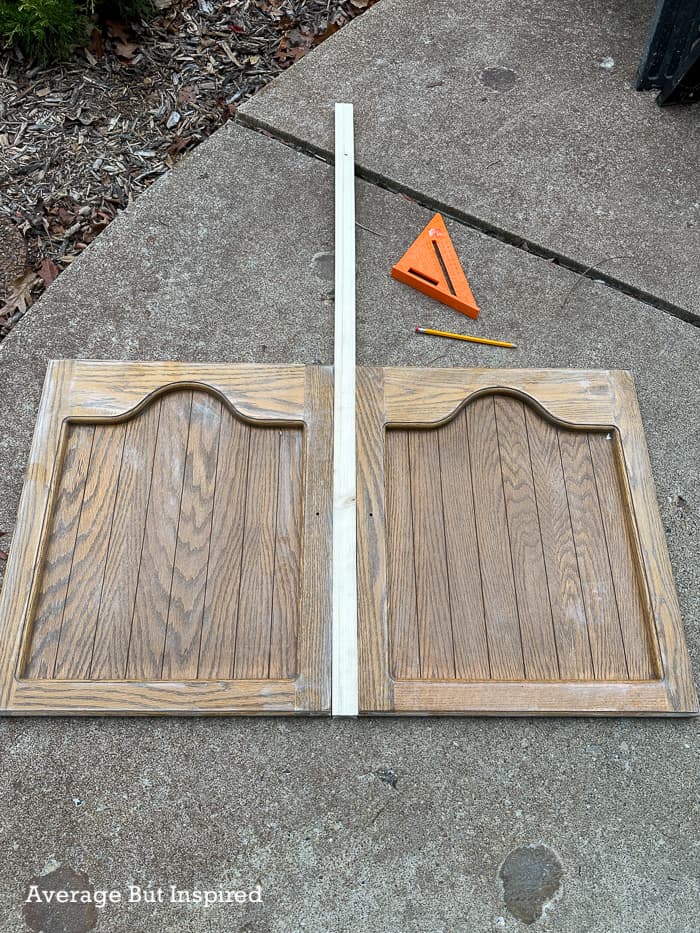
Since I only had this one piece of wood and I was nervous about making a jagged cut with my circular saw, I went the old-fashioned route and cut it by hand with a saw and miter box. It wasn’t the most efficient, but I got a clean cut!
Next, I ran a thin line of wood glue on each side of the 1×2, and pressed it between the cabinet doors. I then clamped it all together in two places.
I also put wood filler in the hardware holes.

Once everything was dry, I flipped it over and attached five-inch mending braces to the back. I’m not sure if this was truly necessary, but I figured it couldn’t hurt in holding everything together.
I should have bought longer braces so that they could be screwed into both sides of the cabinet and the 1×2. Because these were too short to do that, I staggered them, with each being fastened into one cabinet door and the 1×2.
I also attached two large D-ring hangers on the upper back corners. This would allow me to hang the headboard on the wall.
Finally, I flipped the piece back over and painted it with one-step paint that was left over from my kids’ bathroom vanity makeover. With two coats of paint, it was ready to go.
The Finished Cabinet Doors Headboard
I installed anchors in the wall and hung the headboard at the perfect height for this loft bed that rests on a 3″ bed frame. (Can you believe they make bed frames that are so low to the ground?)
I mean, come on! Tell me that is not cute!
I am so glad I saved those cabinet doors all those years. It was definitely worth it (to me, at least – ha!).
Watch Me Build This Headboard! See The DIY Cabinet Doors Headboard Video on YouTube.
This DIY headboard project could easily be modified to accommodate any size bed: with the addition of more cabinet doors and/or wider wood pieces, you could make even a King-size headboard!
Alright, so the big question now is what should I make with the four remaining cabinet doors? Tell me in the comments!
Alex says
This is such a creative idea! I’ve been trying to figure out a new headboard and I love this idea. Thanks so much for sharing!
Bre says
That’s awesome – so glad this was inspiring. Thank you!!
Lina Ebeid says
Such a brilliant way to repurpose old furniture! This headboard idea is pure genius.
Bre says
Hi, Lina – thank you!! Appreciate it!