• Skip to primary navigation
  • Skip to main content
  • Skip to primary sidebar
Average But Inspired logo - DIY and craft

Average But Inspired

Craft a home you love. DIY and craft tutorials.

  • About
    • Contact Me
    • Disclosures
    • Privacy Policy and Copyright Policy
  • DIY
    • Furniture
  • Crafts
    • Dollar Store Crafts
    • Seasonal
      • Patriotic & Summer
      • Valentine’s Day
      • Easter & Spring
      • Fall & Halloween
      • Christmas & Winter
  • Home Decor
    • Organization
  • Shop
    • DIY Swag
    • DIY Guides
  • Home

Pretty DIY Paper Mache Bunny

March 8, 2018 by Bre 2 Comments

Make a beautiful paper mache bunny or paper mache rabbit as spring decor that evokes memories of the past.

I just love how Target always finds ways to make my bill higher than it should be.  On my most recent trip, for example, I tossed this unfinished paper mache bunny into my cart without giving it a second thought.  She felt right at home amongst the toilet paper and socks.
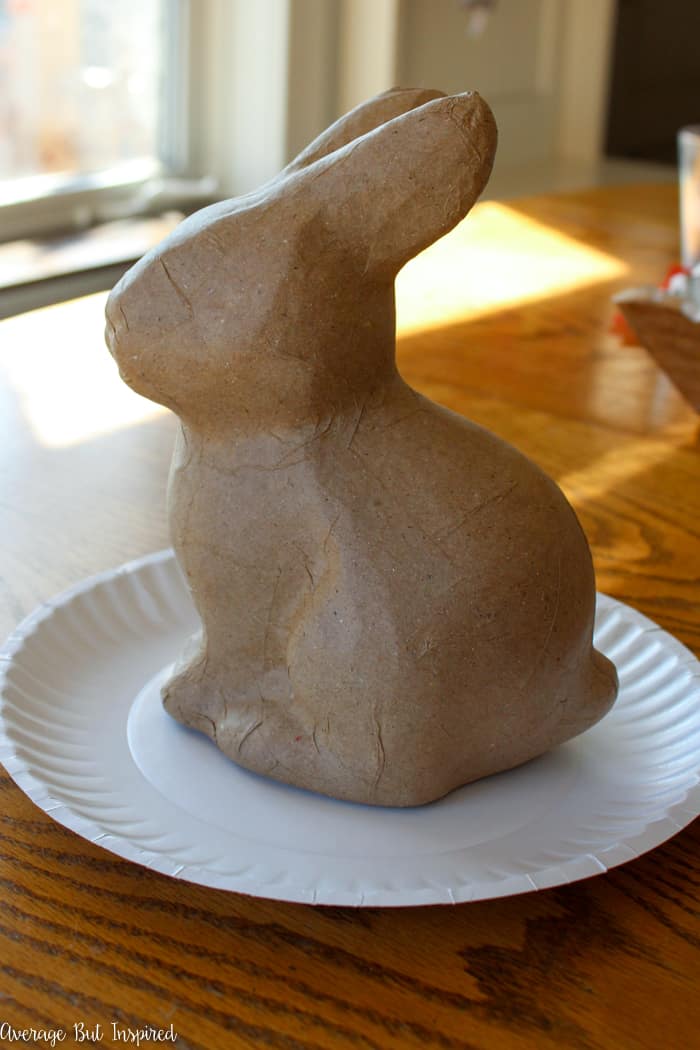
Transform an unfinished paper mache bunny into a charming and pretty vintage paper mache bunny with simple supplies like newspaper and paper flowers. This paper mache bunny will add such a pretty touch to your spring or Easter decor!

After bringing her home and staring at her for a couple of days, I felt inspired to give her a new look, and now my DIY Paper Mache Bunny looks like this – perfect for spring decor!
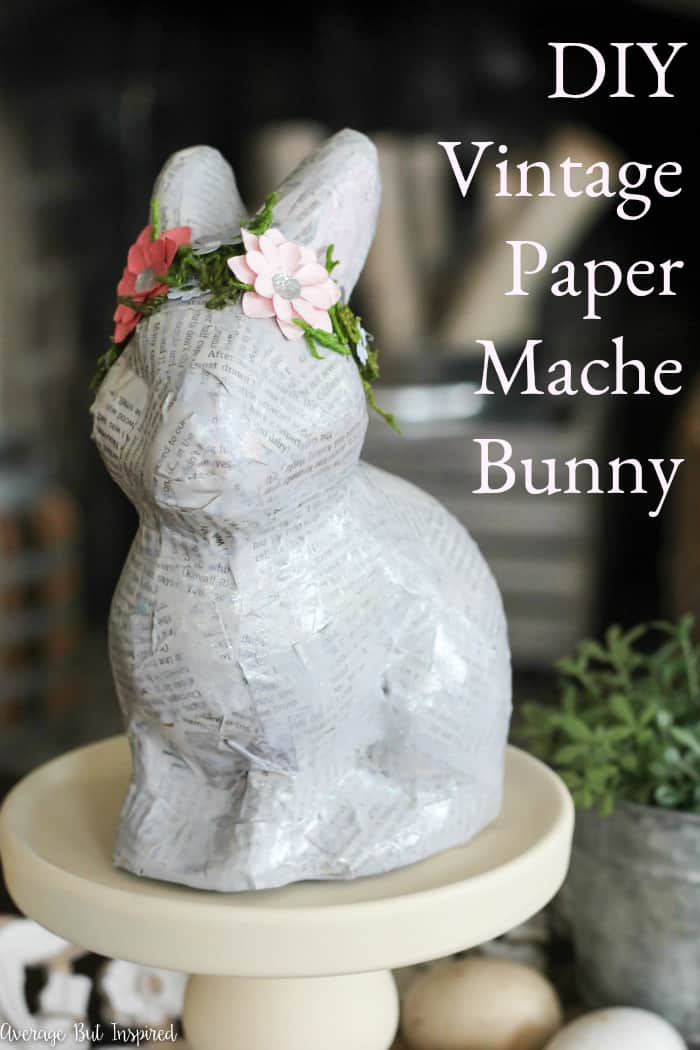
Transform an unfinished paper mache bunny into a charming and pretty vintage paper mache bunny with simple supplies like newspaper and paper flowers. This paper mache bunny will add such a pretty touch to your spring or Easter decor!

Keep reading and I’ll teach you how to make one of your own.

Supplies Needed for a DIY Paper Mache Bunny

Some of these links are affiliate links.  Please read my disclosure policy for more information.

  • Unfinished paper mache bunny
  • Newspaper
  • Scissors
  • Mod Podge (matte finish)
  • Gray acrylic paint
  • Pink acrylic paint
  • Water
  • Paint brush
  • Glamour Dust glitter paint
  • Moss
  • Small faux flowers
  • Hot glue gun

How to Make a Paper Mache Bunny or Paper Mache Rabbit

Begin by cutting a newspaper into tiny strips.  Once you have a big collection of strips, paste them to the unfinished paper mache bunny with Mod Podge.

Transform an unfinished paper mache bunny into a charming and pretty vintage paper mache bunny with simple supplies like newspaper and paper flowers. This paper mache bunny will add such a pretty touch to your spring or Easter decor!

You can overlap the strips, but don’t make any area too thick. Just a slight overlap of newspaper works well.

Once the newspaper is dried to the bunny, put a thin topcoat of Mod Podge all over the bunny.

After that dries, water down some gray acrylic paint and lightly cover the bunny so that the newspaper words are muted but still visible.  I think the words give the bunny some character and vintage-looking charm!

Transform an unfinished paper mache bunny into a charming and pretty vintage paper mache bunny with simple supplies like newspaper and paper flowers. This paper mache bunny will add such a pretty touch to your spring or Easter decor!

Then, add some light pink paint in the inner portions of the ears.

Transform an unfinished paper mache bunny into a charming and pretty vintage paper mache bunny with simple supplies like newspaper and paper flowers. This paper mache bunny will add such a pretty touch to your spring or Easter decor!

When the gray and pink paints are dry, cover the entire bunny with a coat of Glamour Dust glitter paint.  This will give the bunny a beautiful shine when the sunlight hits it!  It’s a really subtle glitter and not overwhelming.

DIY Bunny Planters are another adorable DIY Easter or Spring Decor Craft you might enjoy!

(You could also sprinkle very fine glitter into Mod Podge and use that as a topcoat.)

However, if you don’t like the glitter look, you could leave the bunny as-is, or seal with another coat of Mod Podge.

Transform an unfinished paper mache bunny into a charming and pretty vintage paper mache bunny with simple supplies like newspaper and paper flowers. This paper mache bunny will add such a pretty touch to your spring or Easter decor!

Finally, hot glue moss and faux flowers around the bunny’s head to create an adorable flower crown.  This is my favorite part of this bunny!

Transform an unfinished paper mache bunny into a charming and pretty vintage paper mache bunny with simple supplies like newspaper and paper flowers. This paper mache bunny will add such a pretty touch to your spring or Easter decor!

And that is all you have to do to make a beautiful DIY Paper Mache Bunny for your spring or Easter decor!

Transform an unfinished paper mache bunny into a charming and pretty vintage paper mache bunny with simple supplies like newspaper and paper flowers. This paper mache bunny will add such a pretty touch to your spring or Easter decor!

This easy project is one that you can leave out until summer!  It’s not overly Easter, so you can pass it off a little longer than some other decorations.

Transform an unfinished paper mache bunny into a charming and pretty vintage paper mache bunny with simple supplies like newspaper and paper flowers. This paper mache bunny will add such a pretty touch to your spring or Easter decor!

I guess that, in the end, I’m glad I have no self-control in Target and that I bought that unfinished paper mache bunny, because this project is pretty sweet and will add a little cuteness to my spring decor.

Filed Under: Easter, Holiday

Reader Interactions

Comments

  1. Nanci Ring says

    March 10, 2018 at 2:10 pm

    I recently found your blog, via Craft Gawker, and bookmarked it… I had passed on this bunny last week, but after seeing this post, I went back and got it to make my own version. It’s turning out so cute! Thanks for the inspiration!❤️

    Reply
    • Bre says

      March 21, 2018 at 1:21 pm

      Hi, Nanci! AAAAAH I love it!!! 🙂 So happy your bunny is turning out cute. Yay!

Leave a Reply Cancel reply

Your email address will not be published. Required fields are marked *


Primary Sidebar

Let’s Connect!

Hi, I’m Bre! Thanks for visiting Average But Inspired, where I show you how to work with what you’ve got to create a home you love.

Bre of Average But Inspired - a DIY and craft blog

Love DIY? Subscribe to Get Posts E-mailed!

How Can I Help You?

blank

How to Paint a Door to Look Like Wood (It’s Easier Than You Think!)

blank

Limewash Stone Fireplace Makeover: Bye Bye Orange Stone Fireplace, Hello Neutral Stone Beauty!

blank

7 Tips for Hosting a Party on a Budget

blank

My DIY Kitchen Makeover Reveal!

Looking for Something?

Copyright © 2013-2022, Bre Eggert (Average But Inspired). All rights reserved.
  • Home
  • DIY
  • Crafts
  • Home Decor
  • Privacy Policy and Copyright Policy
  • Disclosures
  • Contact Me