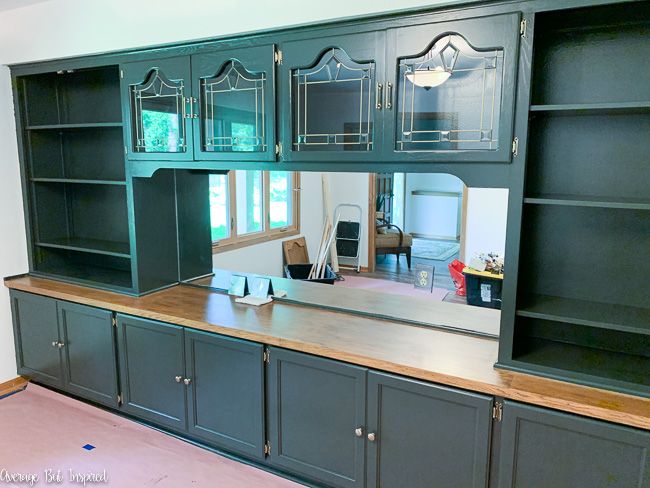
My new house was built in the 1970’s and is overflowing with mirrored surfaces! I’ve eliminated some of these reflective surfaces by wallpapering the mirrored bookcases next to the fireplace and modernizing a full mirrored wall with tape (yes, tape!), but for my built-in china cabinet makeover I decided to antique the plate glass mirror that was part of the cabinet, instead of totally covering it.
Here’s what the china cabinet looked like after I painted it, but before I antiqued the mirror. (Aren’t the construction debris piles you see in the background nice? :-))
Why Antique a Mirror From the Front?
Since the mirror is attached to china cabinet, I couldn’t follow one of the typical DIY mirror antiquing tutorials, because those all require you to remove the back layer of the mirror (the gray covering on the back of any mirror). Because of that, I experimented a lot and came up with my own way to antique a mirror from the front with paint – no chemicals at all!
This method of antiquing a mirror is fantastic because it costs hardly any money at all, is actually very easy to do, and lets you antique ANY mirror! It is not always possible to remove the back of a mirror (for example – if the mirror is glued in place, like mine, or if you don’t want to work with harsh chemicals, which are required for traditional antiquing methods), so this is an awesome alternative mirror antiquing technique for everyone.
Supplies Needed for This DIY Antique Mirror Finish
This post contains affiliate links. To read my full disclosure policy, please click here.
- Black metallic multi-surface craft paint (any brand will work – just make sure it’s metallic and multi-surface)
- Silver metallic multi-surface craft paint (any brand will work – just make sure it’s metallic and multi-surface)
- Craft sea sponges
- Windex made with vinegar
- Paper towels
- Clean, dry wash cloth or terry cloth towel
- Paper plate or paint palette
- Optional: small craft mirrors to test your technique prior to painting your mirror. I purchased small mirrors at Dollar Tree to do my testing.)
How to Antique a Mirror From the Front With Paint
I took photos of each step of this process, but it may be a little difficult to understand with photos and text alone. Don’t worry – I also made a video to help show you how to recreate this technique yourself. You’ll find that near the bottom of this post!
Begin with a clean mirror surface. Once the mirror is dry, you’re ready to go! Begin by squirting a small amount of silver metallic multi-surface craft paint onto a paper plate or palette. Take one sea sponge and run it through the paint. Dab off excess paint and then begin stamping the mirror.
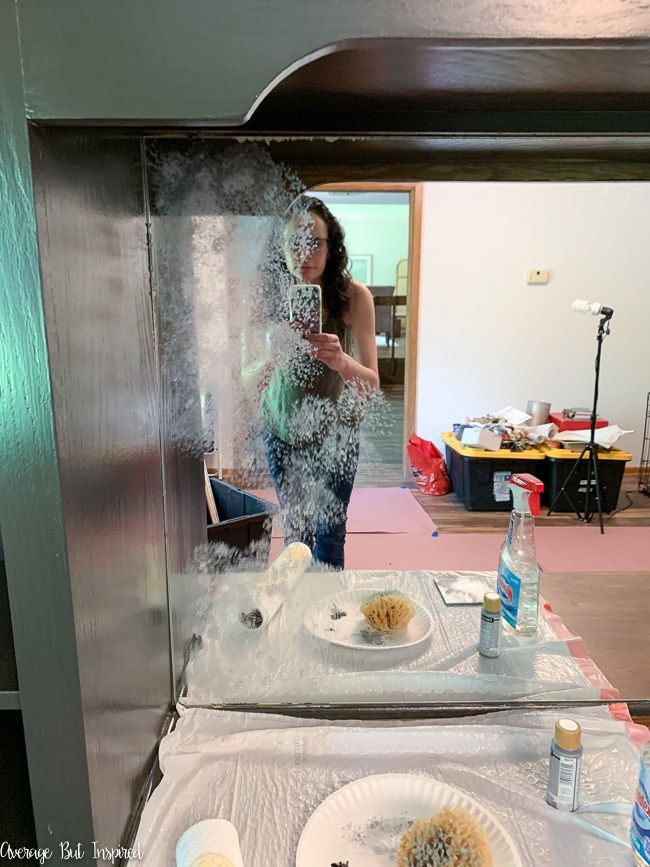
Notice that I did not cover the entire mirror with the silver craft paint – instead I made sure to leave some parts of the “regular” mirror showing.
Once you complete a small section of the mirror, and before the silver craft paint dries, lightly mist the mirror with a spray of the Windex with vinegar.

You’ll see some of the paint run down the mirror. That is OK and what you want to happen! Take a clean sea sponge (not one with paint on it), and start dabbing up the Windex with the sponge.
This creates a different texture than the original paint stamping.
Next, take a paper towel sheet and press it onto the painted surface. This will remove more of the Windex and paint, and also cause a blurred imprint to transfer to the mirror surface.
Repeat this paint, spray, dab, and press process until you cover the mirror with the silver craft paint.
See how the reflection is blurred, but parts of “regular” mirror remain? That’s how it is on authentically antiqued mirrors, too!
Next, it’s time to add the black metallic craft paint. This is what really takes the antique look to the next level.
For this part, you dab the black paint on the exact same way as you did the silver paint – apply it with the clean sea sponge.
You don’t need to add as much black paint as you did silver paint. The black is more of an accent whereas the silver paint formed the base of the antique mirror look. So, just do this process in strategic areas to really give your mirror that old look.
Before the black paint dries, dab it with the clean, dry wash cloth or terry cloth towel. You do not spray the black paint with Windex! Just press and dab with the towel in order to give it a slightly different look than the silver paint.
Let the paint dry and then you’ve successfully antiqued a mirror from the front instead of the back!
Since this is a painted finish, it’s important to take care when cleaning a mirror you’ve antiqued in this manner. I generally just dust the mirror with a soft cloth to clean it. Since it doesn’t need the shiny finish of a regular mirror, there’s no need to spray it with window or glass cleaner!
How to Antique a Mirror From the Front Video Tutorial
Now, as promised, here’s the video that shows you how I achieved this antiqued mirror look with paint. I hope this helps you understand how easy this faux finish is to replicate!
-Bre
Lisa says
Yes this will work great on the back of the curio I’m updating! Thanks so much for doing the video.
Bre says
Hi, Lisa – that’s awesome!! So glad it helps. Thank you!
Elizabeth says
This is so lovely! I’ve recently bought a 100+ year old row house with a mirrored wall. I’ve been trying to figure out how to work with it without either removing the mirror and damaging the wall, or leaving it and having everyone (mainly me!) on the toilet. This is perfect! If it’s antiqued, you may still get a little glimpse, but at least it will be blurry! Thank you for the great tutorial.