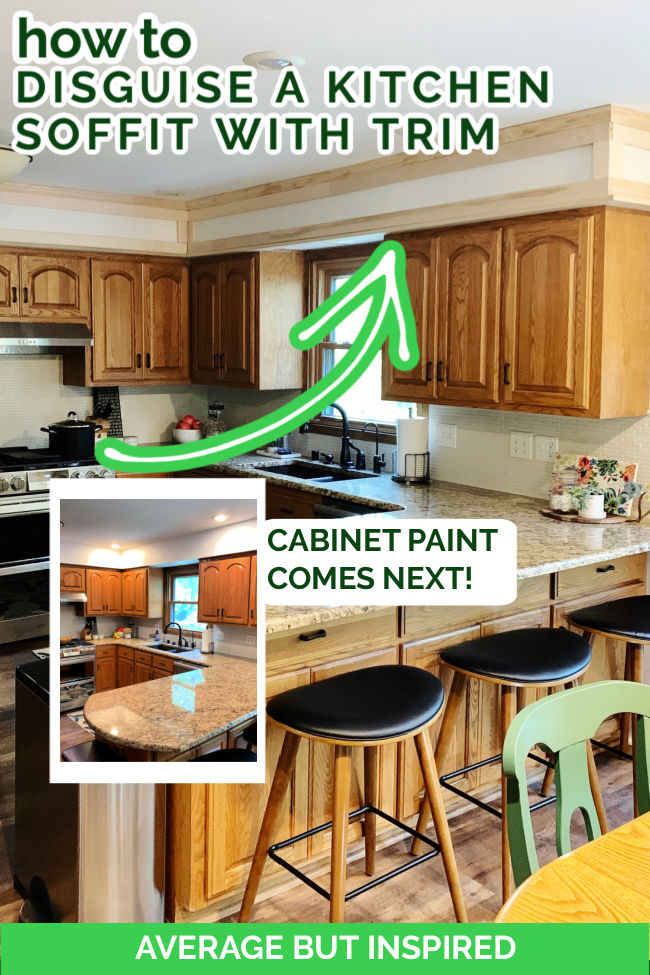
After I painted my kitchen tile backsplash, my husband and I started Part 2 of our kitchen revamp: our DIY kitchen soffit makeover. Our goal was to disguise the kitchen soffit (the part of the ceiling over the cabinets; sometimes called a ‘bulkhead’ or a ‘fur down’) and make it look more like it is part of the cabinets and less like wasted space.
I am painting the kitchen cabinets and the soffit the same color to make them blend together (you can see the finished painted cabinets in this post and the totally finished DIY Kitchen Makeover here), but this post is intended to show you how this kitchen soffit makeover made our kitchen look better, and how you can do the same!
Supplies Used for This Kitchen Soffit Makeover
This post contains affiliate links. To read my full disclosure policy, please click here.
Tools Used:
- Miter Saw
- Brad Nailer
- Mallet
- Level
- Tape Measure
Wood Used:
- 2.25″ crown molding
- 1×2 wood
- 1×3 wood
- 1×4 wood
Supplies Used:
- Caulk
- Wood Filler
- Pencil
How to Disguise a Kitchen Soffit
Before I jump in to give you all the details on this project, let me show you the “BEFORE” photo of the kitchen. This shows the backsplash tile has already been painted, but we hadn’t yet begun making over the soffit.

Over the course of a couple of weekend days we transformed the soffits, using multiple sizes of boards and molding. Here is the step-by-step!
Step 1: Attach Crown Molding to Top of Soffit
For the first part of our soffit makeover, we installed 2.25″ crown molding at the top of the soffit – connecting the soffit and the ceiling – with the brad nailer.

Because of the steps that came later in this process, we first attached small pieces of 1×2″ wood to the back of each crown molding section. We did this so that the crown molding would sit flush with the boards we attached to the soffit later in the project.
This means that the crown molding was sitting out farther than the soffit – and that is just what we needed for the next step to look right.
Step 2: Attach 1×3″ Horizontal Boards to Soffit
Next, we cut 1×3″ boards with the miter saw, and attached them directly below the crown molding installed in Step 1, and also on the lower front of the soffit.
Because the crown molding was mounted on the 1×2 pieces, the molding and the 1×3 boards were flush together. We cut the 1×3 boards with straight cuts at the end of each soffit, and beveled cuts in the inner corner.
Step 3: Attach Vertical 1×3″ Boards to Soffit
Once the horizontal 1×3 boards were in place, we measured the distance between the 1×3’s at every corner, and we cut 1×3″ pieces to attach in the corners. It was interesting how different the measurements were! The soffits were definitely not the same size in all spots.
As in Step 2, we cut the outer corners with straight cuts, and did bevel cuts for the inner corner. We attached the vertical blocks at every corner.
The soffits were already looking better at this point!
Step 4: Attach 1×4″ Boards to Connect Cabinets and Soffit
Finally, we removed the small piece of trim or molding that was at the top of our cabinets and the base of the soffit. You can see it hanging down in this photo.
We then used the brad nailer to attach 1×4″ boards to the base of the soffit (at the top of the cabinets), so that approximately 1″ of wood extended beyond the base of the soffit.
By having this piece stick out farther than the soffit, it actually made the soffit and the cabinet boxes look like they are the same (or similar) depth, as opposed to the soffit sticking out farther than the cabinets. It’s a crazy visual trick!
Step 5: Caulk!
So . . . my husband did an incredible job on this soffit makeover, but he is not a carpenter by trade. Because of that, we had a lot of caulking to do before priming!
I used Alex Flex caulk because it said it’s the best for molding and trim, but I’m not a caulk expert (bummer!), so I don’t know if this more expensive caulk was truly necessary.
After caulking and priming, I’ve now started painting the cabinets and soffit, and it’s looking SO GOOD! Here is a little sneak peek of how this is all coming together! (UPDATE: TO SEE THE TOTALLY FINISHED PAINTED CABINETS, CHECK OUT THIS POST and see the TOTALLY UPDATED KITCHEN WITH NEW COUNTERTOPS HERE.)
I really think our attempt to disguise our kitchen soffit is working and making our kitchen look much nicer than it did before!
I hope this post is helpful to you, too! As always, let me know if you have any questions or comments!
-Bre
- DIY Painted Tile Backsplash
- How to Convert a Kitchen Desk to Pull-Out Trash
- DIY Painted Oak Cabinets
- How to Hide the Side of a Refrigerator with Magnetic Panels
- DIY Kitchen Makeover Reveal
Daniel Marquez says
I love this idea!! Thank you for sharing. I am totally going to do this. Are your soffits textured? I’m debating whether if I should skim coat the soffit before.
Bre says
Hi, Daniel! Yes, they are textured and yes, I wish I would have skim coated or put up a sheet of thin wood / lauan beforehand! 🙂
Sam says
Your soffit idea is so nice! We are in the process of deciding how update our kitchen.
This has given me some good ideas to run with. I’m older and not sure I can do all the painting of cabinets, but I might just give it a try.
Did you do sanding on your cabinets before painting them?
For sure, will do a soffit makeover of some kind. Yours was great!
Thanks for showing all the steps!
Tj says
Do you have any after pics of the whole kitchen? Ours is almost exactly the same layout, I’m looking to update and would love to see the colors. Thanks!
Bre says
Hi, TJ- you bet! Here is the post where you’ll find all of the “after” photos. Good luck with your project! https://averageinspired.com/2021/05/diy-kitchen-makeover.html
Sheri Wooten says
Hey Bre….Your kitchen looks beautiful!
How tall are your kitchen cabinets, your ceiling height and soffit space?
Your kitchen looks exactly like mine does before your renovations. Yes, the Early American oak cabinets.
I’m thinking of doing the same thing to my very dark and outdated kitchen.
Thanks!
Nanette says
did you use cabinet paint on the soffit or wall paint? I am getting ready to paint my kitchen and not sure which paint for quantity estimates.
Bre says
Hi! I used the same cabinet paint on the wood part of the soffit (Advance paint) and I used a BM latex paint in one sheen different on the soffit wall only because the wall is textured and the texture was showing too much with the sheen of the cabinet paint! If your soffit is smooth, I would use the same cabinet paint.
Tina P. says
I just got my cabinets refinished and need to do this to my trim. Thanks for all the great information and pictures!
Alex says
This is awesome! I love how simple of a project it was and yet the kitchen looks beautiful! I would love to do something similar to this in my kitchen, that way I don’t need to purchase brand new cabinets to try to fill in the space up there. I think doing this paired with some cabinet refacing on the door and drawer fronts would totally change the look of the kitchen while staying within a decent budget. Thanks so much for the inspiration!
Diana Young says
So I am in the process of doing the same to my soffit above the cabinets. I can’t for the heck of me, do good cuts so I left scratching my head along with a bunch of cut up molding bits I cannot use. I will not let it defeat me. Or make me husband do it when he returns from training. The sad thing is I am the jack of all trades, but cannot master the crown molding thing.
Bre says
Oh, man, I am sorry! Those cuts are SO tricky!! Do you know the blog Top Shelf DIY? Erin at that blog is amazing with crown moulding and cuts. She may be able to help you get it just right. She even has a group on Facebook where you might be able to get some help with the cuts. GOOD LUCK!!!
Amanda says
Thank you so much for the inspiration! I don’t know how to post photos in the comments, but we just redid our kitchen with gorgeous antique white uppers and navy blue lowers and used the same trick on the soffit, except we already had crown moulding installed, so we just used baseboards, which were the perfect width (and came in a multipack, haha).
Bre says
Hi, Amanda! That sounds GORGEOUS!!! Thank you so much for sharing! Congrats on your new kitchen. Enjoy! 🙂
Pat Grau says
I have soffits that need a cosmetic update and a very similar kitchen layout. Since I’m having the cabinets refaced with shaker doors I think your square edged molding idea will be perfect. I have a provlem you don’t have–my soffit extends out over the eating bar area with 2 pendent lights (the previous owners removed the overhead cabinets that had been mounted there). Since there are no cabinets there, how do you think it would look to omit the bottom 1×2 that you used to complete the lower edge? Also, did you change the window molding when you painted it? The answer to that might be another post.
Bre says
Hi, Pat! I’m so sorry for my delayed response! I think since you wrote on the 4th of July I missed this! Anyway, I am really sorry but I’m such a visual person that I’d have to see a photo to truly understand/assess the situation. You can definitely email me one at averagebutinspired@gmail.com or DM me on Instagram and we can chat! As for the window molding – I did not change it. I ended up painting the wood molding white, and I had to leave the window part the brown oak color because the window is vinyl. I didn’t want to paint the vinyl and risk warping the windows. 🙂
Sydney says
What color did you use on the cabinets?
Bre says
Hi! I used Hampshire Taupe by Benjamin Moore.
Pam Smith says
This looks great!! I was trying to figure out a way to help disguise the soffit at my daughter’s house and I think your idea is wonderful! Your kitchen makeover looks amazing!
D. Foley says
did you cut the 1″ x 3″ and 1″ x 4″ to width or just use standard 1″ x 4″ , which would be 3 1/2″ wide ?
Bre says
Great question! We did not cut them to width; we used the standard sizes. Thanks!
Megan Heiden says
Thank you so much for your reply! Makes sense to paint the underside to continue the illusion. Hoping to be ready to paint in a few days!
Bre says
I’m so excited for you!! Send me a pic by email (averagebutinspired@gmail.com) or through Instagram DM!! I’d love to see it!
Megan Heiden says
Hi Bre! The soffit transformation is amazing and has inspired me to do the same thing to my kitchen soffit. I am wondering what you did with the cabinets that bordered the window? I can’t decide if I should add trim on the sides back towards the window or leave them as they are. Also, did you paint the underside of the soffit above the sink the same as the cabinets or the same as the ceiling? We are going with green cabinets so it will be pretty noticeable whatever decision we make there! Thank you so much!
Bre says
Hi, Megan! So exciting!! I hope you love your kitchen transformation. I LOVE green!! OK so to answer your questions: (1) I’d say don’t add trim to the back towards the window. You could add it after you paint if you think it’s necessary!; and (2) I painted the underside of the soffit above the sink the same color as the cabinets and soffit in order to continue the look of “cabinetry” vs. wall/ceiling. I’m so excited for your project – good luck!