If you ask me, the front yard is an overlooked spot for a patio. It’s such a great place to see what’s going on and catch up with neighbors.
Last spring we installed a small front yard patio as a pseudo-front porch, and we have loved this latest project in our string of 1970s home exterior updates!
This wasn’t the easiest project we’ve tackled in this house, but it sure made a difference in our curb appeal and enjoyment of our front yard!
The Before: Overgrown Yews
Before we added this patio, we had a bank of overgrown yew bushes that took over the sidewalk to the front door. They were unshapely and kind of boring.
Yews are great in the sense that they’re pretty indestructible. But when you want to get rid of them, that comes back to bite you you-know-where.
We hired some college guys to rip them out for us, and it was a process!
Basically, they tied each yew to a truck and then pulled out fast to rip it out of the ground. I felt so bad for these guys; the project was harder than they anticipated, I think.
Check out all of our 1970s home exterior updates!
In the end, they got it done and we had an empty space left like this. To our surprise, there was gravel or rock everywhere – inches deep.
We think it was a drainage “solution,” and it would’ve been impossible for us to remove all of that rock. That is part of the reason we put a patio here – it would’ve been tricky to plant substantial landscaping in this area.

Finding Stone for the DIY Patio
So, once the yews were out and we settled on our patio plan, my husband and I got to work.
We went to a local quarry (Wisconsin has a lot of them, surprisingly!), and purchased Eden Flagstone, because it had colors similar to the colors on our limewashed exterior stone column.
Purchasing from local sources can often be cheaper than purchasing patio stone from big box retailers.
Unless you make a mistake like we did . . .
We knew to purchase slightly more than we needed for the patio, but we purchased waaaaay more than we needed. Oops. Probably twice as much as was necessary.
This post contains affiliate links. Please read my disclosure policy for more information.
Building the Front Yard Patio with Flagstone
Once we had the flagstone, we got to work.
We started by spray painting the general shape of the patio, and then used a manual tamper to compact the soil and get it flat and as level as possible.
We used a manual tamper because we were building a small patio. It was hard work though: very physical. If you’re not strong (like me), or are building a large patio, you should consider renting a gas-powered tamper.
(Also, because we had so much rock/stone already in this area, we did not lay down a paver base. If you are building a patio on soil, you will likely want to put down paver base first!)
Next, we spread leveling sand in the tamped area.
All of these photos are of my husband, but I swear I was 100% a part of this job, too!
After that was smooth and level, we got to work setting the flagstone in the patio area.
We started along the edges and picked flagstone pieces that were curved along the edge (for the corners), or straight (for the sides and front).
It was over 90 degrees the weekend we did this, and I don’t recommend that. Poor planning on our part. It was pretty miserable.
The process consisted of me hunting for flagstone pieces that would fit in certain spots, and carrying them to my husband. He would set them and gently tap them into place with a rubber mallet.
We got as many flagstone pieces into place as we could, and then near the end we had to use a chisel and hammer to break some into smaller pieces and/or pieces that fit better.
This was definitely an art; not a science.
To keep all of these stones in place, we poured traffic bond (or polymer jointing sand) in between each of them. Then, we wet it down according to the product directions.
Once that set, we put landscape edging along the patio. Then we poured pea gravel around and in between the stones. The landscape edging keeps the pea gravel in place.
Landscaping the Front Yard Patio
We covered up the preexisting gravel around the newly-built patio with a thick layer of topsoil. Then we planted a variety of plants suitable for rocky soil, and covered up the soil with mulch.
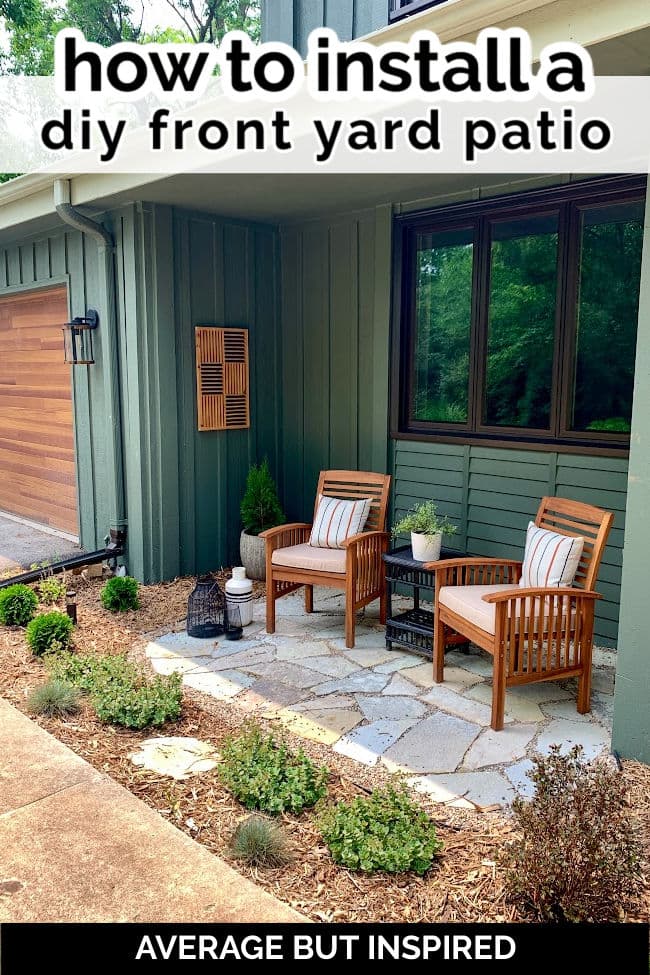
The Finished Front Yard Patio
Our front yard flagstone patio turned out adorable, and we absolutely love it! We added some gorgeous wood chairs to tie in with the garage door, and a table I found at Goodwill (that I spray painted).
We love sipping on morning coffee or a Friday evening cocktail out here, while the kids are running around out front.
And, we love the curb appeal boost it gives our 1970s home.
Mike says
Approximately what are the dimensions of the patio (the part where you have the flagstone down)?
Paula says
Could you tell us where you found your chairs and table?
Bre says
Hi! Man, I should’ve put that in the post! That was dumb of me. Anyway, I got them from Overstock.com which is now Bed Bath and Beyond! Hope that helps and thanks for stopping by!
Sun Frog Wood Sealers says
This article on creating a small front yard patio is a fantastic DIY guide. The step-by-step instructions and helpful tips make it accessible for anyone looking to enhance their outdoor space. It’s inspiring to see how creativity can transform limited space into a charming, functional patio. Great job!
Bre says
Thank you!!
MrsSW says
Hi Bre,
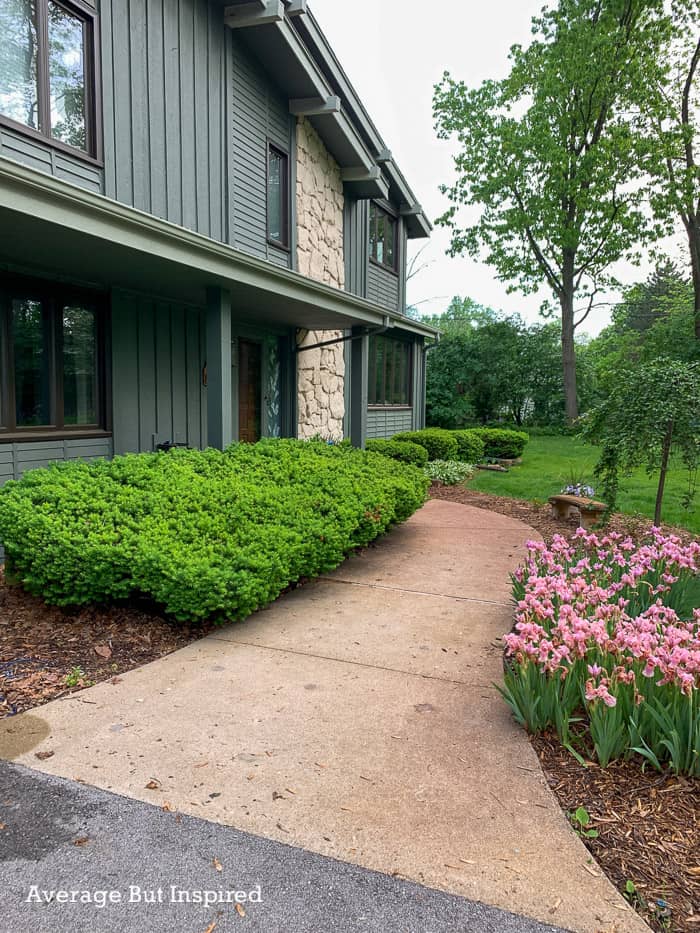
Your tiny patio is perfect there. Looking at the long-view from the street I have to ask what kind of ferns those are. Ferns are a favorite of mine – it never occurred to me that y’all could have ferns that lush so far north.
Thanks,
Sheila
Bre says
Hi, Sheila – thank you so much!! As for the ferns, I wish I knew! They are incredible and SO resilient. They were here when we moved in. I think they must get just the right amount of sun and shade in that spot. :-). Thanks for stopping by to check out my post!
Jamie says
I’d love to know the approximate size of the patio you did! Also, how much did you order vs how much you ended up using?! Very similar to something we are going to do for a 2- chair sitting are
Bre says
Hi! OK I double checked and we ordered one ton of stone (that’s how they sell it at the quarry we purchased from) and it was WAY WAY WAY too much. I ended up lining the barrier between our backyard woods and grass with the extra. I’d say we probably needed 1/3 the amount we ordered. As for size – it is currently covered in snow. I’d go measure it but it’s a mess outside, lol! My estimate is like 12′ wide x 6′ high?
Kathy says
Amazing transformation!!! Kudos to you both!!!
Bre says
Hi, Kathy! Thank you so much! 🙂
Marlee says
Gorgeous!
Bre says
Marlee, thank you!!! Come have a glass of wine with me out here sometime! 🙂
Kristine C. says
What a great project and it looks so nice with your house! I’ve enjoyed following along with all the diy projects you’ve done and appreciate the step-by-step, easy-to-follow instructions. Thanks!
Bre says
Kristine, thank you so much!! I appreciate you taking time to leave me a comment and your positive words. Thank you thank you!