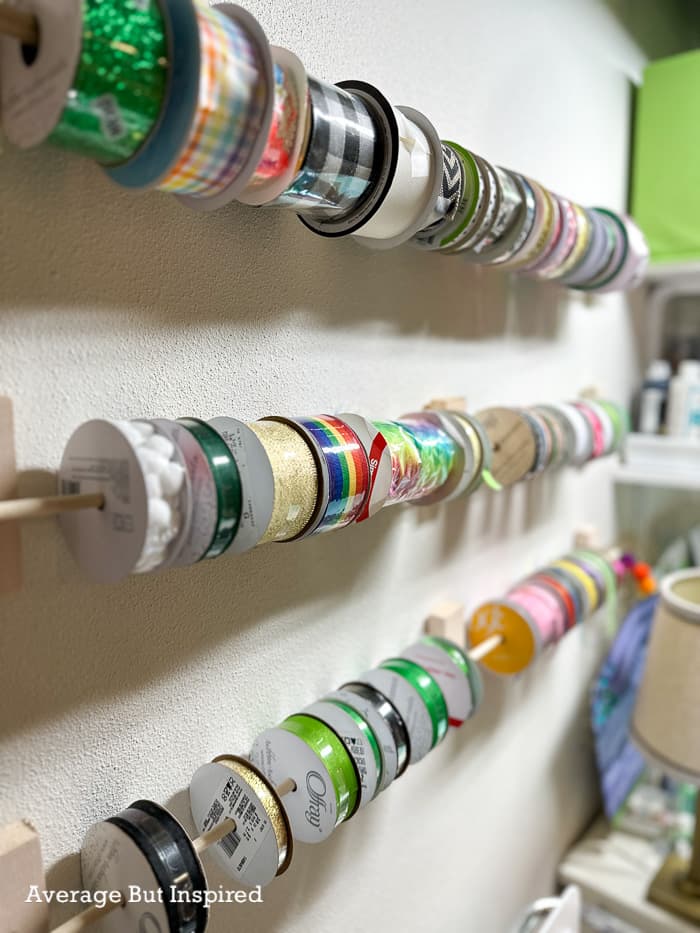
Looking for an effective way to organize ribbon? Make this DIY Ribbon Holder and get your ribbon stash in order!
Confession: my ribbon storage used to consist of a box where I’d throw ribbon spools and ribbon scraps alike.
It was a jumbled mess and almost impossible to find what I needed for any given project. I was like an animal burrowing in the dirt in that ribbon box! Imagine wild tails of ribbon flying everywhere in my craft room. What a disaster!
When I was given a large quantity of beautiful craft ribbon recently, I knew this had to change! I needed an effective ribbon storage organizer: something more sophisticated than my janky box.
But to my surprise, the ribbon organizers available at craft stores were too small, and the ribbon storage racks available online were too expensive. No thank you!
Since nothing pre-made seemed to meet my needs, I knew I needed to take matters into my own hands. As a result, I came up with this DIY Ribbon Storage Rack, which has given me an amazing way to store ribbon and keep my craft area tidy!

Let me show you how you can keep your ribbon organized, too!
DIY Ribbon Organizer Supplies
This post contains affiliate links. Please read my disclosure policy for more information.
These are the exact supplies I used to make the ribbon holder as shown in this post. Feel free to modify to make this project your own!
- Wooden dowels (I used two 3/16″ dowel rods and one 5/16″ dowel. Note that these are the long dowels purchased from home improvement stores; not the short dowels you purchase at a craft store. Also, before purchasing dowels, it will be helpful if you look at your ribbon collection to find the spools with the largest center holes and the smallest center holes. Purchase dowels that fit both sizes to accommodate your collection.)
- 1″ x 2″ common board (I cut one board into six pieces that are each approximately 3″ long)
- Circular saw or hand saw (or have the boards and dowels cut at the home improvement store)
- #6 Zinc screw eye hooks (I used 8 total: 6 with the 3/16″ wooden dowels and 2 with the 5/16″ dowel)
- Command Picture Hanging Strips (12 pound rating or more)
- Recommended: Electric drill
- Optional: paint
How to Make a DIY Ribbon Holder or Ribbon Rack
This wall mounted ribbon storage goes together so quickly and easily that I know you’re going to wish you made one for your ribbon collection sooner!
Step One: Measure and Cut
The first step is to determine how much space you have for your ribbon organizer. Measure the wall space, and then cut the dowels to fit within the width of that space.
It’s very easy to cut the dowels with a hand saw, so you don’t need to use power tools for this part!
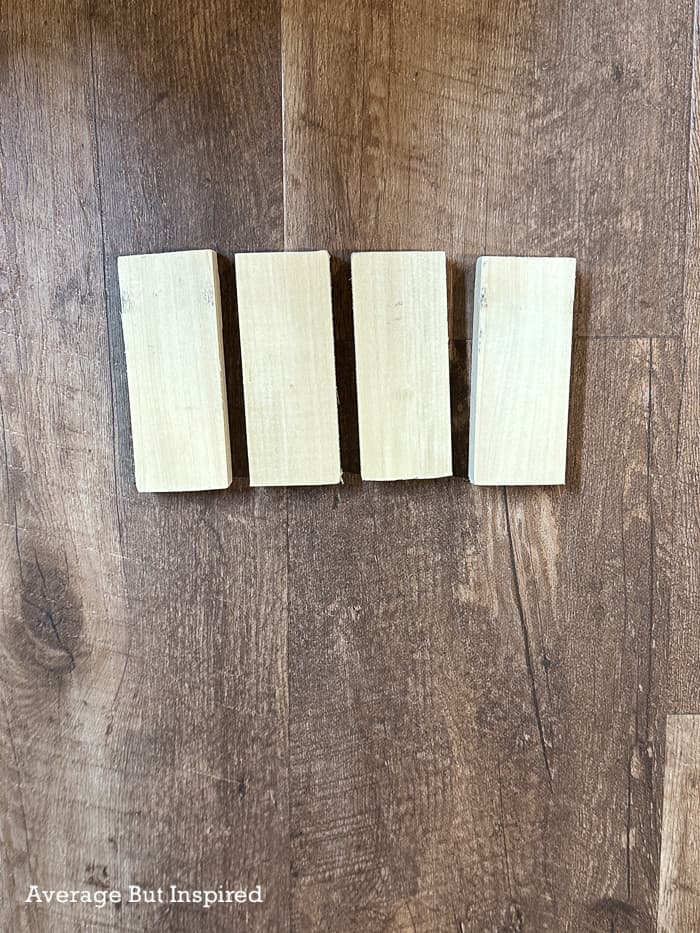
Next, cut the common board into 3″ pieces. I needed eight three-inch pieces (“blocks”) to make the ribbon storage shown in this post (three rows of ribbon storage).

The thinner 3/16″ dowels required three blocks each, while the 5/16″ dowel only needed two.
I used my circular saw to cut the board, and I wasn’t overly precise in my cuts. If you want the blocks to be perfectly straight, it may be better to use a hand saw in a miter box (tedious) or a miter saw.

Note: if you want to paint your DIY ribbon organizer, do it now – before you hang it on the wall! That might sound obvious, but I didn’t paint at first, and only after I had it on the wall did I decide to paint the wooden blocks. That was dumb.
Step Two: Attach Screw Eye Hooks to the Wooden Blocks
Next, I drilled a small pilot hole in the middle of each wooden block, and was careful not to drill all the way through.
Then I screwed a screw eye hook into each of the blocks, making sure the screw hooks were straight up and down on each block.

Note that I did not screw them all the way into the blocks – it is actually good to have them sticking off the block as much as possible. The more space you have between the dowel and the wall, the easier it will be for the ribbon spools to spin when needed.
Step Three: Fasten the Wooden Blocks to the Wall
Instead of anchoring the blocks to the wall, I decided to use Command Picture Hanging Strips, which are one of my favorite inventions of all time. Not only do I love them because they don’t damage the wall, but they also make it really easy to get things like this level! You can readjust them easily until you get it just right, which is wonderful for a (sometimes) inaccurate person like me!
Anyway, I used the 12 pound Command Picture Hanging Strips, and mounted two on the wall; putting them at a distance that the 5/16″ dowel could rest in the screw hooks with a little bit of overhang on each side.

I put some of the largest ribbon spools onto the dowel, and then used that sizing to determine how far down to hang the next set of wooden blocks and corresponding dowel.

The next two rows were for the skinner dowels, which cannot accommodate as much weight without sagging, so I placed an additional block with hook in the center for each of the 3/16″ dowels (not pictured above!).
Step Four: Place the Ribbon Spools Onto the Ribbon Rack
Finally, slide one end of the dowel out of the screw hook, and place the spools of ribbon onto the new ribbon rack!
Ribbon spools with large center holes fit best on the wider dowel, whereas ribbon rolls with smaller center holes fit best on the skinnier dowels.

This inexpensive but effective method for storing ribbon has made my craft table work area so much neater! And, it’s so much easier to find what I need! (I even found ribbon that I know is from 2103! I used it to make this DIY Ribbon Chandelier!)
How to Organize Ribbon Scraps
While the DIY ribbon storage organizer has solved the problem of what to do with all those spools of ribbon, you might be wondering what I did with the previously mentioned ribbon scraps.
Obviously they can’t hang on the rods like the spools!
Well, my “janky” old ribbon box is still being used, but in a much more effective way now!
I’ve grouped types of ribbon or string and put them into Ziploc bags within the box. But another creative idea for DIY ribbon storage of scraps is to wrap them around cardboard scraps. Store them in old shoe boxes or plastic storage containers.
More Ribbon Storage Organizers
Okay, if my DIY ribbon storage ideas aren’t for you, maybe you’d benefit from a premade or store-bought ribbon organizer! Just because those didn’t work for me doesn’t mean they won’t be a perfect solution for you.
Here are some of the best ribbon storage options I’ve found for your craft room! Click any picture to shop.
**
Comment below with any questions about my DIY Ribbon Storage Rack! I’m always happy to help.


Ila Caparatta says
I love your idea, but I purchased curtain rods to hang mine. Thought they might be sturdier.
Bre says
That’s a great idea! Thanks for sharing!!
Bindu says
Your ribbon organizer looks like art!
Bre says
Hi, Bindu, thank you so much!! It’s fun to have the ribbon on display (and tidy)!