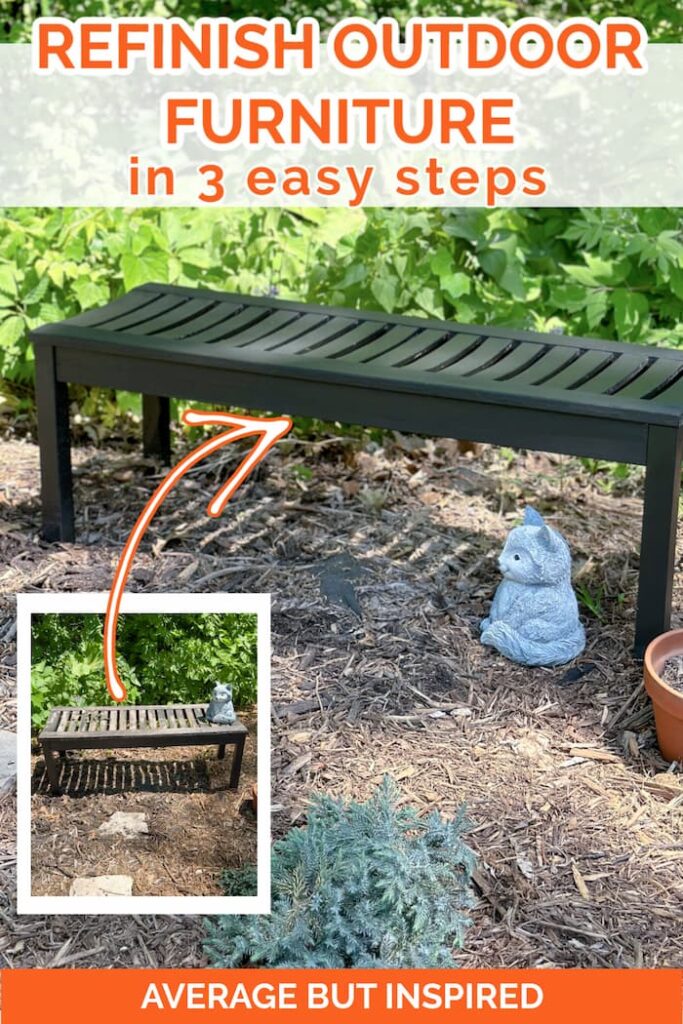
Has your outdoor furniture seen better days? Learn how to refinish outdoor wood furniture in three simple steps! Your patio furniture will never look better.
I know you’ve been there: the warm weather finally hits and you’re pumped to spend time outside.
But when you head out to relax, you realize your outdoor furniture has seen better days.
What once was beautiful wood furniture adorning your patio is now gray, cracked, and faded. (Hmm . . . funny how outdoor wood furniture ages the same way I am. Ha!)
Don’t despair: there’s hope! And, the good news is that refinishing wood furniture is likely to be so much easier than you think!
In just three simple steps, you can restain outdoor wood furniture and make it look brand new once again!
Supplies Needed to Refinish Outdoor Wood Furniture
This post contains affiliate links. Please read my disclosure policy for more information.
These are the outdoor wood furniture refinishing supplies I use and recommend. Of course you can supplement as you see fit!
- Exterior wood stain and sealer (I recommend buying a stain with a sealer built in. More on that later in this post)
- Stain brush or chip brush
- Paint stir stick
- Rubber gloves or disposable latex gloves
- Sandpaper
- Clean cloth, clean rag, cotton rag, and/or tack cloth
- Optional: electric sander (like an orbital sander)
How to Restain Outdoor Wood Furniture
For this tutorial, I’m refinishing the outdoor wood bench that I purchased to use near my DIY Fire Pit at my old home.
The photos in that blog post show the bench when it was brand new. It was stained solid black and in perfect condition.
After five years in the direct sunlight and harsh Illinois and Wisconsin winter conditions, the bench looked like this.
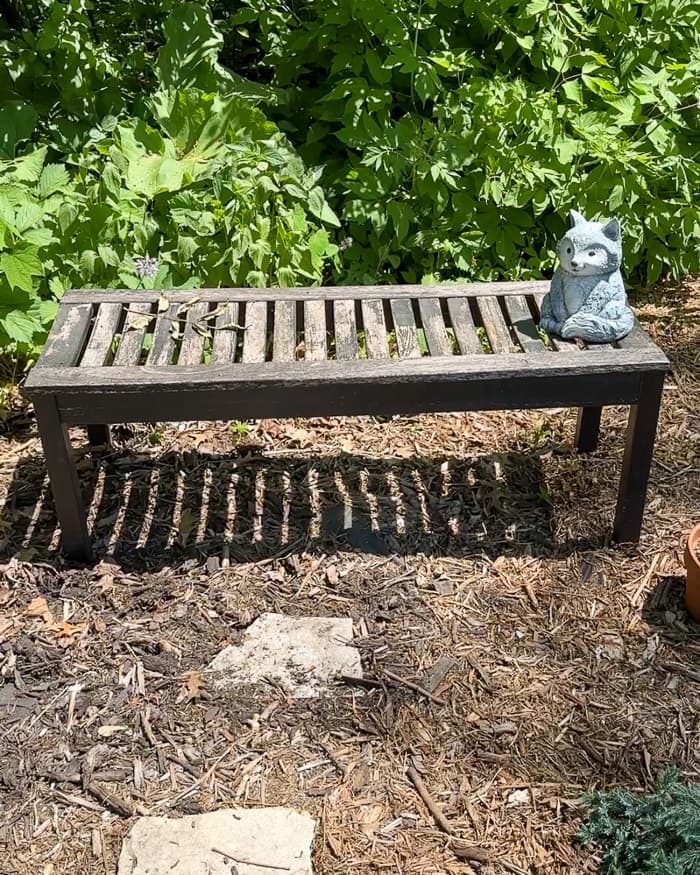
Totally grayed out and starting to crack in places, it was time to freshen it up!
Got Teak Wood? You’ll Want This Post!
Clean the Outdoor Furniture Well
The first step in this wood furniture refinishing journey is to clean the piece well.
“Clean well” will mean different things for different pieces.
For example, cleaning this bench consisted of me wiping it down with a paper towel. I made sure to brush off all the pollen and get it as clean as I could with just that towel.

If your wood furniture piece has things like bird poop, mildew, or algae on it, however, you’ll need to clean it better. I recommend hosing it off with a jet sprayer attachment, or using a soft wash pressure washer if you have one available.
If using water to clean the furniture, make sure to give it plenty of time to dry completely (in a covered space, preferably), before staining.
Sand the Wood Furniture (maybe!)
Next, it’s time to sand the outdoor furniture piece . . . maybe. (I know you’re hoping you don’t have to!)
In the case of my outdoor bench, I stained it with a solid exterior stain in the same color (or slightly darker color) as the original. Because of that, I wasn’t concerned with the preexisting black stain on the bench. I knew the solid stain in the same color would blend with it.
With that in mind, there are two times I recommend sanding before restaining outdoor wood furniture.
Sand Flaking Paint, Cracking, and Rough Spots
The first is if your piece has flaking paint, is cracking, or has rough spots that might give people splinters or other injuries.
In this case, you’ll want to sand in order to create a smooth surface give the new stain an even wood surface on which to adhere. You can try hand sanding, but if the furniture is in rough condition, you may need to switch to an electric sander.
Sand Before Applying Lighter Stain
The next is if you’re using a semi-transparent exterior stain (as opposed to a solid exterior stain), or if you’re staining the wood a lighter color than it currently is.
In both of these scenarios, the original stain color will show through the new stain color if you don’t sand to remove it.
If you do stain, make sure to remove all sanding dust once finished. You don’t want to work dust into your new stained finish.
Stain the Furniture Surface
The next (and final) step is where the outdoor furniture refinishing magic happens!
While wearing gloves (unless you enjoy a stain-colored manicure), apply a thin coat of exterior wood stain and sealer to your wood furniture piece.
Follow the grain of the wood, and apply it in long, even strokes.
Depending on the condition of your patio furniture, you may need to apply more than one coat. In that case, follow the manufacturer’s recommendations and directions on the stain you purchased.
I used Behr Solid Color Waterproofing Stain and Sealer and only needed one coat. I really liked this exterior stain product because unlike its oil based stain competitors, this product had virtually no odor and cleaned up very easily.
It also covered really well and hid a lot of imperfections due to the solid color. Finally, it waterproofs wood furniture and protects it from UV rays. Since the sealer is built in, it saves a lot of time, too!
After the stain is applied, let it dry completely. Make sure to keep it out of the rain or wet conditions for the time recommended on the stain product used (in my case it was four hours).
Maintaining Outdoor Wood Furniture
Once you get your outdoor wood furniture looking good again, it’s easier to maintain it than to refinish it every few years.
There are a few ways to do this, and you can choose what works best for you!
One option is to use heavy-duty outdoor furniture covers when the outdoor furniture is not in use. I use these on my outdoor patio set, and while I find it annoying to take off the covers, store them, and put them back on, they have extended the life of my furniture.
Another option is to apply a transparent sealing topcoat to the wood furniture once a year (or more, if local conditions call for it – like if the furniture gets a lot of direct sunlight or you live on the coast).
And finally, a product I love and use on the wood chairs on my front yard patio is Howard Sun Shield Wood Conditioner and Protectant. This product wipes on and makes old wood look hydrated and lively again. It also contains UV protectant, so it’s great for maintaining outdoor furniture easily.
***
I hope this guide on how to refinish outdoor wood furniture in three simple steps was helpful to you! Please comment below with any questions, and to share your success story!
Kayla Fernandez says
Thanks for sharing informative article.
Alice Mcmiller says
Refinishing outdoor wood furniture can give it a new lease on life, especially after a few seasons of weathering. Your step-by-step guide makes it seem achievable for anyone, even those without much DIY experience. Thanks for sharing these valuable tips on sprucing up outdoor spaces!
Bre says
Hi, there – thank you!