Wondering about the benefits and drawbacks of using the MusselBound Adhesive Tile Mat for your next tiling project? This MusselBound review will give all the info you need!
My first time tiling! I was so excited to install a porcelain tile backsplash for the basement dry bar I built. Prior to this, I’d only installed a peel and stick backsplash and painted a tile backsplash!
A big part of my excitement was due to the fact that I’d be using the MusselBound Adhesive Tile Mat: the darling of Instagram DIYers all over. Promising to reduce both time and mess of a traditional tiling project, I had to try it!
This post contains affiliate links. Please read my disclosure policy for more information.
My first tiling project turned out great (if I do say so myself), and I am sure a big contributor to the success was the MusselBound mat.
That being said, there are some cons or drawbacks to using the adhesive mat that you should be aware of! Don’t worry: I’ll cover everything you need to know!
What is the MusselBound Adhesive Tile Mat?
OK for those of you not in the know (usually that’s me), a quick explanation of what it is we’re talking about in this post.
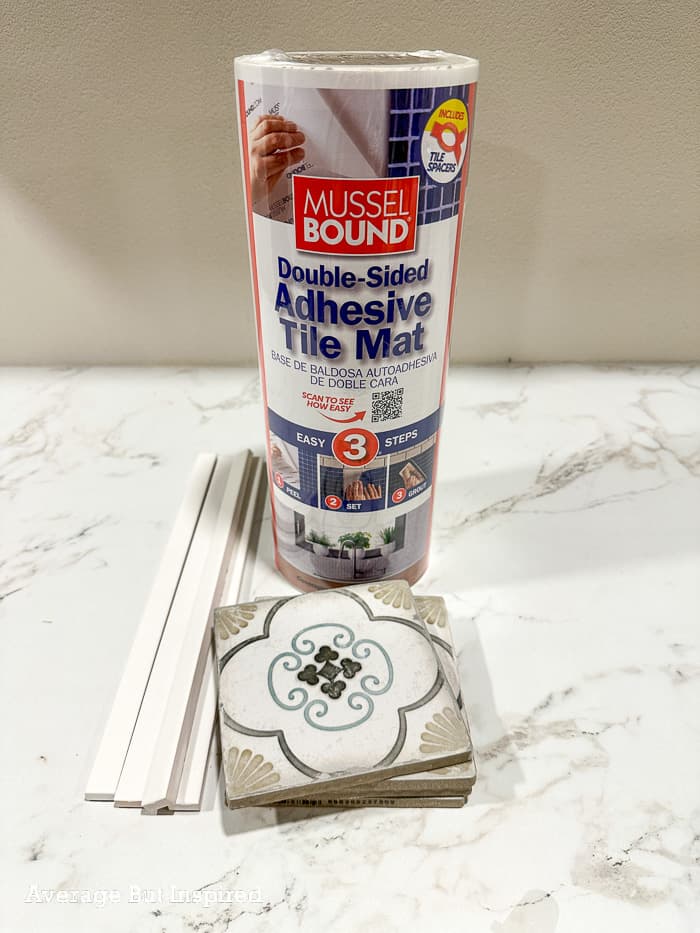
The MusselBound Adhesive Tile Mat is a replacement for traditional mortar, which is what you put on a surface to make tile stick before grouting it.
It’s a double-sided adhesive mat that comes in a roll measuring 15 feet, 10 inches long (which gives you a minimum of 15 square feet per roll).
You remove the paper backing, press the MusselBound to the wall (using a tile float to really make sure it sticks), and remove the top layer paper backing when you’re ready to place the tile.
Tiling with MusselBound Adhesive
Now that you know a little bit more about what exactly MusselBound is, let me show you how I used it to tile the backsplash of my DIY built-in snack bar!
The wall had some texture on it, but I’d gently sanded it previously (when I hung peel and stick wallpaper there).
Applying MusselBound to the Wall
The MusselBound manufacturer recommends installing the product vertically, and cutting it to size with a utility knife once it’s in place. I tried cutting in place but found that cumbersome, so I cut it to size before applying it to the wall.
Then I cut any overhang onto the countertop with a utility knife and a straight edge.
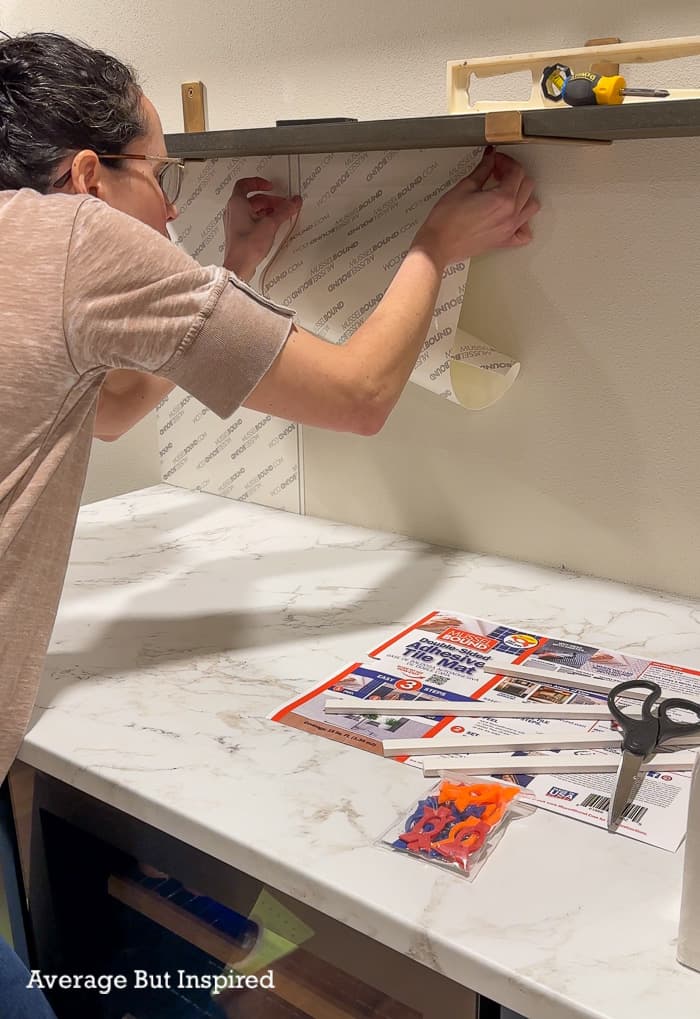
Once I pressed a sheet onto the wall, I used a grout float and a brayer to make sure it was definitely sticking to the wall! I probably overdid it but figured you can never be too sure. 🙂

I did have to slightly reposition one sheet, and that went fine because I hadn’t pressed down on it enough to really activate the adhesive yet.
Applying MusselBound to the area I needed went very quickly. I didn’t have any outlets or edges to cut around, so it was a very simple installation.
Placing the Tile onto the MusselBound Tile Mat
I left the wall with that MusselBound Tile Mat on it for a day or so, and got to work tiling. It was nice not having to apply the MusselBound and tile immediately – I could work at my own pace.
Pressing the tiles into place with the included MusselBound spacers was very easy. I started in the center, used my laser level to keep things straight, and worked outward until I completed everything I could do with full tiles.
Once I pressed a tile onto the MusselBound, I immediately used the grout float to press it on there really well and activate that adhesive.
The only hiccup I ran into was cutting these pretty patterned tiles with my manual tile cutter. They did NOT want to cooperate. It was a very frustrating process that resulted in me only having one tile left (because I broke so many), and me drinking wine while my husband took over the cutting duties.
I should have rented a wet saw. BUT . . . and it’s a big but . . . that’s one of the drawbacks or cons of using MusselBound. Wet or damp tiles will not stick AT ALL.
So, if you’re using a wet saw, you have to dry out each tile you cut before you can cut it. MusselBound recommends doing this in the oven. Can we talk about how time consuming that would be?
Grouting Tile Placed on MusselBound
Even though I was emotionally spent after the “all the tiles are breaking” drama, I had to grout the tile within 24 hours of application of the tiles to the MusselBound.
OK, maybe I didn’t have to do it within 24 hours, but it was strongly recommended by the company. And I’m a rule follower so I woke up early on a Saturday to make sure I finished grouting within that 24 hour window.
Grouting tile on MusselBound is done the same way as tile on mortar, so it was a straightforward process!
Supplies Used In This Project
MusselBound Review: Pros /Benefits and Cons / Drawbacks of Using MusselBound
As you can tell from my first tiling experience, my only problem had nothing to do with MusselBound.
I thought it would be helpful to see the pros/benefits and cons/drawbacks of using MusselBound in a list form, so here ya go!
Pros of Using MusselBound Adhesive Tile Mat
- Less Mess: no messy mortar or thinset to contend with.
- Fast Application: Applying MusselBound to the wall is a fast process.
- Immediate Grouting: unlike traditional tiling where there is a wait time to grout, you can grout tile placed on MusselBound immediately.
- Comes with Spacers: the roll includes three sizes of spacers (1/8″, 1/16″ and 3/32″) in a slightly different shape from traditional tile spacers, that work with MusselBound.
- Beginner-Friendly: I’m a beginner! And I loved this product.
- No Time Limit for Applying Tile (With Protective Top Sheet In Place): once the MusselBound is in place, there is no time limit for when you can place the tile, as long as you keep that protective top sheet on to cover the sticky surface. So it’s good for people like me who always have to stop and start a project.
Cons or Negatives of MusselBound
- No Flooring: it cannot be used on floors.
- Use on Textured Walls: MusselBound needs to make direct contact with all parts of the wall. If your wall or surface is textured, it could be difficult to get a strong bond.
- More Expensive: MusselBound is more expensive than traditional mortar.
- Wet Tile: wet or damp tile will not stick to MusselBound at all. So, if you’re using a wet saw, you need to dry out each tile before placing it. This is time consuming!
- Grout Within 24 Hours: The manufacturer strongly recommends that you grout tiles placed on MusselBound within 24 hours. So, just make sure that’s doable for you.
I am really glad I had the opportunity to install tile myself, and I am thankful for MusselBound because it removed an element of intimidation for me.
I will definitely use this adhesive tile mat again if I need to tile. It gets two thumbs up from me! (Read more about my Basement DIY Dry Bar project in that linked post!)
So what do you think? Will you try MusselBound Adhesive Tile Mat? Let me know in the comments, or ask me any questions there!
Dr. DEW says
I’m going to try it in my kitchen. I have outlets but,I can cut around them. I’m tired of getting ripped off by contractors. I’ll definitely be doing this myself.
Bre says
Nice!!! Good for you! I hope it turns out amazing!
Tile Installers Portland Oregon says
Your review of the MusselBound Adhesive Tile Mat provides a balanced look at its pros and cons, helping readers make an informed decision. The insights are practical and valuable.
VR Kurt says
I used MusselBound Adhesive Tile Mat to tile my backsplash 7 years ago. I now want to remodel and use a different updated tile. How do I remove the existing tile from the adhesive mat?
Bre says
Hello! I’m sorry but I don’t have the answer to that. Perhaps contact the company?
Chips of wood says
you can use musselbound right over the existing tile and apply new tile if that’s possible in your situation. You may need to add a trim feature if you have exposed edges.