My little guy is growing up so quickly and is ready for his big boy room! We recently started getting his gender neutral nursery transitioned over to an airplane theme room. So far I’ve painted the walls, assembled bunk beds, and done this gray chalk paint dresser makeover. The room is coming together!
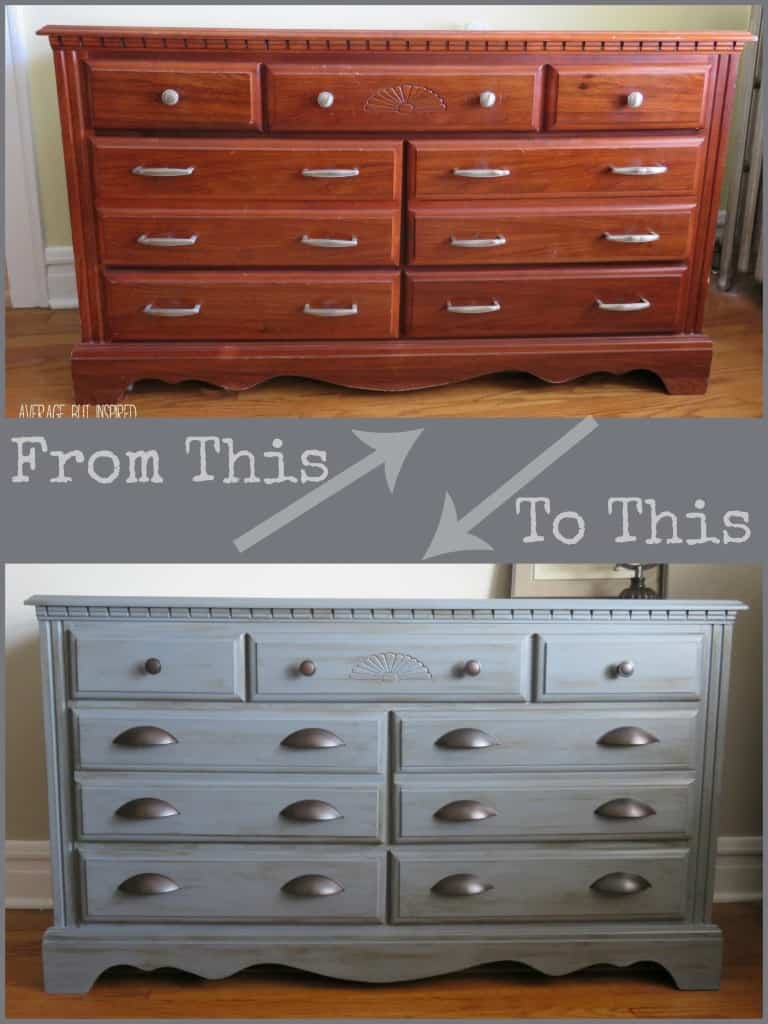
The Dresser Before Painting
So this was my lovely dresser that my parents bought me when I was around nine years old. It had different hardware at the time (much more old-school looking in brass and with those weird flourish thingies), but my husband and I switched it out when our daughter was born, and that’s what you see in this photo.

This post contains affiliate links. To read my full disclosure policy, please click here. Many thanks to DecoArt for providing the awesome paint for this project! The project and opinions are all my own.
My son’s bunk beds are an orange wood tone – one that looks really bad with the color of this dresser. Since we purchased the beds used and for a bargain price, I got over the color pretty quickly. (I figure we saved around $700 by purchasing them used.) And since I’m too lazy to paint bunk beds, I decided to paint the dresser in an effort to make his furniture not look so awful together.
Gray Chalk Paint Dresser Makeover: The Painting Process
Since we’re going with a vintage aviation look in the room, I knew I wanted to do a gray color on the dresser. I checked out DecoArt’s line of Americana Decor Chalky Finish paints and decided to mix two of their gray chalk paint colors — Yesteryear and Relic — to create my own hybrid color.
The paints mixed easily, and after I’d done my prep work (which was literally just wiping down the dresser to remove dust), I applied my first coat.
I used a small roller for the top and sides, and a 1″ brush for the rest of the piece. The paint applied SO smoothly and easily, and it dried really quickly, which is a plus when working with little kids in the vicinity. (I would have taken all the drawers out to paint, but they wouldn’t come out!)
I was able to apply my second coat almost immediately, and was totally pleased that the coverage was fabulous! Two coats, and 16 oz. of paint, was all it took for this entire piece of dark furniture!
Sealing the Chalk Painted Dresser with Wax
After I was sure that the paint was totally dry, I applied a protective topcoat of SC Johnson Paste Wax, using my large natural bristle brush. (DecoArt has a line of finishing waxes, too, but since I already had finishing wax at home, I didn’t want to be greedy and ask them to send me theirs.)
I let that dry to a haze and then buffed it. I love using wax to seal chalk paint because it produces such a beautiful, velvety finish.
(Sidenote: this is what was happening while I was waxing. My kids were systematically emptying the bookshelf of every.single.book.they.own and jumping in the pile. Nutcases.)
Adding Dark Wax to Antique the Dresser
A couple of days later, I got out my Briwax Dark Wax and got to “vintageizing” (made up word) the dresser. I wanted to give it some depth and character, so I streaked on the wax with a lint free cloth. I was a little overzealous though and got some MAJOR streaks and mistakes (on the dresser and on myself).
Yikes. Pretty awful.
Removing too much dark wax on furniture
But it was all fine because I grabbed my clear paste wax, put a little on a rag, and went over the spots where I’d applied too much dark wax. The dark wax came right off and my mistakes vanished. Phew!
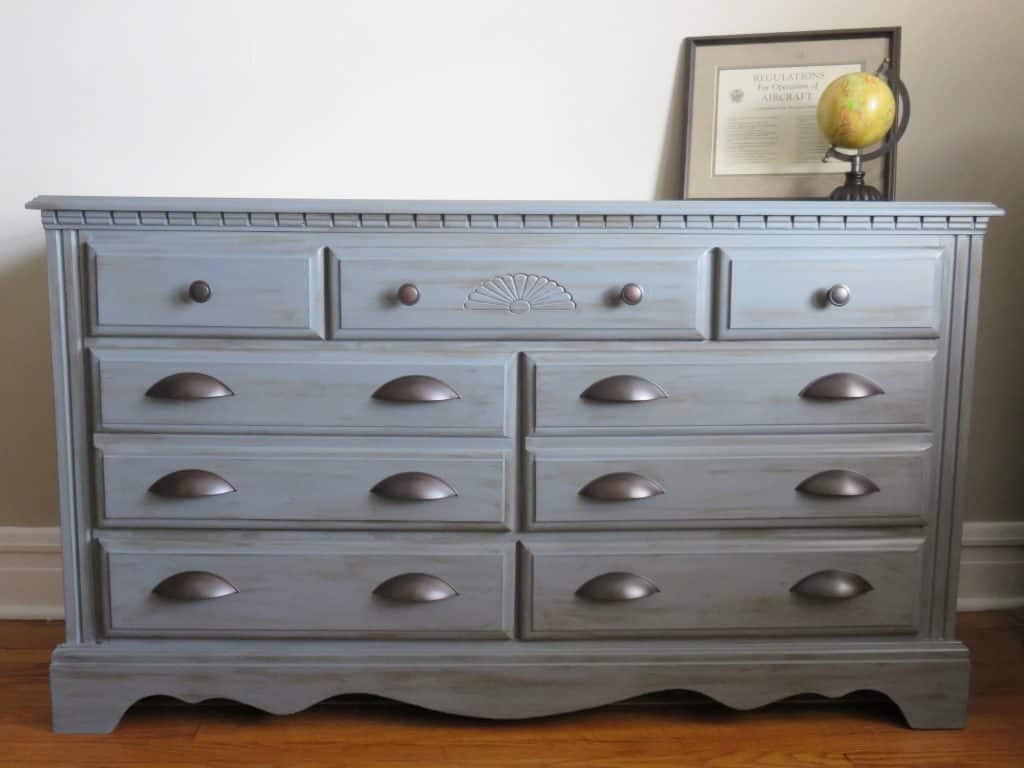
Now my childhood dresser looks like new with its gray chalk paint makeover and new hardware!
I can’t believe the difference! It’s so much better for a boy now (in my opinion), and I think it helps set the stage for the vintage aviation bedroom!
I couldn’t be happier with the results. Let’s just hope the rest of the room turns out as well as this dresser!
– Bre