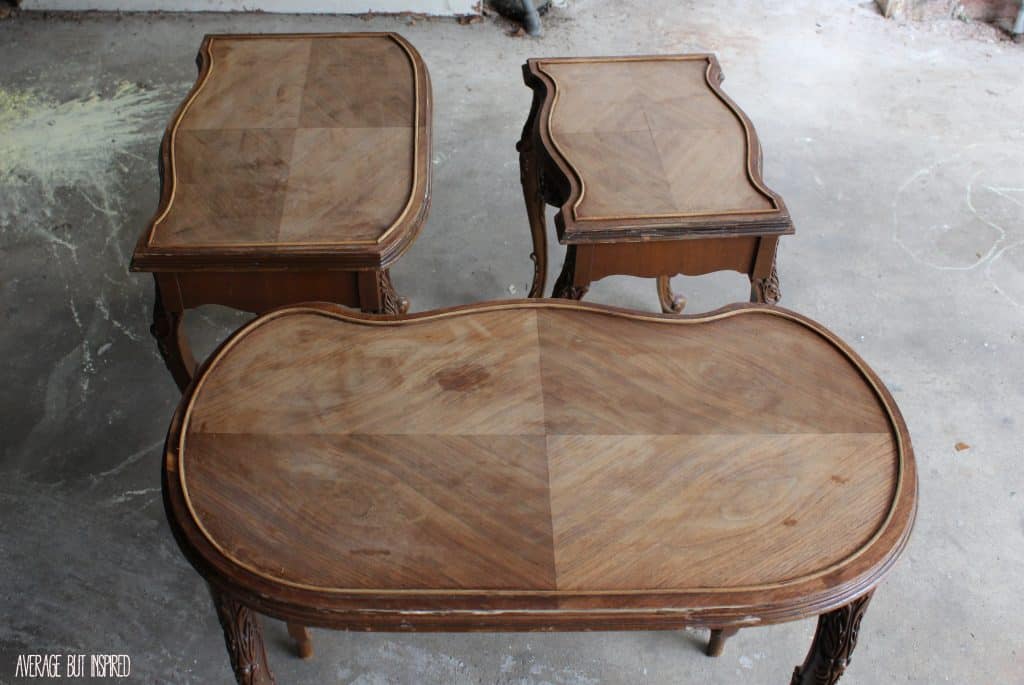
I cannot adequately describe how sorry and depressing this chair was when I got it at Goodwill. It was so drab, and it looked like an animal had been gnawing at it before it found its way into my home.
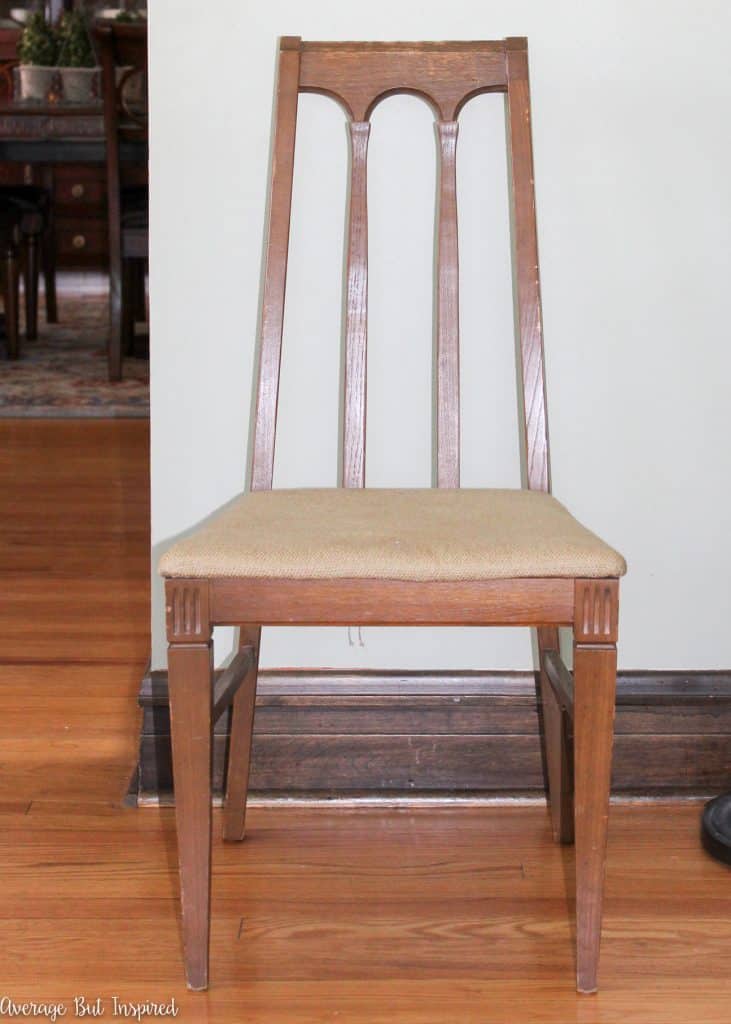
B-O-R-I-N-G. The finish was ugly, and the chair seat was even uglier. It was stained and dirty burlap fabric. No wonder someone donated it.
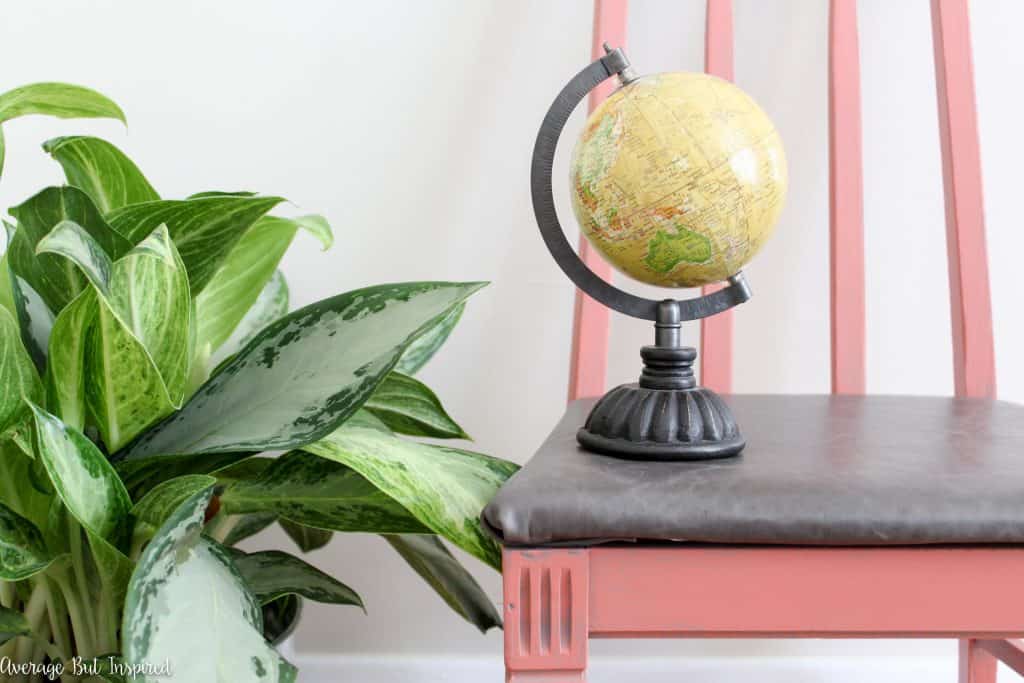
I knew I could give it new life with paint and beautiful leather upholstery, and I can’t wait to show you my coral painted chair makeover!
Coral Chair Makeover Supplies
Thank you to Leather Hide Store for supplying the leather upholstery fabric used in this project. This post contains affiliate links. To learn more, please read my disclosure policy.
- Gray chalk paint
- Coral chalk paint
- Creme Wax
- Leather upholstery fabric
- Heavy duty stapler
- Extra sharp fabric scissors
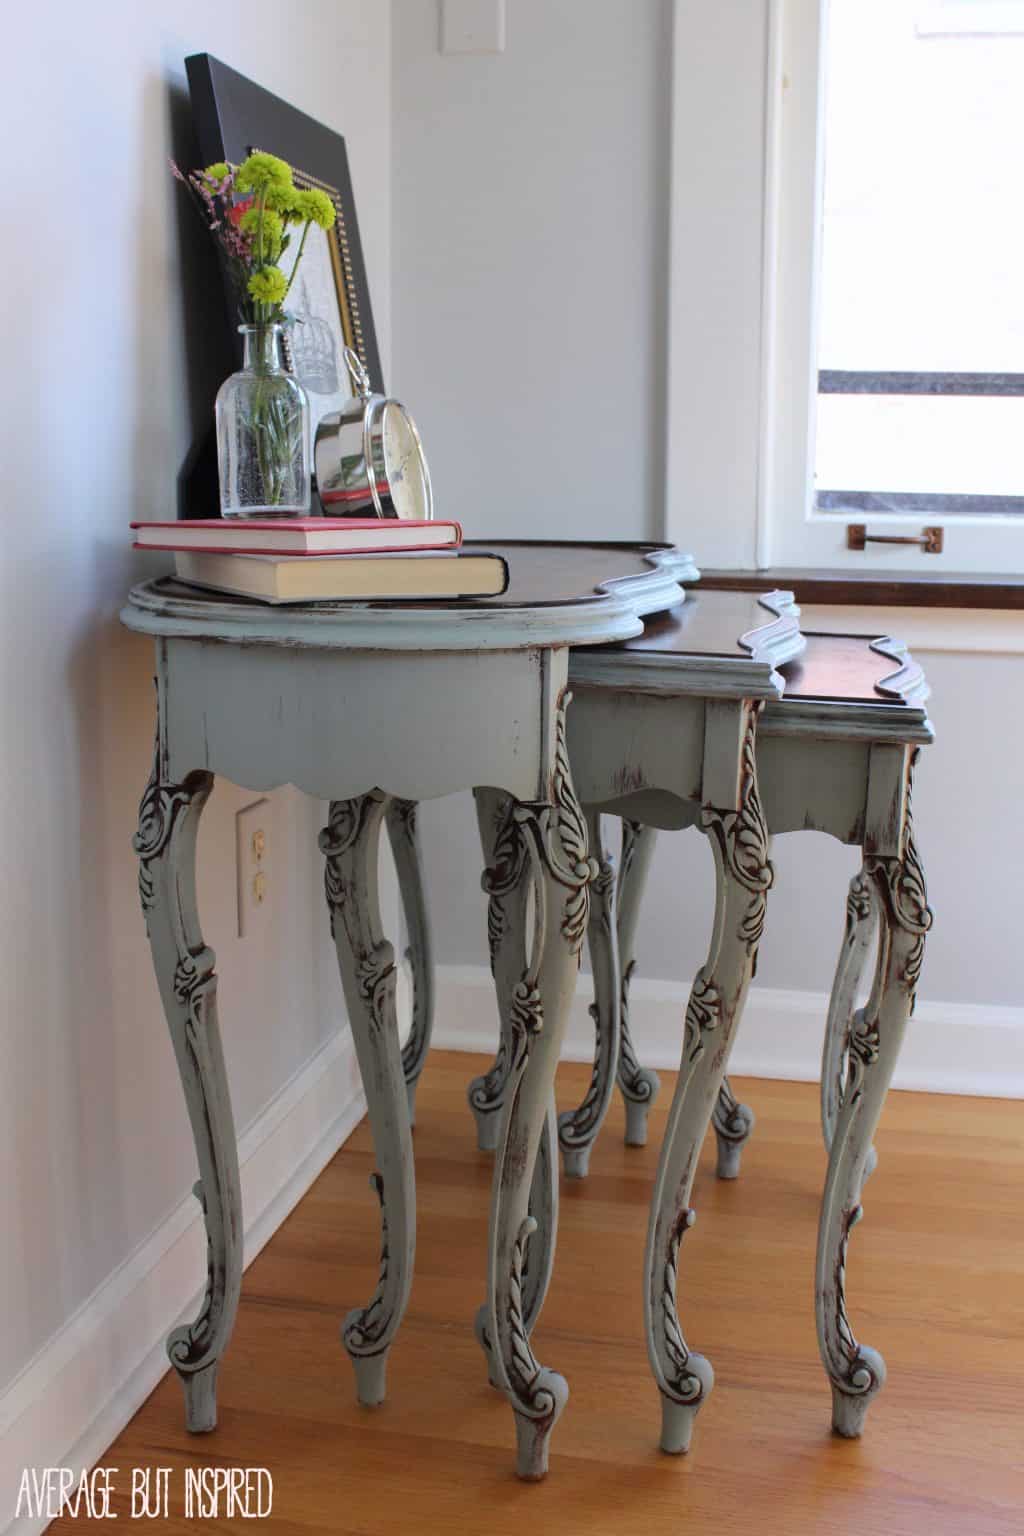
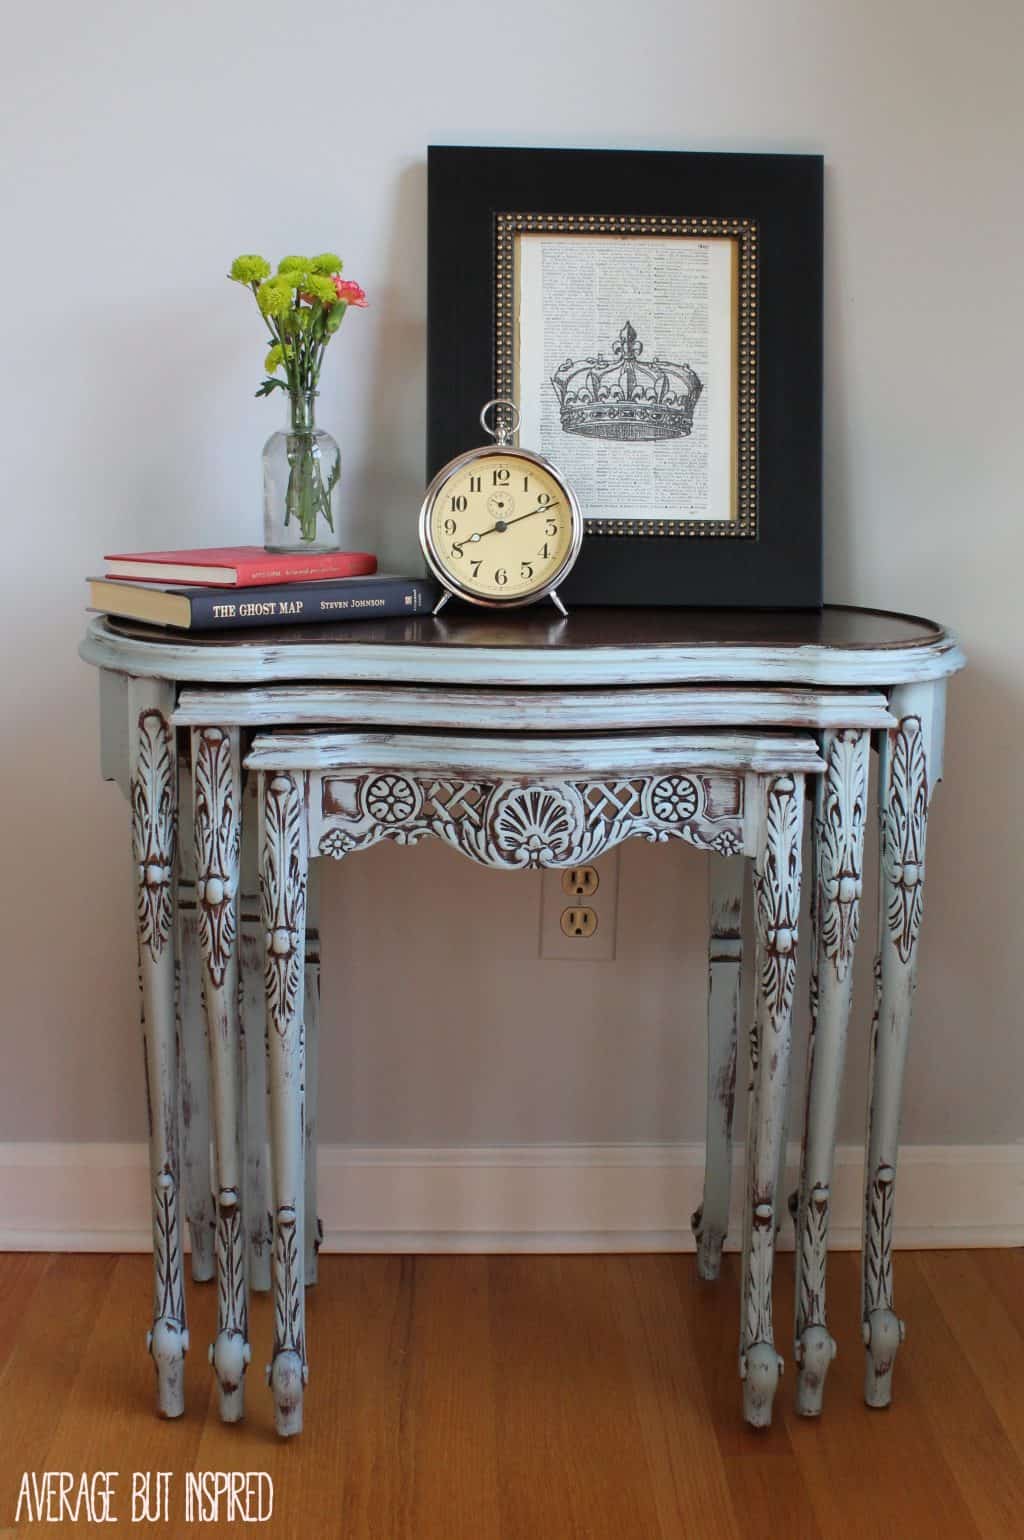
Coral Painted Chair with Leather Seat Makeover
Are you ready to see how it turned out? I’m in love!

I painted it with gray chalk paint and then gave it a topcoat of coral chalk paint. I let some of the gray chalk paint peek out underneath to give it a slightly distressed look, and then I sealed it up with an awesome finishing wax that has virtually no odor (translation: you can use it inside).
Once I had the chair refinished, I got to work reupholstering the seat with the most gorgeous, buttery-soft gray leather I have ever seen or felt.
This large swath of storm gray distressed leather came from Leather Hide Store, which is a family-owned upholstery leather supplier that sells gorgeous, top-quality leather at wholesale prices. You will definitely want to check them out for your leather upholstery needs.
There were so many options of upholstery leather to choose from, I had a hard time narrowing it down. I’m glad I picked the gray distressed leather though, because I think it ended up being perfect for this project!
I removed the fabric from the seat (I found three layers of fabric on there, including this ugly and stained faux silk – gah!), and cut my leather to be slightly larger than the entire seat. I made sure to use extra sharp fabric scissors to cut the leather because regular craft scissors would not have done the trick.
Then I used my heavy duty stapler to adhere the leather to the chair seat. I started in a corner, went to the opposite diagonal corner, and repeated that process. Then I did the middle of each side.
Then I stapled all around the seat, making sure to pull the leather nice and tight. Once I had all of my staples in place, I trimmed as much excess leather as I could.
The seat reupholstering process went smoothly (thank goodness!), and I didn’t ruin the leather in the process. Phew!
I re-screwed the seat onto the chair, and was so happy to see that the ugly duckling chair had such a pretty new look!
The leather seat is so soft and comfortable, and really brings this once plain Jane chair up a notch in style points.
I cannot get over the difference some paint and a gorgeous new upholstered leather seat made for this chair. It just shows you that with good materials, you can make anything pretty again! (I’m gonna use that line with my husband next time I go clothes shopping, too.)
Now that you’ve seen my refinished and reupholstered leather seat chair, I bet you’ll want to try your hand at reupholstering with leather, too! Check out The Leather Hide Store’s Ultimate Leather and Fabric Reupholstery Guide, which will give you exact amounts of material needed to refinish over 200 types of furniture!