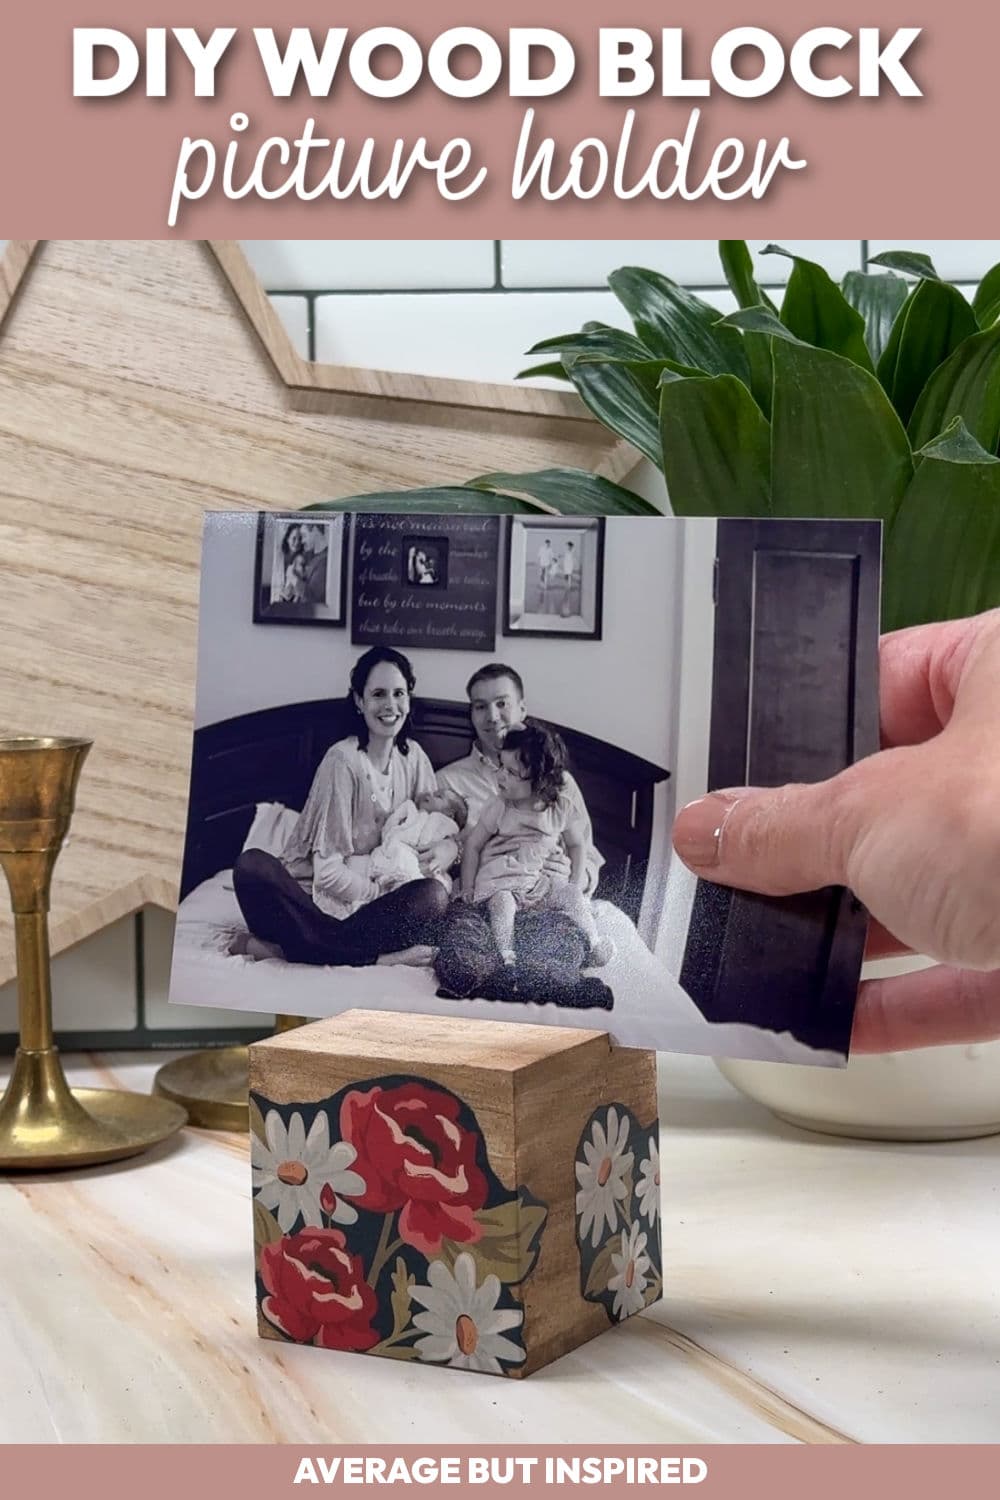
Unfinished wood blocks are full of craft potential! Learn how to make a picture holder or picture frame with this wood block craft project.
Whether you buy unfinished wooden blocks at the craft store, Dollar Tree, or make your own cubes with scrap wood, you can create this simple project!
Turning wood blocks into personalized photo holders or printable holders is not only fun, but it’s also so easy to do.
In this tutorial I will show you how to make your own version of this simple wood block craft, which is a great project to do with the kids or to use as a handmade gift idea.
DIY Wood Block Photo Holder Supplies List
These are the basic supplies I used to create the wood block picture holder shown in this post. Some of the links are affiliate links, and you can read my disclosure policy for more information on that.
- Unfinished wood block (I purchased this craft wood cube at Dollar Tree. Craft stores also sell wooden blocks, and you can make your own with scrap wood, too.)
- Hand saw and miter box (you could also use power tools, like a miter saw, if you’re so inclined)
- Ruler and pencil
- Acrylic craft paint, water, and a paintbrush
- Scrapbook paper
- Mod Podge and a paintbrush
There are so many ways to personalize this project to suit your style! Other supplies you could use include rubber stamps, stickers, rub on transfers, vinyl, ribbon, napkins or tissue paper (for decoupage), 3D embellishments, and more.
How to Make a Wood Cube Picture Holder
Although this is one of the easiest projects you’ll ever do, step by step instructions may help! So, here we go!
First, draw a straight line across the top of the wood block. This is where you’ll create the slot for the picture or printable to go. I drew the line about 2/3 of the way back, but you could really place it wherever you like.
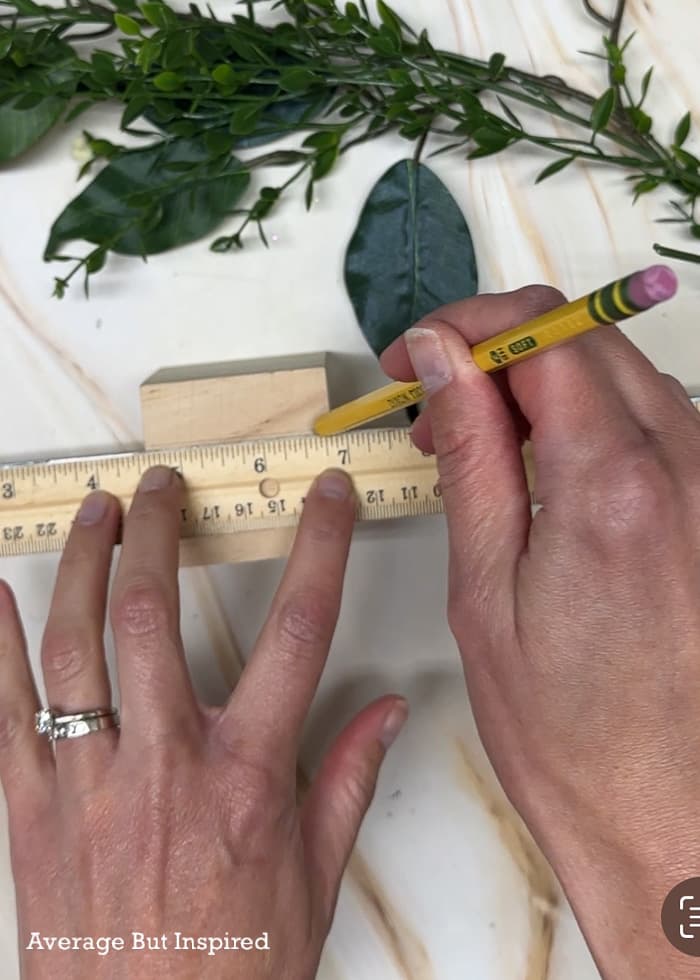
Next, fasten the block into a miter box and saw along the line you drew. Don’t saw too deep – you need just enough of a slit that the picture can stand upright in the block, but you don’t want it so deep that the picture rests too far into the block (obstructing the picture’s visibility).

With that slit in place, it’s time to customize the photo holder! As I mentioned before, you can do this part however you like!
I created a faux stain by watering down craft paint and brushing that over the entire cube.
Once the whole thing was painted, I cut scraps of floral paper into little pieces. I then put a thin layer of Mod Podge on the back of that paper and pressed it onto the wood block.
Looking for Other DIY Picture Frame Ideas?
After about twenty minutes, I covered the top of the paper with another thin layer of Mod Podge. This seals that paper in place and helps make sure it won’t come off!
And with that, my adorable wood block photo holder was complete.
It looks great with a regular photo in it . . .
and even holding a free printable for my Fourth of July decor! (It’s a vintage sheet music cover printable. I have a set of six available in that linked blog post if you want them!)
Now, after I made this, I realized these would also be great for wedding table numbers, place card holders, and they would even make great centerpieces with a dinner menu propped inside. So, you’re not limited to photo holder wood block crafts by any stretch of the imagination!
I hope you enjoyed this creative wood block craft idea. Please let me know in the comments what you think and if you have any questions!
Campbell Addison says
The picture holder look so aesthetic and it’s enhance the beauty of the picture, made with love and emotion.
Bre says
Thanks!!