• Skip to primary navigation
  • Skip to main content
  • Skip to primary sidebar
Average But Inspired logo - DIY and craft

Average But Inspired

Craft a home you love. DIY and craft tutorials.

  • About
    • Contact Me
    • Disclosures
    • Privacy Policy and Copyright Policy
  • DIY
    • Furniture
  • Crafts
    • Dollar Store Crafts
    • Seasonal
      • Patriotic & Summer
      • Valentine’s Day
      • Easter & Spring
      • Fall & Halloween
      • Christmas & Winter
  • Home Decor
    • Organization
  • Shop
    • DIY Swag
    • DIY Guides
  • Home

Christmas

5 Tips for Decorating the Dining Room for Christmas

November 17, 2015 by Bre 23 Comments

This post has great ideas for decorating your dining room for Christmas! 5 manageable tips will have you decking the halls in no time! #ad

Don’t overthink your Christmas dining room decor. Here are five tips for decorating the dining room for Christmas!

It’s the most wonderful time of the year, and I could not be more excited to celebrate Thanksgiving and Christmas with my family and friends!  

Normally I’m a “wait until after Thanksgiving to deck the halls” kind of girl, but I realized that planning ahead and decorating (even a little bit), before Thanksgiving will mean less stress for me in December.

This post has great ideas for decorating your dining room for Christmas! 5 manageable tips will have you decking the halls in no time! #ad

It was a snap to turn my dining room into an elegant winter wonderland, and to make it just as easy for you, I’m sharing five tips for decorating the dining room for Christmas.  

I’m glad I decorated this room first because my mom’s dining room is where so many of my fondest Christmas memories have taken place.  Sharing beautiful meals with those I love while soft lights twinkle and Christmas decor sparkles in the background is a part of every Christmas memory for me.  

This post has great ideas for decorating your dining room for Christmas! 5 manageable tips will have you decking the halls in no time! #ad

To give future memories a proper setting, my own dining room had to be transformed into an elegant but festive space.  

This post has great ideas for decorating your dining room for Christmas! 5 manageable tips will have you decking the halls in no time! #ad

1.  Light it Up

A big part of the magic of Christmas is twinkling lights everywhere you look.  Why not bring that into the dining room with an abundance of sparkle and candlelight?

This post has great ideas for decorating your dining room for Christmas! 5 manageable tips will have you decking the halls in no time! #ad

If you’re clumsy like me and worried about setting the table or yourself on fire (um, yes, I have done that), then flameless LED candles are the perfect solution!

I set my table with lots of subtly-sparkled LED candles and votives.

This post has great ideas for decorating your dining room for Christmas! 5 manageable tips will have you decking the halls in no time! #ad

The glittery branch trees and evergreen garland I bought add even more glamour and shimmer to the table, even when it’s not dark outside.  

This post has great ideas for decorating your dining room for Christmas! 5 manageable tips will have you decking the halls in no time! #ad

Don’t limit the sparkle to the table, though!  I carried the look throughout the room by adding these gorgeous lanterns and wine-colored LED candles near the tree.

This post has great ideas for decorating your dining room for Christmas! 5 manageable tips will have you decking the halls in no time! #ad

This post has great ideas for decorating your dining room for Christmas! 5 manageable tips will have you decking the halls in no time! #ad

The soft glow and ambiance the candlelight creates while reflecting off the glittery accent pieces will inspire family and friends to linger, and will make the dining room a memorable setting for the Christmas memories being made.  

2.  Set a Special Table

Since the table is the centerpiece of any holiday dinner, make it shine with special details like festive linens, unique place cards, and beautiful accessories.  

This post has great ideas for decorating your dining room for Christmas! 5 manageable tips will have you decking the halls in no time! #ad

These Christmas tree placemats are a wonderful way to bring Christmas to the meal in the absence of holiday china or tableware.  With their ribbon and bell detailing, they’re a special addition to the table.  

This post has great ideas for decorating your dining room for Christmas! 5 manageable tips will have you decking the halls in no time! #ad

Unique touches like mini mason jar place cards filled with greenery cuts will also have guests smiling and feeling special.

This post has great ideas for decorating your dining room for Christmas! 5 manageable tips will have you decking the halls in no time! #ad

And how about these cute new Santa salt and pepper shakers?  I mean, come on.  They’re adorable.  

This post has great ideas for decorating your dining room for Christmas! 5 manageable tips will have you decking the halls in no time! #ad

With a beautiful table set, guests will truly enjoy themselves at the holiday meal – even if the food is not very good (which is what happens when I host).

I Think You’ll Like These Other Christmas Ideas, Too!

Classic Christmas Mantel Decor

DIY Wood Bead & Jingle Bell Garland

3.  Say Yes to Swag

Adding swags to the backs of chairs elevates the look of any holiday dining room.  

I made these by tying together faux evergreen swags, ornaments, and ribbon – looping them through my chairs.

This post has great ideas for decorating your dining room for Christmas! 5 manageable tips will have you decking the halls in no time! #ad

Make them personal to you and your family’s traditions by including ornaments that have meaning to you.  

This post has great ideas for decorating your dining room for Christmas! 5 manageable tips will have you decking the halls in no time! #ad

The ice skates on my swags are a nod to my daughter’s obsession with ice skating.  They’ll definitely be a conversation starter, which can certainly be helpful at some holiday meals!

4.  Add a Tree

Beautiful evergreens are synonymous with Christmas, so why not bring one into the dining room?  

I’m not saying you have to lug the Griswold family tree in there (especially if your dining room is small like mine), but even a small tree will bring ambiance and joy into the room.

This post has great ideas for decorating your dining room for Christmas! 5 manageable tips will have you decking the halls in no time! #ad

I was SO excited to find this faux tree because it is the perfect size for my space.  I also love that it is pre-lit and came with an adorable base so I didn’t have to buy my own or skirt the tree.  

This post has great ideas for decorating your dining room for Christmas! 5 manageable tips will have you decking the halls in no time! #ad

My kids are so excited to have a tree in the dining room, and I have to admit that I am, too.  It is really beautiful to look at, and I know it will be especially beautiful during a lovely meal.

5.  Pay Attention to the Little Details

To really complete a dining room’s transformation for the Christmas season, pay attention to the little details.  

One way to do that is to swap out regular artwork or wall hangings for Christmas art.

This post has great ideas for decorating your dining room for Christmas! 5 manageable tips will have you decking the halls in no time! #ad

Adding garlands and ornaments to other bare spaces also adds a festive touch.

This post has great ideas for decorating your dining room for Christmas! 5 manageable tips will have you decking the halls in no time! #ad

You can also try emptying dishes and containers of their regular contents and substituting with sparkly ornaments of varying shapes and sizes.  

This post has great ideas for decorating your dining room for Christmas! 5 manageable tips will have you decking the halls in no time! #ad

Put out seasonal candy dishes, too!  They look cute on their own, and guests will love nibbling on sweet treats once you fill them with candy.  The little details can be the easiest to take care of, but they really show you care.

This post has great ideas for decorating your dining room for Christmas! 5 manageable tips will have you decking the halls in no time! #ad

I hope these tips help excite you for the holidays to come and give you some inspiration for your own Christmas home!

Now that you’ve seen my decked out dining room and read my tips for creating your own beautiful holiday dining space, which room are you planning to transform this Christmas?

Filed Under: Christmas, home decor

Recycle Christmas Cards Idea: Make an Adorable DIY Banner

January 5, 2015 by Bre 27 Comments

Upcycled Christmas Card Bunting

Looking for a way to recycle Christmas cards? Let me show you how to repurpose them into a decorative banner you can enjoy all winter long!

I received so many gorgeous Christmas cards this year!  It was as if everyone I know decided to send out their best card ever.  Seeing all of the beautiful holiday greetings displayed throughout my home helped make Christmas even more special!

Because of that, it was really hard to part with the holiday cards when putting away the Christmas decor (like my DIY Holiday Card Holder).  

So I got to thinking . . . instead of throwing them out, why not extend the fun and recycle the holiday cards into something else? And that’s when I decided to upcycle my Christmas cards and turn them into a decorative banner to enjoy all winter long.

Need a way to recycle Christmas cards? Why not upcycle holiday cards into an adorable winter banner you can display all season long? This post shows you how to reuse those old holiday cards in a new way!

This was a totally mindless project that only took about 20 minutes to put together – perfect for when you’re watching those reruns at night!

Recycled Christmas Card Banner Supplies

This post contains affiliate links. Please read my disclosure policy for more information.

All you need in the way of supplies are the following items:

  • Christmas cards or holiday cards (photo cards with printed backs worked best for me!)
  • Large shape punches in the shapes and sizes of your choice: I used a 3″ circle punch. (Note: you could use a Cricut machine to cut shapes, too!)
  • 1/8″ hole punch
  • Bakers twine or thin string
  • Optional: extra cardstock if you want to substitute in some non-Christmas card pieces

How to Make an Upcycled Christmas Card Banner

First, spread out all of your holiday greeting cards and separate them into piles arranged by color scheme and/or style. Then, pick the colors that work with the overall look you’re going for.

Once you have selected your Christmas cards (and supplemental cardstock, if you’re using it), use your large hole punch to cut out lots of circles.  

Looking for a way to recycle Christmas cards once the holidays are over? Why not recycle the cards and make them into a DIY banner!

Next, use a small hole punch to put two holes in the top of each circle.  

Upcycle holiday cards and turn them into an adorable banner you can display all winter long.
Punch holes in the tops of pieces of Christmas cards to create a DIY banner.

Next, thread bakers twine through the holes in the top of each circle to create your bunting or banner.

String twine through holes punched in holiday cards to create a recycled Christmas cards banner.

Hang it up and you’re all set!   You may need to adjust the placement of some of the shapes on your banner or bunting, but that’s an easy fix.

Recycle Christmas cards and turn them into a DIY banner you can display all winter long.

This DIY banner made from old Christmas cards is such a great way to recycle holiday greetings! It adds a fun pop of color wherever you hang it, and helps brighten some of those gray winter days!

I must say that it’s also a nice way to ease some of the pain of putting away all of the Christmas decorations.

Upcycled Christmas Card Bunting

What do you do with the Christmas cards or holiday cards once the holidays are over? Tell me in the comments below!

Filed Under: Christmas, Holiday

A Clear Ornament Snowman

December 10, 2014 by Bre 22 Comments

blank

Friends!

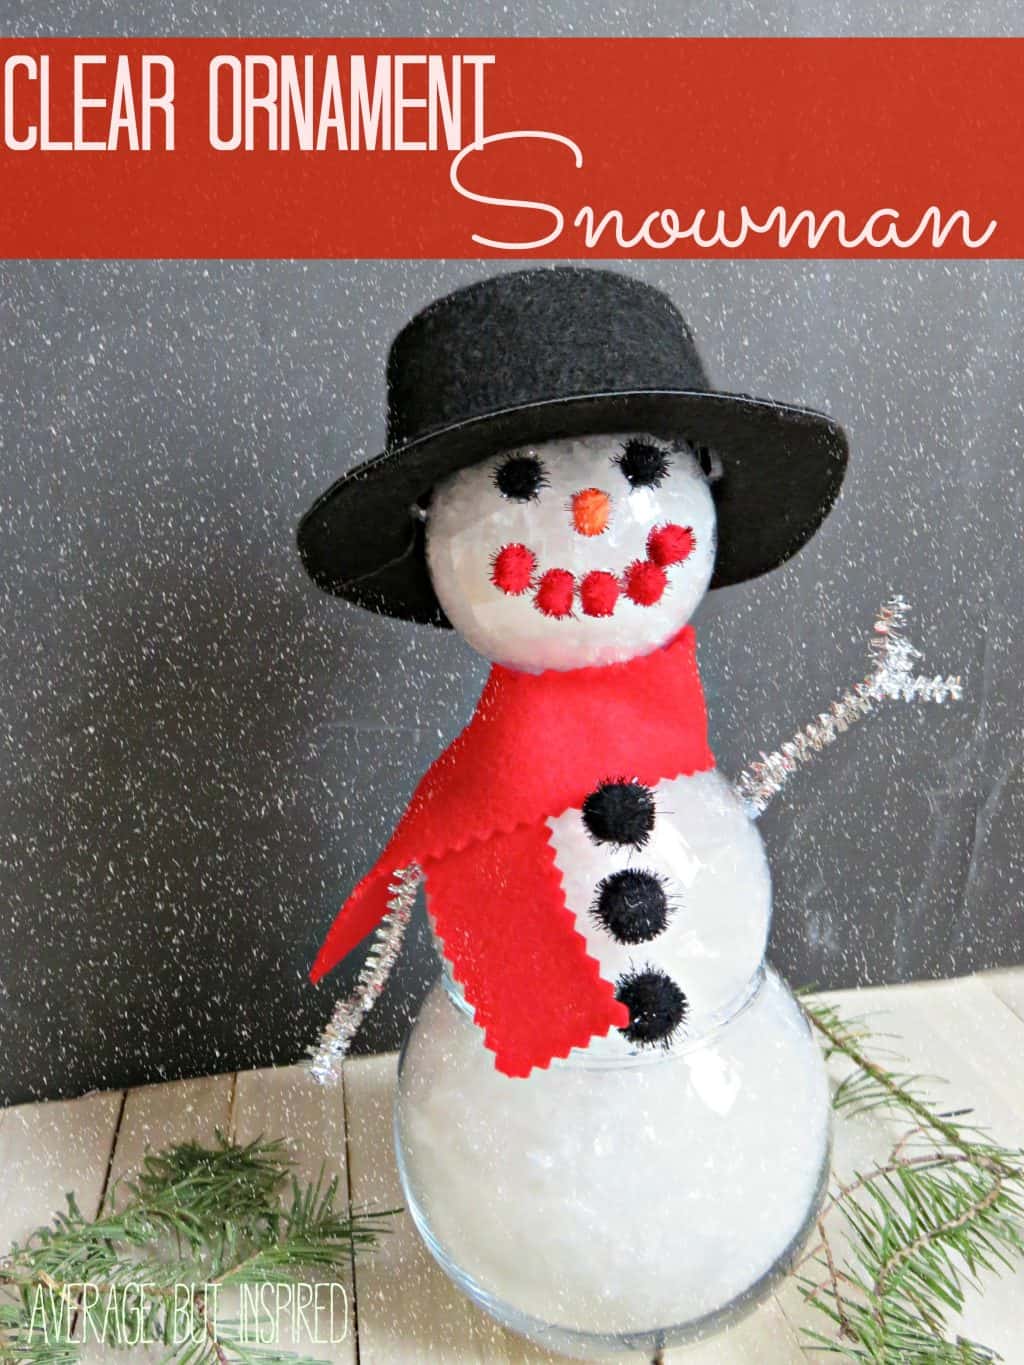
It’s that time again! Time for the Monthly DIY Challenge where some of my talented blogger friends and I take the same basic craft supply and turn it into something fabulous! This month we’ve chosen the ubiquitous clear ornament, which seems perfectly fitting for December, if you ask me!  clear_ornament_challenge

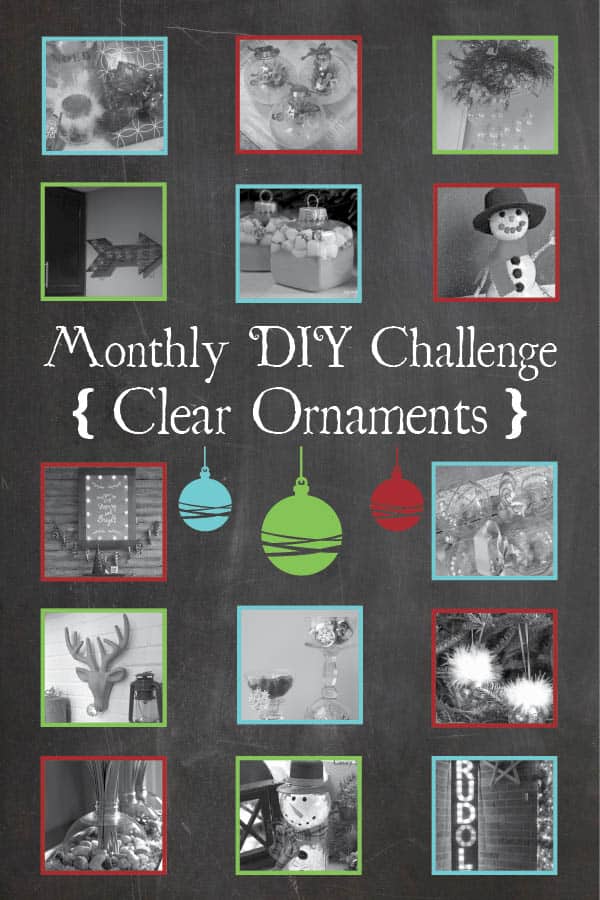
Being perfectly honest, I found this challenge to be, well, quite challenging! Pinterest revealed that every single ornament idea I had was “so last year” (or the year before, or the year before that).  Luckily, my mom and sister were more than generous with alternate suggestions, as we had a lot of time to think about this during a recent weekend stay at the hospital with my dad.  One of the many ideas was to turn an ornament into a snowman.

And so . . . please let me introduce you to my new clear ornament snowman friend, Pierre.  He’s channeling his inner Frenchman with his jaunty cap and fashionable scarf.

Clear Ornament Snowman (with header) [Read more…] about A Clear Ornament Snowman

Filed Under: Christmas

Easy DIY Holiday Card Holder

November 24, 2014 by Bre 20 Comments

Easy DIY Holiday Card Holder

This festive DIY holiday card display can be made in a snap and treasured for years to come!

One of the best times of the holiday season is when the holiday cards start arriving! Finding actual greetings – sprinkled amongst the typical bills and marketing postcards – brings excitement each time you open the mailbox!

And the best way to extend the fun of receiving Christmas cards is to actually display them. Don’t just put them in a basket, or even worse- toss them in the trash (pssst check out this Upcycled Christmas Card Garland project for an idea of what to do with those cards once the holidays are over).

Instead, let me show you how to make this easy DIY holiday card holder. You can display Christmas cards and holiday greeting cards, and enjoy the smiles of your friends and family all season long.

This is an easy DIY holiday card holder that you can make easily and display for years to come!

 I mean really, how festive is this wreath holiday card holder?

DIY Christmas Card Holder Supplies

This post contains affiliate links. Please read my disclosure policy for more information.

  • 18″ wood wreath form (or 18″ chipboard wreath form, if you can find one)
  • Clothespins (I used 25)
  • Wired ribbon
  • Wood glue
  • Hot glue (and glue gun)
  • Gold glitter paint
  • Green acrylic paint
  • Paint brush (a foam brush works great)
  • Green craft felt (in two shades); red craft felt
  • Sharp fabric scissors

How to Make a DIY Holiday Card Holder Display

You’re going to love how easily this adorable Christmas card display goes together!

Step One: Paint the Wreath Base and Clothespins

First, paint the wreath form and clothespins green using regular acrylic paint.

Alternatively, you could use green spray paint for an even quicker project! (However, remember to spray paint outdoors or where there is a lot of ventilation. That could be tough at this time of year!)

Learn how to make a DIY Christmas card holder in this post. It's a beautiful way to display holiday greetings.

Step Two: Create a Hanger for the Holiday Card Holder

Once the paint dries, tie a ribbon into a loop at the top of the wreath. This will allow you to hang the card holder anywhere you like: on a blank wall or empty wall, on a vintage window for an antique look, or even on the back of a door.

Then, make a bow out of the same ribbon and hot glue it to the front. This adds a decorative touch and helps hide the knot in your ribbon hanger.

Step Three: Glue Clothespins to the Wreath Base

Next, it’s time to attach the clothespins! Glue them around the wreath form with wood glue, alternating the opening ends on the inside and outside of the wreath form.  

Clothespins glued to a wood wreath base are the Christmas card holders in this DIY holiday card holder project.

Step Four: Embellish the Card Holder with Felt Leaves and Berries

After the glue has dried, cut holly leaves and berries out of felt. These don’t have to be perfect – don’t stress about this! The key is to have sharp scissors.

Glue the felt leaves and berries to some of the clothespins, and add some gold glitter paint to some of them for some sparkle.  

Learn how to make a festive Christmas card holder in this post!

 Not only is this a beautiful way of displaying Christmas cards and holiday greetings, but you’ll have the pleasure of knowing you made it yourself!

A DIY holiday card holder is a wonderful way to display Christmas cards.

This easy way to hang Christmas cards will last for years to come, and will be the perfect way to display those cherished holiday greetings.

Learn to make a DIY Christmas card display that looks like a wreath.

Now tell me in the comments below – how do you usually display your Christmas cards?

Filed Under: Christmas

  • « Go to Previous Page
  • Page 1
  • Interim pages omitted …
  • Page 4
  • Page 5
  • Page 6

Primary Sidebar

Let’s Connect!

Hi, I’m Bre! Thanks for visiting Average But Inspired, where I show you how to work with what you’ve got to create a home you love.

Bre of Average But Inspired - a DIY and craft blog

Love DIY? Subscribe to Get Posts E-mailed!

How Can I Help You?

blank

How to Create a Faux Antique Brass Finish with Paint

blank

How to Paint Over Tile

blank

How to Paint a Countertop to Look Like Marble!

blank

7 Tips for Hosting a Party on a Budget

Looking for Something?

Copyright © 2013-2022, Bre Eggert (Average But Inspired). All rights reserved.
  • Home
  • DIY
  • Crafts
  • Home Decor
  • Privacy Policy and Copyright Policy
  • Disclosures
  • Contact Me