• Skip to primary navigation
  • Skip to main content
  • Skip to primary sidebar
Average But Inspired logo - DIY and craft

Average But Inspired

Craft a home you love. DIY and craft tutorials.

  • About
    • Contact Me
    • Disclosures
    • Privacy Policy and Copyright Policy
  • DIY
    • Furniture
  • Crafts
    • Dollar Store Crafts
    • Seasonal
      • Patriotic & Summer
      • Valentine’s Day
      • Easter & Spring
      • Fall & Halloween
      • Christmas & Winter
  • Home Decor
    • Organization
  • Shop
    • DIY Swag
    • DIY Guides
  • Home

Christmas

How to Make Fake Snowballs for Decor

January 2, 2021 by Bre 8 Comments

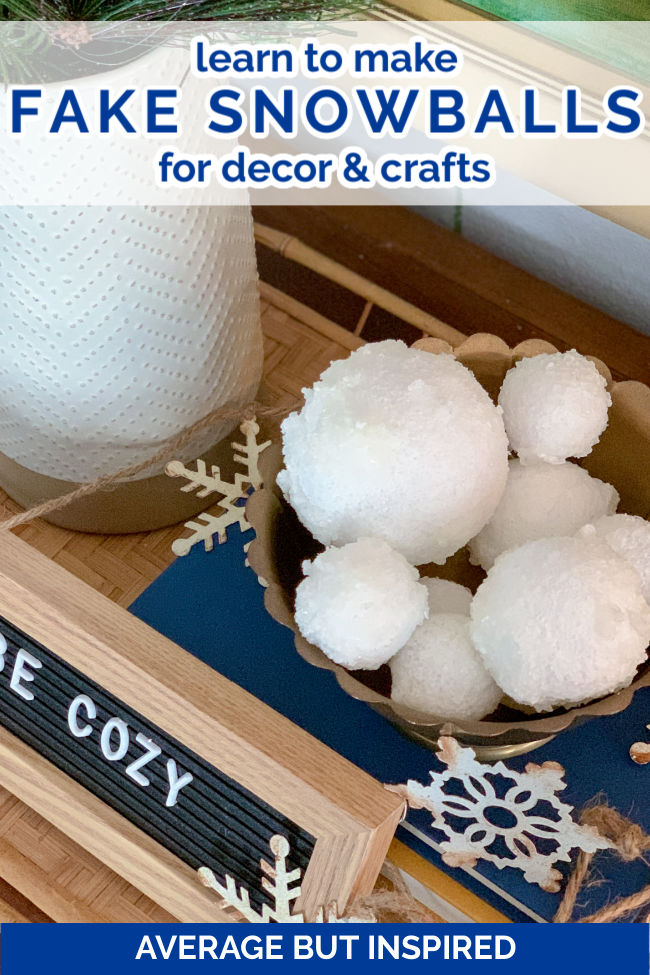
Learn to make your own fake snowballs for adorable winter decor!

With Christmas decorations packed away the house can feel stark!  Because of that, it’s fun to add some winter-themed decor to the mix. 

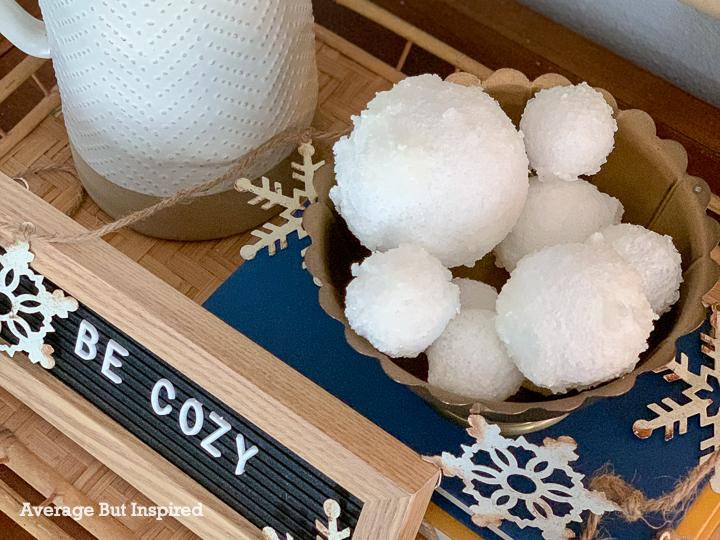
One great way to do that is to make fake snowballs for decor.  They’re easy to make, inexpensive, and look great in vases, jars, bowls – anywhere really!  They’re a beautiful winter vase filler.

This is so cute for winter decor! Learn to make fake snowballs - they look great as winter vase fillers, popped in a bowl, or displayed with some greenery for a seasonal touch.

Supplies Needed to Make Fake Snowballs

This post contains affiliate links.  To read my full disclosure policy, please click here.

To make DIY fake snowballs, you really only need three main supplies!  Many of the items can be purchased at the dollar store, or you can get them through the links I’m sharing here.

  • White floral foam balls in various sizes (I used three sizes)
  • Epsom salt
  • Mod Podge (any finish will work)
  • Mixing container and stir stick
  • Optional: latex gloves or rubber gloves
White floral foam balls form the base of DIY snowballs.

How to Make Fake Snowballs for Decor

Before you get started crafting up some beautiful snowballs, I highly recommend that you put on a pair of gloves!  This project is really messy, and I think you will not be happy if you’re not wearing gloves. 

I keep a large package of latex gloves on hand all the time (get it – ha!), because they’re invaluable when it comes to crafts & DIY!

Now that my warning is complete, let me show you how to do this!

Begin by mixing epsom salt and Mod Podge in some type of mixing container.  You can eyeball the amount – I probably did a little less epsom salt than Mod Podge.

Learn how to make fake snowballs for decor and crafts! With simple supplies you can make many of them very quickly!

Once those ingredients are mixed together, you need to work quickly because the epsom salt will start to absorb the Mod Podge!

Start rolling a foam ball into the epsom salt and Mod Podge mixture, coating the ball with the mixture.

As the mixture thickens, you will start pressing it onto the foam ball more so than rolling the ball in the mixture.  This will create lumps and texture, and that’s perfect!  

It's easy and fun to make fake snowballs. These snow balls can be used for winter decorations and more!

A snowball is not perfectly round, so you want this variation in texture and coverage.

When you have a good amount of mixture distributed around the foam ball, set it aside to dry, and repeat with the other foam balls.  

These should be dry and ready to display in a few hours, depending on the amount of Mod Podge you used and the humidity in the room.

Need some winter decor inspiration? Check out my Simple Winter Decor Ideas post!

Something important to note is that it is unlikely your entire foam ball will be covered with the epsom salt / Mod Podge mixture. There will be parts of foam ball still visible.  That is OK! 

Learn how to make fake snowballs for decor or crafts. It's very easy and makes for a wonderful winter decor accessory for any space!

Because the floral foam is white, it still gives the appearance of snow – especially when combined with the other parts that have the epsom salt / Mod Podge mixture.

blank

So what do you think?  Will you try making some fake snowballs for your winter decor this year?


Filed Under: Christmas, Crafts

Favorite Things in 2020 Gift Ideas

November 24, 2020 by Bre 4 Comments

blank

The holidays are upon us!  This year, more than ever, it’s important to plan ahead for gift giving.  Because of that, I’ve compiled my favorite things from 2020 into a handy gift guide to help inspire your shopping.

All of these gift ideas for 2020 are things that my family and I discovered and loved during this strange year!  It’s funny how they share a common theme of keeping us comfortable at home.  They’re also all available online at the links I’ve included, so there’s no need to go to a crowded store to shop!

This list of Bre from Average But Inspired's favorite gifts for 2020 will help you with your Christmas gift shopping! All of these items are things she owns and vouches for. They're all things designed to keep your family safe and happy at home this winter, and into the future.

In addition to these gift ideas, you’l find links to my blogger friends’ gift ideas for 2020, too!  Those are located at the end of this post.  Please make sure to visit their gift guides, too, for even more wonderful ideas to complete your list.

Favorite Things in 2020 Gift Ideas: Items to Keep You Comfortable at Home


Every one of these gift ideas is something I own or a service I use! I vouch for all of these products as excellent gift ideas. Many of the links in this post are affiliate links. To read my full disclosure policy, please click here.

This post contains affiliate links, which means that I earn a small commission at no added cost to you if you purchase product through said links. I only recommend products that I know and believe in.
blank

PhoneSoap UV Smartphone Sanitizer 

Photo Credit: Amazon.com

If you're at all like me, you will LOVE the PhoneSoap phone sanitizer! This awesome device rids your smartphone of up to 99.99% of germs and bacteria . . . and we all know just how germy phones are!

This product has made me so happy over the past year. I love knowing that in under 10 minutes my phone is so fresh and so clean. It's the best!

blank

Cricut Joy - Smart Cutting & Writing Machine

Photo Credit: Cricut

I think I was the last person on earth to get a Cricut. I was worried it would be too confusing and too much of a space hog. I WAS SO WRONG!

Cricut Joy is the new small-scale cutting and writing machine, and it is so intuitive and user-friendly! It cuts over 50 materials and connects to either your laptop or phone via a Bluetooth connection.

This little machine has opened up a whole new world of DIY possibilities for me. If you or anyone on your list is a crafter or maker, he or she would be thrilled to get a Cricut Joy!

blank

Literati Kids Book Club

Photo Credit: Literati.com

During the time our libraries were closed, my kids and I discovered Literati, which is essentially a subscription book club. Every three months (you can set the duration you want - longer or shorter), my kids get a box filled with books and book-related goodies. They look at them and decide which they'd like to keep to read, and we send the rest back in the prepaid packaging.

The books are ALWAYS books they would never pick on their own, which I love. It is broadening their reading horizons.

Also, the prices are guaranteed to be the same or less than the current Amazon.com book prices, so you are not getting a bad deal price wise either.

While we do the kids Literati box, there is also a version for adults. This would be an awesome gift for the book lover in your life!

blank

Stainless Steel Outdoor Patio Heater 

Photo Credit: Amazon

Instead of being cooped up indoors all fall and winter, get someone on your list an outdoor patio heater!

We invested in one early this fall and have really enjoyed being able to extend our patio season. This winter we plan to fire up our patio heater and a fire pit for extra coziness outside!

blank

Capri Blue Volcano Iridescent Jar Candle

Photo Credit: Anthropologie

The signature scent of Anthropologie stores in a gorgeous candle was one of the best gifts I received this year! My cousin gave me this delightful surprise, and I am happy every time I light it.

Both the scent and the beautiful mercury glass jar are indulgent. This is a lovely gift that any lady would love to receive.

blank

15 ft Round Trampoline and Enclosure Combo 

Photo Credit: Academy Sports & Outdoors

If you have kids and the space for it, a trampoline is an AMAZING gift!

We got one over the summer and sort of thought it might be a waste of money. We couldn't have been more wrong! Our kids jump ALL THE TIME!

It's such great exercise and an amazing way to get them outdoors. I can't say enough about the benefits of a trampoline!

blank

DeLonghi Dinamica TrueBrew Iced Auto Coffee/Espresso Machine

Photo Credit: DeLonghi

For all of the coffee lovers who are working from home, or just spending more time at home....

This combination machine is a dream!

My husband got this for a big birthday earlier this year and it is incredible!

The price tag is steep at first, but without a daily trip to Starbucks, it's almost paid for itself.

It makes every type of coffee drink you could think of, including iced coffee (brews at a lower temperature). It also has a frother for when you want to play barista.

blank

Stitch Fix

Photo Credit: Stitch Fix

Because I haven't been going shopping other than for the essentials, my wardrobe was really lacking. Granted, I'm just working from home, but I still wanted to feel somewhat put together!

I started up my Stitch Fix subscription again, and I couldn't be happier! I have mine set to every three months, and I love the clothing they've been sending me.

My 10-year-old daughter has also started getting Stitch Fix. She's very picky and since I can't take her to stores, this made complete sense! She has gotten a lot of clothing that she loves, and the price point for kids is extremely reasonable!

Stitch Fix also offers styling for men!

This is a great gift for anyone who might like a little fashion boost.

blank

Flexispot Electric Sit to Stand Desk 

Again, we did a lot of working from home this year. This electric sit-to-stand desk made a HUGE difference for my husband!

He absolutely loves being able to adjust the height of this desk with the push of a button, and I actually find him standing at it more than sitting.

It comes in multiple color combinations and sizes, so if someone you know could benefit from a better working situation, check this out.

blank

One Night Ultimate Werewolf Game

Photo Credit: Amazon

OK. . . I am not much of a game player, but for people who are, this game is super fun and funny!

My family LOVES this game! We have my sister and brother-in-law to thank for introducing us to it.

I really don't even know how to describe it, but it involves closing your eyes, listening to some dramatic instructions via an app on your phone, and a lot of lying. It is great for a group of people and is probably best for ages 8 and up.

Visit My Friends’ Gift Guides for 2020, Too!

Green With Decor – My favorite things 2020
Charleston Crafted – My favorite things 2020
construction2style – Our favorite finds 2020
Bright Green Door – My favorite things 2020
Average But Inspired – My favorite things 2020
House by Hoff – My favorite things 2020
Lovely Etc. – Favorite things gift guide
Simple Nature Decor – Favorite 2020 holiday gift ideas for kids
White Cottage Home & Living – My favorite things 2020
Shining on Design – My favorite things 2020
Sincerely Sara Meadows – My favorite things 2020
Houseful of Handmade – My favorite things 2020
Old House to New Home – My favorite things 2020

Filed Under: Christmas

DIY Toilet Paper Roll Ornament

November 17, 2020 by Bre 4 Comments

blank

Never did I ever think that a DIY Toilet Paper Roll Ornament is something I would make . . . let alone blog about!  But alas, here we are in 2020 where everything is weird!  A toilet paper roll ornament is just what we need to decorate our trees this year, and to remember everything we’ve been through in 2020 – including the great toilet paper shortage!

This is the BEST DIY ornament for 2020! Learn how to make this toilet paper ornament, which will bring a grin to everyone's face this year! Who can forget the great TP shortage of 2020?

Seriously though, this ornament brings a smile to my face.  I remember being elated to find a package of toilet paper at Target sometime in April, and I also remember telling my kids to only use two sheets at a time! I even wrote a Facebook post lamenting how I used to take the TP for granted.  

SO BIZARRE!

I have a feeling many of you can relate: this was an experience that brought us all together!  So grab some simple supplies and whip up a bunch of these toilet paper roll ornaments for your friends and family.  You won’t believe how easy they are to make!

Supplies Needed to Make DIY Toilet Paper Roll Ornaments

This post contains affiliate links.  To read my full disclosure policy, please click here.

  • Paper straw (preferably in brown, or in a light color so you can color it with a marker)
  • White felt (I used a standard 9″ x 12″ size sheet)
  • Sharp scissors
  • Ruler
  • Pencil
  • Brown marker (unless you found brown paper straws with brown insides)
  • Fine tip paint marker (I used these metallic paint markers.  They worked the best of the ones I tested, which included Sharpies and acrylic paint markers)
  • Hot glue and hot glue gun
  • Thin ribbon or colored twine

How to Make a DIY Toilet Paper Roll Ornament

Start by cutting off a piece of the paper straw to be about 3″ long.

Use paper straws to make toilet paper roll ornaments.

Next, color the outer edges and inner edges of the paper straw with the brown marker.

Learn how to make a DIY toilet paper roll ornament with a paper straw.

Once the marker has dried on the straw, lay the straw piece at the bottom of a piece of white felt, and mark the edge with pencil.  Do this again at the top of the felt.  Then, use the ruler to connect those two markings, and draw a faint line with the pencil onto the felt.

Learn how to make the perfect Christmas ornament for 2020 in this blog post.

Cut out that strip of felt, and then repeat this process to cut a second piece of felt the exact same width.

Use white felt to craft the perfect DIY Christmas ornament for 2020!

Next, hot glue one strip of felt to the paper straw.  Just put a thin line of hot glue onto the straw, and press the felt on top of that.

This post shows you how to make a DIY toilet paper roll ornament with felt and a straw. It's so cute and easy!

Now, carefully roll that strip of felt around the straw.  Every once in a while, dab some hot glue onto the felt to hold it in place as you’re rolling.

When you finish rolling the first strip of felt, glue it down.  Then, put a thin line of hot glue right where that piece of felt ends, and place the second strip of felt onto the hot glue.  The felt strips should be flush with one another.  (No, that’s not a bathroom joke. HA!)

Continue rolling and gluing until you’ve almost rolled that entire second strip of felt around the straw.  Leave a slight tail hanging, and hot glue the felt slightly above that tail.

Learn how to make a DIY toilet paper roll ornament in this post.

Next, use a paint marker (I used these metallic paint markers as they wrote the cleanest and boldest of others that I tested), to write the year 2020 on the tail, and also to add dashes around the “toilet paper” to show the perforation marks.  I accidentally wrote the year a little off center, so I popped a tiny heart next to the year, too. 

Learn how to make a DIY toilet paper roll ornament in this post.

Finally, thread a skinny piece of ribbon or colored twine through the paper straw to create the ornament hanger.  

This is the best DIY ornament for 2020! Learn how to make a DIY toilet paper roll ornament with simple supplies. This ornament will put a smile on people's faces when they see it.

With that, you’ve created a special ornament to help cement this awful year in your mind, to be remembered every Christmas from here on out.  Hahahaha!  

This is the perfect ornament for 2020! Make this DIY toilet paper roll ornament to bring a smile to people's faces this year. The great toilet paper shortage is something we'll never forget!

Tell me in the comments below – do you have a funny toilet paper-related memory from 2020?

-Bre

CHECK OUT OTHER CHRISTMAS CRAFTS & DECOR IN MY CHRISTMAS GALLERY!

blank


Filed Under: Christmas, Holiday

How to Make a Jingle Bell Wood Bead Garland for Christmas

October 31, 2019 by Bre 2 Comments

blank

Learn to make a wood bead garland with jingle bells – it’s the perfect simple Christmas decor!

In my humble opinion, Christmas decor feels even more special when it’s handmade.  The time and care that goes into making the decor elevates it to a new level. 

One of the simplest and most festive pieces of handmade Christmas decor you can make is a garland, and this Jingle Bell Wood Bead Garland is a versatile piece that can be used anywhere! 

This is so pretty and easy to make! This DIY jingle bell wood bead garland is just perfect for Christmas decor! Get all the instructions in this post.

Wood bead garlands are a decor staple these days, but the addition of jingle bells and festive holiday ribbon to a regular garland makes this wood bead garland extra special for Christmas! 

Plus, it is oh-so-easy to put together, and it’s a great project to get your children to help with.  It’s really that simple!

Materials Needed for a Wood Bead Jingle Bell Garland

This post contains affiliate links.  Please read my disclosure policy for more information.

  • Multipack of wood beads in varying sizes
  • Jingle bells in varying sizes
  • Bakers twine
  • Needle with large eye
  • Christmas ribbon
  • Scissors
With these simple supplies - jingle bells, wood beads, and bakers twine - you can make a gorgeous Christmas garland!

How to Make a Wood Bead Jingle Bell Garland

Begin by folding a long piece of bakers twine in half and threading it through a needle with a large eye.  (You want to fold the bakers twine in half to give it more strength once you start stringing the wood beads and jingle bells.) 

I chose red and white bakers twine because it is so Christmasy!  It reminds me of a candy cane.

Use a needle with a large eye to thread bakers twine through the beads.

Once the needle is threaded, tie a knot at the opposite end of the twine to hold the pieces together.

Next, begin stringing wooden beads onto the twine.  I used a mix of sizes of wood beads, and I alternated them. 

Use a needle with a large eye to thread the bakers twine through the wood beads.

Using a needle was essential for getting the twine through the beads.  I don’t honestly think you could make a wood bead garland without a needle!

Then, I also added in different sizes of jingle bells to the garland.  For my garland I strung four wood beads, then a bell, and alternated that pattern all the way down the length of the twine. 

Add jingle bells to the garland to make it perfect for Christmas.

When I got to the end of the twine, I tied off that end.  Then I got to work making ribbon tassels to add to the ends of the wood bead garland.

Love a Handmade Christmas? I Think You’ll Like This Idea, Too!

DIY Holiday Simmer Pot Gift

Making the ribbon tassels was so easy!  Just cut four pieces of ribbon, stack them on top of one another, fold in half, and tie a piece of bakers twine around them near the top to secure and form a tassel. 

It's so easy to make a ribbon tassel!

Once the tassels are made, loop the ends of the bakers twine through the loops in the tassels, and tie to secure. 

Add pretty decorative tassels to the wood bead garland.

After that, the garland is complete!  

Depending on how long you make it, it would look beautiful on a Christmas tree or Christmas mantel! 

If you opt for a shorter version, you could put it around a vase, on a tiered tray decorated for Christmas, or simply laid on a table as part of a Christmas vignette. 

Make a pretty wood bead and jingle bell garland for Christmas! This DIY wood bead garland is so easy to make - click to view the tutorial on how to make your own!

The wood bead garland I made has 40 wood beads, 10 bells, and measures 34″ long excluding the tassels.  Those figures might help you calculate how many of each supply you need to make a shorter or longer wood bead garland.

This is a beautiful Christmas craft! Make a wood bead garland with jingle bells and Christmas ribbon tassels for a beautiful decorative touch. It's such an easy craft!

So what are you waiting for?  Grab the supplies you need and get to stringing!  And make sure you pin this image on Pinterest so you can easily find this tutorial again when you need it.  

LOVE this DIY Christmas decor! Learn how to make a jingle bell wood bead garland to add a homemade touch to your Christmas decor this year. This easy Christmas craft is a pretty way to use simple supplies for a stunning decorative touch.

Filed Under: Christmas, Holiday

DIY Decor Tags {A Versatile Christmas Decor Craft}

October 24, 2019 by Bre Leave a Comment

blank

Before you get mad and tell me it’s not even Halloween yet, let me explain why I’m sharing a Christmas craft in October.  I am moving (you can read more about that here), and as a result, a lot of my craft supplies are boxed up AND I can’t decorate my house for fall or Halloween because of showings, etc. 

Because of that, I’m limited in what creative muscles I can flex right now, and this easy Christmas craft was just right!  It’s a transformation of Dollar Tree printed chipboard tag ornaments into darling buffalo check decor tags that add a special touch to Christmas decorations!

Add a dash of charm to your Christmas decor with these dollar store DIY decor tags! Using only dollar store supplies, you can make these large tags to add to wreaths, vases, to use as ornaments, to put in tiered trays, or to hang from a doorknob! The possibilities are endless, and these are such a cute Christmas craft!

Large scale decor tags have been popping up all over the stores, and this project gave me a chance to put my own twist on the trend.  Everything I used can be purchased at Dollar Tree, so you know it’s also extremely budget-friendly! 

Where To Use Large Decor Tags

Before I give you all the details on how to make your own decor tags, you might be wondering WHY you’d make these tags.  What do you use decor tags for?  The answer is – just about anything!  They’re actually really versatile and add a pop of interest anywhere you put them.  Some favorite uses for decor tags are:

  • added to wreaths for a seasonal touch
  • in a tiered tray (these are all the rage over on Instagram and Pinterest. I might be the only person who doesn’t have a tiered tray to decorate.)
  • hanging on a doorknob
  • hanging from a vase or planter
  • tied together as standalone door decor
  • grouped in a basket as part of a larger vignette

Hopefully those ideas spark an idea for you of where you could use similar decor tags in your own home!

Add a dash of charm to your Christmas decor with these dollar store DIY decor tags! The buffalo check wrapping paper makes these tags on trend for Christmas this year! Using only dollar store supplies, you can make these large tags to add to wreaths, vases, to use as ornaments, to put in tiered trays, or to hang from a doorknob! The possibilities are endless, and these are such a cute Christmas craft!

Supplies Used to Make Large Decor Tags

Now, let’s get down to business!  Here’s what you need to make these cute Christmas decor tags.

This post contains affiliate links.  To read my full disclosure policy, please click here.

  • Decorative chipboard tag ornaments (not currently available online, but the large size chipboard tags are available online)
  • Buffalo check wrapping paper (not currently available online)
  • Matte Mod Podge
  • Scissors
  • Paint brush
  • Poster sticker letters
  • Red truck mini ornaments (4 pack) (not currently available online)
  • Jingle bells
  • Twine
  • Black and silver acrylic paint
  • Fine grain sandpaper

How to Make Christmas Tags for Decor

To help you find in store the exact tags I used for this project, here they are!

Use these Dollar Tree tag ornaments to make adorable decor tags for your Christmas decorations this year.

Flip them over to the flat backside (the fronts have some raised glitter on them), and cut wrapping paper to be slightly larger than the tags.  Then, trace the tags onto the back of the wrapping paper.

Use Christmas wrapping paper to add a festive touch to these decorative tags.

Cut out the tag shapes from the wrapping paper.  Then, place a thin coat of Mod Podge over the entire chipboard tag.

Mod Podge is the perfect decoupage medium to attach wrapping paper to these decorative tags.

Carefully place the wrapping paper that you cut to the shape of a tag on top of the Mod Podge chipboard tag.

Buffalo plaid wrapping paper adds a festive touch to this Christmas craft.

Carefully smooth out any wrinkles and make sure that the wrapping paper is flattened all over.  Set the tag aside to dry.  This will take about 20 minutes.

Once the tag seems dry, gently rub the edges of the wrapping paper with sandpaper.  This will remove any wrapping paper that’s sticking over the edge of the chipboard tag.  

Use sandpaper to remove excess paper from the tags.

Next, apply a thin layer of Mod Podge over the top of the wrapping paper.  This will help seal the wrapping paper onto the tag, and it will remove the shiny finish of the wrapping paper.  

Add a layer of Mod Podge to the top of the tag.

Set it aside to dry.  As it dries, you will notice that the hazy finish disappears.  Yay!  

Once it’s dry, gently brush a bit of black paint around the edges of the tag to give it an aged look.  Adding black paint around the edges of the tag will help add an aged look.

Then, apply the poster stickers to write out words that fit on the tags.  I think four letters are the max that will fit with these poster stickers on these tags.  Dollar Tree poster stickers are an easy way to add lettering to these decor tags.

Use a pencil to poke a hole through the wrapping paper at the top, and then, for an added touch of authenticity, paint a silver circle around the hole.  Use silver paint to add a faux metal circle to the tags.

String twine through the hole, and add decorative elements to the twine.  I used the cutest little red truck ornaments from Dollar Tree and silver jingle bells.  But, you could get creative and add whatever embellishments you like!

These darling decorative tags were created with Dollar Tree craft supplies!

See how easy it is to upgrade the look of these Dollar Tree tags with just a few simple tweaks?  You get a totally adorable look for hardly any money at all.  I just love when decor works out that way!

-Bre

Here’s Another Great Dollar Tree Christmas Craft! Check Out This Dollar Tree Christmas Cloche! 

blank

Filed Under: Christmas, Dollar Tree, Holiday

How to Make the Cutest Paper Christmas Tree Garland

December 4, 2018 by Bre 4 Comments

blank

Learn how to make a paper Christmas tree garland. This Christmas paper craft is a great craft for all ages!

I don’t know about you, but Christmastime brings out my desire to craft like no other time of year!  Whether it’s making decor for my house or gifts for someone else, I just want to make make make!

Unfortunately the added time constraints of this season can leave little time for crafting, but as creative people, WE MUST MAKE!

So, let’s take time to indulge our inner craft gods and goddesses and create something special – even if it’s a super quick craft like this adorable Paper Christmas Tree Garland.

(And check out my other Christmas and Winter Crafts in the linked project gallery!)

Adorable! Learn how to make the cutest paper Christmas tree garland in this post. It's so easy to create a cute Christmas garland! #papergarland #diygarland #christmastreegarland #papercrafts

Taking a little bit of time to create will help you feel more fulfilled and less stressed – trust me.

Supplies Needed for a Paper Christmas Tree Garland

This post contains affiliate links.  Please read my disclosure policy for more information.

  • Colored cardstock (make sure to buy cardstock that’s colored on both sides – unlike scrapbook paper, which is usually white on the back.)
  • Paper cutter (or scissors and a ruler)
  • Glue Dots (optional: you could also use a hot glue gun for this part!)
  • Glitter stars
  • Hot glue gun and glue
  • Twine or string

How to Make a Paper Christmas Tree Garland

Okay, I was creatively uninspired and sorting through my craft supplies to see what I could make for a Christmas craft.  I found a whole bunch of 8.5″ x 11″ rainbow cardstock that I bought for who knows what reason.

I grabbed it and my paper cutter and started messing around.  A little while later, I figured out how to make these adorable paper Christmas trees and I decided to make this garland.  It’s so easy!

Step One: Cut Cardstock Strips

Begin by cutting four, 11″ long and 1″ wide strips of cardstock.  If you have a paper cutter, this is SUPER easy!

Adorable! Learn how to make the cutest paper Christmas tree garland in this post. It's so easy to create a cute Christmas garland! #papergarland #diygarland #christmastreegarland #papercrafts

If you don’t have a paper cutter, you need to get one!  I bought mine back in 2005 when I was wedding planning and I have used it so much since then!  If you don’t have a paper cutter, you can either measure with a ruler and cut with scissors, or just eyeball it and cut freehand.

Next, shorten these strips of paper as follows:

For larger paper Christmas trees: keep one strip 11″ long, cut one down to 9″, cut another down to 7″, and cut the last one down to 5″.

Adorable! Learn how to make the cutest paper Christmas tree garland in this post. It's so easy to create a cute Christmas garland! #papergarland #diygarland #christmastreegarland #papercrafts

For smaller paper Christmas trees:  cut one strip down to 9″, cut one down to 7″, cut another down to 5″, and cut the last one down to 3″.  

Step Two: Create Paper Rings

Next, use the Glue Dots or double-sided tape to attach each strip together at the ends to form rings.  Alternatively, use hot glue to create the paper rings.

Adorable! Learn how to make the cutest paper Christmas tree garland in this post. It's so easy to create a cute Christmas garland! #papergarland #diygarland #christmastreegarland #papercrafts

Then, take the largest ring and press it down in half, so that the folds are crisp.

Place more of the Glue Dots, double-sided tape, or hot glue in the middle.

Adorable! Learn how to make the cutest paper Christmas tree garland in this post. It's so easy to create a cute Christmas garland! #papergarland #diygarland #christmastreegarland #papercrafts

Repeat this process with the other rings and stack them one on top of the other.  For the smallest ring, push it into a point at the top so that it looks like the top of a Christmas tree!

Repeat this process until you have a forest of paper Christmas trees.

Step Three: Embellish the Paper Trees

At this point, adorn the tops of the trees with chipboard stars, add glitter to the edges to look like snow, glue on sequins to look like ornaments – whatever you want!

Adorable! Learn how to make the cutest paper Christmas tree garland in this post. It's so easy to create a cute Christmas garland! #papergarland #diygarland #christmastreegarland #papercrafts

Step Four: Tie Together with Twine

After the trees are complete, tie them together with twine or string to create a darling paper Christmas tree garland.  

Adorable! Learn how to make the cutest paper Christmas tree garland in this post. It's so easy to create a cute Christmas garland! #papergarland #diygarland #christmastreegarland #papercrafts

This garland is so unique!  I haven’t seen any like it online, and I love the festive touch it adds in my kitchen.  

Adorable! Learn how to make the cutest paper Christmas tree garland in this post. It's so easy to create a cute Christmas garland! #papergarland #diygarland #christmastreegarland #papercrafts

This simple project did not take much time at all, and I’m so glad I made it a priority because crafting is what lessens my stress!  

Adorable! Learn how to make the cutest paper Christmas tree garland in this post. It's so easy to create a cute Christmas garland! #papergarland #diygarland #christmastreegarland #papercrafts

Taking time to do things I enjoy is part of what helps me keep my head on straight during the hectic holiday season.  I hope you will do the same for yourself!  

Adorable! Learn how to make the cutest paper Christmas tree garland in this post. It's so easy to create a cute Christmas garland! #papergarland #diygarland #christmastreegarland #papercrafts
 

Filed Under: Christmas, Holiday

  • « Go to Previous Page
  • Page 1
  • Page 2
  • Page 3
  • Page 4
  • Interim pages omitted …
  • Page 6
  • Go to Next Page »

Primary Sidebar

Let’s Connect!

Hi, I’m Bre! Thanks for visiting Average But Inspired, where I show you how to work with what you’ve got to create a home you love.

Bre of Average But Inspired - a DIY and craft blog

Love DIY? Subscribe to Get Posts E-mailed!

How Can I Help You?

blank

7 Tips for Hosting a Party on a Budget

blank

How to Paint a Door to Look Like Wood (It’s Easier Than You Think!)

blank

How to Paint a Countertop to Look Like Marble!

blank

How to Paint Over Tile

Looking for Something?

Copyright © 2013-2022, Bre Eggert (Average But Inspired). All rights reserved.
  • Home
  • DIY
  • Crafts
  • Home Decor
  • Privacy Policy and Copyright Policy
  • Disclosures
  • Contact Me