• Skip to primary navigation
  • Skip to main content
  • Skip to primary sidebar
Average But Inspired logo - DIY and craft

Average But Inspired

Craft a home you love. DIY and craft tutorials.

  • About
    • Contact Me
    • Disclosures
    • Privacy Policy and Copyright Policy
  • DIY
    • Furniture
  • Crafts
    • Dollar Store Crafts
    • Seasonal
      • Patriotic & Summer
      • Valentine’s Day
      • Easter & Spring
      • Fall & Halloween
      • Christmas & Winter
  • Home Decor
    • Organization
  • Shop
    • DIY Swag
    • DIY Guides
  • Home

Holiday

Glitter Glue Valentines {Free Printable Valentine Cards}

January 30, 2015 by Bre 22 Comments

Adorable Valentines for boys or girls – these free printable glitter glue cards are great for a classroom exchange!

Being the mother of a two and four-year old, I consider myself an expert in things that preschoolers love. 

Glitter glue is one of those things.  It is like the BEST.THING.EVER when you’re little.

So this year, my kids will be passing out glitter glue Valentines to their friends at school!  

And I’m sharing these free printable Valentine cards with you, too!  You can download the PDF file later in this post and print out as many copies as you need!

These Free Printable Valentine Cards are super cute! Attach glitter glue pens to them for a fun no-candy Valentine treat.

This post contains affiliate links.  Please read my disclosure policy for more information.

 I found ten packs of glitter glue at Dollar Tree, which makes these Valentines a total bargain!

Glitter glue pens from Dollar Tree are a great no-candy Valentine's Day card attachment!

Here’s a tip about Dollar Tree: not every story will have the same products. You can use their locator services on the website to see if your store has these glitter glues before you head out.

If not, you can order them from the website, or shop elsewhere!

For example, here’s an awesome large package of glitter glue pens that will probably be enough for the entire class!

Print these glitter glue Valentine’s cards at home, or send to your local print shop!

Then use a hole punch to punch through each card, and attach the glitter glue tubes with bakers twine or thin ribbon tied through the cards.

These Free Printable Valentine Cards are so cute! Attach tubes of glitter glue for a fun no-candy Valentine card.

Just click to download these Glitter Glue Valentines!

If you’re not into the glitter glue idea, I shared another free printable Valentine that used mini stampers.  

If you use these, I hope you and your kids enjoy them! Happy Valentine’s Day!

Filed Under: Holiday, Valentine's Day

Light Up Heart Valentine’s Day Art

January 26, 2015 by Bre 22 Comments

Learn how to make your own fun Valentine's Day art with this easy tutorial!

A lot of people hate Valentine’s Day.

I am not one of those people.  I love Valentine’s Day!

It is just so cute.  And it is a fun excuse to eat a lot of chocolate.  And wear pink.  And say cheesy things to special people.

So yeah, I dig it.

Part of my Valentine’s Day celebration this year involves this cute light up heart Valentine’s Day art that I made for my home.  It’s bold and fun, and my favorite part is that it SHINES, day or night!  Learn how to make your own fun Valentine's Day art with this easy tutorial!   [Read more…] about Light Up Heart Valentine’s Day Art

Filed Under: Holiday, Valentine's Day

Recycle Christmas Cards Idea: Make an Adorable DIY Banner

January 5, 2015 by Bre 27 Comments

Upcycled Christmas Card Bunting

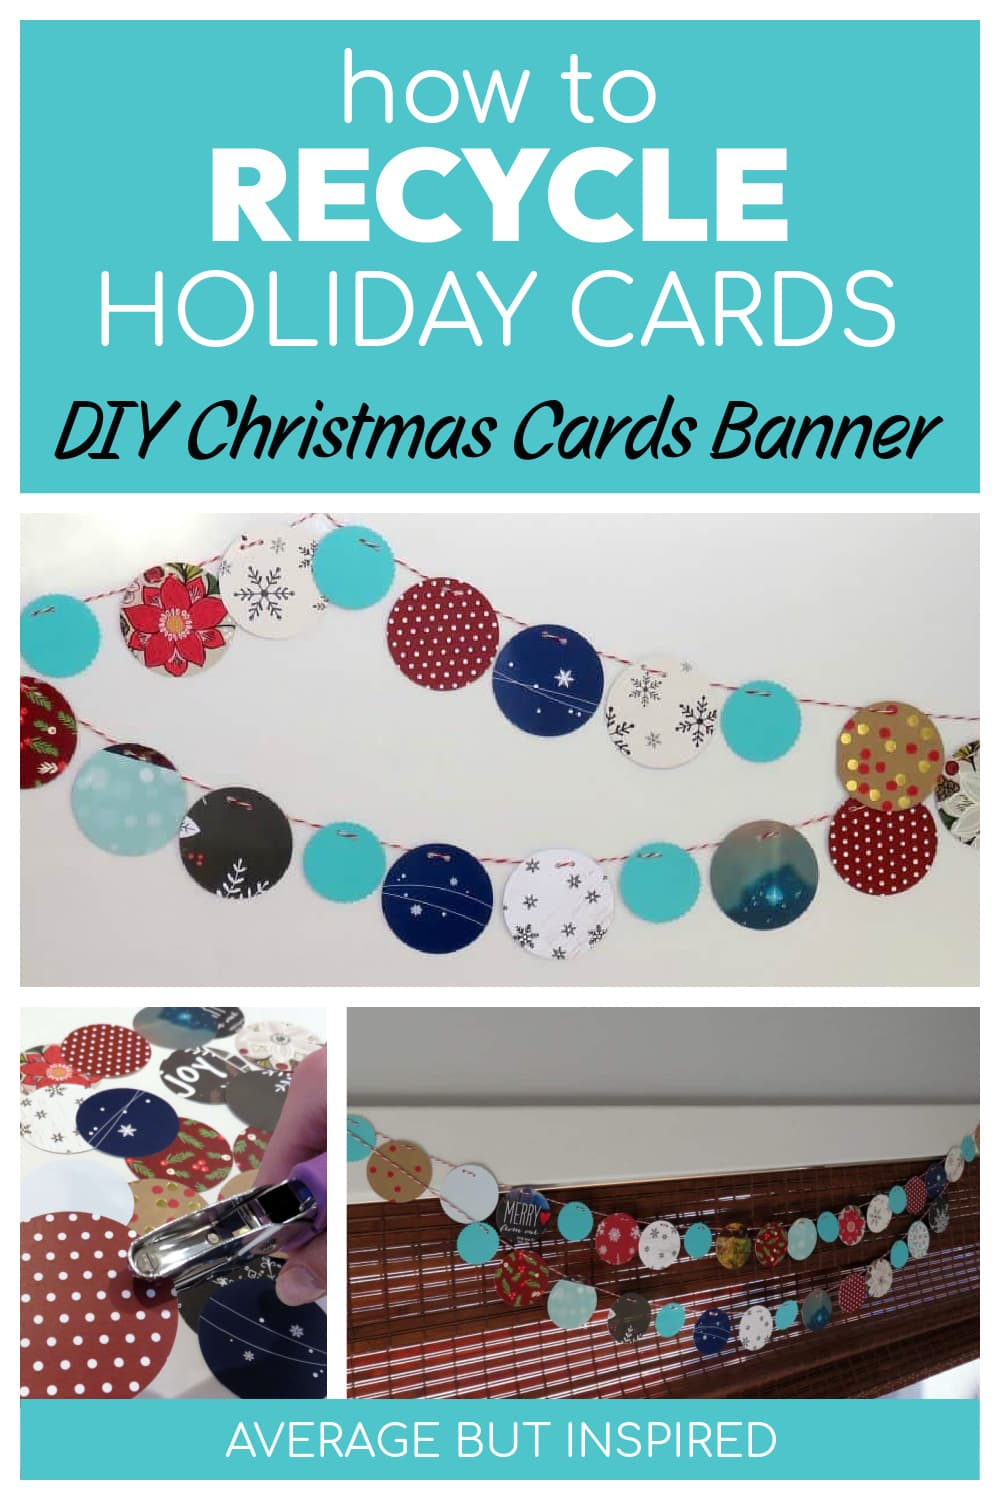
Looking for a way to recycle Christmas cards? Let me show you how to repurpose them into a decorative banner you can enjoy all winter long!

I received so many gorgeous Christmas cards this year!  It was as if everyone I know decided to send out their best card ever.  Seeing all of the beautiful holiday greetings displayed throughout my home helped make Christmas even more special!

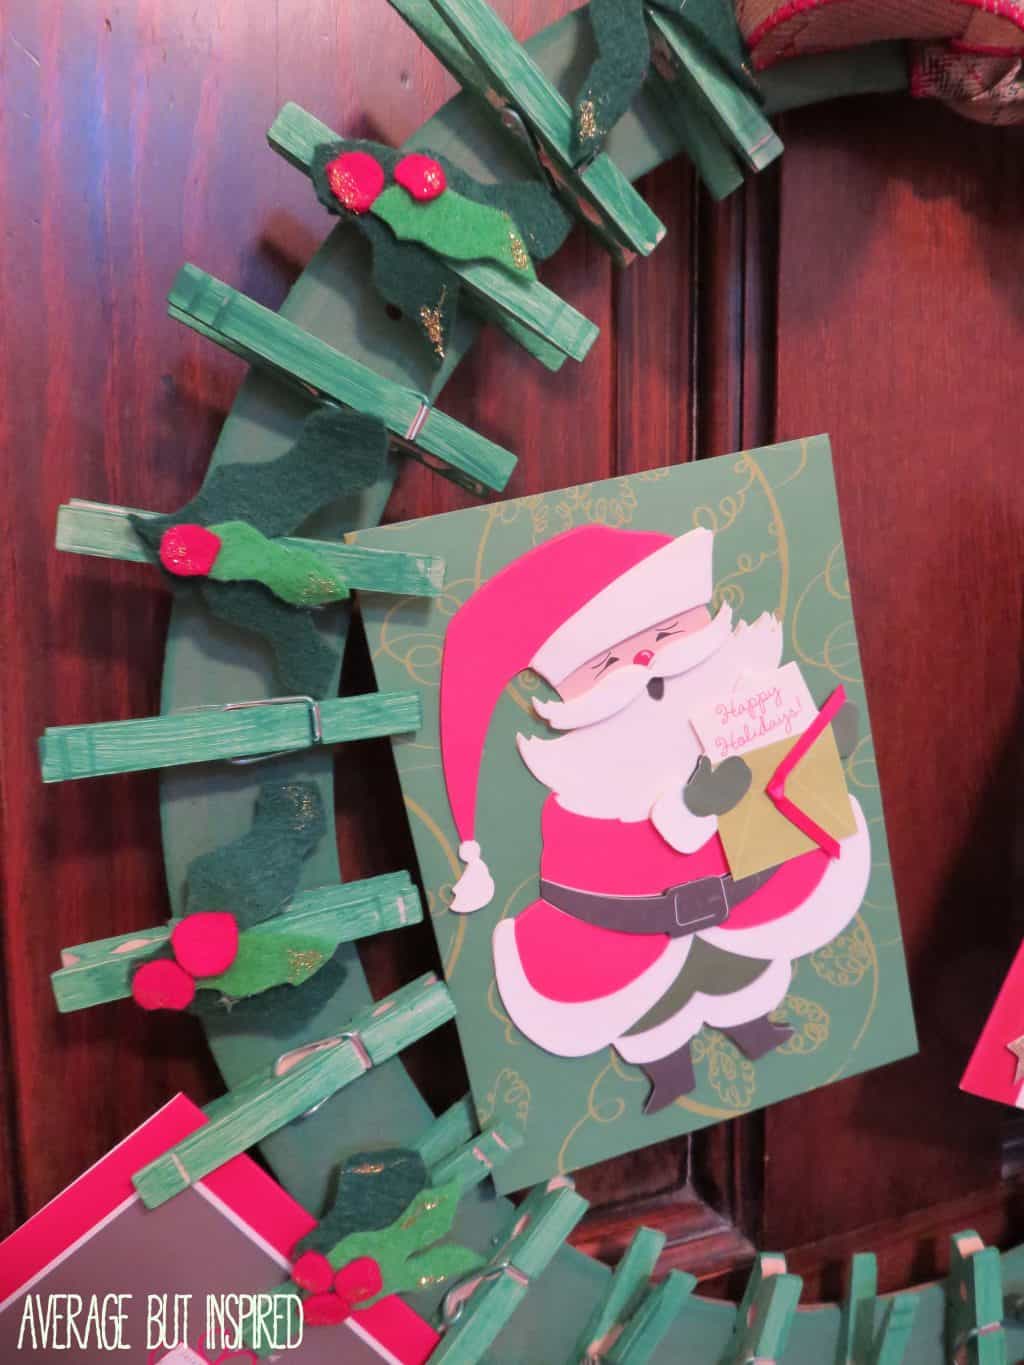
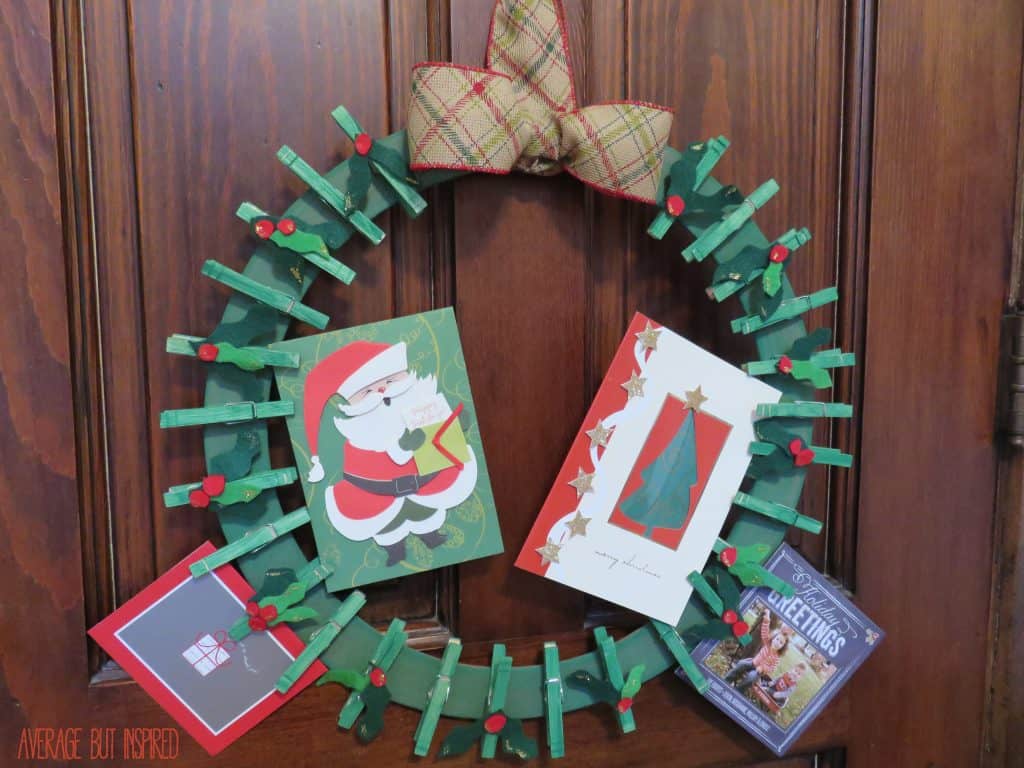
Because of that, it was really hard to part with the holiday cards when putting away the Christmas decor (like my DIY Holiday Card Holder).  

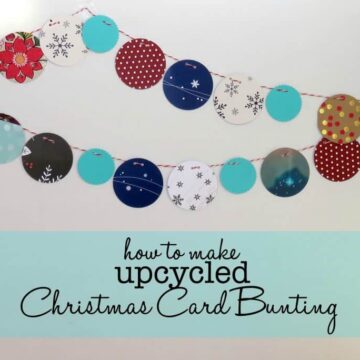
So I got to thinking . . . instead of throwing them out, why not extend the fun and recycle the holiday cards into something else? And that’s when I decided to upcycle my Christmas cards and turn them into a decorative banner to enjoy all winter long.

Need a way to recycle Christmas cards? Why not upcycle holiday cards into an adorable winter banner you can display all season long? This post shows you how to reuse those old holiday cards in a new way!

This was a totally mindless project that only took about 20 minutes to put together – perfect for when you’re watching those reruns at night!

Recycled Christmas Card Banner Supplies

This post contains affiliate links. Please read my disclosure policy for more information.

All you need in the way of supplies are the following items:

  • Christmas cards or holiday cards (photo cards with printed backs worked best for me!)
  • Large shape punches in the shapes and sizes of your choice: I used a 3″ circle punch. (Note: you could use a Cricut machine to cut shapes, too!)
  • 1/8″ hole punch
  • Bakers twine or thin string
  • Optional: extra cardstock if you want to substitute in some non-Christmas card pieces

How to Make an Upcycled Christmas Card Banner

First, spread out all of your holiday greeting cards and separate them into piles arranged by color scheme and/or style. Then, pick the colors that work with the overall look you’re going for.

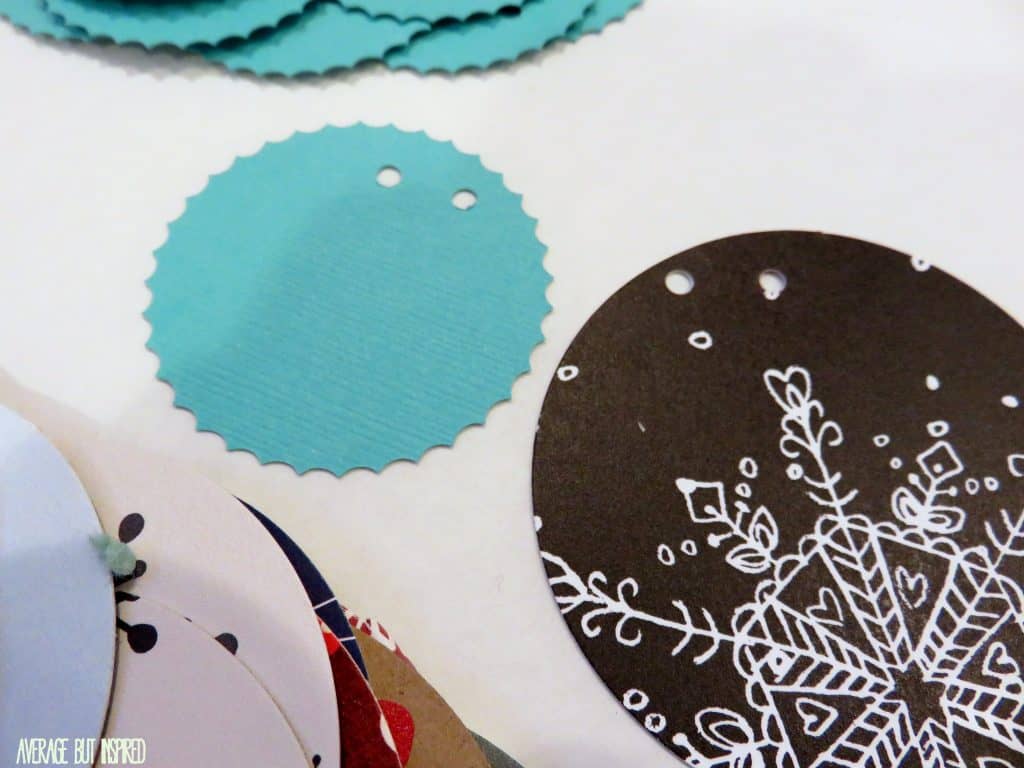
Once you have selected your Christmas cards (and supplemental cardstock, if you’re using it), use your large hole punch to cut out lots of circles.  

Looking for a way to recycle Christmas cards once the holidays are over? Why not recycle the cards and make them into a DIY banner!

Next, use a small hole punch to put two holes in the top of each circle.  

Upcycle holiday cards and turn them into an adorable banner you can display all winter long.
Punch holes in the tops of pieces of Christmas cards to create a DIY banner.

Next, thread bakers twine through the holes in the top of each circle to create your bunting or banner.

String twine through holes punched in holiday cards to create a recycled Christmas cards banner.

Hang it up and you’re all set!   You may need to adjust the placement of some of the shapes on your banner or bunting, but that’s an easy fix.

Recycle Christmas cards and turn them into a DIY banner you can display all winter long.

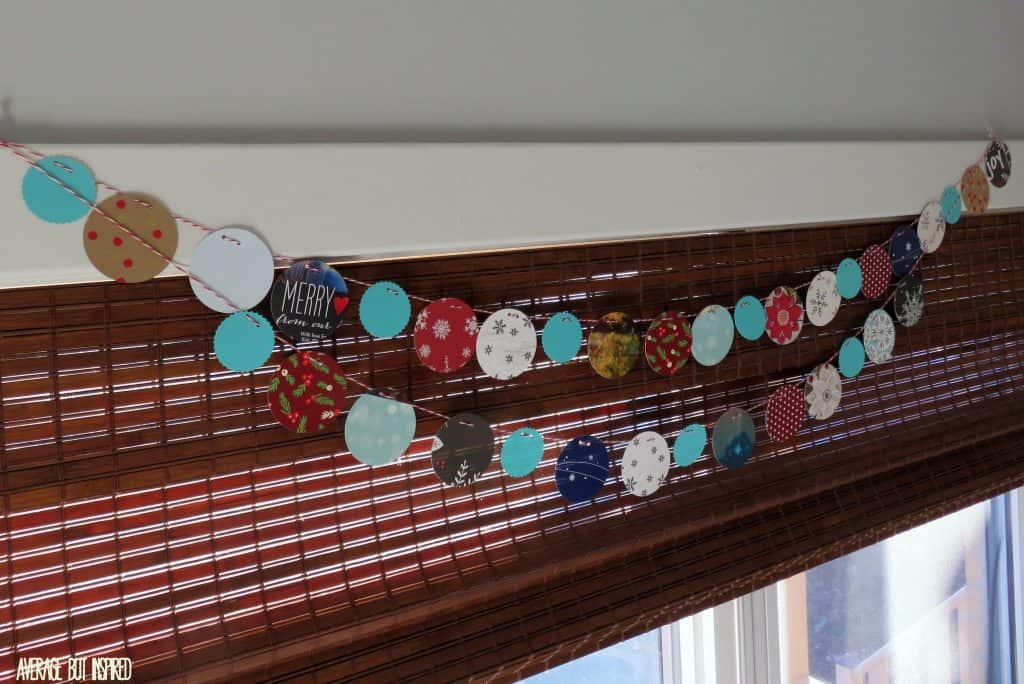
This DIY banner made from old Christmas cards is such a great way to recycle holiday greetings! It adds a fun pop of color wherever you hang it, and helps brighten some of those gray winter days!

I must say that it’s also a nice way to ease some of the pain of putting away all of the Christmas decorations.

Upcycled Christmas Card Bunting

What do you do with the Christmas cards or holiday cards once the holidays are over? Tell me in the comments below!

Filed Under: Christmas, Holiday

A Clear Ornament Snowman

December 10, 2014 by Bre 22 Comments

blank

Friends!

It’s that time again! Time for the Monthly DIY Challenge where some of my talented blogger friends and I take the same basic craft supply and turn it into something fabulous! This month we’ve chosen the ubiquitous clear ornament, which seems perfectly fitting for December, if you ask me!  clear_ornament_challenge

Being perfectly honest, I found this challenge to be, well, quite challenging! Pinterest revealed that every single ornament idea I had was “so last year” (or the year before, or the year before that).  Luckily, my mom and sister were more than generous with alternate suggestions, as we had a lot of time to think about this during a recent weekend stay at the hospital with my dad.  One of the many ideas was to turn an ornament into a snowman.

And so . . . please let me introduce you to my new clear ornament snowman friend, Pierre.  He’s channeling his inner Frenchman with his jaunty cap and fashionable scarf.

Clear Ornament Snowman (with header) [Read more…] about A Clear Ornament Snowman

Filed Under: Christmas

Easy DIY Holiday Card Holder

November 24, 2014 by Bre 20 Comments

Easy DIY Holiday Card Holder

This festive DIY holiday card display can be made in a snap and treasured for years to come!

One of the best times of the holiday season is when the holiday cards start arriving! Finding actual greetings – sprinkled amongst the typical bills and marketing postcards – brings excitement each time you open the mailbox!

And the best way to extend the fun of receiving Christmas cards is to actually display them. Don’t just put them in a basket, or even worse- toss them in the trash (pssst check out this Upcycled Christmas Card Garland project for an idea of what to do with those cards once the holidays are over).

Instead, let me show you how to make this easy DIY holiday card holder. You can display Christmas cards and holiday greeting cards, and enjoy the smiles of your friends and family all season long.

This is an easy DIY holiday card holder that you can make easily and display for years to come!

 I mean really, how festive is this wreath holiday card holder?

DIY Christmas Card Holder Supplies

This post contains affiliate links. Please read my disclosure policy for more information.

  • 18″ wood wreath form (or 18″ chipboard wreath form, if you can find one)
  • Clothespins (I used 25)
  • Wired ribbon
  • Wood glue
  • Hot glue (and glue gun)
  • Gold glitter paint
  • Green acrylic paint
  • Paint brush (a foam brush works great)
  • Green craft felt (in two shades); red craft felt
  • Sharp fabric scissors

How to Make a DIY Holiday Card Holder Display

You’re going to love how easily this adorable Christmas card display goes together!

Step One: Paint the Wreath Base and Clothespins

First, paint the wreath form and clothespins green using regular acrylic paint.

Alternatively, you could use green spray paint for an even quicker project! (However, remember to spray paint outdoors or where there is a lot of ventilation. That could be tough at this time of year!)

Learn how to make a DIY Christmas card holder in this post. It's a beautiful way to display holiday greetings.

Step Two: Create a Hanger for the Holiday Card Holder

Once the paint dries, tie a ribbon into a loop at the top of the wreath. This will allow you to hang the card holder anywhere you like: on a blank wall or empty wall, on a vintage window for an antique look, or even on the back of a door.

Then, make a bow out of the same ribbon and hot glue it to the front. This adds a decorative touch and helps hide the knot in your ribbon hanger.

Step Three: Glue Clothespins to the Wreath Base

Next, it’s time to attach the clothespins! Glue them around the wreath form with wood glue, alternating the opening ends on the inside and outside of the wreath form.  

Clothespins glued to a wood wreath base are the Christmas card holders in this DIY holiday card holder project.

Step Four: Embellish the Card Holder with Felt Leaves and Berries

After the glue has dried, cut holly leaves and berries out of felt. These don’t have to be perfect – don’t stress about this! The key is to have sharp scissors.

Glue the felt leaves and berries to some of the clothespins, and add some gold glitter paint to some of them for some sparkle.  

Learn how to make a festive Christmas card holder in this post!

 Not only is this a beautiful way of displaying Christmas cards and holiday greetings, but you’ll have the pleasure of knowing you made it yourself!

A DIY holiday card holder is a wonderful way to display Christmas cards.

This easy way to hang Christmas cards will last for years to come, and will be the perfect way to display those cherished holiday greetings.

Learn to make a DIY Christmas card display that looks like a wreath.

Now tell me in the comments below – how do you usually display your Christmas cards?

Filed Under: Christmas

Funky Pilgrim Silhouette Vases for Thanksgiving

November 7, 2014 by Bre 16 Comments

blank

Okay, you might think this project is weird.  And that’s OK, because yeah, it’s kind of weird.

See, I know that Pilgrims are such an important part of Thanksgiving, but I find them kind of stodgy and boring.  That’s why I decided to make these funky Pilgrim silhouette vases for Thanksgiving! My Pilgrim friends are now fashionable with a diamond necklace and a feathered cap!  They’re ready to P-A-R-T-A-Y!FUnky Pilgrims Vases for Thanksgiving
[Read more…] about Funky Pilgrim Silhouette Vases for Thanksgiving

Filed Under: Fall and Halloween, Holiday

  • « Go to Previous Page
  • Page 1
  • Interim pages omitted …
  • Page 13
  • Page 14
  • Page 15
  • Page 16
  • Page 17
  • Go to Next Page »

Primary Sidebar

Let’s Connect!

Hi, I’m Bre! Thanks for visiting Average But Inspired, where I show you how to work with what you’ve got to create a home you love.

Bre of Average But Inspired - a DIY and craft blog

Love DIY? Subscribe to Get Posts E-mailed!

How Can I Help You?

blank

My DIY Kitchen Makeover Reveal!

blank

7 Tips for Hosting a Party on a Budget

blank

How to Paint a Countertop to Look Like Marble!

blank

How to Paint Over Tile

Looking for Something?

Copyright © 2013-2022, Bre Eggert (Average But Inspired). All rights reserved.
  • Home
  • DIY
  • Crafts
  • Home Decor
  • Privacy Policy and Copyright Policy
  • Disclosures
  • Contact Me