• Skip to primary navigation
  • Skip to main content
  • Skip to primary sidebar
Average But Inspired logo - DIY and craft

Average But Inspired

Craft a home you love. DIY and craft tutorials.

  • About
    • Contact Me
    • Disclosures
    • Privacy Policy and Copyright Policy
  • DIY
    • Furniture
  • Crafts
    • Dollar Store Crafts
    • Seasonal
      • Patriotic & Summer
      • Valentine’s Day
      • Easter & Spring
      • Fall & Halloween
      • Christmas & Winter
  • Home Decor
    • Organization
  • Shop
    • DIY Swag
    • DIY Guides
  • Home

Fall and Halloween

20 Unique Pumpkin Crafts

September 5, 2019 by Bre Leave a Comment

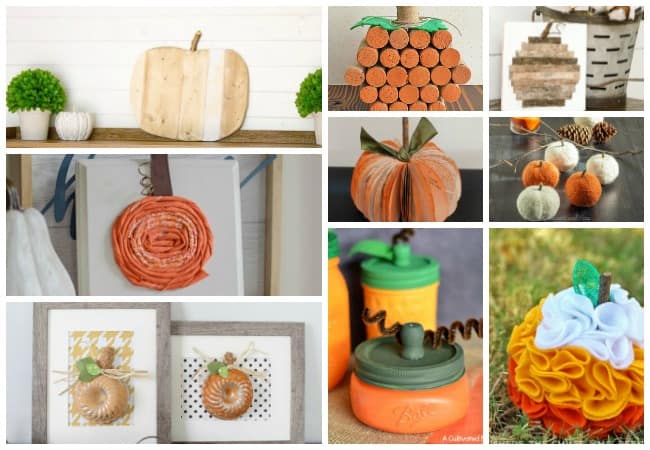
Pumpkins are a fall decorating staple, and rightfully so!  They come in a multitude of colors, shapes, and sizes, and they are seasonally appropriate for several months (meaning less work in changing out decor).  Because of that, pumpkin crafts are always popular, and I’ve rounded up twenty unique pumpkin crafts that you’ll want to make this season.
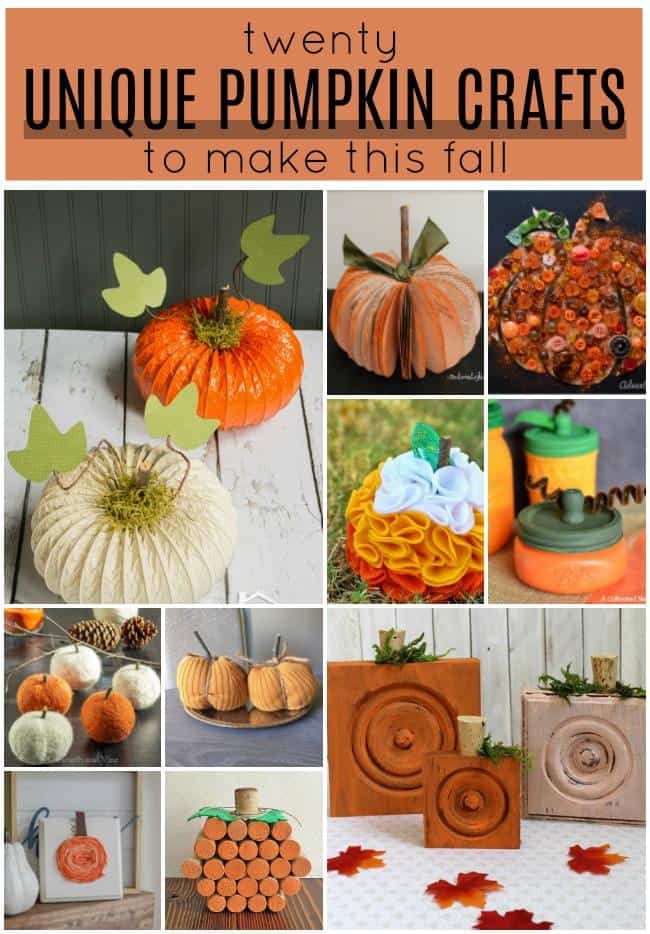
Get your fall crafting in overdrive with this awesome roundup of twenty unique pumpkin crafts you'll definitely want to make this fall. These great pumpkin projects are so cute!

Now trust me, these pumpkin crafts are not your typical “decorate a fake pumpkin” crafts!  (Not that there’s anything wrong with those!)  These are all unique pumpkin projects that feature pumpkins made out of anything BUT pumpkins (real or fake)!

To get full project instructions for any of these, just click the project title and you’ll go right to the site where the pumpkin craft tutorial lives.  

Pool Noodle Pumpkins by Average But Inspired

Let’s kick things off with one of my unique pumpkin crafts!  Can you believe you can transform foam pool noodles into adorable pumpkins?  It’s true!  This is one of the easiest crafts around, and it makes some of the cutest pumpkins in the patch.  blank

Tin Can Pumpkins by Ann’s Entitled Life

Does it get much easier (or cuter) than this?  Who doesn’t have tin cans easily accessible at all times?  Find out how Ann made hers into adorable pumpkins!  

Ann's Entitled Life shows you how to make this unique pumpkin craft: tin can pumpkins!

Fabric Pumpkin Plaque by Our Home Made Easy

This simple fabric pumpkin project will add punch to any shelf or bookcase that needs some fall sprucing.  It is also a great way to use up fabric scraps!  

Our Home Made Easy shows you how to make this unique pumpkin craft: fabric pumpkin plaque!

Book Page Pumpkin by Creations by Kara

Grab an old book and some scissors and get to work!  Kara shows you how to craft a book page pumpkin in this easy-to-follow tutorial!

Creations by Kara shows you how to make a book page pumpkin. This is just one of the unique pumpkin crafts featured in this post.

DIY Wine Cork Pumpkin by Decor by the Seashore

Save up your wine corks or buy a bag at the craft store, and then get to work making this cute DIY wine cork pumpkin!  How sweet of a gift would this be for your girlfriends or book club members (come on, every book club involves wine!)?  Get the step-by-step instructions right in the post.  

Use wine corks to create a darling wine cork pumpkin that's perfect for fall!

15 Minute Sock Pumpkins by Heathered Nest

How great would these sock pumpkin crafts be for a school Halloween party?  Quick, easy, and cute – they’re bound to be a hit with any grade!  

Heathered Nest shows you how to make pumpkins with socks! This is a fun fall craft for class Halloween parties.

Pallet Pumpkins by Sugar Bee Crafts

I just love these pallet pumpkins for your outdoor fall decor!  These are definitely unique – don’t you think they’d look cute in a pretty fall floral display?  

Sugar Bee Crafts shows you how to make this unique pumpkin project: pallet pumpkins for outdoor display!

Mason Jar Pumpkin Craft by A Cultivated Nest

Grab that mason jar stash (or pick up some cheap mason jars at Dollar Tree), and make these adorable mason jar pumpkins!  How cute would these be filled with candy and presented to a neighbor, teacher, or co-worker this fall?  

A Cultivated Nest shows you how to make this unique pumpkin craft: mason jar pumpkins!

Trim Corner Block Pumpkins by Average But Inspired

Hey, hey – it’s one of my pumpkin craft projects in here!  I had so much fun making these trim corner block pumpkins, and they’re still one of my favorite fall decor pieces today!  You can find these trim corner blocks at any large home improvement store, and then check out my tutorial to learn how to make these sweet pumpkins!

Average But Inspired shows you how to transform wood trim block corners into adorable pumpkins!

Fabric Pumpkins from Old Shirts by Our Crafty Mom

Before you toss those old clothes in the donate pile, think about if you can reuse them to make adorable fabric pumpkins!  This great upcycle from Michelle at Our Crafty Mom can be put together in no time, and for hardly any expense at all!

Our Crafty Mom shows you how to make this unique pumpkin project: t-shirt pumpkins!

Dryer Vent Pumpkins by Practically Functional

How creative is this pumpkin craft???  While you’re at Lowe’s or Home Depot getting trim corner blocks to make the pumpkins pictured above, pick up some dryer vents, too!  Then make Jessi’s cute dryer vent pumpkins and let everyone marvel at this creative pumpkin craft!  

Practically Functional shows you how to make this unique pumpkin project: dryer vent pumpkins!

Loom Knit Pumpkin by Rootsy

I don’t know the first thing about knitting, but I’m willing to bet that some of you do!  Because of that, I thought this knitted pumpkin craft was a great one to share!  Plus, the tutorial is very detailed and good for beginners.  

Rootsy shows you how to make this adorable pumpkin craft: a loom knit pumpkin.

Button Pumpkin Craft by Adventure in a Box

Sweet and simple is the name of the game for this adorable button pumpkin craft!

Adventure in a Box shows you how to make this unique pumpkin craft: a button pumpkin!

Felted Dryer Ball Pumpkins by Hearth & Vine

Oh my word – these little dryer ball pumpkins are too cute for words!  Patti shows you how to make them (even if you’ve never needle felted before), and the result is darling!  

Hearth & Vine shows you how to make this unique pumpkin craft: felted dryer ball pumpkins.

Bandana Pumpkins by Sadie Seasongoods

These sweet bandana pumpkins add a dash of vintage charm to your fall decor!  Check out Sadie Seasongoods’ detailed tutorial on how to make these cute pumpkins.  Sadie Seasongoods shows you how to make this unique pumpkin project: bandana pumpkins!


Bundt Cake Pan Pumpkins by Average But Inspired

Oh yeah, I’ve got another one of my pumpkin crafts in here!  These little bundt cake pan pumpkins are the cutest!  I love to display them in my kitchen every fall.  See how to make them in my post!

Average But Inspired shows you how to transform bundt pans into pumpkins!  

Paper Pumpkin Craft by Ann’s Entitled Life

Don’t you love checking out the scrapbook paper aisle to see what fun prints are in stock?  (I can’t be the only one!)  Get some pretty paper and make yourself a whole patch of these paper pumpkins!  

Ann's Entitled Life shows you how to turn scrapbook paper into a cute pumpkin craft.

Ruffled Felt Pumpkin by Where The Smiles Have Been

Felt is one of my favorite craft supplies to work with because it lends such a homemade feel to any craft.  This ruffled candy corn felt pumpkin is no exception!  This just screams fall cuteness!  

Where the Smiles Have Been shows you how to turn felt into a beautiful ruffled pumpkin.

Scrap Wood Pumpkin by Making it in the mountains

Gather that scrap wood hiding out in your garage or basement and get to work crafting a farmhouse-inspired scrap wood pumpkin!  Leave it neutral, stain it, or paint it – this pumpkin can be customized however you like!

Making it in the mountains shows you how to turn scrap wood into a farmhouse pumpkin for fall.

Paper Bag Pumpkins by This Ole Mom

This is another great pumpkin craft that would work well for a halloween party craft!  It’s easy and inexpensive and such a fun project!  

This Ole Mom shows you how to turn a paper bag into a pumpkin.

Natural Birch Bark Pumpkin Art by Little House of Four

For all of my neutral-loving friends out there, this pumpkin project is the one for you!  Katie shows you how to create a piece of beautiful and natural pumpkin decor with birch bark.  

Little House of Four shows you how to create a birch bark pumpkin.

So there you have it – 20 fabulously unique pumpkin crafts you can make this fall!  Which one is your favorite?  Let me know which of these you’ll be making in the comments below!  And, don’t forget to pin this image to Pinterest!  

Are you looking for the perfect fall craft? Look no further! These twenty unique pumpkin crafts are sure to inspire you. These are easy pumpkin projects that add a dash of charm to any space!

Filed Under: Fall and Halloween, Holiday

Make a Dollar Store Toolbox Planter

August 29, 2019 by Bre 2 Comments

blank

The kids are back in school and the temps are cooling off: my mind is definitely shifting gears toward fall!  Because of that, last week I shared a cute DIY Dollar Tree Pumpkin Sign project that will cozy up your home decor, and this week I’m sharing another fun fall project!  This dollar store toolbox planter is perfect for your your porch or an entryway table!  So cute!! Transform a Dollar Tree toolbox into a pretty planter filled with flowers for fall! Learn how to replicate this look for any season - it's so easy!

Isn’t it pretty?!?  And friends, it is SO darn cheap to put together.  EVERYTHING except the spray paint is from Dollar Tree!

Okay well enough oooooh’ing and aaaaah’ing over this dollar store fall decor – let’s get down to business!

Supplies Needed to Make a Dollar Tree Toolbox Planter

Like I said, pretty much everything for this project is from Dollar Tree!  If it’s not from the D.T., I will let you know next to the supply name.  Also, some of the links may be affiliate links.  You can read my full disclosure policy here.

  • Toolbox
  • Floral foam brick
  • Faux flowers of your choice (I used a bunch of sunflowers leftover from my Dollar Tree Sunflower Wreath, mums, and a beige flower of some sort)
  • Faux pumpkin clips (they come in a three pack)
  • Plaid wired ribbon
  • Harvest metal word (they come in a three pack of Harvest, Thankful, and Welcome)
  • Spray paint (I used this brand and color of spray paint) (not Dollar Tree)
  • Black acrylic paint to add some faux age to the toolbox (not Dollar Tree)
  • Gold acrylic paint for the metal word (not Dollar Tree)
  • E6000 glue (not Dollar Tree)

How to Make a Dollar Tree Toolbox Planter

Start by spray painting the toolbox in whatever color you like.  I really liked this matte burgundy/purple color because it was bold and moody – perfect for fall!  Spray paint a Dollar Tree toolbox a fun color and use it as a planter!

Once the spray paint dried, I lightly added a bit of black paint all over the toolbox to make it look older and less “flat” – if that makes any sense. 

Next, I popped a block of floral foam inside the toolbox.  The rectangular floral foam from Dollar Tree is the perfect fit for the toolbox.  Dollar Tree floral form is the perfect base for this toolbox planter.

Next, I got to work cutting faux florals and placing them into the floral foam.  

Fall faux flowers will be beautiful in the toolbox planter.

I had a stem of faux leaves set aside to use, but decided that the colors didn’t look right with the flowers I was using, so I ultimately ditched them.  Press faux flowers into floral foam.

Once I had the flowers in place, I worked in some of the Dollar Tree wired ribbon, and then added several of the faux pumpkin clips.  Those clips are great because they just attached right to the flowers, exactly where I wanted them!  Faux flowers and pumpkins from Dollar Tree make a beautiful fall arrangement.

Finally, and not pictured here because I forgot to photograph this step, I dabbed a little gold acrylic paint on the metal word “Harvest” and let it dry.  Then I glued it to the inside of the toolbox for a little extra flair.

It all came together super cute and much prettier than the toolbox in its original form.  🙂  This is so pretty! Learn how to upcycle a toolbox into a planter! This fall arrangement is gorgeous and made entirely with Dollar Tree florals.

I can’t stop making Dollar Tree crafts – I hope you’re not sick of them!  Love this pretty fall flower arrangement! See how she transformed a Dollar Tree toolbox and made it a beautiful fall planter!

This entire toolbox planter cost $7 in Dollar Tree Supplies and $4 in paint.  I had the rest of the supplies already, so there was no cost there.  That is not bad at all!  Faux pumpkins, plaid ribbon, and faux florals make a beautiful fall floral arrangement.

So what do you think – will you be transforming a toolbox into a pretty planter for your home?  Let me know!

-Bre


Filed Under: Dollar Tree, Fall and Halloween

The Perfect Pumpkin Sign (A Fall Dollar Tree DIY!)

August 20, 2019 by Bre Leave a Comment

blank

Dollar Tree has always been my favorite, but this season they have seriously stepped up their crafting and DIY game!  If you haven’t stocked up on fall and Halloween crafting supplies yet, you need to get over there pronto.  (And if you haven’t read my post on The Best Craft Supplies to Buy at Dollar Tree – do it!)  I picked up a few of their new fall items and make the perfect pumpkin sign for my fall decor – and it only took about 20 minutes!  Make the perfect pumpkin sign with this fun Dollar Tree DIY project! This dollar store fall craft is so cute!             

This cute pumpkin sign will stay out all fall – even through Halloween – because of the color scheme I used.  The great thing is that it can be customized however you want, so make this in any color to suit your taste or decor!

Supplies Used for This Dollar Tree Pumpkin Decor

Here’s what I used to make this fall sign:

  • Dollar Tree canvas artwork (any pattern or design will work!)
  • Dollar Tree “create your own ornament” wood pumpkin shapes
  • Dollar Tree DIY pumpkin craft stickers
  • Dollar Tree Jenga game (those are the wood blocks shown in the project)
  • Scrapbook paper
  • Scissors
  • Spray Adhesive
  • Acrylic craft paint in orange, white, and black
  • Paintbrush
  • Hot glue and hot glue gun
  • Letter stamps
  • Black stamp pad

Dollar Tree's fall craft items are adorable! Use them to create a cute fall sign that you'll have out all season.

How to Make a Fall Pumpkin Sign

First I painted the edges of the Dollar Tree canvas artwork black.  I used two coats of paint for this step.  Remember, you can use any color paint you like!  Transform a Dollar Tree canvas artwork into a cute pumpkin sign for fall.

Once the paint dried, I traced the shape of the canvas onto the back of a piece of scrapbook paper.  I cut that out and then sprayed the canvas and the back of the paper with spray adhesive.  I quickly pressed the scrapbook paper into place on the front of the canvas and trimmed any parts that stuck up over the edges of the canvas.  Use spray adhesive to fasten scrapbook paper to a canvas to create a pumpkin sign for fall.

Then I got to work painting the pumpkins!  I mixed up a few shades of orange by simply mixing basic orange and white acrylic paint.  I painted one of the Dollar Tree pumpkin ornaments and two of the DIY craft stickers.  Paint plain Dollar Tree pumpkin ornaments to create a cute pumpkin sign for fall.

After those pumpkins dried, I used one of the pieces of twine from the ornaments package and tied it around each of the pumpkins’ stems.  Then I used the hot glue gun to fasten them to the canvas.  I even hot glued the stickers because the adhesive wasn’t super strong and I didn’t want those pumpkins going anywhere!  Create a cute pumpkin sign for fall.

Next, I stamped the word “pumpkin” onto two of the Dollar Tree Jenga game blocks.  They’re the perfect little wood blocks for all kinds of projects!  If you don’t have letter stamps and/or a stamp pad, you could use the tiny letter stickers at Dollar Tree for this step!

Use stamps on Dollar Tree Jenga pieces to create a cute pumpkin sign for fall.

Finally, I hot glued the “pumpkins” piece into place and added a little black paint around the edges of both the word piece and the entire sign.  This gave a distressed look that I like!  Create a unique pumpkin sign for fall.

And that’s all it took to transform a canvas into an adorable piece of fall decor!  Make the perfect pumpkin sign with this fun Dollar Tree DIY project! This dollar store fall craft is so cute!

I’d love for you to share this pumpkin sign project with your friends, or pin it to Pinterest to help others find it!  

And, if you love fall crafting, check out some of my other great fall craft ideas in my holidays gallery!

-Bre

Filed Under: Crafts, Dollar Tree, Fall and Halloween, Holiday

DIY Thanksgiving Embroidery Hoop Wreath

October 31, 2018 by Bre 4 Comments

blank

Another Halloween has come and gone, and Thanksgiving will be here before we know it.  Although there’s increasing pressure from every direction to jump straight into Christmas, I remain steadfast in my dedication to giving Thanksgiving the respect it deserves!  As such, I made this little Thanksgiving Embroidery Hoop Wreath to help acknowledge the holiday AND keep my family grateful during this special season!  The “interactive” component lets you and your family add things for which you’re thankful all season long – so sweet!

Make a beautiful Thanksgiving embroidery hoop wreath to help you remember what you're grateful for this season!

Supplies Needed for Embroidery Hoop Thanksgiving Wreath

This post contains affiliate links.  To read my full disclosure policy, please click here.

  • Embroidery hoop
  • Craft felt (2 sheets)
  • Scissors
  • Ribbon
  • Faux feathers
  • Faux pumpkin floral pick
  • “Thankful” word art
  • E6000 glue
  • Large popsicle sticks
  • Optional: Rose Gold wax and cloth

How to Make an Embroidery Hoop Thanksgiving Wreath

Before I jump into the tutorial, I have to tell you that I did not buy anything new to make this project!  I’ve challenged myself NOT to buy any craft supplies for the rest of 2018, so I’m only using what I’ve got.  The first project I made in my “craft stash de-stash challenge”, was my leaf stamped tea towels, and this is the second project in my challenge!

To give my Thanksgiving wreath something “special,” I applied rose gold wax to the outer edges of the embroidery hoop, but that is totally optional!  You could leave your embroidery hoop plain or paint it.  Make a beautiful Thanksgiving embroidery hoop wreath to help you remember what you're grateful for this season!

Next, I stacked two sheets of acrylic felt on top of each other and put them into the embroidery hoop.  Make a beautiful Thanksgiving embroidery hoop wreath to help you remember what you're grateful for this season!

When they were secure, I cut off the excess felt from around the edge of the embroidery hoop.  This created a pocket in my wreath.  Make a beautiful Thanksgiving embroidery hoop wreath to help you remember what you're grateful for this season!

Next, I tied several different ribbons to the top of the embroidery hoop.  I mixed some burlap, gingham, and solid cream colored ribbon for a fun look.  Make a beautiful Thanksgiving embroidery hoop wreath to help you remember what you're grateful for this season!

After that, I put some feathers and pumpkin picks into the ribbon.  This really bulked up the top of the wreath and gave it an abundant look – perfect for the Thanksgiving season!  Make a beautiful Thanksgiving embroidery hoop wreath to help you remember what you're grateful for this season!

Finally, I glued the “thankful” word art to the front of the felt pocket.  I carefully applied a bit of the rose gold wax to the word art to make it blend better with the embroidery hoop.Make a beautiful Thanksgiving embroidery hoop wreath to help you remember what you're grateful for this season!

To make this Thanksgiving wreath even more special, I wrote some things my family and I are thankful for on popsicle sticks and put those in the pocket.  We will add to this in the weeks leading up to Thanksgiving.  I think it will be a great conversation starter at dinner!  Make a beautiful Thanksgiving embroidery hoop wreath to help you remember what you're grateful for this season!

I think this wreath is beautiful and sentimental, and perfect for the Thanksgiving season.  Make a beautiful Thanksgiving embroidery hoop wreath to help you remember what you're grateful for this season!

It’s currently on my fall mantel, but I will probably move it into the kitchen so we can all easily see it and remember to add our “grateful sticks” each day!  Make a beautiful Thanksgiving embroidery hoop wreath to help you remember what you're grateful for this season!

How do you remember to be grateful for the blessings in your life during this time of year?

-Bre

You May Also Like These DIY Thanksgiving Place Cardsblank


Filed Under: Fall and Halloween, Holiday

DIY Vintage Bug Halloween Decorations

October 10, 2018 by Bre Leave a Comment

blank

Forget mummies, witches, and skeletons – the thing that scares me most at Halloween is the plethora of creepy crawly insects at every turn.  From spiders to centipedes, those little buggers are enough to make me squirm.

I overcame my fear of these pests to make some Creepy Crawly Vintage Bug Halloween Decorations to add to my interior decor (you saw my outdoor decor in my Halloween porch post last week), and think they turned out too cute not to share!

Cute and creepy! Make these vintage bug Halloween decorations with inexpensive craft supplies! They're a fun Halloween craft for all ages.

Thank you to DecoArt, Inc. for providing the paint used in this post.  The project is all my own.  Also, this post contains affiliate links.  To read my full disclosure policy, please click here.

Supplies Needed to Create Vintage Bug Display Halloween Decorations

  • Unfinished wood plaques
  • Small plastic bug toys
  • Multi-surface acrylic paint (I used gold, black tie, chocolate, and cotton ball)
  • Paint brushes
  • Stencils (I used a harlequin pattern, polka dots, and stripes)
  • E6000 glue
  • Metal label holders
  • Paper
  • Plate stands

How to Create Vintage Bug Display Halloween Decorations

Begin by painting the edges of the unfinished wood plaques with gold multi-surface paint.

Cute and creepy! Make these vintage bug Halloween decorations with inexpensive craft supplies! They're a fun Halloween craft for all ages.

Then paint the tops of the wood plaques with ivory multi-surface paint.

Cute and creepy! Make these vintage bug Halloween decorations with inexpensive craft supplies! They're a fun Halloween craft for all ages.

Once the paint has dried, use stencils to add pattern to the plaques with black multi-surface paint.

Cute and creepy! Make these vintage bug Halloween decorations with inexpensive craft supplies! They're a fun Halloween craft for all ages.Cute and creepy! Make these vintage bug Halloween decorations with inexpensive craft supplies! They're a fun Halloween craft for all ages.

Set the plaques aside to dry.  Paint the plastic bug toys with gold multi-surface paint.

Cute and creepy! Make these vintage bug Halloween decorations with inexpensive craft supplies! They're a fun Halloween craft for all ages.

Once that paint has dried, highlight the details on the bug toys with bronze multi-surface paint.  This will make the bugs look aged.

Cute and creepy! Make these vintage bug Halloween decorations with inexpensive craft supplies! They're a fun Halloween craft for all ages.

Next, add metal label holders and labels to the wooden plaques.  I printed my labels out on regular printer paper.

Cute and creepy! Make these vintage bug Halloween decorations with inexpensive craft supplies! They're a fun Halloween craft for all ages.

Finally, glue the bugs to the plaques with glue that attaches plastic to wood.  E6000 is my new favorite multi-purpose glue!

Cute and creepy! Make these vintage bug Halloween decorations with inexpensive craft supplies! They're a fun Halloween craft for all ages.

Display the Vintage Bug Decorations with plate stands or tiny easels (I’ve even seen them at Dollar Tree)!  Cute and creepy! Make these vintage bug Halloween decorations with inexpensive craft supplies! They're a fun Halloween craft for all ages.

Super creepy and also super cute!  Cute and creepy! Make these vintage bug Halloween decorations with inexpensive craft supplies! They're a fun Halloween craft for all ages.

Please PIN this image to Pinterest to help others find this fun Halloween craft project!  And, if you’re looking for another adorable DIY Halloween decor idea, check out my DIY Yarn Ghost Art post for a macrame-inspired ghost decoration.

Cute and creepy! Make these vintage bug Halloween decorations with inexpensive craft supplies! They're a fun Halloween craft for all ages. #halloweendecorations #halloweencrafts #halloweendecor

Filed Under: Fall and Halloween, Holiday

Dollar Store Halloween Porch Decor

October 4, 2018 by Bre 7 Comments

blank

While I absolutely love Halloween, I’m not typically a big decorator for the holiday.  I’m not really sure why – it is what it is.  But this year is different because my kids (ages 6 and 8) insisted that we “go all out” and make our house the spookiest on the block.  They wanted to spend my entire life’s savings on Halloween decorations, so I had to rein them in and take them to Dollar Tree to get their fix.

We put up their decorations over the weekend and I’m happy to share their vision** with you!  (**Everything you see is what they picked out.  My version of a Halloween porch would have looked a lot different!  It was hard to let them drive this bus, but I’m glad they got a chance to express their creativity and vision for a Halloween porch.)

This Halloween porch is filled with dollar store items! Check out the post to see how to use dollar store Halloween decorations to deck out your home for Halloween.

The caution tape was a big hit with my kids.  I think we bought four different types.  Currently only two are displayed on our porch (wrapped around the mum planters and along one of the sidelights), but I’ve been told that the others will definitely be going up for Halloween night.

Planters wrapped in caution tape are a great Halloween decorating idea!

This “creepy” skeleton dude is the splurge item on the porch.  Press his hand and his eyes glow red and he says all kinds of weird stuff to you (REALLY LOUDLY).  The kids were lucky they caught me in a generous moment during one of our Home Depot trips.  🙂

This post is filled with ideas for decorating your porch for Halloween with dollar store items!

The planters are my favorite part of the porch.  They’re filled with lots of random Dollar Tree finds, but it kind of works!

Fill an outdoor planter with dollar store Halloween decorations for a spooky look on your front porch! This Halloween front porch has lots of budget-friendly ideas!

I mean, when doesn’t a skull look good next to your front door?Fill an outdoor planter with dollar store Halloween decorations for a spooky outdoor Halloween display! This post has lots of good dollar store Halloween decor ideas!Glittered skulls in an outdoor lantern are a fabulous way to decorate for Halloween! These dollar store Halloween porch decor ideas are not to be missed!

Now this doormat combo is a huge point of contention with my kids.  My mom gave me this personalized pumpkin doormat earlier this fall and I love it.  The kids say it’s too cute.  They want it gone.  What do you think?  Should it stay or should it go?Layered doormats make a beautiful statement at the front door.

Well, that’s the end of my Halloween front porch tour.  My porch is so tiny that there’s not much to see!  I hope you enjoyed seeing my kids’ handiwork.  Stop by on Halloween night for some candy!

This Halloween front porch is filled with dollar store Halloween decorations. See how to decorate your Halloween porch on a budget!

Filed Under: Dollar Tree, Fall and Halloween, Holiday

  • « Go to Previous Page
  • Page 1
  • Page 2
  • Page 3
  • Page 4
  • Page 5
  • Go to Next Page »

Primary Sidebar

Let’s Connect!

Hi, I’m Bre! Thanks for visiting Average But Inspired, where I show you how to work with what you’ve got to create a home you love.

Bre of Average But Inspired - a DIY and craft blog

Love DIY? Subscribe to Get Posts E-mailed!

How Can I Help You?

blank

7 Tips for Hosting a Party on a Budget

blank

Limewash Stone Fireplace Makeover: Bye Bye Orange Stone Fireplace, Hello Neutral Stone Beauty!

blank

How to Create a Faux Antique Brass Finish with Paint

blank

How to Paint a Countertop to Look Like Marble!

Looking for Something?

Copyright © 2013-2022, Bre Eggert (Average But Inspired). All rights reserved.
  • Home
  • DIY
  • Crafts
  • Home Decor
  • Privacy Policy and Copyright Policy
  • Disclosures
  • Contact Me