• Skip to primary navigation
  • Skip to main content
  • Skip to primary sidebar
Average But Inspired logo - DIY and craft

Average But Inspired

Craft a home you love. DIY and craft tutorials.

  • About
    • Contact Me
    • Disclosures
    • Privacy Policy and Copyright Policy
  • DIY
    • Furniture
  • Crafts
    • Dollar Store Crafts
    • Seasonal
      • Patriotic & Summer
      • Valentine’s Day
      • Easter & Spring
      • Fall & Halloween
      • Christmas & Winter
  • Home Decor
    • Organization
  • Shop
    • DIY Guides
  • Home

Crafts

Plumbing Pieces Kitchen Art

February 11, 2015 by Bre 42 Comments

Whew! It’s time for another Monthly DIY Challenge! Can you believe it? I sure can’t! (In case you’re new here, some blogger friends and I team up to share projects with a common theme on the second Wednesday of each month. You can check out all of the projects, which are linked at the bottom of this post!)

This month we had to use plumbing pieces.  [Insert LOUD, annoying, negative buzzer sound here.]  plumbing_graphic

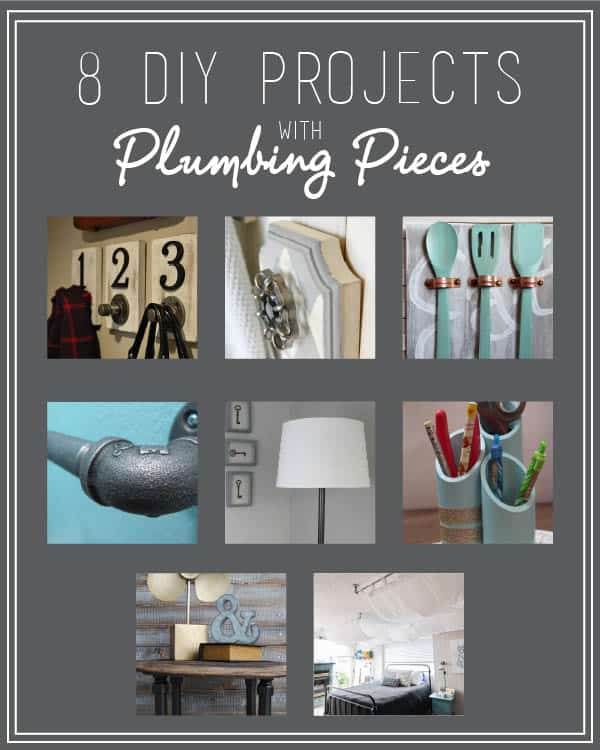
I am NOT a fan of plumbing pieces. They scare me. They took me outside of my comfort zone (aka any aisle in Michaels). I was a TOTAL fish out of water** on this one, folks. Literally, I was wandering the aisles of the home improvement store looking at all of this plumbing stuff, just praying that NOBODY would ask me if I needed help. I didn’t want to be like “Oh yeah, I’m just browsing.” ‘Cause who browses for plumbing pieces?! Awkward.

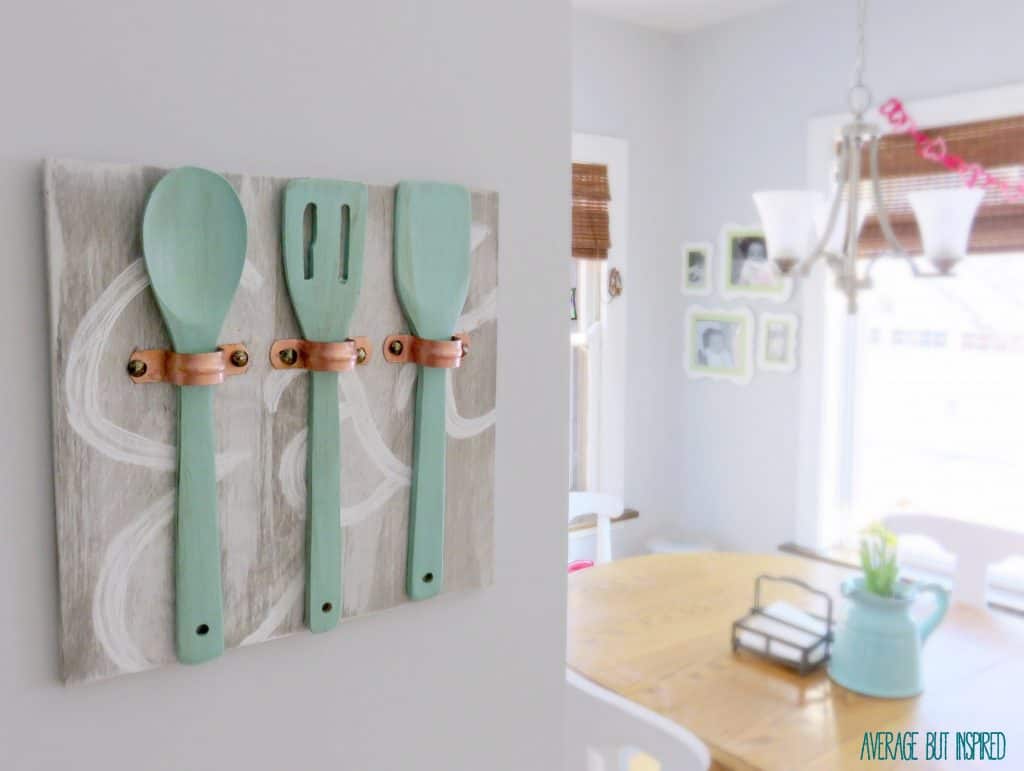
Luckily there were no helpful sales associates at the store that day, so I sucked it up and did the best I could on my own.  I found some cool looking copper pipe straps and used them in a piece of DIY art for my kitchen.

Average But Inspired shows you how to make unique art for your kitchen using copper pipe straps, wooden utensils and some paint!
[Read more…] about Plumbing Pieces Kitchen Art

Filed Under: Crafts

Easy DIY Painted Leather Bracelets

January 20, 2015 by Bre 27 Comments

Use Americana Multi-Surface Paint to customize leather cuff bracelets any way you want!

Thank you to DecoArt for sponsoring this post.  The project and opinions are my own.

I looooove jewelry.  Any kind.  Expensive or inexpensive;  subtle or over the top – it really doesn’t matter to me.  As long as it adds some interest to my outfit, I’m all about it.  Needless to say,  I had a blast making (and wearing) these easy DIY painted leather bracelets, which only required a few supplies and a little bit of time!

Use Americana Multi-Surface Paint to customize leather cuff bracelets any way you want!
[Read more…] about Easy DIY Painted Leather Bracelets

Filed Under: Crafts

DIY Glitter Glazed Glass Jars

November 3, 2014 by Bre 40 Comments

DIY Glitter Glaze Jars

I think I’ve mentioned before that I have hoarder-like tendencies from time to time.  Recently, I began stashing away glass jars that previously held things like salsa, spaghetti sauce, and alfredo sauce.  I had them all lined up near my craft desk, just waiting to be used.

photo

Then one day, I finally decided I had to use them or recycle them.  So I got to experimenting and figured out a way to make them glitter-tastic with a homemade glitter glaze.  After they dried, I dolled them up a bit, and now they look like this!  

DIY Glitter Glaze Jars

It was super easy, so let me show you how to do it, too.

This post contains affiliate links. Please read my disclosure policy to learn more.

Remove labels from jars

First up, I had to get those super-sticky labels off the jars. I started by soaking them in water to loosen the adhesive as much as possible. Then I switched to Goo Gone to get the rest of the stickiness off.

Once the labels were off, I thoroughly washed the jars with soap and water.

Mix Mod Podge and glitter

Next, I mixed up a concoction of Mod Podge and gold glitter acrylic paint.  I did not measure how much I used, but there was much more Mod Podge than there was glitter paint.  

For what it’s worth, I used glossy Mod Podge, but I don’t really think the finish matters.

Glitter Jars (mix supplies)

Pour the glitter mix into the jars

After that, I poured some of the Mod Podge/Glitter Paint mixture into each jar and swirled it around until the entire jar was coated.

Glitter Jars (swirl paint)

Next, I turned the jars upside down so that the excess Mod Podge/Glitter mixture could drain.

Once all of the excess had run off, I turned the jars over and let them dry for approximately 18 hours.  (I’m glad that bottle of wine made it into this photo.  Classy.)

Glitter Jars (Drying)

Pro tip I learned since this article was originally written so long ago: use a hairdryer on low heat and speed to expedite the drying process. You can make this project MUCH faster that way!

Once dry, they looked so pretty and glittery!

How to make glitter glaze jars

I just loved them and decided they’d make a perfect Thanksgiving centerpiece. So I embellished them a bit by adding some twine at the top (this also helped to hide expiration dates that were printed on the exterior of some of the jars), putting some faux flowers in each jar, and using clothespins to affix paper letters spelling “GATHER.”

Glitter Jars in Dining Room

The best part of using clothespins to attach the letters is that I can easily remove them to use the jars in a different way at Christmas! How beautiful will they be with battery-operated tea lights inside?

Glitter Jars (closeup)

I just love them and can’t wait to see them on my Thanksgiving table. I also love that I transformed some old containers into something beautiful for hardly any money at all!

Glitter Jars (Hater)

Oh yeah, and I also love how my husband has the BEST time rearranging the jars so that they spell other things.  Can I just say that he is super awesome?  
– Bre

Save leftover glass jars from the recycling bin and make a beautiful glitter glaze jar centerpiece for Thanksgiving or any holiday! #thanksgiving #thanksgivingdecor


Filed Under: Crafts

How to Make Your Own Mickey or Minnie Mouse Ears {in 10 Minutes!}

October 14, 2014 by Bre 41 Comments

blank

Need some mouse ears for a Halloween costume or a trip to Disney? Learn how to make no-sew DIY Mickey Mouse ears in this tutorial!

I cannot believe this, but my daughter does not want to be Elsa from Frozen for Halloween.  I am quite certain she’s the exception to the rule for the 4 year old girl demographic.  Instead, she decided to be Minnie Mouse after her little brother decided he wanted to be Mickey Mouse.

I am one happy mama.  A cute, coordinated costume for the two of them, and I didn’t even have to beg or bribe?  It’s a miracle!

Anyway, I went to buy their costumes at my favorite big box store that shall remain nameless, and found that the costumes were: (1) expensive; and (2) junky.  Like full of holes junky.  

So, I decided that with hardly any effort at all, I could make them decent Mickey and Minnie costumes.  (Luckily they’re young and won’t really know if their costumes are the laughingstock of the neighborhood.)

With a few inexpensive supplies you can make DIY Mickey Mouse or Minnie Mouse ears! Best part is that it only takes about 10 minutes total! This is a great DIY Halloween costume for kids or adults!

In case I fail miserably, I decided to start this costume-making process early.  But I’m happy to say that I’ve gotten the ears down, and can show you how to make your own DIY Mickey Mouse ears and DIY Minne Mouse ears in 10 minutes or less!

Supplies Needed to Make DIY Mickey Mouse Ears or DIY Minnie Mouse Ears

This post contains affiliate links.  Please read my disclosure policy for more information.

You hardly need any supplies to make these DIY mouse ears, which is a total bonus.

  • Black Headband
  • Stiffened Felt (in black) (I got this at Michaels in the same aisle as craft felt.  It is about $2.00 per sheet, but it’s thicker and sturdier.)
  • Hot Glue Gun
  • Soup Can
  • Scrap Paper
  • Polka Dotted Ribbon (if you’re making Minnie Mouse ears)
  • Silver or White Sharpie
  • Fabric Scissors

How To Make DIY Mickey Mouse Ears or DIY Minnie Mouse Ears

Now that you have your supplies, let’s make the cutest DIY mouse ears around!

First, get a soup can and trace two circles about 1/4″ apart from one another on a sheet of construction paper.  

With a few inexpensive supplies you can make your own Mickey Mouse or Minnie Mouse ears! Best part is that it only takes about 10 minutes total!

Chicken soup, tomato soup, Italian wedding soup . . . pick your favorite flavor! 🙂

Ears - 2 circles

Next, connect the two circles with two concave lines.

With a few inexpensive supplies you can make your own Mickey Mouse or Minnie Mouse ears! Best part is that it only takes about 10 minutes total!

Then cut out your template.

Ears - cut template

After that, trace the template onto stiffened felt using a metallic Sharpie. You’ll need to use a metallic or white Sharpie so that you can actually see the mouse ears outline.  

Repeat the tracing process, and then cut out both sets of ears.

With a few inexpensive supplies you can make your own Mickey Mouse or Minnie Mouse ears! Best part is that it only takes about 10 minutes total!

With your headband nearby, place hot glue in the middle portion of the ears.

With a few inexpensive supplies you can make your own Mickey Mouse or Minnie Mouse ears! Best part is that it only takes about 10 minutes total!

Then, press that hot glued part of the felt onto the underside of the headband, and fold the circles upwards toward each other.

With a few inexpensive supplies you can make your own Mickey Mouse or Minnie Mouse ears! Best part is that it only takes about 10 minutes total!

Put glue all over the inside of the circles and press them together to close them up.

Note that while I used fabric glue to do this, hot glue will work just fine!

Now you’re finished if you want DIY Mickey Mouse ears!

If you want Minnie Mouse ears, make a bow out of polka dotted ribbon and glue that to the middle of the headband.

With a few inexpensive supplies you can make your own Mickey Mouse or Minnie Mouse ears! Best part is that it only takes about 10 minutes total!

SUPER easy! And fast! And inexpensive! And . . . your kids will love them just like mine love theirs!

I am pretty proud of myself for figuring this out and for deciding to DIY their costumes this year.  I just hope it doesn’t backfire . . . I guess we’ll see come October 31!

With a few inexpensive supplies you can make your own Mickey Mouse or Minnie Mouse ears! Best part is that it only takes about 10 minutes total!

How to Make Mickey Mouse or Minnie Mouse Ears

How to Make Mickey Mouse or Minnie Mouse Ears

Yield: 1
Prep Time: 5 minutes
Active Time: 10 minutes
Total Time: 15 minutes
Difficulty: Easy
Estimated Cost: $2

Make your own DIY Mickey Mouse ears or Minnie Mouse ears! Perfect for Halloween or child dress up.

5.0 Stars (29 Reviews)

Materials

  • Black Headbands
  • Black Stiffened Felt
  • Fabric Glue
  • Polka Dot Ribbon
  • Sharpie
  • Soup Can
  • Paper

Tools

  • Sharp Fabric Scissors
  • Hot Glue Gun

Instructions

  1. Using the soup can, trace two circles about 1/4″ apart from one another on a sheet of construction paper.  blank
  2. Connect the two circles with two concave lines. Cut out the template. blank
  3. Trace the template onto stiffened felt using a metallic Sharpie so that you can see the outline. blank
  4. Place some hot glue in the middle portion of the ears. Affix that portion of the ears to the bottom side of the headband, folding upwards. blank
  5. Place hot glue or fabric glue all over the inside of one of the circles, and press the circles together to close them up. blank
  6. If making Minnie Mouse ears, create a bow with polka dot ribbon and hot glue to the headband. blank
© Bre
Category: Crafts
blank

Have you ever DIY’d a Halloween costume?  How did it turn out for you?

Filed Under: Crafts

Cozy Sweater Gift Jars: a Sweater Upcycle Idea

September 23, 2014 by Bre 14 Comments

blank

Looking for a creative sweater upcycle or repurposing idea? Try making these cozy sweater gift jars! They’re perfect for fall!

I have never used a mason jar for anything in my life.  Preserving, crafting, containing . . . nothing.  Because mason jars are everywhere these days, I sort of feel like I should win some type of medal for that.  Agree?

Being of German heritage (translation = I am stubborn), I declared that I would not break my mason-jar-free existence at any cost.  

But, I am also a lawyer, so I easily found a loophole in this declaration, and am now able to present to you these cute and cozy sweater gift jars that do not use mason jars, per se, but instead, plain glass jars. (Is there a difference? Probably not. LOL!)

And, they’re an awesome way to repurpose or upcycle that ratty sweater from college. Win!

These jars were dyed orange, wrapped in sweater remnants and adorned with twine and fall leaves for a cute and cozy look.Gotta love loopholes (when they work to your advantage at least).

Anyway, these jars were really fun to make and I know they’ll be really fun to give, too.  You only need a few simple supplies, which is a total bonus.

Sweater Jars Supplies Needed

Some of these are affiliate links.  Please read my disclosure policy for more information.

Note: when I published this post back in 2014, Mod Podge had a pre-tinted product that came in orange. It is no longer sold, but this tutorial has been updated to account for that!

  • Glass jars
  • Mod Podge in any finish
  • Orange acrylic paint
  • Old Sweater
  • Twine
  • Artificial Leaves
  • Mixing bowl and spoon

How to Make Upcycled Sweater Gift Jars

Start by mixing a small amount of orange acrylic paint with Mod Podge. Continue adding paint until you have a shade you like!

Next, pour a generous amount of Mod Podge into each jar.  Then, swirl it around and coat the inside of each jar in its entirety.

Jar - Mod Podge in Jar SwirlNext, turn each jar upside down and let the excess Mod Podge drain from the jars.  This took a long time – like hours.  

(Remember: the Mod Podge shown in this photo is no longer sold, but this written tutorial has been updated to account for that!)

Jar - Draining

Once the excess product finishes draining, turn the jars over to let them begin drying out.  The Mod Podge product will still be thick and opaque at this point.

If the Mod Podge isn’t drying as fast as you’d like, you can use a blow dryer to speed up the drying process. And, once the Mod Podge is dry, it will become translucent instead of opaque!  

Here’s Another Great Sweater Upcycle Idea!

Sweater Embroidery Hoop Art

Next, grab an old sweater and cut parts of the sleeves off.

Jar - Sweater

Then, put those sweater sleeves around the jars.  The parts with the cuffs look best.

Jar - Swaeter around it

Finally, tie some twine around the sweater portion and add some artificial fall leaves to the twine.   These jars were dyed orange, wrapped in sweater remnants and adorned with twine and fall leaves for a cute and cozy look.

Pop a little candy, coffee, or a gift card in there and you’ve got a cute little gift for someone special!  

blank

I’m handing my first one out tomorrow to thank a friend for helping me out with my daughter.  I hope she loves it!

Filed Under: Crafts, Fall and Halloween

DIY Earring Organizer Made from a Kitchen Gadget

September 12, 2014 by Bre 29 Comments

blank

Hi, friends-

If you’ve been following my blog for any amount of time at all, you know that I have a deep love for Dollar Tree.  I find the BEST things there, and of course they’re always things that I never knew I needed before.

Things like this splatter screen that I found in the kitchen section.

Dollar Tree splatter screen to earring organizer. {Average But Inspired}
What in the world do you do with this thing in the kitchen?  It has a mesh screen, so I don’t really understand how it’s supposed to prevent splattering, but whatever – I didn’t buy it for the kitchen anyway.
Nope.  From the second I laid eyes on it, I thought EARRING ORGANIZER!
See, I have a collection of some awesome dangle earrings that I used to wear on nights out.  Since my nights out now usually consist of “Kids Eat Free Night” at [insert local brewpub name here], I don’t wear my fun earrings all that much anymore.  They sit in my jewelry box and tangle themselves up with my more practical earrings, which is super annoying.
So, I decided they need to be segregated and I made this special place for them – all from my Dollar Tree splatter screen!
Dollar Tree splatter screen to earring organizer. {Average But Inspired}
Easiest project EVER.  I know I’ve said it before, but this time it is the truth.  All you need is:
  • splatter screen
  • spray paint
  • ribbon
Step One
Spray paint your splatter screen.  (Learn from my mistake – make sure the screen part isn’t touching whatever you’re painting on, as the paint may pool and form smudges on your screen.)
Step Two
Add some ribbon to the top of the splatter screen for a cute touch.
Step Three

Put your earrings through the mesh and hang up your new earring organizer.

Dollar Tree splatter screen to earring organizer. {Average But Inspired}
SEE?  I told you it was the easiest project ever.
Dollar Tree splatter screen to earring organizer. {Average But Inspired}
– Bre

Filed Under: Crafts, Dollar Tree, Organization

  • « Go to Previous Page
  • Page 1
  • Interim pages omitted …
  • Page 17
  • Page 18
  • Page 19
  • Page 20
  • Page 21
  • Go to Next Page »

Primary Sidebar

Let’s Connect!

Hi, I’m Bre! Thanks for visiting Average But Inspired, where I show you how to work with what you’ve got to create a home you love.

Bre of Average But Inspired - a DIY and craft blog

Love DIY? Subscribe to Get Posts E-mailed!

How Can I Help You?

blank

How to Paint a Countertop to Look Like Marble!

blank

7 Tips for Hosting a Party on a Budget

blank

Limewash Stone Fireplace Makeover: Bye Bye Orange Stone Fireplace, Hello Neutral Stone Beauty!

blank

How to Paint a Door to Look Like Wood (It’s Easier Than You Think!)

Looking for Something?

Copyright © 2013-2022, Bre Eggert (Average But Inspired). All rights reserved.
  • Home
  • DIY
  • Crafts
  • Home Decor
  • Privacy Policy and Copyright Policy
  • Disclosures
  • Contact Me