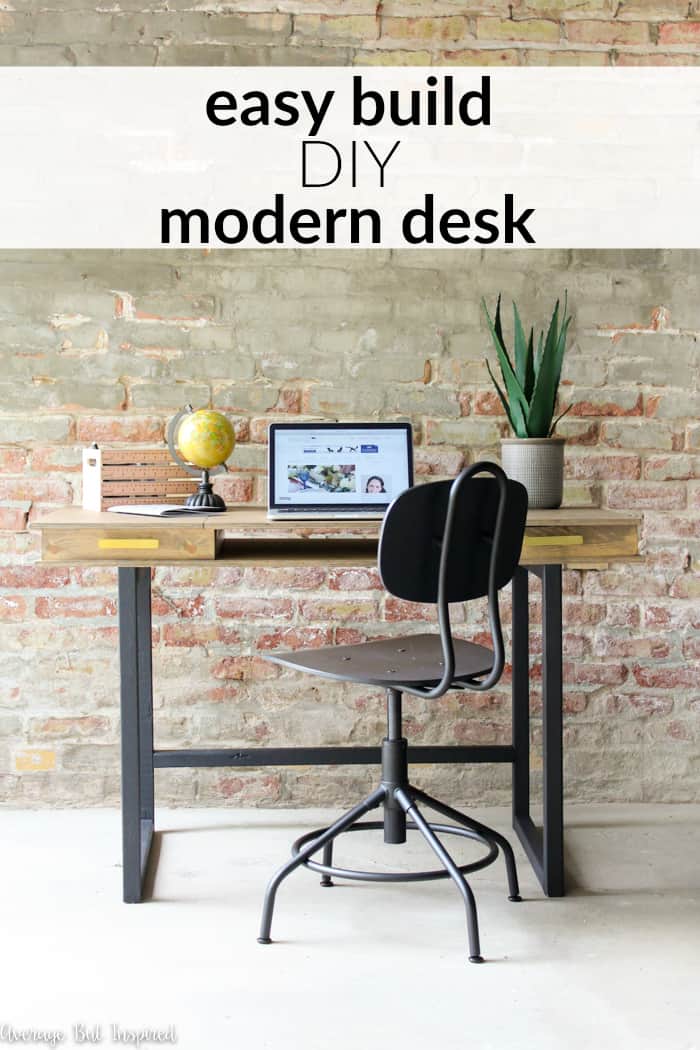
Build an easy and affordable DIY Modern Desk for your home office space!
As part of the (now defunct) Monthly DIY Challenge, I partnered with Kreg Tool Company to use their Kreg Jig® R3 pocket hole system in a DIY project. Thank you to Kreg for sponsoring this post!
I used the Kreg Jig R3 to create a gorgeous DIY Modern Desk for my sister, and I am THRILLED to tell you that ANYONE can build this desk (I swear. I NEVER thought I could build something like this.)!
This post contains affiliate links. Please read my disclosure policy for more information.
The DIY Modern Desk Plans
OK, so before I show you how I built this desk, let me tell you that I downloaded the plans for this desk from Ana White’s website, where she provides tons of FREE woodworking plans!
I chose her Modern 2×2 Desk Base plan and her and her Desktop with Storage Compartments plan.
If you want to build this desk, go to those links and download those plans. Then come back here and check out my process photos as they might help you a bit.
Anyway, once I was armed with those instructions and supply lists, I headed to the store to buy my lumber and some other supplies. And I have a confession . . . I was actually really nervous to go buy the materials for this project! I was scared that I wouldn’t even be able to load the lumber into my cart or get it home.
Once I purchased everything and got it into the car, I actually cried a tiny bit from relief. Can you believe it? That will tell you how much of a building novice I am!
The Desk Building Process – DIY Modern Desk Base
With the scary supply shopping part finished, I felt a little bit better about the whole prospect of building a desk for my sister. Something about being in the comfort of my own home/garage made things seem a little better.
I started by building the base of the desk. I grabbed my circular saw and cut the pieces for the base.

Next it was time to start putting the base together, and here’s where I started to get nervous again.
I had to use my new Kreg Jig R3 pocket hole system to do this, and frankly, I didn’t know what I was doing!
Once I watched this helpful video and practiced on a few scrap boards, I got the hang of it and instantly understood why people love their Kreg Jig systems so much!
Kreg Jig pocket hole systems let you create pocket hole joints (which are very strong joints), quickly and easily, by drilling an angled hole through one board, which allows you to then drill your screw through that hole and into the other board.
In addition to pocket holes providing strong joints, they’re also really nice because you don’t have visible screws on your projects; they’re hidden!
See those holes in the wood pictured below? Those are the pocket holes that I drilled using my Kreg Jig R3 drill bit.
Once I had all of my pocket holes drilled, I fastened the base pieces together with the 2.5″ pocket hole screws that were recommended in my desk base plans.
See how I drilled the pocket hole screw right through the pocket hole into the other piece of wood?
I put them all together, fastening them with my 2.5″ pocket hole screws and ended up with two base pieces that looked like this.
Following the desk base plans, I clamped these two pieces to my temporary work table, and screwed the top bar to both of the squares in order to attach them.
Next, I screwed the footrest bar 6″ from the bottom.
And with that, the base of my DIY modern desk was finished! Because this part went so smoothly, I decided to keep going and build the desktop in the same day. I was on a roll and had to keep my momentum going!
The Process – Modern Desk Build Desktop
The first thing I did for the desktop was cut 1×3 boards with my circular saw, per the desktop plans, in order to create storage compartments within the desktop.
Then I drilled pocket holes with my Kreg Jig R3 system, and attached the pieces together with 1.25″ pocket hole screws.
Next, I laid those storage compartment pieces on top of the base piece of my desktop. I traced around them with a pencil and then drilled pilot holes in that piece of wood so that it would be easier to attach the compartment pieces to the desktop base.
Once I did that, the desktop looked like this.
I then took the other piece of plywood and cut it into three sections, per the desktop plans.
I deviated slightly from the plans here, however, because they called for use of a circular saw to cut the top piece into three sections. If you’ve ever used a circular saw, however, you know that it’s not super easy to get a perfect cut – and I wanted this desktop to be perfect.
My friend, who happens to be a skilled designer and craftsman, was over that afternoon hanging with my husband, and offered to bring his track saw over to help me get really straight cuts for the desktop.
We used that and then I knew I had to have one for myself! I didn’t even know that Kreg had JUST come out with the Kreg Rip-Cut and the Kreg Circular Saw Track, which are exactly what I could have used to get straight lines on this desktop.
(UPDATE: I subsequently bought both of those tools and use them regularly! They especially were useful for my DIY Modern Fireplace Refacing project!)
Anyway, after the desktop pieces were cut, I fastened the outer pieces to the top of the desk with hinges.
And then, not pictured here, I fastened the middle part of the desk with my super fun new brad nailer, which made attaching the desktop a breeze! That completed the building of the desktop!
The Process – Modern DIY Desk Painting and Staining
The next day, I painted the base of the desk with matte black chalk paint. This made the legs look like they are metal – giving them that modern look!
Then I stained the top of the desk with my new favorite stain color. (I first used this stain on the over-the-toilet storage I made for my Master Bathroom Makeover and fell in love!)
I gave it two coats of poly on top to protect it, and after it dried, I added decorative hardware to the front and screwed the desktop onto the base to fasten it all together!
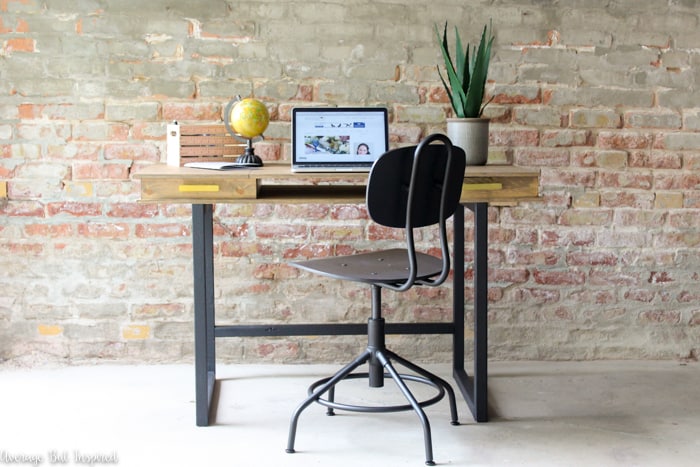
The Finished Product – DIY Modern Desk
Once I finished building this desk, I had a sense of accomplishment unlike anything I’ve felt before. It may sound crazy, but building this desk made me prouder than graduating from law school!
I think it’s because I didn’t really know if I could actually pull this off or not. And when I did, it gave me so much confidence and determination to take on another building project.
If you’ve ever thought that you want to try building something, I really encourage you to do it. It is so gratifying to see the results of your work come together in a finished piece like this!
I have to be honest, it made me so proud to see the way my kids reacted to my DIY desk, too. Every time someone came over to our house, my daughter would bring them to the garage to see what I built.
That is an immense sense of pride and accomplishment to know that my kids are watching and excited about what I’m doing, too.
And, it felt really good to bring my sister her desk and see how perfectly it fits in her apartment.
I’m so thankful for the opportunity to have been pushed out of my comfort zone and learned how to use the Kreg Jig R3.
Not only did my sister gain a beautiful piece of furniture that is well-constructed with strong joints, but I gained a sense of accomplishment that has me dreaming up my next DIY project!